
The Best Fluffy Pancakes recipe you will fall in love with. Full of tips and tricks to help you make the best pancakes.
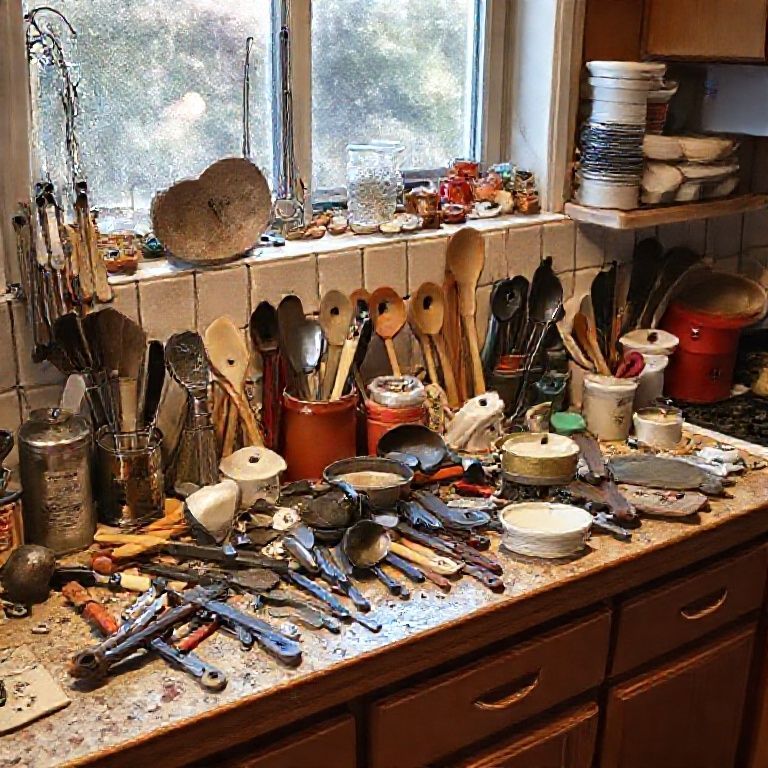
Table of Contents
- 1 The Psychology of Small Kitchens: Why We Struggle (and How to Reframe It)
- 2 Step 1: Declutter Like a Pro (Without Losing Your Mind)
- 3 Step 2: Rethink Storage, Vertical, Hidden, and Unexpected
- 4 Step 3: Multifunctional Tools and Furniture, Do More with Less
- 5 Step 4: Organize by Zones, Not Just by “Type”
- 6 Step 5: Lighting and Visual Tricks to Make Space Feel Bigger
- 7 Step 6: The Pantry, Where Space Goes to Die (and How to Resurrect It)
- 8 Step 7: The Fridge, Your Most Underutilized Storage Space
- 9 Step 8: DIY Hacks vs. Worth-the-Splurge Solutions
- 10 Step 9: Maintenance, Because Clutter Always Comes Back
- 11 Step 10: Mindset Shifts, The Real Key to a Functional Small Kitchen
- 12 Final Thoughts: Your Kitchen, Your Rules
- 13 FAQ: Your Small Kitchen Questions, Answered
I’ll admit something embarrassing: I once spent 20 minutes searching for my garlic press in a 150-square-foot kitchen. It wasn’t in the “tool drawer” (which was really just a shoebox I’d repurposed), nor wedged between the toaster and the air fryer on the counter. Eventually, I found it buried under a stack of mismatched Tupperware lids, because of course, the one place I hadn’t looked was the spot where I’d last used it: the sink. That was the day I realized my kitchen wasn’t just small; it was a black hole of inefficiency.
If you’re reading this, you’ve probably had a similar moment of spatial despair. Maybe your spice collection has outgrown its designated shelf, or your pots and pans are stacked so precariously that removing one triggers a Jenga-like collapse. Small kitchens aren’t just a physical constraint, they’re a psychological battle. Every inch feels like a negotiation: Do I keep the blender out for smoothies or store it to free up counter space? Can I justify owning a stand mixer when I bake twice a year? And why, why, do I own seven wooden spoons?
Here’s the good news: After years of trial, error, and a few questionable DIY experiments (RIP, my ill-fated pegboard wall), I’ve learned that maximizing a small kitchen isn’t about cramming more stuff into less space, it’s about rethinking how you use what you have. This guide isn’t just a list of storage hacks (though there are plenty of those). It’s a framework for working with your kitchen’s limitations, not against them. We’ll cover everything from the psychology of clutter to the tools worth splurging on, the mistakes almost everyone makes (including me), and the unexpected places you’re probably wasting space right now.
By the end, you’ll have a plan that’s tailored to your cooking habits, not some Pinterest-perfect ideal. And hey, if nothing else, you’ll at least know where your garlic press is.
-
The Psychology of Small Kitchens: Why We Struggle (and How to Reframe It)
1. The “Just One More Thing” Syndrome
Small kitchens expose our hoarding tendencies. That “just in case” muffin tin? The novelty avocado slicer you used once? The three half-empty bottles of olive oil? We overestimate how much we’ll use things and underestimate how much space they take up. The first step isn’t organizing, it’s auditing your attachments.
Try this: Pull everything out of your cabinets and drawers. Yes, everything. Now, sort items into three piles:
- Use weekly: These earn prime real estate.
- Use monthly/seasonally: These can be stored less accessibly.
- Haven’t used in 6+ months: Donate, sell, or trash. Be ruthless.
You’ll be shocked by how much you’re holding onto “just because.” I found five spatulas in my “monthly” pile. Five. For one human.
2. The Illusion of “Empty” Space
We tend to see empty countertops or shelves as available space, not potential space. That blank stretch of wall above your stove? The gap between the fridge and the cabinet? The inside of cabinet doors? These are opportunities, not dead zones. The key is to train your brain to spot them.
For example, I used to think my under-sink cabinet was only for cleaning supplies. Then I realized the back of the door could hold sponges and trash bags, freeing up shelf space for bulkier items. Similarly, the side of my fridge now has a slim magnetic knife strip, no counter space lost, but my knives are always within reach. Small kitchens reward creative thinking, not just tidying.
3. The “I’ll Fix This Later” Trap
Procrastination thrives in small kitchens. We tell ourselves we’ll “organize properly” someday, so we default to stacking, stuffing, and shoving. But clutter begets clutter. That “temporary” pile of mail on the counter becomes a permanent fixture. The “just for now” box of snacks on the floor stays for months.
The fix? Adopt the “two-minute rule”: If a task takes less than two minutes (putting away a dish, hanging up a towel, tossing expired spices), do it immediately. For bigger projects, schedule a 30-minute “kitchen reset” every Sunday. Set a timer, put on music, and tackle one problem area. Progress > perfection.
-
Step 1: Declutter Like a Pro (Without Losing Your Mind)
The 80/20 Rule of Kitchen Tools
You’ve heard of the Pareto Principle: 80% of results come from 20% of efforts. In kitchens, it’s more like 80% of your cooking comes from 20% of your tools. That means most of what you own is just taking up space. Here’s how to identify your 20%:
- Track your usage: For a week, note which tools you reach for daily. My list: chef’s knife, cutting board, one skillet, one pot, wooden spoon, and tongs. Everything else was negotiable.
- Beware of “unitaskers”: Tools that do one thing (egg slicers, apple corers, garlic peeler tubes) are usually not worth the space. Exceptions: If you use it weekly (e.g., a pasta maker for homemade noodle lovers).
- Consolidate duplicates: You don’t need three spatulas, two can openers, or four sets of measuring cups. Pick the best one and donate the rest.
The “Would I Buy This Today?” Test
Hold up each item and ask: “If I didn’t own this, would I buy it today?” If the answer is no, it’s clutter. This question cuts through sentimental attachment. For example, I had a fondue set from a 2012 Christmas gift. Had I used it in the past five years? No. Would I spend $50 on it today? Absolutely not. Out it went.
Bonus: Apply this to food storage. How many half-empty bags of flour or rice do you have? How many spices are expired? A pantry audit can free up shocking amounts of space. I once found three unopened jars of marinara sauce from 2021. Three.
The “One In, One Out” Rule
To prevent recluttering, adopt this rule: For every new item you bring in, one must go. Bought a new air fryer? Donate the old toaster oven. Got a fancy new knife? Retire the dull one. This forces you to evaluate purchases critically and maintains equilibrium.
I’ll be honest: This rule is harder than it sounds. I once tried to justify keeping a broken blender because “maybe I’ll fix it.” Spoiler: I didn’t. The rule only works if you’re honest with yourself.
-
Step 2: Rethink Storage, Vertical, Hidden, and Unexpected
Vertical Space: Your Secret Weapon
In small kitchens, floor and counter space are luxury goods, but wall space is often underutilized. Here’s how to exploit it:
- Pegboards: IKEA’s SKÅDIS or a custom DIY version lets you hang tools, utensils, and even small shelves. Pro tip: Paint it the same color as your walls to blend in.
- Magnetic strips: Mount one for knives (saves drawer space) or spice jars (use small magnetic containers). I keep mine above the stove for easy access.
- Floating shelves: Use them for frequently used items (mugs, plates) or decorative storage (pretty jars for grains). Just don’t overcrowd, open shelves can look messy fast.
- Hooks: Command hooks inside cabinet doors hold measuring cups, pot lids, or cleaning tools. The back of your pantry door is prime real estate.
Warning: Vertical storage can backfire if it becomes visual clutter. If it’s not functional or beautiful, it’s just noise. I once hung all my pots on a rack, it looked cool for a week, then felt like a metal jungle.
Hidden Storage: Out of Sight, Out of Mind
The best storage is invisible. Here’s where to find it:
- Under cabinets: Add slim pull-out drawers or shelves for spices, foil, or cutting boards.
- Toe-kick drawers: That 4-inch gap beneath your cabinets? Custom shallow drawers can store flat items like baking sheets or trays.
- Inside cabinets:
- Door-mounted racks for spices or cleaning supplies.
- Stackable shelves to double vertical space (great for plates or bowls).
- Pull-out bins for trash/recycling (freed up my under-sink area entirely).
- Appliances with storage: Some microwaves or toaster ovens have built-in shelves underneath. My toaster oven has a drawer that holds my air fryer baskets.
Pro tip: Use uniform containers. Transferring dry goods (flour, sugar, pasta) into matching jars or bins creates visual calm and stacks neatly. I use OXO’s POP containers, they’re airtight, stackable, and the buttons let you know they’re sealed.
Unexpected Spaces You’re Ignoring
Think outside the cabinet:
- The space above the fridge: Add a slim shelf for rarely used items (extra cookbooks, serving platters).
- The sides of cabinets: Slim rolling carts or magnetic strips can hold spices or tools.
- The area above the sink: A tension rod can hang cleaning supplies or dish towels.
- The top of cabinets: If you have open upper cabinets, the very top can store lightweight, infrequently used items (like holiday dishes). Just dust occasionally.
I once stored my stand mixer on top of my upper cabinets. Did I use it often? No. But when I did, I just had to pull over a stool. Accessibility is relative, if you use something once a month, a slight inconvenience is worth the space saved daily.
-
Step 3: Multifunctional Tools and Furniture, Do More with Less
The Art of the Multitool
In a small kitchen, every tool should earn its keep. Prioritize items that serve multiple purposes:
- Instant Pot or multi-cooker: Replaces a slow cooker, rice cooker, steamer, and pressure cooker. I use mine 3x a week.
- Immersion blender: Blends soups, sauces, and smoothies without taking up counter space like a bulky blender.
- Cast iron skillet: Goes from stovetop to oven to table. Mine doubles as a baking dish for frittatas or even bread.
- Mandoline slicer: Slices, juliennes, and grates, replaces multiple single-use tools.
- Collapsible items: Measuring cups, colanders, and even mixing bowls that flatten for storage.
I replaced my food processor, blender, and hand mixer with a Ninja Foodi Power Pitcher System. It’s not cheap, but it’s saved me enough shelf space to justify the cost. Splurge on tools that replace three others.
Furniture That Works Double Duty
Your kitchen furniture should pull its weight:
- Kitchen island on wheels: Adds prep space, storage, and can be moved when not in use. Mine has shelves underneath for my Instant Pot and air fryer.
- Drop-leaf table: Folds down when not in use but expands for dining or extra prep space.
- Bar cart: Rolls out for entertaining, holds liquor or pantry overflow, and tucks away otherwise.
- Bench with storage: If you have a breakfast nook, choose a bench with lift-up seating for pots or small appliances.
Ikea’s BEKVÄM cart is a game-changer, it’s sturdy, fits in tight spaces, and the wheels lock. I use it as a coffee station, extra pantry, and sometimes a makeshift desk when I’m working from home.
Appliances: The Space-Sucking Culprits
Appliances are the biggest space hogs. Ask yourself:
- Do I reallyeed a toaster, or can I use the oven’s broiler?
- Can my stand mixer’s bowl double as a serving dish?
- Is there a smaller version? (E.g., a 3-cup food processor instead of 11-cup.)
- Can I store it elsewhere? My air fryer lives in a hall closet, I pull it out when needed.
Hard truth: If you’re not using an appliance weekly, it doesn’t deserve counter space. Store it in a closet, under the bed, or in a shared storage area (like a basement or garage, if you have one).
-
Step 4: Organize by Zones, Not Just by “Type”
Why Traditional Organization Fails
Most people organize by category: all spices together, all pots together, all baking tools together. But this ignores how you actually cook. When you’re making dinner, you don’t need all your spices, just the ones for that recipe. You don’t need every pot, just the one you’re using and its lid.
Instead, organize by workflow zones:
- Prep zone: Cutting boards, knives, mixing bowls, measuring cups/spoons.
- Cooking zone: Pots, pans, spatulas, oven mitts, timers.
- Serving zone: Plates, bowls, utensils, serving spoons.
- Cleanup zone: Dish soap, sponges, trash/recycling bins, drying rack.
- Pantry zone: Group by meal type (breakfast, snacks, dinner sides) rather than food type.
This might mean storing your olive oil near your skillet (cooking zone) instead of with other oils (pantry zone). Or keeping your colander in the sink cabinet (cleanup zone) instead of with other “miscellaneous” tools. It feels counterintuitive at first, but it saves time and frustration.
The “First Things First” Rule
Store items where you first reach for them in the cooking process. For example:
- Spices go near the stove, not in a far cabinet.
- Trash bags go under the sink, not in a hallway closet.
- Coffee supplies go near the kettle or coffee maker, not in a random drawer.
I used to keep my spices in a cabinet above the fridge, because that’s where they “belonged.” But I’d have to climb on a stool every time I cooked. Now, they’re in a slim pull-out drawer next to the stove. Convenience trumps tradition.
-
Step 5: Lighting and Visual Tricks to Make Space Feel Bigger
Lighting: The Illusion of Space
Dark, dim kitchens feel smaller. Bright, even lighting makes spaces feel larger:
- Under-cabinet lighting: LED strips (battery-powered or plug-in) illuminate counters without taking up space.
- Mirrored backsplash: Reflects light and visually doubles the space. Even a small mirror above the sink helps.
- Sheer window treatments: Let in natural light while maintaining privacy.
- Light-colored walls: Whites, soft grays, or pale blues reflect light better than dark colors.
I swapped my heavy wooden valances for roller shades and added a plug-in LED puck light under my upper cabinets. The difference was shocking, my kitchen felt 20% bigger instantly.
Visual Clutter vs. Functional Clutter
Not all clutter is created equal. A jumbled countertop feels chaotic, but a well-organized pegboard feels intentional. Hide what’s ugly, display what’s beautiful or functional:
- Store bulky appliances in cabinets or closets.
- Use clear jars for pantry items (uniformity = calm).
- Keep counters limited to 1-2 “daily use” items (e.g., coffee maker, toaster).
- Add a small plant or artwork to draw the eye upward.
I used to keep my toaster, blender, and knife block on the counter. Now, only the toaster stays out (I use it daily). The blender lives in a cabinet, and my knives are on a magnetic strip. Less visual noise = more perceived space.
-
Step 6: The Pantry, Where Space Goes to Die (and How to Resurrect It)
The Pantry Black Hole
Pantries are deceptively deep. Items get pushed to the back and forgotten. The solution? Treat your pantry like a grocery store:
- First In, First Out (FIFO): Place newer items behind older ones so nothing expires unseen.
- Group by meal: Store all pasta-related items (noodles, sauces, parmesan) together. Same for breakfast (oatmeal, granola, syrup).
- Use bins for categories: Snacks in one, baking supplies in another, cans in a third. Label them.
- Add lazy Susans: For corner cabinets or deep shelves, no more lost jars.
I added stackable acrylic bins to my pantry shelves. Now, instead of digging through a jumbled mess, I pull out the “snacks” bin or the “baking” bin. It’s like a filing system for food.
The Bulk Buying Trap
Buying in bulk saves money but costs space. Ask yourself:
- Do I have room to store this?
- Will I use it before it expires?
- Is the savings worth the clutter?
I used to buy giant bags of rice and flour. Now, I buy smaller quantities more often. The trade-off in cost is worth the space saved. If you must buy bulk, decant into smaller, stackable containers.
-
Step 7: The Fridge, Your Most Underutilized Storage Space
Fridge Organization 101
Fridges are often packed haphazardly, but small changes maximize space:
- Use clear bins: Group like items (cheeses, condiments, snacks) so you can pull out a whole bin instead of digging.
- Door storage: Reserve for condiments and drinks, these can handle temperature fluctuations.
- Stackable shelves: Some fridges let you adjust or add shelves. Use them!
- Lazy Susan for sauces: No more lost jars in the back.
- Vacuum-seal or use reusable bags: Flatten leftovers or bulk items to save space.
I added two slim bins to my fridge: one for meal-prep containers, one for snacks. Now, I can see everything at a glance, and nothing gets lost in the abyss.
The Freezer: A Frozen Wasteland
Freezers are notorious for mystery meats and forgotten veggies. Tame it with:
- Label everything with dates. Use a marker on tape or a label maker.
- Flatten bags: Store soups, sauces, and meats flat to stack like files.
- Use bins: One for meats, one for veggies, one for prepared meals.
- Monthly purge: Toss anything older than 3 months (or 6 for meats).
I once found a bag of frozen berries from 2022. 2022. Now, I do a freezer cleanout every month when I pay rent. It’s a good reminder.
-
Step 8: DIY Hacks vs. Worth-the-Splurge Solutions
DIY Hacks That Actually Work
Not all hacks are created equal. These are tried and true:
- Tension rods: Add inside cabinets to create extra shelves for cutting boards or trays.
- Binder clips: Clip bags of chips or snacks to keep them sealed and upright.
- Shoe organizers: Hang on the back of doors for spices, snacks, or cleaning supplies.
- Mason jars: Screw lids under shelves to create hanging storage for small items (like spices or tea bags).
- Pool noodles: Cut and place in drawers to keep plates or cutting boards from sliding.
My favorite hack? A magazine holder mounted inside a cabinet door to hold foil, parchment paper, and plastic wrap. No more rummaging through a jumbled drawer.
When to Splurge
Some things are worth the investment:
- Custom cabinet inserts: Pull-out shelves, spice racks, or drawer dividers tailored to your space.
- High-quality stackable containers: Airtight, uniform, and durable (like OXO or Glasslock).
- A pegboard system: Like the ones from Workshop or Upline-modular and sturdy.
- A slim, high-capacity trash can: Like SimpleHuman’s sensor cans, which fit in tight spaces but hold a lot.
I spent $200 on custom pull-out shelves for my lower cabinets. Worth every penny, no more crawling on the floor to reach the back.
-
Step 9: Maintenance, Because Clutter Always Comes Back
The 10-Minute Nightly Reset
Spend 10 minutes before bed:
- Wipe counters.
- Put away stray items.
- Run the dishwasher (or hand-wash dishes).
- Take out the trash if it’s full.
This prevents the “snowball effect,” where one day of mess leads to a week of chaos. Small efforts compound.
The Quarterly Deep Clean
Every 3 months, do a full audit:
- Check expiration dates (spices, oils, canned goods).
- Reassess tool usage (have you used that mandoline lately?).
- Wipe down shelves and drawers (crumbs and spills add up).
- Rearrange zones if your cooking habits have changed.
I set a calendar reminder for this. It’s not fun, but neither is digging through a cluttered cabinet during dinner prep.
-
Step 10: Mindset Shifts, The Real Key to a Functional Small Kitchen
Accept Imperfection
Your kitchen doesn’t need to look like a magazine spread. Function > aesthetics. If a system works for you but looks messy, that’s okay. My spice drawer is a jumble, but I can find everything in seconds because it’s organized by usage, not alphabetically.
Cook Smarter, Not Harder
Small kitchens reward efficient cooking habits:
- Prep ingredients before you start cooking (mise en place).
- Clean as you go, wash bowls or utensils while food simmers.
- Use fewer pots (e.g., one-pot meals, sheet pan dinners).
- Batch cook and freeze meals to reduce daily clutter.
Embrace Minimalism (But Make It Livable)
You don’t need to own only 10 items. Minimalism in small kitchens means:
- Owning only what you use.
- Storing things intentionally.
- Letting go of guilt (you don’t need to keep your aunt’s chipped casserole dish).
I still own a waffle maker. I use it once a month, and it brings me joy. Minimalism isn’t about deprivation, it’s about intentionality.
-
Final Thoughts: Your Kitchen, Your Rules
Here’s the truth: There’s no one “perfect” way to organize a small kitchen. What works for a baker won’t work for someone who meal-preps. What feels efficient to a minimalist might feel sparse to a home chef. The goal isn’t to follow every tip in this guide, it’s to steal the ideas that fit your life and ignore the rest.
Start small. Pick one problem area (the junk drawer, the spice cabinet, the fridge) and tackle it this weekend. Then, observe: Does the new system make cooking easier? If not, tweak it. Your kitchen should serve you, not the other way around.
And if all else fails? Remember: Even the most disorganized kitchen can make a great meal. The food matters more than the space. But if you can make the space work for you, not against you? That’s the real win.
Now, if you’ll excuse me, I need to go find my garlic press. Again.
-
FAQ: Your Small Kitchen Questions, Answered
Q: I rent my apartment and can’t drill holes or install permanent storage. What can I do?
A: No drilling? No problem. Use:
- Tension rods (for extra shelves or hanging items).
- Adhesive hooks (Command strips hold surprisingly well).
- Freestanding shelves or carts (like IKEA’s RÅSKOG).
- Over-the-door organizers (for pantry or cabinet doors).
- Magnetic strips (for knives or spices, stick to the fridge or a metal backsplash).
I lived in a rental for years and used a pegboard propped against the wall (no mounting needed) with hooks for my most-used tools. It was stable enough and moved with me.
Q: I love to bake, but my kitchen is tiny. How can I make it work?
A: Bakers need more tools, but you can optimize:
- Store baking sheets vertically in a file organizer (fits in a cabinet).
- Use nesting mixing bowls (they stack inside each other).
- Keep flour/sugar in airtight containers that stack.
- Invest in a stand mixer with attachments (replaces a hand mixer, food processor, and pasta maker).
- Use the oven for storage when not in use (pans, baking dishes).
I keep my rolling pin in a wall-mounted wine rack-it’s the perfect size! And my cookie cutters hang on a small hook inside a cabinet door.
Q: I live with roommates/partners/kids, and they won’t keep things organized. Help!
A: Shared kitchens are tough, but try:
- Assign zones: Give each person a cabinet or shelf for their items.
- Label everything: “Sugar” not “Mystery White Powder.”
- Use clear bins: So it’s obvious when something’s in the wrong place.
- Weekly reset: Pick a time (Sunday nights) when everyone tidies their area.
- Compromise: If they won’t use a pegboard, maybe a utensil crock on the counter is the lesser evil.
In my last shared apartment, we had a “lost and found” bin. If something was left out, it went in the bin. After a week, it was donated. Worked like a charm.
Q: What’s the one thing you’d recommend splurging on for a small kitchen?
A: A custom pull-out pantry or cabinet organizer. It’s pricey (often $200–$500), but it doubles your usable space by letting you access the back of deep cabinets without digging. I installed one in my 24-inch-wide “pantry” (really just a tall cabinet), and it holds more than my old 36-inch pantry did. Game. Changer. If that’s out of budget, splurge on uniform, airtight storage containers. They stack neatly, keep food fresh, and make everything look intentional. I use OXO’s POP containers-they’re not cheap, but they’ve lasted 5+ years and saved me from so many spilled flour disasters.
@article{how-to-maximize-space-in-a-small-kitchen-a-2025-guide-to-clever-storage-multifunctional-tools-and-mindset-shifts-that-actually-work,
    title   = {How to Maximize Space in a Small Kitchen: A 2025 Guide to Clever Storage, Multifunctional Tools, and Mindset Shifts That Actually Work},
    author  = {Chef's icon},
    year    = {2025},
    journal = {Chef's Icon},
    url     = {https://chefsicon.com/how-to-maximize-space-in-a-small-kitchen/}
}