The Best Fluffy Pancakes recipe you will fall in love with. Full of tips and tricks to help you make the best pancakes.
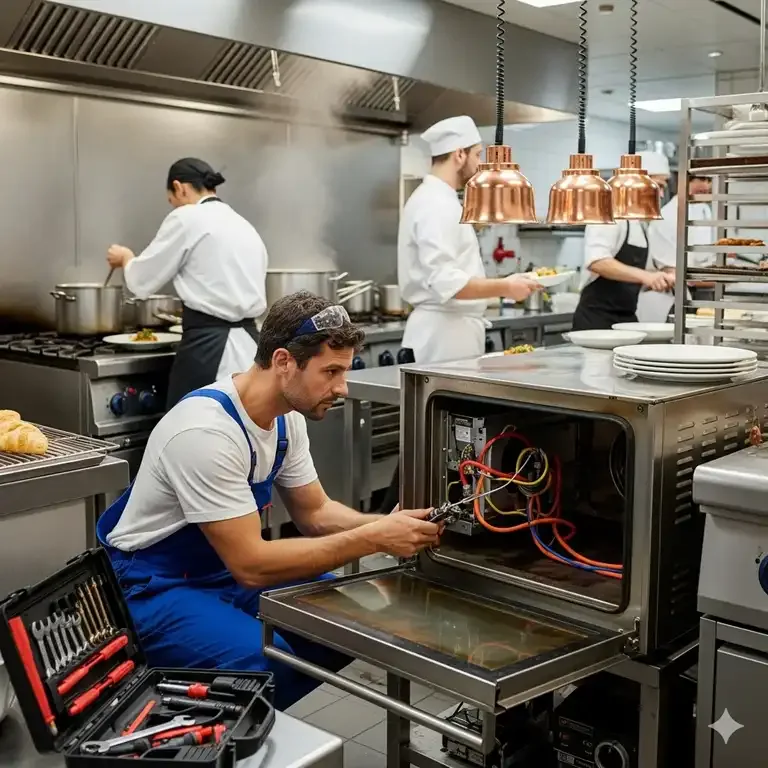
Let me tell you about the time I walked into a restaurant kitchen at 2 AM, armed with nothing but a clipboard and a sinking feeling. The place was a warzone, grease caked on the walls, fryer oil that looked like it hadn’t been changed since the Reagan administration, and a walk-in cooler that smelled like something had died in there (spoiler: it had). The owner, a guy named Marco who’d been in the business for 20 years, looked at me and said, “Sammy, I don’t have time for deep cleaning. We’re too busy.” Sound familiar?
Here’s the thing: I get it. You’re juggling staff shortages, supply chain nightmares, and customers who think “medium rare” means “still mooing.” The last thing you want to think about is scrubbing behind the ovens when you’ve got tickets piling up. But here’s the brutal truth-skipping deep cleaning isn’t saving you time, it’s costing you money. Health code violations, equipment failures, and that mysterious smell that makes customers side-eye their food? That’s your profit margin walking out the door.
So let’s talk about how to build a commercial kitchen deep cleaning schedule that doesn’t require shutting down for a week or hiring a team of hazmat-suited professionals. I’ve spent the last decade working with restaurants from food trucks to Michelin-starred kitchens, and I’ve seen what works (and what doesn’t). This isn’t about turning your kitchen into a surgical suite, it’s about creating a system that keeps your space functional, safe, and actually *saves* you time in the long run. By the end of this, you’ll know:
- How to break down deep cleaning into manageable chunks (without losing your mind)
- The exact tasks that health inspectors *always* check (and how to pass with flying colors)
- How to train your staff to clean like pros (even if they currently think “sanitize” means “wipe with a rag”)
- The sneaky ways deep cleaning can actually *improve* your kitchen’s efficiency
- How to create a schedule that works for your specific volume (whether you’re doing 50 covers or 500)
Let’s start with the uncomfortable truth: most restaurants are doing deep cleaning wrong. They either go full Marie Kondo once a year (and then let things slide for 11 months) or they’re stuck in a cycle of surface-level cleaning that doesn’t actually address the gunk building up in the shadows. Neither approach works. What you need is a layered cleaning system-daily maintenance, weekly deep dives, and monthly overhauls, that keeps your kitchen running smoothly without requiring a herculean effort.
Why Your Current Cleaning Schedule Is Probably Failing You
The Hidden Costs of “We’ll Get to It Later”
I was consulting with a BBQ joint in East Nashville last year that was doing $12K in sales on Saturdays alone. The owner, a guy named Devin, was proud of their efficiency, until the health inspector shut them down for a weekend. Turns out, their “we’ll clean it when it’s slow” approach had resulted in grease buildup in the hood system that was a literal fire hazard. The cost of the emergency cleaning? $4,500. The cost of being closed for two days during their busiest weekend? Closer to $25K. And that’s not even counting the hit to their reputation.
Here’s what most restaurant owners don’t realize: deep cleaning isn’t just about health code compliance, it’s about operational efficiency. That grease-clogged exhaust fan? It’s making your AC work harder, which means higher utility bills. Those crusty oven racks? They’re increasing your cook times, which means slower ticket times. The mysterious sludge in your floor drains? That’s why your kitchen smells like a gym locker, and why your staff is calling out sick more often.
I’m not saying you need to turn your kitchen into a sterile lab. But there’s a middle ground between “we clean when we have to” and “we spend four hours a day scrubbing.” The key is strategic deep cleaning-focusing your efforts on the areas that have the biggest impact on safety, efficiency, and longevity of your equipment.
The Psychology of Cleaning (Or Why Your Staff Hates It)
Let’s talk about why your staff rolls their eyes every time you mention deep cleaning. It’s not because they’re lazy (well, usually not). It’s because most cleaning tasks are:
- Invisible: If you clean behind the fryer, no one notices, until you don’t, and then suddenly it’s a disaster.
- Unrewarding: There’s no immediate payoff. Unlike cooking, where you get the satisfaction of creating something, cleaning just makes things… not dirty.
- Overwhelming: When you say “deep clean the kitchen,” your staff hears “scrub every surface for hours,” which is paralyzing.
- Disconnected: Most staff don’t understand *why* certain tasks matter, so they see them as pointless busywork.
Here’s how we fix this: make cleaning visible, rewarding, and manageable. That means:
- Creating checklists that break tasks into 15-minute chunks
- Assigning ownership (“This is your station, you’re responsible for X”)
- Explaining the “why” behind each task (“If we don’t clean the ice machine filter, the water tastes like metal and customers complain”)
- Celebrating wins (“The walk-in smells amazing this week, great job on the shelves!”)
Is this the only way to do it? Probably not. But in my experience, it’s the most effective way to get buy-in from your team. And let’s be real, you can have the most brilliant cleaning schedule in the world, but if your staff isn’t executing it, it’s worthless.
The 4 Layers of a Killer Deep Cleaning Schedule
1. Daily: The Non-Negotiables
Look, I know you’re tired at the end of a shift. The last thing you want to do is spend an extra hour cleaning. But here’s the thing about daily tasks: they prevent the need for deep cleaning later. Think of it like brushing your teeth, skip it for a few days, and suddenly you’re looking at a root canal.
Here’s what *actually* needs to happen every single day in your kitchen:
- Fryers: Filter the oil and wipe down the exterior. That crusty grease on the outside? It’s not just gross, it’s a fire hazard.
- Grill and flattop: Scrape and degrease while still warm. Cold grease is like cement, good luck getting it off later.
- Range hoods: Wipe down the filters. This is one of those tasks that seems pointless until you see the grease dripping onto your food during service.
- Floors: Not just sweeping-degreasing. Regular mop water just spreads the grease around. Use a degreaser and change the water frequently.
- Walk-in cooler: Wipe down shelves and check for spills. That mystery liquid in the corner? It’s probably not water.
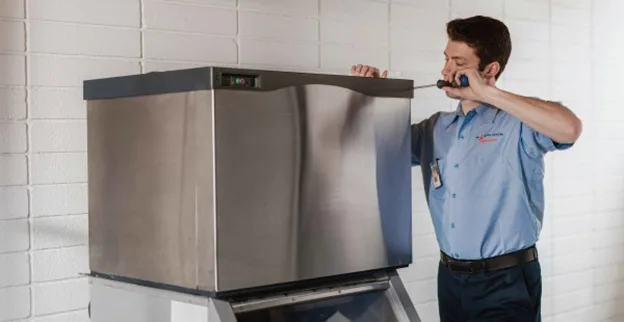
- Ice machine: Wipe down the interior and check the filter. Fun fact: ice machines are one of the most common sources of health code violations.
- Trash cans: Wash them out. Yes, even the ones in the prep area. No one wants to prep food next to a bin that smells like old fish.
I know what you’re thinking: “Sammy, we don’t have time for all this.” Here’s the secret-you don’t have to do it all at once. Break it into 15-minute chunks throughout the shift. Assign specific tasks to specific people. Make it part of the closing checklist. The key is consistency. Do these things every day, and you’ll spend less time on deep cleaning later.
2. Weekly: The Deep Dives
Weekly tasks are where most restaurants drop the ball. They either do them too often (wasting time) or not often enough (letting gunk build up). The sweet spot? One focused deep-cleaning session per week, ideally during a slow period or after closing.
Here’s what your weekly deep clean should include:
- Ovens and ranges: Remove racks and soak them in degreaser. Scrub the interior with a heavy-duty cleaner. That black stuff on the bottom? It’s not just burnt food, it’s a fire hazard.
- Fryers: Drain the oil completely and scrub the interior. That “seasoned” layer on the bottom? It’s making your food taste like old grease.
- Exhaust hoods: Remove the filters and soak them in degreaser. Scrub the interior of the hood. This is one of those tasks that’s easy to skip, but it’s also one of the most important for fire safety.
- Refrigeration units: Pull out all the shelves and drawers. Wash them with warm, soapy water. Wipe down the interior walls. Check the door seals, if they’re cracked or dirty, they’re not sealing properly.
- Floor drains: Pour boiling water and degreaser down them. That smell coming from your drains? It’s not just unpleasant, it’s a sign of bacteria buildup.
- Walls and ceilings: Wipe down splatters and grease buildup. This is one of those tasks that seems unnecessary until you see the health inspector’s face when they shine a flashlight at your ceiling.
- Small equipment: Blenders, food processors, slicers, take them apart and wash every piece. That “seasoned” layer on your slicer? It’s not adding flavor, it’s a breeding ground for bacteria.
Now, I can already hear the pushback: “Sammy, we don’t have time for all this every week.” Fair point. Here’s how to make it manageable:
- Rotate tasks: Don’t try to do everything every week. Split the list into two parts and alternate.
- Assign ownership: Give each task to a specific person. When everyone’s responsible, no one’s responsible.
- Use slow periods: If you’re dead on Tuesday afternoons, that’s your deep-cleaning time.
- Make it a team effort: Turn it into a competition. Who can clean their station the fastest? Who finds the most hidden gunk?
Is this the only way to structure weekly cleaning? No. But it’s a system that works for most restaurants. The key is to pick a schedule and stick to it. Consistency is more important than perfection.
3. Monthly: The Heavy Lifting
Monthly tasks are where most restaurants start to sweat. These are the tasks that require more time, more effort, and often more specialized equipment. But here’s the thing: skipping monthly deep cleaning is like skipping oil changes in your car. You might get away with it for a while, but eventually, something’s going to break down.
Here’s what your monthly deep clean should include:
- Exhaust system: This is the big one. Your exhaust system needs to be professionally cleaned at least once a month (more often if you’re a high-volume kitchen). That grease buildup isn’t just gross, it’s a fire hazard. And no, wiping down the hood isn’t enough. You need a professional with the right tools to clean the ducts and fans.
- Walk-in freezer: Defrost it completely and scrub every surface. Check the seals on the door, if they’re cracked or dirty, they’re not sealing properly, which means your freezer is working harder than it needs to.
- Grease traps: Have them professionally pumped and cleaned. This is one of those tasks that’s easy to ignore, but it’s also one of the most important for preventing backups and odors.
- Floor grout: Scrub it with a degreaser and a stiff brush. That black stuff between your tiles? It’s not just dirt, it’s a breeding ground for bacteria.
- Walls and ceilings: Do a deep clean of all surfaces. This isn’t just about aesthetics, grease buildup on walls and ceilings is a fire hazard.
- Equipment calibration: Check that your ovens, fryers, and refrigeration units are all working properly. A few degrees off can mean the difference between perfectly cooked food and a health code violation.
- Storage areas: Go through your dry storage and walk-in. Throw out expired items. Wipe down shelves. Check for pests. This is one of those tasks that’s easy to skip, but it’s also one of the most important for food safety.
Now, I know what you’re thinking: “Sammy, this is a lot.” It is. But here’s the thing-you don’t have to do it all at once. Break it into chunks. Assign specific tasks to specific people. Use slow periods. The key is to make a plan and stick to it.
One more thing: document everything. Keep a log of what was cleaned, when it was cleaned, and who did the cleaning. This isn’t just for your records, it’s also a great way to show health inspectors that you’re taking cleaning seriously.
4. Quarterly/Annually: The Overhauls
Quarterly and annual tasks are the ones that most restaurants never get around to. They’re time-consuming, they’re expensive, and they often require shutting down for a day or two. But here’s the thing: skipping these tasks can cost you way more in the long run.
Here’s what your quarterly/annual deep clean should include:
- Quarterly:
- Ductwork: Have your ductwork professionally cleaned. This isn’t just about air quality, it’s also about fire safety.
- Refrigeration coils: Clean the coils on your walk-in and reach-in units. Dirty coils make your refrigeration units work harder, which means higher utility bills and a shorter lifespan for your equipment.
- Floor drains: Have them professionally cleaned and inspected. This is one of those tasks that’s easy to ignore, but it’s also one of the most important for preventing backups and odors.
- Equipment deep clean: Disassemble and deep clean your major equipment, ovens, fryers, grills, etc. This isn’t just about cleanliness, it’s also about extending the life of your equipment.
- Annually:
- Kitchen layout: Take a step back and look at your kitchen layout. Is it still working for you? Are there bottlenecks? Are there areas that are constantly dirty or cluttered? This is a great time to make changes.
- Equipment audit: Go through all your equipment. What’s working well? What’s on its last legs? What can be repaired or replaced? This is a great time to make a plan for the year ahead.
- Deep clean everything: This is your chance to do a top-to-bottom deep clean. Scrub every surface. Wash every wall. Clean every nook and cranny. This isn’t just about cleanliness, it’s also about resetting for the year ahead.
I know what you’re thinking: “Sammy, this is overwhelming.” It is. But here’s the thing-you don’t have to do it all at once. Break it into chunks. Assign specific tasks to specific people. Use slow periods. The key is to make a plan and stick to it.
One more thing: don’t be afraid to call in the professionals. Some tasks, like cleaning your exhaust system or ductwork, are best left to the experts. It might cost you a few hundred dollars, but it’s a lot cheaper than a fire or a health code violation.
How to Build a Cleaning Schedule That Actually Works for Your Restaurant
The One-Size-Fits-None Problem
I was working with a food truck in Austin a few years back that was doing brisket tacos out of a 12-foot trailer. The owner, a guy named Javier, showed me his “cleaning schedule”-a three-page document that looked like it was designed for a 5,000-square-foot kitchen. He was trying to follow it, but it was impossible. The tasks were too time-consuming, the equipment didn’t match, and half the stuff didn’t even apply to his operation.
Here’s the thing: there’s no such thing as a one-size-fits-all cleaning schedule. A high-volume steakhouse has different needs than a vegan café. A food truck has different challenges than a hotel kitchen. The key is to build a schedule that works for your specific operation.
So how do you do that? Start by asking yourself a few questions:
- What’s your volume? A restaurant doing 50 covers a night can afford to spend more time on cleaning than one doing 500.
- What’s your menu? A kitchen that fries everything will have different cleaning needs than one that’s mostly salads.
- What’s your space like? A small, open kitchen has different challenges than a sprawling back-of-house.
- What’s your staff like? A team of experienced chefs will have different cleaning needs than a crew of part-time college students.
- What’s your budget? Some tasks can be done in-house, while others require professional help.
Once you’ve answered these questions, you can start building your schedule. Here’s how:
Step 1: Audit Your Kitchen
Before you can build a cleaning schedule, you need to know what needs to be cleaned. Walk through your kitchen and make a list of every surface, piece of equipment, and area that needs attention. Be thorough, don’t just focus on the obvious stuff. Look for hidden areas where grease, grime, and bacteria can build up.
Here’s a quick checklist to get you started:
- Floors (including grout and drains)
- Walls and ceilings
- Exhaust hoods and filters
- Ovens, ranges, and grills
- Fryers
- Refrigeration units (walk-ins, reach-ins, under-counter)
- Ice machines
- Small equipment (blenders, food processors, slicers, etc.)
- Storage areas (dry storage, walk-in, freezer)
- Trash and recycling areas
- Prep stations
- Dishwashing area
- Employee areas (lockers, break room, etc.)
Once you’ve made your list, go through it and categorize each item by how often it needs to be cleaned (daily, weekly, monthly, quarterly, annually). This will be the foundation of your cleaning schedule.
Step 2: Assign Tasks to Specific People
One of the biggest mistakes restaurants make is assigning cleaning tasks to “the team.” When everyone’s responsible, no one’s responsible. Instead, assign specific tasks to specific people. This creates accountability and ensures that nothing falls through the cracks.
Here’s how to do it:
- Break tasks into stations: Assign each station (grill, fryer, prep, etc.) to a specific person. That person is responsible for cleaning their station at the end of each shift.
- Assign deep-cleaning tasks: For weekly, monthly, and quarterly tasks, assign them to specific people based on their skills and availability. For example, your line cook might be responsible for cleaning the fryer, while your prep cook handles the walk-in.
- Rotate tasks: To prevent burnout, rotate deep-cleaning tasks among your staff. This also ensures that everyone knows how to clean every piece of equipment.
One more thing: make sure everyone knows what’s expected of them. Provide training on how to clean each piece of equipment. Post checklists in visible areas. And don’t be afraid to hold people accountable, if someone isn’t doing their part, address it immediately.
Step 3: Create a Cleaning Calendar
Now that you’ve audited your kitchen and assigned tasks, it’s time to create a cleaning calendar. This is where you’ll map out when each task needs to be done. The key is to spread out the work so it’s manageable.
Here’s how to do it:
- Daily tasks: Assign these to the end of each shift. Make them part of the closing checklist.
- Weekly tasks: Pick one day a week for deep cleaning. Assign specific tasks to specific people. For example, Mondays might be for cleaning the walk-in, Tuesdays for the fryers, etc.
- Monthly tasks: Pick one day a month for heavy-duty cleaning. Assign specific tasks to specific people. For example, the first Monday of the month might be for cleaning the exhaust system, the second Monday for the walk-in freezer, etc.
- Quarterly/annual tasks: Schedule these in advance. Make sure you have the time, staff, and resources to get them done.
Here’s a sample cleaning calendar to get you started:
| Day | Daily Tasks | Weekly Tasks | Monthly Tasks |
|---|---|---|---|
| Monday | Fryers, grill, floors, trash cans | Walk-in cooler | Exhaust system (1st Monday) |
| Tuesday | Fryers, grill, floors, trash cans | Ovens and ranges | Walk-in freezer (2nd Monday) |
| Wednesday | Fryers, grill, floors, trash cans | Exhaust hoods | Grease traps (3rd Monday) |
| Thursday | Fryers, grill, floors, trash cans | Refrigeration units | Floor grout (4th Monday) |
| Friday | Fryers, grill, floors, trash cans | Small equipment | |
| Saturday | Fryers, grill, floors, trash cans | Walls and ceilings | |
| Sunday | Fryers, grill, floors, trash cans | Storage areas |
Is this the only way to structure your calendar? No. But it’s a starting point. The key is to find a rhythm that works for your restaurant.
Step 4: Train Your Staff
You can have the most brilliant cleaning schedule in the world, but if your staff doesn’t know how to execute it, it’s worthless. Training is the key to a successful cleaning program.
Here’s how to train your staff effectively:
- Start with the why: Explain why each task is important. For example, “If we don’t clean the ice machine filter, the water tastes like metal and customers complain.”
- Demonstrate the how: Show your staff how to clean each piece of equipment. Don’t assume they know, even experienced chefs might not know the best way to clean a specific piece of equipment.
- Provide written instructions: Post checklists in visible areas. Include step-by-step instructions for cleaning each piece of equipment.
- Watch and correct: Observe your staff as they clean. Provide feedback and correct mistakes immediately.
- Make it a team effort: Turn cleaning into a competition. Who can clean their station the fastest? Who finds the most hidden gunk?
One more thing: lead by example. If you’re not willing to get your hands dirty, your staff won’t be either. Make cleaning a priority, and your team will follow suit.
Step 5: Document Everything
Documentation is one of those things that seems boring until you need it. Then it’s a lifesaver. Keep a log of what was cleaned, when it was cleaned, and who did the cleaning. This isn’t just for your records, it’s also a great way to show health inspectors that you’re taking cleaning seriously.
Here’s what your cleaning log should include:
- Date and time of cleaning
- Task performed
- Person responsible
- Any issues or concerns (e.g., “Grease trap was full, scheduled for pumping”)
- Follow-up actions (e.g., “Order new gaskets for walk-in door”)
You can keep your log in a binder, on a spreadsheet, or in a digital app. The key is to make it easy to update and easy to access. And don’t forget to review it regularly, this is a great way to spot trends and address issues before they become problems.
How to Make Deep Cleaning Less Painful (And More Effective)
The Right Tools for the Job
I walked into a diner in Memphis last year where the owner was using dish soap and a sponge to clean his fryer. I wish I was kidding. The problem? He was using the wrong tools for the job. Dish soap is great for dishes, but it’s not strong enough to cut through the grease and grime in a commercial kitchen.
Here’s what you actually need:
- Degreaser: This is your best friend in a commercial kitchen. Look for a heavy-duty degreaser that’s designed for food service. It should be strong enough to cut through grease but safe for food contact surfaces.
- Scrub brushes: You need a variety of brushes for different tasks. A stiff-bristled brush for scrubbing grills, a softer brush for delicate surfaces, and a long-handled brush for hard-to-reach areas.
- Scrapers: For removing baked-on food from ovens, grills, and fryers. Look for scrapers with replaceable blades so you can keep them sharp.
- Microfiber cloths: These are great for wiping down surfaces. They’re more effective than paper towels and they can be washed and reused.
- Steam cleaner: This is a game-changer for deep cleaning. A good steam cleaner can loosen grease and grime without the need for harsh chemicals. It’s also great for sanitizing surfaces.
- Pressure washer: For cleaning floors, walls, and outdoor areas. Look for a pressure washer with adjustable pressure so you don’t damage surfaces.
- Gloves and goggles: Safety first! Some cleaning chemicals can be harsh, so make sure your staff is protected.
One more thing: don’t skimp on quality. Cheap tools might save you money upfront, but they’ll cost you more in the long run. Invest in good-quality tools that will last.
The Power of Prevention
The best way to make deep cleaning easier? Prevent the mess in the first place. Here are a few simple tricks to keep your kitchen cleaner:
- Line your fryer baskets: Use disposable liners to catch food particles. This makes filtering the oil easier and reduces the amount of gunk that builds up in the fryer.
- Use drip pans: Place drip pans under grills, fryers, and other equipment to catch grease and food particles. This makes cleaning easier and reduces the risk of fires.
- Clean as you go: Encourage your staff to clean up spills and messes immediately. This prevents them from becoming bigger problems later.
- Use the right oil: Some oils break down faster than others. Choose an oil that’s designed for high-heat cooking and has a long lifespan.
- Filter your oil regularly: This extends the life of your oil and reduces the amount of gunk that builds up in your fryer.
- Store food properly: Use airtight containers to prevent spills and contamination. Label everything with the date to prevent food waste.
These might seem like small things, but they add up. A little prevention goes a long way.
How to Motivate Your Staff (Without Bribing Them With Pizza)
Let’s be real, most restaurant staff would rather do anything than clean. So how do you motivate them to take cleaning seriously? Here are a few ideas:
- Make it a competition: Turn cleaning into a game. Who can clean their station the fastest? Who finds the most hidden gunk? The winner gets bragging rights (or a small prize).
- Give them ownership: Assign each person a specific area to clean. When they feel ownership over that area, they’re more likely to take pride in keeping it clean.
- Provide training: Show your staff how to clean each piece of equipment. When they know the right way to do it, they’re more likely to do it well.
- Lead by example: If you’re not willing to get your hands dirty, your staff won’t be either. Make cleaning a priority, and your team will follow suit.
- Recognize good work: When someone does a great job cleaning, acknowledge it. A little recognition goes a long way.
- Make it part of the culture: Cleaning shouldn’t be an afterthought, it should be part of your restaurant’s culture. Make it clear that cleanliness is a priority, and your staff will take it seriously.
Is this the only way to motivate your staff? No. But it’s a starting point. The key is to find what works for your team.
The Sneaky Ways Deep Cleaning Improves Your Kitchen’s Efficiency
Here’s something most restaurant owners don’t realize: deep cleaning isn’t just about cleanliness, it’s about efficiency. A clean kitchen is a well-oiled machine. Here’s how:
- Faster cook times: Clean ovens and grills cook more efficiently. That means faster ticket times and happier customers.
- Lower utility bills: Clean refrigeration coils and exhaust fans work more efficiently. That means lower energy costs and a smaller carbon footprint.
- Longer equipment lifespan: Regular cleaning extends the life of your equipment. That means fewer repairs and replacements, which means more money in your pocket.
- Better food quality: Clean equipment produces better-tasting food. That means happier customers and better reviews.
- Fewer health code violations: A clean kitchen is a compliant kitchen. That means fewer fines and less risk of being shut down.
- Happier staff: A clean kitchen is a pleasant place to work. That means less turnover and a more positive work environment.
So the next time you’re tempted to skip deep cleaning, remember: it’s not just about cleanliness, it’s about efficiency, profitability, and longevity.
Putting It All Together: Your 30-Day Deep Cleaning Plan
Alright, let’s get practical. Here’s a 30-day plan to get your kitchen on a solid deep-cleaning schedule. This isn’t set in stone, adjust it to fit your restaurant’s needs. But it’s a great starting point.
Week 1: Audit and Plan
- Day 1-2: Walk through your kitchen and make a list of everything that needs to be cleaned. Be thorough, don’t just focus on the obvious stuff.
- Day 3-4: Categorize each item by how often it needs to be cleaned (daily, weekly, monthly, quarterly, annually).
- Day 5-7: Assign tasks to specific people. Create a cleaning calendar. Post checklists in visible areas.
Week 2: Train and Implement
- Day 8-9: Train your staff on how to clean each piece of equipment. Provide written instructions and demonstrate the proper techniques.
- Day 10-11: Start implementing the daily cleaning tasks. Make them part of the closing checklist.
- Day 12-14: Begin the weekly deep-cleaning tasks. Assign specific tasks to specific people and rotate as needed.
Week 3: Deep Dive
- Day 15-16: Tackle the monthly deep-cleaning tasks. Schedule professional cleanings for the exhaust system, grease traps, and other specialized tasks.
- Day 17-18: Review the cleaning logs. Address any issues or concerns. Make adjustments to the schedule as needed.
- Day 19-21: Continue with the daily and weekly tasks. Encourage your staff to take ownership of their cleaning responsibilities.
Week 4: Refine and Improve
- Day 22-23: Hold a team meeting to discuss the cleaning schedule. Get feedback from your staff. What’s working? What’s not? Make adjustments as needed.
- Day 24-25: Schedule any outstanding tasks. Make sure everything is up to date.
- Day 26-28: Start planning for the next month. What worked well? What needs improvement? Make a list of goals for the next 30 days.
- Day 29-30: Celebrate your progress! Acknowledge the hard work your staff has put in. Maybe even treat them to pizza (but not as a bribe, just as a thank you).
Is this the only way to structure your 30-day plan? No. But it’s a solid starting point. The key is to find a rhythm that works for your restaurant.
Final Thoughts: The Clean Kitchen Mindset
Look, I’m not going to lie, deep cleaning is a pain. It’s time-consuming, it’s messy, and it’s often thankless. But here’s the thing: it’s also non-negotiable. A clean kitchen isn’t just about passing health inspections, it’s about running a successful, efficient, and profitable restaurant.
So how do you make deep cleaning a priority? It starts with mindset. You have to see cleaning not as a chore, but as an investment. An investment in your equipment, your staff, your customers, and your bottom line.
Here’s my challenge to you: pick one thing from this article and implement it this week. Maybe it’s creating a cleaning calendar. Maybe it’s training your staff on how to clean the fryer. Maybe it’s scheduling a professional cleaning for your exhaust system. Whatever it is, start small. Build momentum. And before you know it, deep cleaning will be a natural part of your restaurant’s routine.
And who knows? Maybe next time I walk into your kitchen at 2 AM, I’ll see a space that’s not just functional, but thriving. A space where the equipment works efficiently, the staff takes pride in their work, and the food tastes better because of it. That’s the power of a solid deep-cleaning schedule.
Now, if you’ll excuse me, I need to go check on Luna, she’s probably knocked over my coffee by now. And if there’s one thing I’ve learned from working in restaurants, it’s that some messes are inevitable. But with the right system, even the biggest messes can be managed.
FAQ
Q: How often should a commercial kitchen be deep cleaned?
A: It depends on your volume and menu, but here’s a general guideline: daily tasks (like wiping down surfaces and filtering fryer oil), weekly deep dives (like cleaning ovens and exhaust hoods), monthly heavy-duty tasks (like professional exhaust system cleaning), and quarterly/annual overhauls (like ductwork cleaning). The key is consistency, skipping tasks leads to bigger problems down the road.
Q: What’s the most commonly overlooked area in restaurant deep cleaning?
A: Hands down, it’s the exhaust system. Most restaurants clean the hood filters regularly, but they neglect the ducts and fans. This is a huge mistake, grease buildup in the exhaust system is a major fire hazard. Another commonly overlooked area? Floor drains. That smell coming from your drains isn’t just unpleasant, it’s a sign of bacteria buildup.
Q: How can I get my staff to take deep cleaning seriously?
A: Start by explaining the “why” behind each task. When staff understand that cleaning the ice machine filter prevents metallic-tasting water (and unhappy customers), they’re more likely to take it seriously. Also, assign ownership, give each person a specific area to clean. When they feel ownership over that area, they’re more likely to take pride in keeping it clean. And don’t forget to lead by example, if you’re not willing to get your hands dirty, your staff won’t be either.
Q: What’s the biggest mistake restaurants make with their deep cleaning schedule?
A: Trying to do too much at once. Deep cleaning isn’t about spending hours scrubbing every surface, it’s about creating a system that keeps your kitchen clean consistently. Break tasks into manageable chunks. Assign specific tasks to specific people. And don’t be afraid to call in the professionals for specialized tasks (like cleaning your exhaust system). The key is to find a rhythm that works for your restaurant and stick to it.
@article{the-ultimate-commercial-kitchen-deep-cleaning-schedule-for-busy-restaurants-that-actually-works,
    title   = {The Ultimate Commercial Kitchen Deep Cleaning Schedule for Busy Restaurants (That Actually Works)},
    author  = {Chef's icon},
    year    = {2026},
    journal = {Chef's Icon},
    url     = {https://chefsicon.com/commercial-kitchen-deep-cleaning-schedule-for-busy-restaurants/}
}