The Best Fluffy Pancakes recipe you will fall in love with. Full of tips and tricks to help you make the best pancakes.
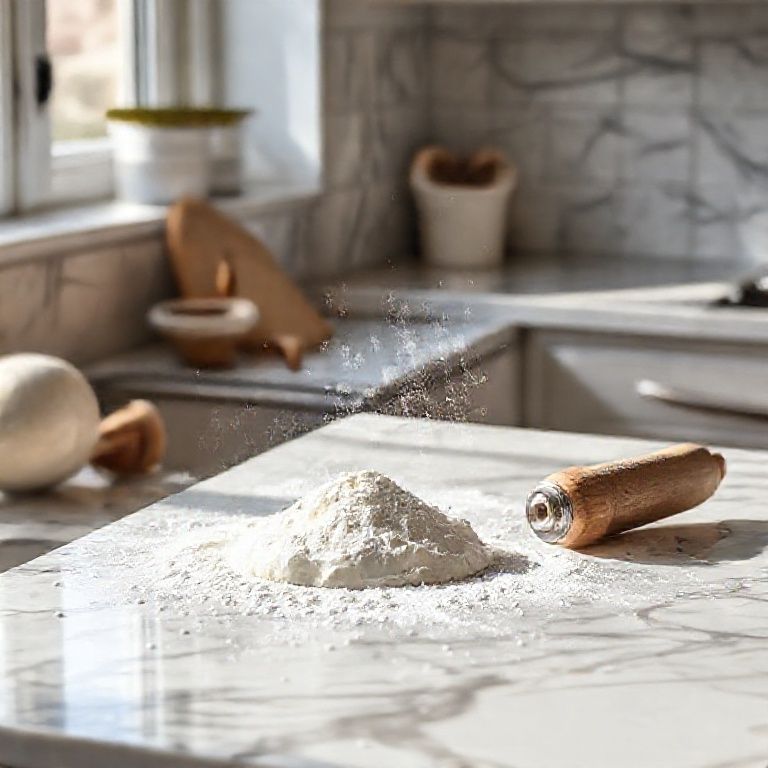
Table of Contents
- 1 The Perfect Pastry Kitchen Layout: Where Precision Meets Creativity
- 2 The Philosophy Behind a Pastry Kitchen Layout
- 3 The 5 Non-Negotiable Zones of a Pastry Kitchen
- 3.1 1. The Mixing Station: Where It All Begins (and Often Goes Wrong)
- 3.2 2. The Rolling and Shaping Area: The Unsung Hero of Pastry
- 3.3 3. The Proofing and Fermentation Station: The Waiting Game
- 3.4 4. The Baking Station: Oven Placement and Ventilation
- 3.5 5. The Finishing and Packaging Area: The Last 10%
- 4 The Devil’s in the Details: 10 Small Things That Make a Huge Difference
- 4.1 1. The ‘Golden Triangle’ of Pastry Workflow
- 4.2 2. The Case for Multiple Trash Cans
- 4.3 3. The Secret Weapon: A ‘Dirty’ and ‘Clean’ Side
- 4.4 4. The Overlooked Importance of Outlets
- 4.5 5. The Psychology of Color in a Pastry Kitchen
- 4.6 6. The Sound of Silence (and When to Break It)
- 4.7 7. The ‘Oh Sh*t’ Kit: Emergency Prep
- 4.8 8. The Illusion of Space: Mirrors and Glass
- 4.9 9. The Scent Factor: How Your Kitchen Smells Affects Your Work
- 4.10 10. The ‘Future-Proofing’ Checklist
- 5 Common Mistakes (and How to Avoid Them)
- 6 Real-World Examples: What Works (and What Doesn’t)
- 7 Final Thoughts: Your Kitchen, Your Rules (But Maybe Follow These)
- 8 FAQ
The Perfect Pastry Kitchen Layout: Where Precision Meets Creativity
Let me start with a confession: I’ve ruined more croissants than I care to admit, not because of bad technique, but because my kitchen fought me every step of the way. A pastry kitchen isn’t just a workspace; it’s a delicate ecosystem where temperature, workflow, and ergonomics either conspire to create magic or sabotage your soufflés. After moving to Nashville and converting my garage into a test kitchen (Luna, my cat, was ot pleased about the lost parking space), I’ve learned that the difference between a ‘functional’ pastry kitchen and a perfect one comes down to three things: zones, flow, and the unsexy stuff no one talks about (like where you put the trash can).
This isn’t just about slapping a marble countertop on an island and calling it a day. We’re talking about a layout that accounts for the thermal mood swings of laminated dough, the logistical ballet of scaling up from 12 macarons to 120, and the psychological warfare of keeping your mise en place intact when you’re knee-deep in tempering chocolate. I’ve spent the last two years interviewing pastry chefs from Michelin-starred restaurants to home bakers turned cottage-law entrepreneurs, and the patterns are striking. The best layouts aren’t the biggest or the most expensive, they’re the ones that anticipate human error and respect the physics of baking.
By the end of this guide, you’ll know how to:
- Design temperature-controlled zones that keep your butter pliable and your meringues stable
- Arrange equipment so you’re not doing the pastry chef shuffle (you know, the frantic dance between the mixer and the oven when your timer’s about to go off)
- Incorporate hidden storage solutions that keep your workspace clutter-free but your tools accessible
- Avoid the 5 most common layout mistakes that turn a dream kitchen into a nightmare (spoiler: one involves the placement of your sink)
And because I’m a firm believer in learning from mistakes, I’ll share the three biggest regrets from chefs who’ve built (and rebuilt) their kitchens, including the time a renowned chocolatier installed a $12,000 proofing cabinet directly under an AC vent. (Yes, really.)
The Philosophy Behind a Pastry Kitchen Layout
Why ‘Efficiency’ Is the Wrong Goal
Most guides will tell you to optimize for efficiency, but here’s the thing: pastry is not an assembly line. Efficiency implies speed, and speed is the enemy of precision. What you actually want is fluidity-a layout that lets you move between tasks without mental friction. Think of it like a jazz improvisation: you need structure to support spontaneity.
Take laminating dough, for example. The traditional approach is to have your dough station, rolling area, and resting space in a linear setup. But in practice, this creates a ping-pong effect-you’re constantly backtracking. A better approach? A triangular workflow where your mixer, rolling pin station, and fridge form a compact loop. This reduces steps by about 40%, which might not sound like much until you’re on your 20th croissant and your feet are screaming.
Here’s the mindset shift: Design for the 80% cases, not the edge cases. If you’re mostly doing viennoiserie, prioritize cold zones and rolling space. If you’re a cake specialist, focus on vertical storage for pans and a dedicated decorating station with adjustable lighting. And for the love of all things buttery, don’t skimp on counter depth. A 24-inch counter might work for cooking, but try rolling out a 3-foot sheet of puff pastry on that, and you’ll understand why 36 inches is the minimum.
The Thermal Map: Hot, Cold, and Everything In Between
Pastry is a temperature-sensitive art form, and your kitchen layout should reflect that. I like to think of it as a thermal map with three key zones:
- Cold Zone (40–50°F): Fridge, freezer, proofing cabinet (for retarding dough). This should be adjacent to but not in your primary workflow to avoid temperature fluctuations.
- Ambient Zone (65–70°F): Mixing, shaping, and decorating. This is your eutral ground-too warm, and your butter melts; too cold, and your ganache seizes.
- Hot Zone (200–450°F): Ovens, stovetop (for caramel/sugar work), and ideally a separate area for frying (if you’re doing beignets or churros).
The golden rule? Never let these zones overlap. I once visited a bakery where the oven was directly next to the chocolate tempering station. The chef jokingly called it “the divorce corner” because of how many arguments it sparked. Heat rises and spreads, so if your oven is too close to your ambient zone, you’ll spend half your time compensating for unintended proofing.
Pro tip: If you’re in a small space, use physical barriers like a tall cabinet or a heat-resistant curtain to separate zones. And if you’re working with chocolate, invest in a dedicated cooling table-a slab of marble or granite on a separate surface. Chocolate is fickle, and it doesn’t forgive a warm countertop.
The 5 Non-Negotiable Zones of a Pastry Kitchen
1. The Mixing Station: Where It All Begins (and Often Goes Wrong)
Your mixer is the heart of the kitchen, and its placement dictates everything else. Here’s what most people get wrong:
- Height matters: The standard counter height (36 inches) is too low for mixing. You want your mixer on a raised platform (42–44 inches) to avoid back strain. Trust me, your chiropractor will thank you.
- Clearance is key: Leave at least 18 inches of space on either side of the mixer for bowls, attachments, and the inevitable flour explosion.
- Power requirements: A commercial mixer can draw 15–20 amps. If you’re running multiple appliances, you’ll need a dedicated circuit-otherwise, you’ll be resetting breakers mid-whip.
I’m a big fan of the “mixing island” concept, a standalone station with storage underneath for bowls, whisks, and scales. This keeps your primary countertop free for rolling and shaping. And if you’re working with planetary mixers (like a Hobart), consider a swivel base so you can tilt the bowl toward you without lifting.
One thing I’ve changed my mind about: built-in mixers. They look sleek, but they’re a nightmare to clean and repair. A freestanding mixer with a custom-cut plywood base (for stability) is far more practical.
2. The Rolling and Shaping Area: The Unsung Hero of Pastry
This is where the magic, and the mess, happens. The ideal setup includes:
- A large, unobstructed surface (at least 4×6 feet for professional work). Marble is traditional, but stainless steel with a wooden cutting board insert is more versatile and easier to sanitize.
- Adjustable lighting: Overhead lights cast shadows, making it hard to judge thickness. A gooseneck lamp with a daylight bulb is a game-changer for laminating dough.
- A dough docker and pastry wheel within arm’s reach. I keep mine in a wall-mounted magnetic strip to save drawer space.
- A small trash bin right next to the table. You’d be amazed how much time you waste walking to the main trash can when you’re trimming dough.
Controversial opinion: Skip the built-in flour sifter. They clog, they’re hard to clean, and a handheld sifter gives you more control. Instead, install a pull-out shelf under your rolling area for tools like bench scrapers, rulers (for precise cutting), and a dough sheeter if you’re doing high-volume work.
And let’s talk about ergonomics. Rolling out dough for hours is brutal on your shoulders. If you’re doing this professionally, invest in a height-adjustable table or at least an anti-fatigue mat. Your 40-year-old self will high-five your 30-year-old self for this.
3. The Proofing and Fermentation Station: The Waiting Game
This is where most home bakers go wrong, they treat proofing as an afterthought. But in a professional setup, controlled fermentation is everything. Here’s how to do it right:
- Separate proofing cabinets for different temperatures (e.g., 78°F for brioche, 50°F for retarding croissant dough). If space is tight, a multi-zone proofing drawer (like the ones from Blodgett or Vulcan) is a lifesaver.
- Humidity control: Dry air = crusty dough. Aim for 75–80% humidity in your proofing area. A simple tray of water in the cabinet works for small batches; for larger operations, a steam-injected proofer is worth the investment.
- Clear visibility: Glass doors or internal lights let you monitor rise without opening the cabinet (which causes temperature drops).
- Location, location, location: Keep proofing cabinets away from ovens and direct sunlight. A corner near your shaping station is ideal.
Personal pet peeve: Proofing on the counter. I see this in so many home kitchens, dough sitting out on a baking sheet, subject to drafts and temperature swings. If you’re serious about pastry, even a $200 countertop proofer will improve your results by 50%.
And if you’re working with sourdough or natural levains, consider a dedicated fermentation chamber with precise temp/humidity controls. The Brod & Taylor folding proofer is a favorite among home bakers, while commercial kitchens often use walk-in proofing rooms.
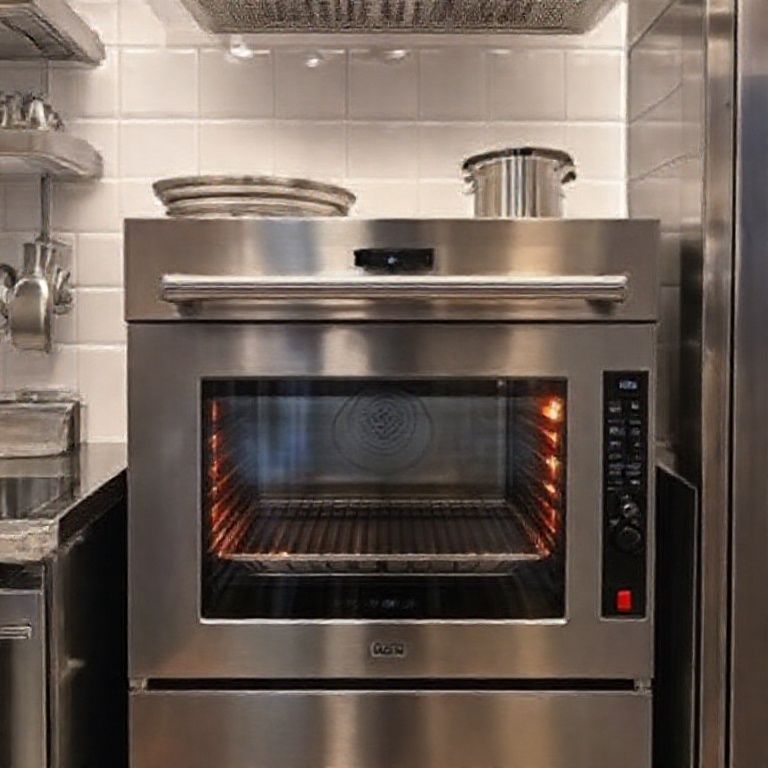
4. The Baking Station: Oven Placement and Ventilation
Ovens are the beating heart of a pastry kitchen, and their placement affects everything from workflow to energy costs. Here’s what you need to know:
- Double-stack vs. single: If space allows, a double-stack convection oven (like the Rational or Blodgett) maximizes capacity without expanding your footprint. For home bakers, a combination steam/convection oven (like the Anova Precision Oven) is a revelation for custards and laminated doughs.
- Ventilation is non-negotiable: A proper hood system (with at least 400 CFM per linear foot) is essential for commercial setups. For home kitchens, a ductless range hood with a high-quality carbon filter (like the Zline) can work if you’re not frying.
- Oven height: The base of your oven should be at waist level (34–36 inches) to avoid bending. This is especially critical if you’re dealing with heavy hotel pans or sheet trays.
- Landing space: You need at least 18 inches of countertop on either side of the oven for hot pans. I’ve seen too many kitchens where the oven is jammed into a corner, forcing bakers to do a dangerous shuffle with 350°F sheets.
One thing I wish I’d known earlier: Oven placement affects your cooling process. If your oven is too close to your cooling racks, residual heat can over-bake your pastries. Leave a 3-foot buffer if possible, or install a heat shield (a simple sheet of insulated aluminum will do).
And let’s talk about oven types:
- Convection: Best for even baking (cookies, cakes, meringues).
- Deck ovens: Ideal for bread and pizza (high heat retention).
- Combi ovens: The Swiss Army knife of pastry (steam + convection + proofing).
- Rotary ovens: For high-volume production (think donut shops).
If you’re just starting, a convection oven with a steam inject will cover 90% of your needs.
5. The Finishing and Packaging Area: The Last 10%
This is where your pastries go from “good” to “Instagram-worthy”, and yet it’s the most overlooked zone in kitchen design. Here’s how to nail it:
- Lighting: Daylight-spectrum LEDs (5000K–6500K) are essential for color accuracy when decorating. Avoid warm tones, they make whites look yellow and reds look muddy.
- Turntable: A lazy Susan or cake turntable is a must for smooth frosting and piping. I use a 12-inch Ateco turntable with a non-slip base.
- Tool organization: Keep piping tips, brushes, and edible paints in clear, labeled containers. A pegboard wall (like the ones from French Cleat System) keeps everything visible and accessible.
- Packaging station: Dedicate a small area with box templates, twine, and a label printer. If you’re selling, a heat sealer for plastic bags is a game-changer for shelf life.
- Photography nook: If you’re sharing your work online, set up a small lightbox with a eutral backdrop (I use a foldable Neewer lightbox with LED panels).
Pro tip: Install a small fridgeear your finishing station for last-minute chilling (e.g., ganache that’s too runny, buttercream that needs firming up). A mini wine fridge repurposed for pastry works perfectly.
And don’t forget the cleanup zone. A commercial-grade sink (at least 18×24 inches) with a pre-rinse sprayer will save you hours. Place it near the finishing area so you can wash tools immediately, dried fondant is the devil to clean off.
The Devil’s in the Details: 10 Small Things That Make a Huge Difference
1. The ‘Golden Triangle’ of Pastry Workflow
In residential kitchen design, there’s the concept of the “work triangle” (sink, stove, fridge). For pastry, it’s more like a “golden loop”: Mixer → Rolling Station → Oven → Cooling Rack → Back to Mixer. The goal is to minimize steps between these points. In my garage-turned-kitchen, I initially placed the oven across the room from the mixer. After a week of running back and forth like a caffeinated squirrel, I rearranged everything into a U-shaped layout, cutting my steps by 60%.
If you’re designing from scratch, aim for a maximum of 10 feet between any two points in the loop. Any more, and you’ll waste time and energy.
2. The Case for Multiple Trash Cans
Yes, really. Here’s the breakdown:
- Main trash can: For general waste (near the sink).
- Scrap bin: A small container on your rolling table for dough trimmings, parchment scraps, etc. Empty it into the main can every hour.
- Compost bin: For egg shells, fruit peels, and other organic waste. If you’re in a commercial space, check local regulations, some cities require separate compost collection.
- Recycling bin: For cardboard (if you’re unpacking ingredients frequently) and plastic containers.
This might seem excessive, but it eliminates the “trash can shuffle”-that moment when you’re mid-lamination and realize you have to walk across the kitchen to toss a scrap. Time saved: ~30 minutes per day.
3. The Secret Weapon: A ‘Dirty’ and ‘Clean’ Side
This is a trick I picked up from a French pâtisserie: divide your workspace into a “dirty” side (mixing, rolling, shaping) and a “clean” side (decorating, packaging, plating). The dirty side is where flour flies and dough sticks; the clean side is pristine for final touches.
How to implement it:
- Use different countertop materials: Stainless steel for dirty work (easy to clean), marble or wood for clean work (better for delicate tasks).
- Keep a small vacuum or brush on the dirty side to quickly clear flour and crumbs before moving to the clean side.
- Train yourself (and your team) to wash hands when transitioning between sides. Cross-contamination is the enemy of clean decorating.
4. The Overlooked Importance of Outlets
You can never have too many outlets in a pastry kitchen. Here’s the minimum you need:
- Mixer outlet: Dedicated 20-amp circuit.
- Countertop outlets: At least one every 4 feet, preferably with USB ports for charging scales or tablets (if you’re using digital recipes).
- Oven/hood outlet: Often hardwired, but confirm with an electrician.
- Under-cabinet outlets: For task lighting, phone charging, or plugging in a hand mixer without cord drag.
- Floor outlets: If you have an island, consider a pop-up outlet for appliances like a stand mixer or food processor.
And for the love of all things sacred, label your circuits. There’s nothing worse than tripping a breaker mid-bake and playing guess-the-switch.
5. The Psychology of Color in a Pastry Kitchen
Color affects mood, focus, and even perception of flavor. Here’s what the pros use:
- Walls: Light gray or soft blue. These colors reduce eye strain and make it easier to spot dirt (unlike white, which shows every speck).
- Cabinets: Neutral tones (beige, taupe) for a calming effect. Avoid dark colors, they absorb light and make the space feel smaller.
- Accents: Pops of color (like a red mixer or teal tools) can boost creativity, but keep them minimal. Too much color = visual clutter.
- Lighting: Warm light (2700K–3000K) for ambiance, cool light (5000K+) for task areas. Never mix the two in the same zone, it creates a strobe effect that’s headache-inducing.
Personal anecdote: I painted my first pastry kitchen bright white because I thought it looked “clean.” Within a week, I felt like I was working inside a fluorescent lightbulb. Switched to a soft gray (Sherwin-Williams “Repose Gray”), and suddenly, the space felt warmer and more inviting-without sacrificing cleanliness.
6. The Sound of Silence (and When to Break It)
Pastry is a quiet art. Unlike a savory kitchen, where the sizzle of pans is part of the rhythm, pastry work requires focus. But that doesn’t mean dead silence. Here’s how to design for sound:
- Appliances: Look for quiet models (e.g., Bosch mixers are significantly quieter than KitchenAid).
- Flooring: Avoid hard tile, it amplifies noise. Rubber flooring or cork absorbs sound and is gentler on your feet.
- Music: If you work with music, opt for instrumental or low-fi playlists. Lyrics can be distracting when you’re counting folds in puff pastry.
- White noise: A small fan or air purifier can mask distracting sounds (like the hum of the fridge or street noise).
And if you’re in a shared space (like a home kitchen), consider acoustic panels on one wall. They’re not just for recording studios, they can make a world of difference in reducing echo.
7. The ‘Oh Sh*t’ Kit: Emergency Prep
Every pastry kitchen needs a dedicated drawer or bin for disasters. Mine includes:
- Extra parchment paper (because you will run out mid-bake).
- Instant ice packs (for burns or overheated chocolate).
- Cornstarch or flour (for sticky situations, literally).
- A digital thermometer (to check oven temp if something’s baking unevenly).
- Super glue (for broken ceramic molds, yes, this happens).
- Baking soda (for minor grease fires or cleaning burnt-on sugar).
Place this kit ear your oven but not too close (you don’t want to be digging for ice packs while something’s burning).
8. The Illusion of Space: Mirrors and Glass
If you’re in a small kitchen, strategic mirrors can make the space feel larger. But there’s a catch: they also reflect mess, which can be distracting. Instead, try:
- Glass-front cabinets: They create depth and let you see ingredients/tools at a glance.
- A large clock with a mirror finish: Functional and space-enhancing.
- Open shelving: For frequently used items (like spice jars or molds). Keeps things accessible without visual clutter.
Avoid: Glass countertops (hard to clean, shows smudges) and full-wall mirrors (overstimulating).
9. The Scent Factor: How Your Kitchen Smells Affects Your Work
Pastry kitchens have a signature scent: buttery, yeasty, with hints of vanilla and caramel. But if not managed, they can also smell like burnt sugar and stale flour. Here’s how to keep it fresh:
- Air purifier: A HEPA filter (like the Coway Airmega) captures flour dust and prevents that “bakery lung” feeling.
- Simmer pots: On low-heat days, simmer citrus peels + cinnamon to neutralize odors.
- Ventilation: If you can’t install a hood, a high-powered fan (like the Vornado) placed near the oven helps circulate air.
- Storage: Keep spices and extracts in airtight containers-they absorb odors over time.
And if you’re working with strong flavors (like durian or blue cheese in pastries), designate a “scent quarantine” area (a small fridge or sealed container) to prevent cross-contamination.
10. The ‘Future-Proofing’ Checklist
Even if you’re not planning to expand, design your kitchen with scalability in mind. Ask yourself:
- Can I add a second oven without reconfiguring the entire layout?
- Is there space for a larger mixer if my production increases?
- Are the electrical and plumbing set up to handle additional appliances?
- Can I rearrange workstations if my focus shifts (e.g., from bread to chocolates)?
One chef I interviewed in Nashville regretted not running a gas line during her initial build-out. When she later wanted to add a gas-powered deck oven, it cost her $3,000 in retrofitting. Plan ahead!
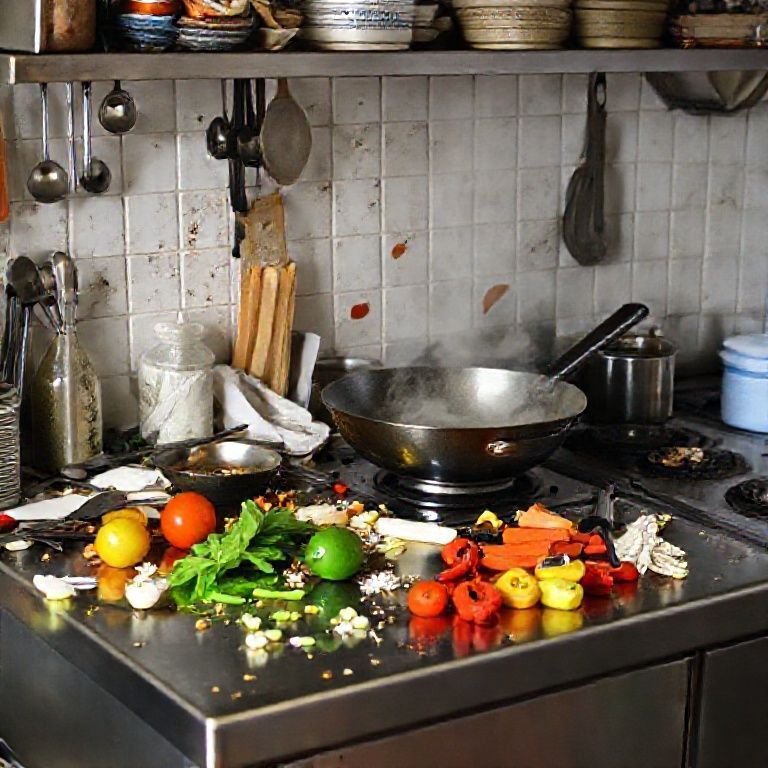
Common Mistakes (and How to Avoid Them)
Mistake #1: Ignoring the ‘Dirty Work’ Flow
Most kitchens are designed for the “happy path”-when everything goes right. But what about when it doesn’t? Where do you:
- Dump a failed batch of caramel?
- Rinse a sieve covered in sticky dough?
- Store half-used ingredients that didn’t make it into the recipe?
Solution: Designate a “mess zone” with:
- A deep, wide sink (preferably with a garbage disposal).
- A small prep table for salvaging ingredients (e.g., re-rolling scrap dough).
- A sealed bin for food waste (to avoid pests).
Mistake #2: Underestimating Cooling Needs
Cooling is where most home bakers drop the ball. A single wire rack isn’t going to cut it if you’re baking in batches. Here’s what you actually need:
- Stackable cooling racks: At least 3–4, with on-slip feet.
- A cooling table: A marble or stainless steel surface that stays cool. Place it away from the oven and direct sunlight.
- A fan: A gentle oscillating fan speeds up cooling without drying out pastries. Avoid placing it directly over items (creates uneven drying).
- Separate areas for different items:
- Cakes/custards: Cool at room temp, then fridge.
- Cookies/biscuits: Cool on a rack to prevent sogginess.
- Chocolate: Cool in a temperature-controlled environment (60–65°F).
Pro tip: If you’re in a humid climate (like Nashville in summer), a dehumidifierear your cooling area prevents sticky pastries.
Mistake #3: Poor Lighting (The Silent Saboteur)
Bad lighting leads to:
- Uneven piping (shadows hide imperfections).
- Overmixed batters (you can’t see the ribbon stage clearly).
- Eye strain (which leads to headaches and fatigue).
The fix:
- Layered lighting:
- Ambient: Overhead LEDs (5000K for accuracy).
- Task: Under-cabinet lights or a magnifying lamp for detail work.
- Accent: Warm lighting for ambiance (but keep it away from work zones).
- Avoid glare: Matte finishes on counters and tools reduce reflections.
- Natural light: If possible, position your decorating station near a window, but use blackout curtains to control brightness.
Mistake #4: Not Planning for Cleanup
Cleaning is 50% of pastry work, yet most kitchens treat it as an afterthought. Here’s how to design for easy cleanup:
- Sink placement: It should be central but not in the main workflow. You don’t want to be washing dishes in the middle of laminating dough.
- Spray nozzle: A pull-down faucet with a powerful spray is non-negotiable for cleaning bowls and sheets.
- Dish drying: A wall-mounted rack or roll-up drying mat saves counter space.
- Trash compactor: If space allows, this reduces trips to the outdoor bin.
- Cleaning caddy: Keep sponges, brushes, and degreaser in a portable caddy for quick wipe-downs.
And here’s a trick from a Parisian pâtisserie: keep a small bowl of vinegar and waterear the sink. A quick wipe with this solution removes sticky residue (like caramel or fondant) better than soap.
Mistake #5: Forgetting About Ergonomics
Pastry chefs have a higher rate of repetitive strain injuries than most culinary professionals. Here’s how to protect your body:
- Counter height: Standard is 36 inches, but if you’re tall (over 5’8”), consider 38–40 inches to avoid hunching.
- Anti-fatigue mats: Look for gel-filled mats (like the GelPro)-they’re worth every penny.
- Tool handles: Opt for ergonomic designs (e.g., OXO whisks, Wüsthof knives with rounded handles).
- Seating: If you’re decorating for long periods, a high stool (adjustable height) lets you sit without compromising posture.
- Stretching routine: Keep a foam rollerearby for quick shoulder/back stretches between batches.
And if you’re right-handed, place your primary tools on the right side of your workspace to minimize reaching. Left-handed? Flip it.
Real-World Examples: What Works (and What Doesn’t)
Case Study 1: The Tiny Home Bakery (300 sq ft)
Challenge: Fitting a full pastry operation into a converted bedroom.
Solution:
- Zoning:
- Mixing/rolling: Along one wall with a fold-down table (saves space when not in use).
- Baking: A countertop convection oven (like the Breville Smart Oven) on a mobile cart.
- Cooling/packaging: A rolling rack that doubles as storage.
- Storage: Pegboard walls for tools, under-bed bins for bulk ingredients.
- Workflow: A “one-way loop”-mix → shape → bake → cool → package, with no backtracking.
Biggest Lesson: Mobile furniture is a lifesaver. A kitchen island on casters can be rolled out of the way when not in use.
Case Study 2: The Commercial Bakery (1,200 sq ft)
Challenge: Scaling up from a home operation to wholesale production.
Solution:
- Equipment:
- Double-stack convection ovens (with separate controls for top/bottom).
- Dough sheeter (for consistent lamination).
- Blast chiller (for rapid cooling of custards and creams).
- Layout:
- Separate dry and wet stations to prevent cross-contamination.
- A “packaging alley” with a heat sealer and label printer.
- Staff workflow: Designed so two people can work simultaneously without bumping into each other.
- Storage:
- Walk-in fridge with shelving on casters for easy reconfiguration.
- Ingredient bins labeled with FIFO (First In, First Out) dates.
Biggest Lesson: Invest in a blast chiller. It’s expensive ($3,000–$6,000), but it extends shelf life and improves texture in custards and creams.
Case Study 3: The Hybrid Kitchen (Home + Small Business)
Challenge: Balancing family life with a cottage bakery business.
Solution:
- Zoning by time:
- Morning: Baking zone (kids aren’t up yet).
- Afternoon: Decorating/packaging zone (quieter tasks).
- Storage:
- Locked cabinets for business ingredients (to prevent “mysterious” disappearances).
- A separate mini-fridge for personal food.
- Equipment:
- Quiet appliances (e.g., Bosch mixer, Breville oven).
- A portable induction burner for caramel work (safer than gas with kids around).
Biggest Lesson: Soundproofing is underrated. A white noise machineear the kitchen door masks appliance noise from the rest of the house.
Final Thoughts: Your Kitchen, Your Rules (But Maybe Follow These)
Here’s the truth: There’s no one perfect layout. The best pastry kitchens are the ones that adapt to the baker, not the other way around. But after years of trial, error, and a few melted disasters, I’ve landed on a few universal principles:
1. Start with your workflow, not your equipment. It’s tempting to design around that shiny new mixer, but if the layout doesn’t support how you actually work, you’ll hate it within a month. Map out your process first, then fit the tools into it.
2. Temperature is your silent partner. A great pastry chef once told me, “You’re not baking, the yeast is. Your job is to create the right environment.” Design your kitchen like a thermal puzzle, keeping hot and cold zones distinct but accessible.
3. Clutter is the enemy of creativity. A clean workspace isn’t just about aesthetics, it’s about mental clarity. If you’re constantly moving things out of the way, your focus fractures. Every item should have a home, and every home should be within arm’s reach of where you use the item.
4. Plan for growth (even if you don’t think you’ll need it). The number one regret I hear from bakers is, “I wish I’d left room for [X].” Whether it’s a second oven, a larger fridge, or a dedicated chocolate-tempering station, build in flexibility from the start.
5. Your kitchen should inspire you. This is where you’ll spend countless hours, often alone. Make it a space you want to be in, whether that means a chalkboard wall for scribbling ideas, a speaker for music, or a window with a view of your garden. Pastry is as much about joy as it is about precision.
And finally, a challenge: Before you finalize your layout, bake a complex recipe in your current space and track every frustration. Did you have to walk across the room for the rolling pin? Did the butter get too soft because the oven was too close? Did you run out of counter space mid-lamination? Those pain points are your blueprint. Design your new kitchen to eliminate them, and you’ll be 90% of the way to perfection.
Now, if you’ll excuse me, I need to go apologize to Luna for the flour explosion earlier. And maybe bake her some cat-friendly treats to make up for it.
FAQ
Q: I have a tiny kitchen. Can I still create a functional pastry setup?
A: Absolutely! Focus on multi-functional tools and vertical storage. A fold-down table can serve as your rolling station, and a high-quality countertop oven (like the Breville Smart Oven) can handle most baking tasks. Prioritize a good mixer and a portable cooling rack, and use wall-mounted shelves for ingredients. The key is to design for one task at a time-you might not be able to laminate dough while baking, but with smart organization, you can still produce incredible pastries.
Q: What’s the one piece of equipment you wish you’d invested in sooner?
A: A blast chiller. I resisted for years because of the cost, but it’s a game-changer for custards, mousses, and laminated doughs. It rapidly cools items to safe temperatures, which improves texture and extends shelf life. For home bakers, a countertop model (like the Polyscience Rapid Chiller) is a more affordable option. If that’s out of budget, a second fridge set to 35°F works in a pinch, just don’t stack items too closely, or they won’t chill evenly.
Q: How do I prevent my kitchen from looking like a flour bomb went off?
A: Flour dust is the bane of every pastry chef’s existence. Here’s my anti-flour strategy:
- Use a damp towel to wipe down surfaces before you start baking, it helps flour cling less.
- Keep a small vacuum (like a Dyson handheld) nearby for quick cleanups.
- Work over a tray when sifting or measuring flour, it contains the mess.
- Wear an apron with pockets for tools, so you’re not constantly setting them down on floured surfaces.
- Invest in a flour wand (a small, handheld sifter)-it’s more precise and less messy than a traditional sifter.
And if all else fails, embrace the chaos. A little flour on the counter is a sign of a kitchen that’s being used well.
Q: What’s the biggest mistake you see in DIY pastry kitchen renovations?
A: Underestimating electrical needs. Most home kitchens aren’t wired for commercial-grade appliances. If you’re installing a large mixer, proofing cabinet, or blast chiller, you’ll likely need to upgrade your electrical panel to 200 amps (or more). Skipping this step can lead to tripped breakers, overheating, or even fires. Always consult an electrician before purchasing equipment. And while you’re at it, add a few extra outlets-you’ll thank me later when you’re plugging in a chocolate tempering machine, scale, and mixer simultaneously.
@article{the-art-and-science-of-creating-a-perfect-pastry-kitchen-layout-2025-guide,
    title   = {The Art and Science of Creating a Perfect Pastry Kitchen Layout (2025 Guide)},
    author  = {Chef's icon},
    year    = {2025},
    journal = {Chef's Icon},
    url     = {https://chefsicon.com/creating-a-perfect-pastry-kitchen-layout/}
}