The Best Fluffy Pancakes recipe you will fall in love with. Full of tips and tricks to help you make the best pancakes.
Table of Contents
- 1 The 10 Principles of an Efficient Restaurant Kitchen Layout
- 1.1 1. The Golden Triangle: Where Workflow Meets Physics
- 1.2 2. The “Dirty vs. Clean” Divide: A Tale of Two Sides
- 1.3 3. The Expedition Station: Command Central
- 1.4 4. The Hot Line: Where the Magic (and Chaos) Happens
- 1.5 5. The Prep Station: Where Mise en Place Meets Real Estate
- 1.6 6. Storage: The Art of Accessibility
- 1.7 7. Ventilation: The Invisible Hero
- 1.8 8. The Dishwashing Station: Where Efficiency Meets Hygiene
- 1.9 9. Flooring: The Unsung Workhorse
- 1.10 10. The Human Factor: Designing for People, Not Just Food
- 2 Putting It All Together: A Step-by-Step Design Process
- 3 Common Mistakes (And How to Avoid Them)
- 4 Final Thoughts: The Kitchen as a Living System
- 5 FAQ
I’ll admit something embarrassing: My first attempt at designing a restaurant kitchen layout was an absolute disaster. We’re talking fridges blocking prep stations, fryers positioned directly under ventilation hoods that couldn’t handle the heat, and a dishwashing area so poorly placed that servers had to dodge line cooks just to drop off dirty plates. It was like watching a poorly choreographed ballet where everyone was constantly on the verge of collision, or worse, third-degree burns.
That was eight years ago in San Francisco, back when I still believed “winging it” was a valid design strategy. Since then, I’ve worked with chefs, architects, and kitchen managers across the country, including my current home base in Nashville, to refine what actually makes a restaurant kitchen functional, efficient, and (dare I say) enjoyable to work in. And here’s the thing: A great kitchen layout isn’t just about fitting in all the equipment. It’s about understanding the rhythm of a restaurant, the way food, people, and energy move through the space. Get it right, and your staff will move like a well-oiled machine. Get it wrong, and you’ll be dealing with burnout, wasted ingredients, and a dining room full of hangry customers wondering why their steak is taking 45 minutes.
So, whether you’re opening a 50-seat bistro in East Nashville or overhauling the kitchen in a high-volume hotel restaurant, this guide will walk you through the 10 critical principles of efficient kitchen design. We’ll cover everything from the “golden triangle” of kitchen workflow to the psychology of station placement, with plenty of real-world examples (and a few hard-earned lessons from my own mistakes). By the end, you’ll know how to design a kitchen that doesn’t just look good on paper, but actually works when the dinner rush hits.
Fair warning: This isn’t a one-size-fits-all blueprint. Every restaurant is different, and what works for a sushi bar won’t fly in a wood-fired pizzeria. But if you approach this with curiosity (and a healthy dose of skepticism toward “industry standards”), you’ll end up with a kitchen that’s tailored to your menu, your team, and, most importantly, your sanity.
The 10 Principles of an Efficient Restaurant Kitchen Layout
1. The Golden Triangle: Where Workflow Meets Physics
Let’s start with the most overlooked (and yet most critical) concept in kitchen design: the golden triangle. No, it’s not some mystical culinary symbol, it’s the three primary work zones that every kitchen revolves around:
- Storage (fridges, dry storage, walk-ins)
- Prep (cutting boards, mise en place stations, ingredient bins)
- Cooking (stoves, ovens, fryers, grills)
The goal? Minimize the distance between these zones. Think of it like a game of Tetris where the pieces are your staff’s footsteps. Every extra step a cook takes to grab butter from the fridge or a server takes to drop off a ticket adds up, over a shift, that’s miles of wasted movement. In a high-volume kitchen, those seconds turn into minutes, and minutes turn into disaster.
Here’s where I messed up early on: I assumed the triangle had to be equal. It doesn’t. The distances between zones should reflect how often your team moves between them. For example, in a burger joint, the prep station (where patties are formed) should be right next to the grill, while the fridge can be a few steps away. But in a fine-dining restaurant where every plate is a composition, the prep area might need to be larger and more centralized.
Pro tip: Grab a roll of painter’s tape and physically map out the triangle on the floor before committing to equipment placement. Walk through a typical service scenario, where does it feel clunky? Where do you find yourself backtracking? Adjust accordingly.
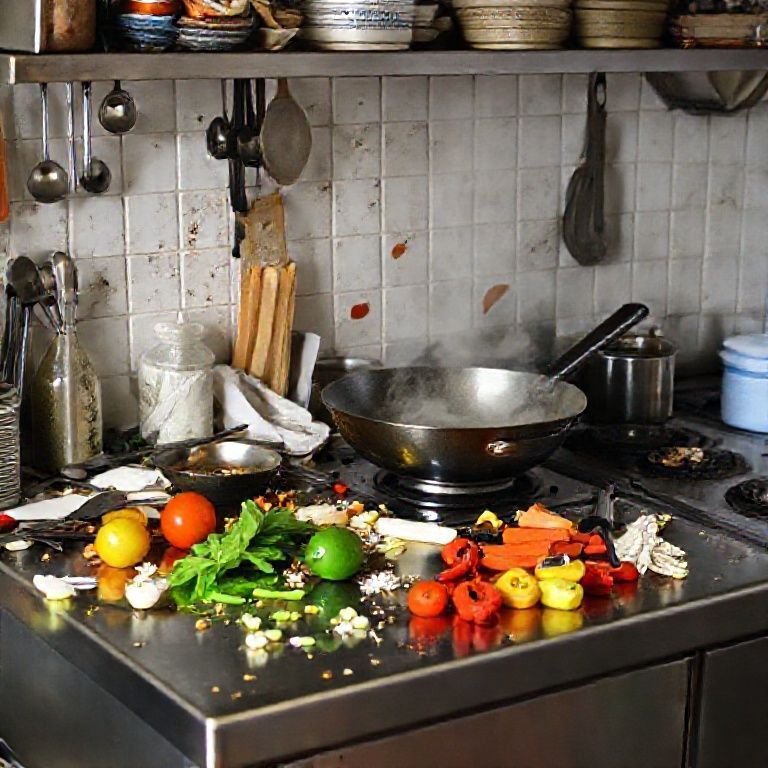
2. The “Dirty vs. Clean” Divide: A Tale of Two Sides
If the golden triangle is the heart of your kitchen, then the dirty/clean divide is its circulatory system. This is the idea that your kitchen should have two distinct “sides”:
- Clean side: Prep, cooking, plating, anywhere food is being handled before it goes to the customer.
- Dirty side: Dishwashing, trash, compost, soiled linens, anywhere waste is generated.
The rule? Never let the two cross. Sounds obvious, right? Yet I’ve seen kitchens where the dish pit is smack dab in the middle of the prep area, forcing cooks to step over stacks of dirty plates to grab herbs. Or worse, where the trash bins are placed right next to the salad station, inviting cross-contamination and a whole host of health code violations.
In an ideal layout, the dirty side should be downwind (literally, near ventilation) and as far from food prep as possible. The dishwashing area should have its own dedicated space with:
- A three-compartment sink (wash, rinse, sanitize)
- A separate handwashing station (required by code, often forgotten)
- A drainboard or rack for air-drying
- A trash/recycling/compost sorting system (more on this later)
I’m torn on whether to recommend a pass-through window for dishes. On one hand, it keeps dirty dishes out of the main kitchen flow. On the other, it can create a bottleneck if not sized correctly. If you go this route, make sure it’s wide enough for stackable bus tubs (at least 24 inches) and positioned so servers aren’t blocking the expediter’s line of sight.
3. The Expedition Station: Command Central
If you’ve ever worked in a restaurant, you know the expediter (or “expo”) is the air traffic controller of the kitchen. They’re the ones calling out tickets, checking plates for accuracy, and making split-second decisions when the kitchen gets slammed. So why do so many kitchens treat the expo station as an afterthought?
The expediter’s station should be:
- Elevated (so they can see the entire line)
- Centrally located (between the cooking stations and the pass-through to the dining room)
- Equipped with a heat lamp (to keep plates warm)
- Large enough for ticket rails and a POS system
I once consulted for a restaurant where the expo station was tucked into a corner, forcing the expediter to crane their neck to see the fry station. The result? Burnt fries, missed modifiers, and a whole lot of yelling. We ended up rebuilding the station to jut out into the kitchen like a peninsula, which gave the expediter a clear view of every station. The difference was night and day.
Bonus consideration: If your restaurant does a lot of takeout or delivery, the expo station should also have a dedicated area for packaging orders. Nothing slows down a kitchen faster than a server trying to bag a to-go order in the middle of the hot line.
4. The Hot Line: Where the Magic (and Chaos) Happens
The hot line is where your kitchen’s efficiency is put to the test. This is where raw ingredients become finished dishes, and where a poorly designed layout can turn a busy Friday night into a scene from Hell’s Kitchen. Here’s how to get it right:
a. Equipment Placement: The Order Matters
The order of your cooking stations should mirror the order of operations for your menu. For most restaurants, that means:
- Prep/par-cooking station (e.g., blanching veggies, searing proteins)
- Primary cooking station (e.g., sauté, grill, fryer)
- Finishing station (e.g., saucing, garnishing, plating)
In a burger-centric kitchen, the grill would be front and center, with the fryer and toasting station nearby. In a pasta-heavy Italian restaurant, the sauté station and pasta cooker would take precedence. The key is to minimize hand-offs. If your menu relies on dishes that require multiple cooking methods (e.g., a protein that’s seared, then braised, then finished under the salamander), those stations should be clustered together.
b. The Fryer Dilemma
Fryers are the divas of the kitchen, essential, but high-maintenance. They generate heat, grease, and noise, and they need proper ventilation (more on that later). Place them too close to the prep station, and your lettuce will wilt before it hits the plate. Put them too far from the expo, and your fries will be cold by the time they’re plated.
The solution? Isolate but don’t segregate. Fryers should be:
- Under their own dedicated hood (to contain grease and odor)
- Near the expo station (but not in it, grease splatter is a real hazard)
- Adjacent to a drain (for easy oil disposal)
- On a on-slip mat (because, well, hot oil + wet floors = bad news)
c. The “Two-Second Rule” for Reach
Every item a cook needs during service should be within a two-second reach. That means:
- Salt, pepper, and oil within arm’s reach of every station
- Common tools (tongs, spatulas, ladles) hanging on rails above the line
- Backup ingredients (like extra butter or herbs) in lowboys (under-counter fridges) directly below the station
I once worked in a kitchen where the spare spatulas were kept in a drawer across the room. You haven’t lived until you’ve seen a line cook sprint mid-service to grab a tool while their sauté pan is burning. Don’t be that kitchen.
5. The Prep Station: Where Mise en Place Meets Real Estate
Prep is the unsung hero of restaurant kitchens. It’s where the tedious, time-consuming work happens, chopping, portioning, organizing, so that service can run smoothly. But too often, prep stations are treated as an afterthought, crammed into whatever space is left after the cooking line is set up.
Here’s what a well-designed prep station needs:
- Ample counter space (at least 3–4 feet per prep cook)
- Under-counter refrigeration (for easy access to ingredients)
- A dedicated sink (for washing produce and cleaning as you go)
- Wall-mounted tool storage (knives, peelers, mandolines)
- Labeling systems (for dates, allergens, and portion sizes)
One of the biggest mistakes I see is prep stations that double as storage. If your prep table is cluttered with bulk containers of flour and oil, your cooks will waste time digging for what they need. Instead, use mobile carts or shelving units to keep bulk ingredients nearby but out of the way.
Pro tip for small kitchens: If space is tight, consider a rolling prep cart that can be wheeled into a walk-in fridge when not in use. It’s not ideal, but it’s better than a prep station that’s constantly in the way.
6. Storage: The Art of Accessibility
Storage is where many kitchen designs fall apart. The temptation is to cram as much as possible into the space, but that often leads to a black hole of forgotten ingredients and wasted time. Here’s how to do it right:
a. The Walk-In Fridge: Organize Like a Librarian
Your walk-in should be laid out like a library, logical, labeled, and easy to navigate. That means:
- Zoning by temperature needs (e.g., dairy on the top shelves where it’s coldest, produce in the middle, meats on the bottom to prevent cross-contamination)
- Clear, consistent labeling (with dates! Nothing worse than mystery sauce from 2023)
- First-in, first-out (FIFO) system (older ingredients in the front, newer in the back)
- Mobile shelving (if space allows, it maximizes storage and makes cleaning easier)
b. Dry Storage: The “No Digging” Rule
Dry storage should follow the same principles as your walk-in, but with an added emphasis on weight distribution. Heavy items (like cases of canned tomatoes) should be on lower shelves to prevent injuries. Frequently used items (spices, oils, pasta) should be at eye level.
c. The “5-Minute Rule” for Backstock
If a cook has to spend more than five minutes searching for an ingredient, your storage system is broken. This is where shadow inventory comes in, keeping a small amount of backup stock near the prep station so cooks aren’t constantly running to the walk-in. For example:
- A spice rack above the prep table
- A small fridge under the prep counter for frequently used dairy or herbs
- A bin system for portioned proteins (so cooks can grab what they need without digging through a stack of trays)
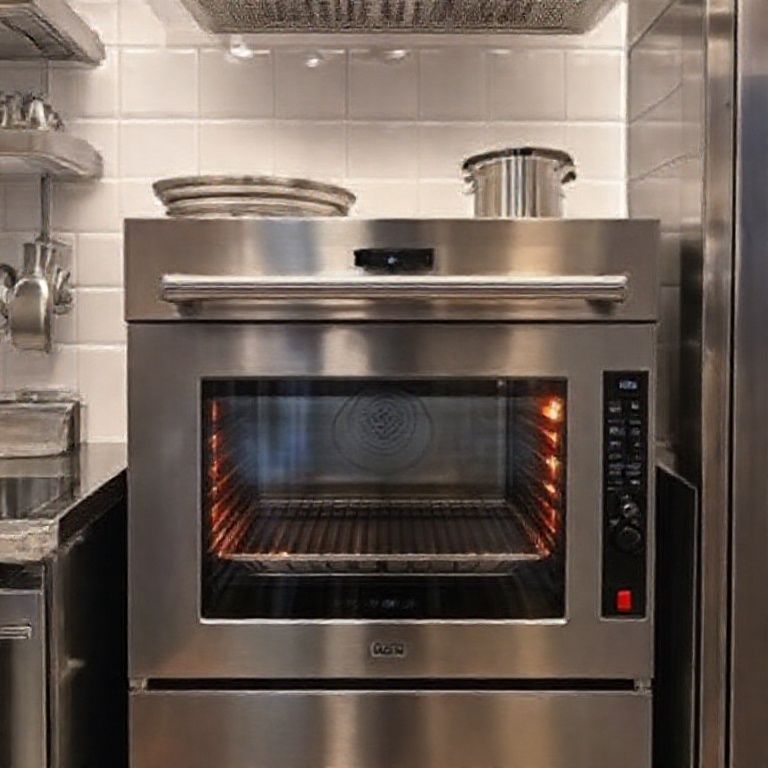
7. Ventilation: The Invisible Hero
Let’s talk about something sexy: hoods and ventilation. Just kidding, it’s not sexy at all, but it’s the difference between a kitchen that’s bearable to work in and one that feels like a sauna during a grease fire.
Here’s what you need to know:
- Type I vs. Type II hoods:
- Type I is for grease-producing equipment (fryers, grills, ranges). It has a fire suppression system and grease filters.
- Type II is for steam and heat (dishwashers, steamers). No grease, no suppression system needed.
- CFM (Cubic Feet per Minute): This measures how much air the hood moves. A typical restaurant kitchen needs 200–400 CFM per linear foot of hood. Undersize it, and your kitchen will be a fog of smoke and heat. Oversize it, and you’ll waste energy (and money).
- Makeup air: For every cubic foot of air your hood sucks out, you need to replace it with fresh air. Otherwise, you’ll create negative pressure, which can make doors hard to open and HVAC systems work overtime.
- Ductwork: The shorter and straighter the ducts, the better. Every bend reduces efficiency. And ever vent into an alley or near outdoor seating, your neighbors (and health inspector) will hate you.
I once consulted for a restaurant where the hood was installed after the cooking line. The result? The fryer was too far from the hood’s coverage area, so every time the fryer was used, the kitchen filled with smoke. We had to reconfigure the entire line to fix it. Moral of the story: Design your ventilation first, then place your equipment under it.
8. The Dishwashing Station: Where Efficiency Meets Hygiene
The dish pit is the heartbeat of your kitchen’s cleanliness, and yet, it’s often designed as an afterthought. A poorly planned dishwashing station can:
- Create bottlenecks during peak hours
- Lead to cross-contamination
- Cause injuries (sharp knives + soapy water = bad combo)
- Violate health codes (improper sanitizing is a top citation)
Here’s how to set it up for success:
- Three-compartment sink: Wash, rinse, sanitize. Non-negotiable.
- Separate handwashing sink: Required by code, often forgotten.
- Pre-scrape station: A dedicated area to scrape plates before they hit the sink (reduces clogs and makes washing faster).
- Drainboards: Enough space to air-dry dishes without stacking them wet (which breeds bacteria).
- Trash/recycling/compost sorting: Clearly labeled bins right next to the scrape station to minimize steps.
- Shelving for clean dishes: Positioned so dishwashers aren’t blocking traffic flow when putting away clean items.
Pro tip: If space allows, install a dish table (a stainless steel table with a sink) for the scrape station. It’s more ergonomic than scraping over a trash can and keeps the area cleaner.
And for the love of all that is holy, do not put the dish pit in a corner with no ventilation. The steam and heat from a busy dishwashing station can make the area unbearable, and turn over your dishwashers faster than you can say “we’re hiring.”
9. Flooring: The Unsung Workhorse
Flooring is one of those things you don’t think about until it’s a problem. Then suddenly, you’re dealing with:
- Slip-and-fall accidents (OSHA’s nightmare)
- Back pain from standing on concrete for 12 hours
- Cracked tiles that harbor bacteria
- Grease stains that won’t come out
Here’s what to look for in restaurant kitchen flooring:
- Material:
- Quarry tile: Durable, slip-resistant, and easy to clean. The gold standard.
- Epoxy-coated concrete: Seamless and hygienic, but hard on the feet.
- Vinyl composition tile (VCT): Affordable and comfortable, but can stain and requires frequent waxing.
- Rubber flooring: Great for ergonomics, but can be damaged by grease and high heat.
- Slip resistance: Look for a coefficient of friction (COF) of at least 0.6 when wet.
- Drainage: Floors should slope 1/8 inch per foot toward floor drains to prevent pooling.
- Coving: The baseboard should be integral (no gaps) to prevent bacteria buildup.
I once worked in a kitchen with polished concrete floors. They looked sleek, but by the end of a double shift, my feet felt like they’d been pounded with a meat tenderizer. If you go with concrete, invest in anti-fatigue mats for high-traffic areas like the line and prep stations.
10. The Human Factor: Designing for People, Not Just Food
Here’s the thing no one tells you about kitchen design: The best layouts account for human behavior, not just equipment specs. You can have the most technically efficient kitchen in the world, but if it ignores how people actually work, it’ll fail.
a. Traffic Flow: The “No Collisions” Rule
Your kitchen should have clear “lanes” for different roles:
- Servers: A dedicated path from the expo to the dining room (no crossing the line!).
- Cooks: Unobstructed movement between stations.
- Dishwashers: A route from the dish pit to storage that doesn’t intersect with food prep.
- Managers: A spot where they can observe without blocking traffic (like a small office or a corner of the prep area).
I once saw a kitchen where the server station was placed between the hot line and the prep area. Every time a server picked up an order, they had to squeeze past a cook carrying a scorching hot pan. It was a recipe for disaster, and sure enough, within a month, someone got burned.
b. Ergonomics: Because Happy Staff = Happy Kitchen
Restaurant work is physically demanding. Small design tweaks can make a huge difference in staff comfort and longevity:
- Counter heights: Standard is 36 inches, but consider adjustable-height tables for prep stations to accommodate different users.
- Footrests: A simple $20 rail under the prep table can reduce back pain.
- Lighting: Avoid glare on work surfaces. Under-cabinet LED strips are a game-changer for prep stations.
- Noise control: Rubber mats under equipment can dampen the clatter of pots and pans.
c. The “Stress Test”
Before finalizing your layout, run a simulated service. Grab a few staff members (or friends) and have them:
- Walk through a typical ticket from start to finish.
- Pretend to plate dishes and call out orders.
- Move through the space as if it’s a busy Friday night.
Where do people bump into each other? Where do they have to backtrack? Where does the flow feel unnatural? Adjust accordingly.
And here’s a hard truth: No layout is perfect. There will always be compromises. The goal isn’t perfection, it’s minimizing friction so your team can focus on cooking, not navigating obstacles.
Putting It All Together: A Step-by-Step Design Process
Now that we’ve covered the principles, let’s talk about how to actually design your kitchen. Here’s the process I use with clients:
Step 1: Start with Your Menu
Your kitchen layout should be built around your menu, not the other way around. Ask yourself:
- What are the most complex dishes on the menu? Do they require multiple cooking methods?
- What ingredients are used most frequently? Where should they be stored for easiest access?
- Are there peak demand items (like fries or garlic bread) that need their own dedicated station?
- How much of your business is takeout vs. dine-in? Do you need a separate packaging area?
For example, if your restaurant specializes in wood-fired pizzas, your oven should be the focal point of the kitchen, with prep stations for dough and toppings within arm’s reach. If you’re a seafood spot, you’ll need ample space for fish prep and storage at safe temperatures.
Step 2: Measure Twice, Cut Once (Literally)
Before you buy a single piece of equipment, measure your space down to the inch. Note:
- Ceiling height (for ventilation and hood clearance)
- Doorways and hallways (will that new fridge fit through the door?)
- Utility locations (gas lines, electrical outlets, plumbing)
- Fire suppression requirements (hoods, sprinklers, extinguishers)
I once had a client who ordered a beautiful six-burner range, only to realize it wouldn’t fit through the kitchen doorway. We had to disassemble the door frame to get it in. Don’t be that guy.
Step 3: Create a “Bubble Diagram”
Before diving into exact measurements, sketch a bubble diagram-a rough layout that shows the relationship between zones without precise dimensions. This helps you visualize the flow before getting bogged down in details.
For example:
- Draw a bubble for the hot line, another for prep, another for dishwashing, etc.
- Connect them with arrows to show traffic flow.
- Adjust until the layout feels intuitive.
This is where you’ll spot major flaws. If your arrows are crossing all over the place, you’ve got a problem.
Step 4: Choose Equipment Based on Workflow (Not Just Price)
It’s tempting to buy equipment based on budget or brand loyalty, but every piece should earn its place in your kitchen. Ask:
- Does this save time (e.g., a combi oven that replaces a steamer and convection oven)?
- Does this reduce labor (e.g., an automatic peeler for high-volume veg prep)?
- Does this fit the space without creating bottlenecks?
- Is this easy to clean and maintain?
And don’t forget about utility requirements. A piece of equipment is useless if your kitchen doesn’t have the gas, electrical, or water hookups to support it.
Step 5: Plan for the Worst (Because It Will Happen)
Restaurant kitchens are chaos incubators. Your design should account for:
- Equipment failure: Is there space to wheel in a backup fridge if yours dies mid-service?
- Staff shortages: Can one person run the line if someone calls out?
- Peak rushes: Is there room for an extra cook to jump in during a surge?
- Health inspections: Are your handwashing stations, thermometers, and sanitizer buckets easily accessible?
I once designed a kitchen with no backup plan for the dishwasher. When it broke during a Saturday night rush, we had to wash dishes in the prep sink-which, as you can imagine, did not go over well with the health inspector.
Step 6: Test, Iterate, Test Again
Your first layout won’t be perfect. Neither will your second. The key is to:
- Run simulations (as mentioned earlier).
- Get feedback from your staff, they’re the ones who’ll be using it.
- Be willing to adjust. Maybe the prep station needs to be bigger, or the fryer needs to move.
And remember: A kitchen is never “done.” As your menu evolves, your layout should too. What works for a lunch service might not work for dinner. What works in summer (when you’re doing a lot of cold dishes) might not work in winter (when braised meats dominate the menu).
Common Mistakes (And How to Avoid Them)
Even with the best intentions, it’s easy to mess up a kitchen layout. Here are the most common pitfalls I’ve seen, and how to sidestep them:
Mistake #1: Ignoring the “Adjacency Principle”
The problem: Placing stations that rely on each other far apart. For example, putting the sauté station on one side of the kitchen and the sauce station on the other.
The fix: Cluster related stations. If your menu has a lot of sauced dishes, the sauté and sauce stations should be side by side.
Mistake #2: Underestimating Storage Needs
The problem: Assuming you’ll “figure it out” with storage, then ending up with ingredients stacked in hallways or prep areas.
The fix: Allocate 20–25% of your kitchen space to storage (walk-ins, dry storage, shelving). If you’re tight on space, go vertical with stackable bins and wall-mounted racks.
Mistake #3: Forgetting About Maintenance Access
The problem: Installing equipment flush against walls or other appliances, making it impossible to clean or repair.
The fix: Leave at least 6 inches of clearance behind and around equipment for cleaning and maintenance. This is especially critical for fridges and ovens, which need regular servicing.
Mistake #4: Skimping on Lighting
The problem: Poor lighting leads to eye strain, mistakes, and even accidents (like missing a shard of glass in the prep area).
The fix: Layer your lighting:
- Ambient lighting (overhead LEDs)
- Task lighting (under-cabinet lights for prep stations)
- Accent lighting (to highlight the expo or pass-through)
Mistake #5: Not Planning for Growth
The problem: Designing a kitchen that works for your current volume but can’t handle an increase in business.
The fix: Build in flexibility:
- Leave space for an extra cooking station if you expand the menu.
- Choose modular equipment that can be easily moved or upgraded.
- Design your walk-in with 20% extra capacity for future needs.
Final Thoughts: The Kitchen as a Living System
Here’s what I’ve learned after years of designing (and redesigning) restaurant kitchens: A great layout isn’t static, it’s a living, breathing system that evolves with your restaurant. The best chefs and kitchen managers treat their space like a garden, constantly tending, adjusting, and optimizing as things grow and change.
So yes, follow the principles we’ve discussed. Measure carefully. Plan for workflow. Prioritize safety and efficiency. But also leave room for experimentation. Maybe your line cooks will discover a more intuitive way to organize their stations. Maybe you’ll realize that moving the prep table six inches to the left shaves 30 seconds off every ticket. Those small tweaks add up.
And remember: The goal isn’t just to design a functional kitchen, it’s to design a kitchen where your team can thrive. A space that reduces stress, minimizes wasted movement, and lets cooks focus on what they do best: creating incredible food.
If you take nothing else from this guide, take this: Your kitchen layout is the foundation of your restaurant’s success. Get it right, and you’ll have a team that’s happier, a service that’s smoother, and a business that runs like a well-oiled machine. Get it wrong, and you’ll be fighting an uphill battle every single shift.
So grab a notepad, start sketching, and don’t be afraid to question the “standard” way of doing things. After all, the best kitchens aren’t just efficient, they’re uniquely, perfectly suited to the people and food that bring them to life.
Now, if you’ll excuse me, Luna just knocked over my coffee, and I need to go salvage my notes before she turns them into a cat bed.
FAQ
Q: How much space do I need per cook in a restaurant kitchen?
A: As a general rule, each cook needs about 10–15 square feet of workspace to move comfortably. For a hot line, plan for 2–3 linear feet per station (e.g., a sauté station, grill station, etc.). In tight spaces, you can go down to 1.5 feet, but it’ll feel cramped during rush hours. Always err on the side of more space, your staff will thank you.
Q: What’s the best flooring for a high-traffic restaurant kitchen?
A: Hands down, quarry tile is the best balance of durability, slip resistance, and ease of cleaning. If you’re on a budget, epoxy-coated concrete is a good alternative, but it’s harder on the feet. Avoid vinyl in high-heat areas (like near the grill) as it can melt or warp. And no matter what you choose, invest in anti-fatigue mats for stations where staff stand for long periods.
Q: How do I know if my ventilation system is powerful enough?
A: Your hood should have a capture velocity of at least 100–150 feet per minute to effectively remove smoke, steam, and grease. A good rule of thumb is 100 CFM per linear foot of hood for light cooking (like a café) and 200–400 CFM per linear foot for heavy cooking (like a steakhouse or fry-heavy kitchen). Always consult a ventilation specialist, they’ll calculate the exact CFM based on your equipment and menu.
Q: Should I prioritize energy efficiency or workflow efficiency in my kitchen design?
A: Ideally, you’d do both, but if I had to choose, I’d prioritize workflow efficiency first. A kitchen that flows well will save you more in labor costs and reduced waste than you’d save on energy bills with a slightly more efficient (but poorly laid out) design. That said, there are plenty of ways to improve energy efficiency without sacrificing workflow:
- Choose ENERGY STAR-certified equipment (like fridges and dishwashers).
- Install demand-controlled ventilation that adjusts fan speed based on heat and smoke levels.
- Use induction cooktops instead of gas, they’re more energy-efficient and safer.
- Opt for LED lighting-it’s brighter, lasts longer, and uses less energy.
Once your workflow is solid, then optimize for energy savings.
@article{how-to-design-an-efficient-restaurant-kitchen-layout-without-losing-your-mind,
    title   = {How to Design an Efficient Restaurant Kitchen Layout (Without Losing Your Mind)},
    author  = {Chef's icon},
    year    = {2025},
    journal = {Chef's Icon},
    url     = {https://chefsicon.com/designing-efficient-restaurant-kitchen-layouts/}
}