The Best Fluffy Pancakes recipe you will fall in love with. Full of tips and tricks to help you make the best pancakes.
Table of Contents
- 1 The Daily Grind: Why Your Fryer’s Morning Routine Matters More Than Yours
- 2 The Weekly Deep Dive: Tasks That Take 10 Minutes But Save You Thousands
- 3 The Monthly Must-Dos: Tasks That Prevent Catastrophic Failures
- 4 The Quarterly Overhaul: Tasks That Extend Your Fryer’s Lifespan
- 5 Putting It All Together: A Maintenance Schedule That Actually Works
- 6 Training Your Team: How to Make Fryer Maintenance a Habit (Not a Chore)
- 7 Conclusion: The Fryer Doesn’t Lie
- 8 FAQ
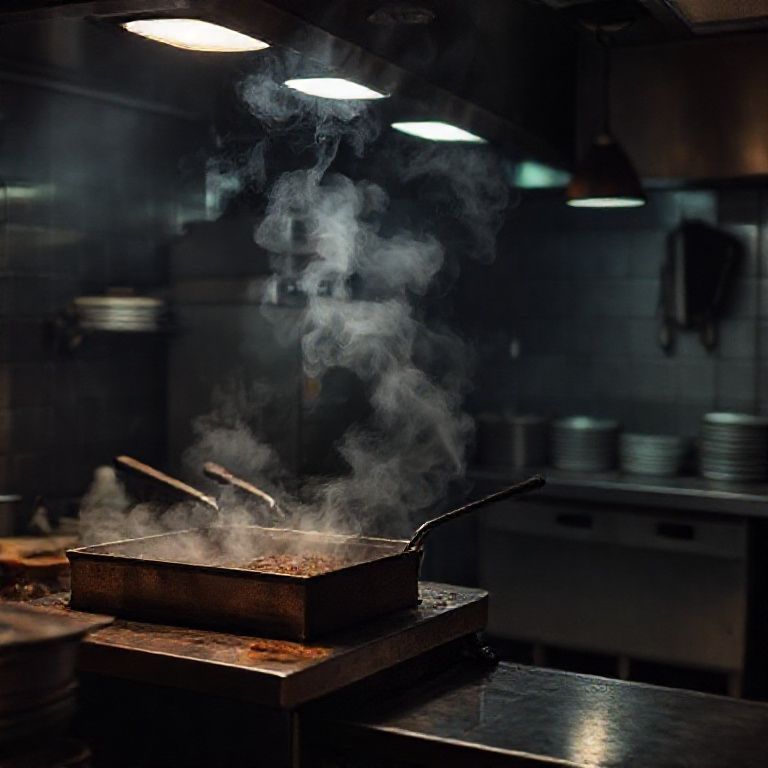
Let me tell you about the time I learned the hard way that fryers don’t forgive neglect. It was a Tuesday night in Nashville, peak dinner service at a restaurant where I was consulting, and the fry station suddenly became a scene from a disaster movie. The oil was smoking like a wildfire, the basket wouldn’t lower, and the temperature gauge was stuck at 400°F while the actual oil was closer to 500. We had to shut down the entire station, refund a dozen orders, and deal with a line of unhappy customers. All because someone (not naming names) skipped the weekly filter and ignored the “check oil level” reminder for three days straight.
Here’s the thing: commercial fryers are the workhorses of any kitchen. They’re the reason your fries come out crispy, your chicken stays juicy, and your onion rings have that perfect golden crunch. But they’re also the most abused, overlooked, and misunderstood pieces of equipment in the back of the house. Most chefs treat them like a microwave, just plug it in and forget about it until something goes wrong. Spoiler alert: something will go wrong. And when it does, it’s never at a convenient time.
This isn’t just another generic maintenance checklist. This is the real talk about what actually happens when you ignore your fryer, why those tiny details matter more than you think, and how to keep your fry station running smoother than a well-oiled machine (pun absolutely intended). By the end of this, you’ll know:
- Why daily oil care is the difference between perfect fries and a health code violation
- How to spot the silent killers that destroy fryers from the inside out
- The weekly rituals that take 10 minutes but save you thousands in repairs
- Why filtering oil isn’t just about taste, it’s about safety and profit
- How to train your staff so they actually want to maintain the fryer (yes, it’s possible)
Let’s start with the uncomfortable truth: most fryer breakdowns aren’t sudden. They’re the result of weeks, sometimes months, of small oversights piling up like grease in a neglected filter. And the worst part? The signs were there all along, you just didn’t know what to look for.
The Daily Grind: Why Your Fryer’s Morning Routine Matters More Than Yours
1. The 5-Minute Pre-Shift Inspection That Saves Hours of Headaches
I get it. Mornings in a commercial kitchen are chaos. You’re juggling deliveries, prepping mise en place, and trying to remember if you actually turned off the stove last night (we’ve all been there). But skipping the fryer inspection is like driving a car without checking the oil, eventually, you’re going to blow the engine. Here’s what you should be doing before the first basket hits the oil:
- Check the oil level. Sounds obvious, right? But you’d be shocked how many kitchens run their fryers with oil levels so low the heating elements are exposed. Not only does this ruin the food (hello, uneven cooking), but it also destroys the elements. Most fryers have a minimum fill line-use it. If yours doesn’t, mark it yourself with a permanent marker. And for the love of all things crispy, don’t just eyeball it. Use a dipstick or sight glass if your fryer has one.
- Inspect the oil quality. Dunk a clean white paper towel into the oil and hold it up to the light. If it’s dark, cloudy, or has visible particles, it’s time to filter or replace it. Pro tip: If the oil smells like burnt plastic or has a rancid odor, don’t just filter it, dump it. Some things can’t be saved.
- Test the temperature. Grab a fryer thermometer (not the built-in one, those lie more than a politician) and check the oil temp. If it’s off by more than 10°F, you’ve got a problem. Could be a faulty thermostat, a bad heating element, or just old oil that’s lost its heat conductivity. Either way, you need to address it before service.
- Look for leaks. Oil leaks are sneaky. They start small, a few drops here, a damp spot there, and before you know it, you’ve got a slip hazard that could shut down your kitchen. Check the valves, seals, and connections daily. If you see oil pooling anywhere, tighten the fittings or replace the gaskets. And if you’re not sure where to look, get a flashlight and follow the grease trail like a detective.
Is this the best approach? Let’s consider: What’s worse, spending five minutes on this now or dealing with a broken fryer during the dinner rush? The answer’s obvious, but you’d be surprised how many kitchens still skip it. Maybe I should clarify: this isn’t about being a perfectionist. It’s about not being an idiot. There’s a difference.
2. The Post-Shift Ritual That Most Kitchens Get Wrong (And How to Fix It)
Here’s where most kitchens drop the ball. They think turning off the fryer and walking away is enough. Spoiler: it’s not. The post-shift routine is just as important as the pre-shift, and it’s where most fryer problems start. Here’s what you should be doing:
- Turn off the heat but leave the fryer on. Wait, what? Hear me out. If you turn off the fryer completely, the oil cools too quickly, and food particles settle at the bottom. Leaving the fryer on (but not heating) for 10-15 minutes keeps the oil circulating, so those particles stay suspended and can be filtered out. It’s like letting a pot of soup simmer before straining it, gross analogy, but you get the idea.
- Filter the oil. I’ll dive deeper into filtering later, but for now, know this: filtering oil daily extends its life by 30-50%. That’s not a typo. And it’s not just about saving money (though that’s a big part of it). Filtered oil cooks food more evenly, reduces smoke, and, most importantly, keeps your customers from tasting last night’s fish and chips in today’s fries. If you’re not filtering daily, you’re basically serving food in dirty oil. Would you cook in a pan you never washed? No? Then why are you doing it with your fryer?
- Clean the baskets and vats. This is where most kitchens cut corners. They’ll wipe down the exterior, maybe scrub the baskets, but they ignore the interior of the fryer vat. Big mistake. Food particles, batter, and grease build up on the walls and heating elements, creating a layer of carbonized gunk that acts like insulation. The result? Your fryer has to work harder to heat the oil, which means longer cook times, higher energy bills, and a shorter lifespan for the equipment. Use a on-abrasive scrubber and a degreaser designed for fryers (not dish soap, it’ll leave a film). And if you’ve got a cool zone (the area at the bottom of the vat where food particles settle), clean it thoroughly. That’s where the magic (and the bacteria) happens.
- Cover the fryer. This is the easiest step, and the one most kitchens skip. Covering the fryer overnight keeps dust, debris, and, let’s be real, roaches out of the oil. It also prevents oxidation, which is what makes oil go rancid. Use a fryer cover or even a clean sheet pan. Just don’t leave it open to the elements.
I’m torn between frustration and sympathy here. I’ve seen kitchens spend thousands on fancy fryers only to treat them like a deep fryer from Walmart. It’s like buying a Ferrari and never changing the oil. Sure, it’ll run for a while, but eventually, it’s going to break down in the most expensive way possible.
The Weekly Deep Dive: Tasks That Take 10 Minutes But Save You Thousands
3. The Hidden Dangers of Ignoring Your Fryer’s Heating Elements
Heating elements are the heart of your fryer, and like any heart, they don’t last forever. Most fryers have either electric elements or gas burners, and both need regular attention. Here’s what to look for:
- Electric elements: These are the metal coils or tubes that heat the oil. Over time, they can develop hot spots-areas where the element is degrading and not heating evenly. You’ll notice this if your oil temperature fluctuates wildly or if certain areas of the fryer cook food faster than others. To check for hot spots, turn off the fryer and let the oil cool slightly (but not completely, you want it warm enough to see the element). Then, use a flashlight to inspect the elements. If you see discoloration, warping, or white deposits (a sign of mineral buildup), it’s time to replace the element. Pro tip: If your fryer has immersion elements (the ones that sit directly in the oil), check them weekly. They degrade faster than tube elements.
- Gas burners: Gas fryers are a different beast. The burners sit below the vat and heat the oil indirectly. The biggest issue with gas fryers is carbon buildup on the burners, which can block the flame and reduce efficiency. To clean them, turn off the gas and let the fryer cool. Then, remove the burners (check your manual for instructions) and scrub them with a wire brush or a burner cleaning tool. If the ports (the tiny holes where the gas comes out) are clogged, use a port needle to clear them. And if you see soot on the burners, that’s a sign of incomplete combustion, which can be dangerous. Time to call a technician.
Here’s the thing: heating elements don’t fail all at once. They degrade slowly, and by the time you notice a problem, it’s often too late. That’s why weekly inspections are non-negotiable. And if you’re not comfortable doing this yourself, hire a professional. It’s cheaper than replacing the entire fryer.
4. Why Your Fryer’s Thermostat Is Lying to You (And How to Fix It)
Your fryer’s thermostat is like a bad friend, it tells you what you want to hear, not what you need to know. Most built-in thermostats are otoriously inaccurate, and relying on them is a recipe for disaster. Here’s how to test yours:
- Fill the fryer with oil and turn it on. Let it heat to the temperature you usually cook at (say, 350°F).
- Use a calibrated fryer thermometer (not a candy thermometer, those aren’t accurate enough) to check the actual oil temperature.
- If the thermometer reads more than 10°F off from the fryer’s display, you’ve got a problem. It could be a faulty thermostat, a bad sensor, or just old oil that’s not conducting heat properly.
If the thermostat is off, you’ve got two options: recalibrate it or replace it. Recalibrating is usually a job for a technician, but it’s worth it. A properly calibrated thermostat ensures your food cooks evenly and reduces the risk of oil degradation. And if you’re thinking, “Eh, it’s only 10 degrees off,” let me stop you right there. Ten degrees might not sound like much, but in the world of frying, it’s the difference between perfectly crispy and soggy disaster. It’s also the difference between oil that lasts a week and oil that goes rancid in three days.
5. The Cool Zone: Your Fryer’s Secret Weapon (And Its Biggest Weakness)
If your fryer has a cool zone (and most modern fryers do), you’ve got a built-in safety net. The cool zone is the area at the bottom of the vat where the oil is cooler, allowing food particles to settle without burning. It’s a genius design, until it’s not. Here’s the problem: most kitchens ignore the cool zone until it’s clogged with carbonized gunk, at which point it’s no longer a cool zone, it’s a fire hazard.
Cleaning the cool zone is simple but often overlooked. Here’s how to do it:
- Turn off the fryer and let the oil cool slightly (but not completely, you want it warm enough to be liquid).
- Use a fryer brush or a plastic scraper to loosen any debris at the bottom of the vat.
- Drain the oil into a filter machine or a clean container (more on filtering later).
- Once the oil is out, use a degreaser and a on-abrasive scrubber to clean the cool zone. If the buildup is bad, you might need to use a fryer cleaning solution (just make sure it’s safe for your fryer’s material, some solutions can corrode stainless steel).
- Rinse the vat thoroughly and dry it before refilling it with oil.
I’ll be honest: cleaning the cool zone is a pain. It’s messy, it’s time-consuming, and it’s easy to put off. But here’s the thing: if you don’t clean it, those food particles will eventually burn, creating smoke, off-flavors, and a fire risk. And if you think that’s bad, wait until you see the health inspector’s face when they find a vat full of black sludge. Trust me, you don’t want that conversation.
The Monthly Must-Dos: Tasks That Prevent Catastrophic Failures
6. The Great Oil Debate: When to Filter, When to Dump, and When to Panic
Let’s talk about oil. Specifically, let’s talk about the oil lifecycle-the process of using, filtering, and eventually replacing the oil in your fryer. This is where most kitchens lose money, either by replacing oil too soon (wasting money) or too late (ruining food and risking health code violations). Here’s how to get it right:
- Filter daily. I can’t stress this enough. Filtering oil removes food particles and debris, which extends the oil’s life and improves food quality. Use a filter machine or a manual filter cone with filter paper. And don’t just filter into the same vat, filter into a clean container, clean the vat, and then pour the oil back in. This ensures you’re not reintroducing debris.
- Know when to dump. Even with daily filtering, oil doesn’t last forever. Here are the signs it’s time to replace it:
- The oil is dark and cloudy (not just a little discolored, think “motor oil”).
- It smokes excessively at normal cooking temperatures.
- It has a rancid or “off” smell (like old paint or burnt plastic).
- Food cooked in it tastes bitter or burnt.
- The oil foams excessively when food is added.
- Test the oil. If you’re not sure whether to dump the oil, use a test strip or a digital oil tester. These tools measure the total polar materials (TPM) in the oil, which is a fancy way of saying how degraded the oil is. Most health departments consider oil with a TPM above 24-27% to be unsafe. If your oil is in that range, dump it.
- Rotate your oil. If you’re using multiple fryers, rotate the oil between them. The fryer that gets the most use (like the one for fries) will degrade the oil faster, so swap it out with oil from a less-used fryer (like the one for chicken). This balances the oil’s lifespan and reduces waste.
Here’s the kicker: most kitchens replace oil based on time (“We change it every Friday”) or volume (“We change it after 100 baskets”). But oil doesn’t care about your schedule. It degrades based on temperature, food type, and usage. Fries degrade oil faster than chicken, and high temperatures degrade oil faster than low ones. So if you’re frying at 375°F all day, your oil won’t last as long as it would at 325°F. Pay attention to the oil, not the calendar.
7. The Gasket Check: Why a Tiny Rubber Ring Is the Key to Your Fryer’s Longevity
Gaskets are the unsung heroes of your fryer. They’re the rubber seals that keep oil from leaking out of the vat and air from getting in. And when they fail, they take your fryer down with them. Here’s what to look for:
- Cracks or tears. Gaskets degrade over time, especially if they’re exposed to high heat or harsh chemicals. If you see cracks, tears, or hardened rubber, it’s time to replace the gasket.
- Leaks. If you see oil pooling around the edges of the vat, the gasket is likely failing. Even a small leak can lead to bigger problems, like oil fires or slip hazards.
- Gaps. Run your finger along the gasket. If you feel gaps or unevenness, the gasket isn’t sealing properly. This can cause heat loss (making your fryer less efficient) and oil oxidation (making the oil go rancid faster).
Replacing a gasket is easy and cheap, usually under $50 for a new one. But ignoring a bad gasket? That’ll cost you hundreds in repairs, not to mention the risk of a fire. Check your gaskets monthly, and replace them at the first sign of wear. And while you’re at it, check the door seals (if your fryer has doors) and the drain valve gasket. They’re just as important.
8. The Burner Tune-Up: Why Your Gas Fryer Is Costing You More Than It Should
If you’ve got a gas fryer, you’ve got a burner system that needs regular attention. Gas burners can get clogged, misaligned, or inefficient over time, and when they do, they waste gas, reduce heat output, and increase your energy bills. Here’s how to keep them running smoothly:
- Check the flame. Turn on the fryer and look at the flame. It should be blue with a slight yellow tip. If it’s mostly yellow, orange, or red, you’ve got a problem. Yellow flames mean incomplete combustion, which wastes gas and creates carbon monoxide. Not good. If the flame is the wrong color, turn off the fryer and call a technician.
- Clean the burners. Turn off the gas and let the fryer cool. Then, remove the burners (check your manual for instructions) and clean them with a wire brush or a burner cleaning tool. Pay special attention to the ports (the tiny holes where the gas comes out). If they’re clogged, use a port needle to clear them.
- Check the air shutter. The air shutter is the part of the burner that controls how much air mixes with the gas. If it’s clogged or misaligned, the burner won’t work properly. Clean the air shutter with a brush and adjust it according to your manual.
- Inspect the gas lines. Look for cracks, leaks, or corrosion in the gas lines. If you see any, turn off the gas and call a professional. Gas leaks are ot something to mess with.
I’ll admit it: gas fryers are more complicated than electric ones. But they’re also more powerful and efficient when they’re running right. If you’re not comfortable working with gas, hire a technician to do a monthly tune-up. It’ll pay for itself in lower energy bills and fewer repairs.
The Quarterly Overhaul: Tasks That Extend Your Fryer’s Lifespan
9. The Deep Clean: Why Your Fryer Needs a Spa Day (And How to Give It One)
Every three months, your fryer needs a deep clean. This isn’t just a quick scrub, it’s a full-on disassembly and degreasing that removes years of built-up grime. Here’s how to do it:
- Drain the oil. Filter the oil into a clean container (you can reuse it after cleaning).
- Disassemble the fryer. Remove the baskets, heating elements, and any removable parts. Check your manual for instructions, some parts may need special tools.
- Scrub the vat. Use a fryer cleaning solution and a on-abrasive scrubber to clean the interior of the vat. Pay special attention to the cool zone and the heating elements. If the buildup is bad, you might need to soak the parts in a degreaser bath overnight.
- Clean the heating elements. For electric fryers, use a brush to remove any carbon buildup from the elements. For gas fryers, clean the burners and ports with a wire brush.
- Inspect the parts. While you’ve got everything apart, check for wear and tear. Look for cracks, corrosion, or warping in the vat, heating elements, and other parts. If anything looks damaged, replace it.
- Reassemble the fryer. Put everything back together, making sure all the parts are secure and the gaskets are in place.
- Refill with oil. Pour the filtered oil back into the vat (or use fresh oil if the old oil is degraded).
- Test the fryer. Turn it on and let it heat to your usual cooking temperature. Check for leaks, odd smells, or temperature fluctuations. If everything looks good, you’re ready to cook.
I know what you’re thinking: “This sounds like a lot of work.” And you’re right, it is. But here’s the thing: a deep clean extends your fryer’s lifespan by years. It also improves food quality, reduces energy costs, and prevents breakdowns. Think of it like changing the oil in your car. You wouldn’t skip that for years, would you? Then why skip it with your fryer?
10. The Calibration Check: Why Your Fryer’s Temperature Is Probably Wrong (And How to Fix It)
Remember how I said your fryer’s thermostat is lying to you? Well, it’s time to call it out. Every three months, you should calibrate your fryer’s temperature to make sure it’s accurate. Here’s how:
- Fill the fryer with oil. Use enough oil to cover the heating elements (check your manual for the recommended amount).
- Turn on the fryer. Let it heat to your usual cooking temperature (e.g., 350°F).
- Check the temperature. Use a calibrated fryer thermometer to measure the oil temperature. If it’s off by more than 10°F, you need to recalibrate the thermostat.
- Recalibrate the thermostat. This is usually a job for a technician, but some fryers have a calibration screw or digital adjustment that you can do yourself. Check your manual for instructions. If you’re not comfortable doing this, call a professional.
- Test the fryer. Once you’ve recalibrated the thermostat, test the fryer again to make sure the temperature is accurate. If it’s still off, you may need to replace the thermostat or sensor.
Why does this matter? Because inaccurate temperatures ruin food. Too hot, and your food burns on the outside while staying raw on the inside. Too cold, and it absorbs too much oil, turning soggy and greasy. And if you’re frying at the wrong temperature, you’re also degrading the oil faster, which costs you money. Calibrating your fryer is like tuning a guitar, it’s a small adjustment that makes a big difference.
Putting It All Together: A Maintenance Schedule That Actually Works
Alright, let’s take a step back. We’ve covered a lot of ground here, and if you’re feeling overwhelmed, I get it. Maintenance is like exercise, everyone knows they should do it, but most people don’t until they’re forced to. So let’s simplify this into a realistic schedule that won’t make your staff groan every time you mention the word “maintenance.”
Daily Tasks (5-10 minutes)
- Check oil level and quality.
- Test oil temperature with a thermometer.
- Filter the oil.
- Clean baskets and vat interior.
- Inspect for leaks.
- Cover the fryer overnight.
Weekly Tasks (15-20 minutes)
- Inspect heating elements (electric) or burners (gas).
- Check thermostat accuracy.
- Clean the cool zone.
- Inspect gaskets and seals.
Monthly Tasks (30-45 minutes)
- Deep clean the fryer (remove and clean all parts).
- Inspect gas lines and burners (gas fryers).
- Check for carbon buildup on heating elements (electric fryers).
- Test oil quality with a TPM tester or strips.
Quarterly Tasks (1-2 hours)
- Disassemble and deep clean the fryer.
- Recalibrate the thermostat.
- Inspect and replace any worn parts (gaskets, heating elements, etc.).
I’m not going to lie: this is a lot. But here’s the thing, it’s way less work than dealing with a broken fryer during peak service. And if you train your staff to do these tasks, it becomes second nature. Start with the daily tasks and work your way up. Once your team sees how much smoother the fryer runs with regular maintenance, they’ll be more likely to stick with it.
And if you’re thinking, “This is all great, but my staff won’t do it,” I’ve got a solution for that too. More on that in the next section.
Training Your Team: How to Make Fryer Maintenance a Habit (Not a Chore)
Let’s be real: most kitchen staff see maintenance as a chore. They’d rather scrub a greasy grill than filter oil or clean a fryer vat. But here’s the secret-maintenance doesn’t have to be miserable. In fact, it can be a point of pride if you frame it right. Here’s how to get your team on board:
1. Make It Part of the Culture
If your kitchen treats maintenance like an afterthought, your staff will too. But if you make it a core part of your kitchen’s identity, they’ll buy in. Here’s how:
- Lead by example. If you’re the chef or manager, do the maintenance tasks yourself sometimes. Show your team that it’s not beneath you.
- Praise good maintenance. When you see someone filtering the oil or cleaning the cool zone without being asked, call it out. A little recognition goes a long way.
- Make it a competition. Challenge your team to keep the fryer in top shape. Who can go the longest without a breakdown? Who can extend the oil life the most? Winner gets a free shift drink or a shoutout in the staff meeting.
2. Simplify the Process
If maintenance feels complicated, your staff won’t do it. So make it as easy as possible. Here’s how:
- Create a checklist. Write down the daily, weekly, and monthly tasks and post it near the fryer. Include pictures if possible, visuals help.
- Use the right tools. If filtering oil is a pain, invest in a filter machine that makes it easier. If cleaning the vat is a hassle, get a long-handled scrubber so your staff don’t have to reach into hot oil.
- Schedule it. Assign maintenance tasks to specific people at specific times. For example, the morning shift filters the oil, and the closing shift cleans the vat. This way, it’s not an afterthought, it’s part of the job.
3. Tie It to Their Interests
Your staff might not care about extending the fryer’s lifespan, but they do care about:
- Better food quality. Show them how filtered oil makes fries crispier and chicken juicier. When they see the difference, they’ll be more likely to maintain the fryer.
- Fewer breakdowns. No one wants to deal with a broken fryer during the dinner rush. Explain how maintenance prevents emergencies.
- Job security. If the fryer breaks down, the kitchen might have to close. And if the kitchen closes, they’re out of a job. Frame maintenance as a way to protect their livelihood.
4. Make It Fun (Yes, Really)
Maintenance doesn’t have to be a drag. Here are a few ways to make it more enjoyable:
- Play music. Put on a playlist while your team cleans the fryer. It’ll make the time go faster.
- Turn it into a game. Challenge your team to clean the fryer in under 10 minutes. Time them and see who can do it the fastest.
- Offer incentives. Reward the team member who does the best job with a gift card or a free meal.
I know what you’re thinking: “This sounds like a lot of work.” And you’re right, it is. But here’s the thing: a well-maintained fryer makes everyone’s job easier. It cooks food faster, reduces smoke, and prevents breakdowns. And when your team sees the benefits, they’ll be more likely to stick with it.
Conclusion: The Fryer Doesn’t Lie
Here’s the hard truth: your fryer is a reflection of your kitchen. If it’s dirty, neglected, and breaking down, that’s a sign of a larger problem. But if it’s clean, well-maintained, and running smoothly, that’s a sign of a kitchen that cares about quality, efficiency, and safety.
I’ll be honest, I didn’t always prioritize fryer maintenance. Early in my career, I treated fryers like most chefs do: plug it in, turn it on, and hope for the best. But after too many breakdowns, too many ruined batches of food, and too many health inspector nightmares, I learned my lesson. Maintenance isn’t optional. It’s the difference between a fryer that lasts five years and one that lasts 15. It’s the difference between food that tastes amazing and food that tastes like last week’s leftovers. And it’s the difference between a smooth service and a chaotic disaster.
So here’s my challenge to you: Pick one maintenance task you’ve been neglecting and do it today. Maybe it’s filtering the oil, maybe it’s cleaning the cool zone, or maybe it’s calibrating the thermostat. Whatever it is, do it now. And then do it again tomorrow. And the next day. Because maintenance isn’t a one-time thing, it’s a habit. And like any habit, it starts with a single step.
Your fryer doesn’t lie. It’ll tell you when it’s happy (crispy food, no smoke, smooth operation) and when it’s not (burnt food, excessive smoke, breakdowns). The question is: are you listening?
FAQ
Q: How often should I really replace the oil in my commercial fryer?
A: It depends on what you’re frying and how often you filter. If you’re frying high-volume items like fries or chicken, you should filter the oil daily and replace it every 7-10 days. If you’re frying less frequently or filtering regularly, you might get 2-3 weeks out of the oil. But don’t rely on time alone, test the oil with a TPM tester or strips. If the TPM is above 24-27%, it’s time to dump it. And if the oil smells rancid or smokes excessively, don’t wait, replace it immediately.
Q: My fryer is smoking a lot. What’s causing it, and how do I fix it?
A: Excessive smoke is usually a sign of one of three things: old oil, high temperature, or food debris. Start by checking the oil. If it’s dark, cloudy, or smells off, replace it. Next, check the temperature. If the oil is too hot (above 375°F for most foods), it’ll smoke. Finally, check for food debris in the oil or on the heating elements. If the oil is clean and the temperature is right, but the fryer is still smoking, you might have a problem with the heating elements or burners. Call a technician to inspect it.
Q: Is it safe to reuse oil that’s been filtered?
A: Yes, but with caveats. Filtering oil removes food particles and debris, which extends its life and improves food quality. But filtering doesn’t remove chemical byproducts that build up over time. That’s why you still need to test the oil and replace it when it’s degraded. And never reuse oil that’s rancid, foaming excessively, or smoking at normal temperatures. When in doubt, dump it.
Q: What’s the best way to train my staff to maintain the fryer?
A: Start by making maintenance a on-negotiable part of the job. Create a checklist and post it near the fryer. Assign tasks to specific people at specific times (e.g., the morning shift filters the oil, the closing shift cleans the vat). Lead by example, do the tasks yourself sometimes to show your team it’s important. And tie maintenance to their interests. For example, explain how filtered oil makes fries crispier or how regular cleaning prevents breakdowns. Finally, make it fun. Play music, turn it into a game, or offer incentives for good maintenance. The key is to make it a habit, not a chore.
@article{the-unsexy-truth-about-commercial-fryer-maintenance-what-your-kitchen-isnt-telling-you-but-should,
    title   = {The Unsexy Truth About Commercial Fryer Maintenance: What Your Kitchen Isn’t Telling You (But Should)},
    author  = {Chef's icon},
    year    = {2026},
    journal = {Chef's Icon},
    url     = {https://chefsicon.com/essential-commercial-fryer-maintenance-tips/}
}