The Best Fluffy Pancakes recipe you will fall in love with. Full of tips and tricks to help you make the best pancakes.
Table of Contents
- 1 Mixing Bowls: The Foundation of Your Baking Adventure
- 2 Measuring Tools: Precision Matters
- 3 Stand Mixer: Your Kneading Companion
- 4 Baking Sheets and Pans: Where the Magic Happens
- 5 Proofing Basket: The Art of Shaping
- 6 Dutch Oven: The Secret to a Perfect Crust
- 7 Baking Stone: Even Heat Distribution
- 8 Thermometer: Temperature Matters
- 9 Cooling Rack: The Final Touch
- 10 Storage Solutions: Keeping Your Bread Fresh
- 11 Your Bread Baking Journey: Where to Begin?
- 12 FAQ
Bread baking is an art that combines science, patience, and the right tools. Whether you’re a beginner or an experienced baker, having the right equipment can make all the difference. As someone who’s spent countless hours in the kitchen, I’ve come to appreciate the value of good tools. In this guide, we’ll dive into the essential equipment for bread baking, from mixing bowls to proofing baskets. By the end, you’ll have a clear idea of what you need to create the perfect loaf.
When I first started baking bread, I was overwhelmed by the sheer number of tools available. But over time, I’ve realized that you don’t need a lot of fancy gadgets to get started. The key is to invest in a few high-quality pieces that will last you a long time. So, let’s get started and explore the world of bread baking equipment.
Mixing Bowls: The Foundation of Your Baking Adventure
Every baking journey begins with a good mixing bowl. You might think any old bowl will do, but there are a few things to consider. First, size matters. You need a bowl that’s large enough to accommodate your dough as it grows. I’ve found that a stainless steel bowl works best because it’s durable and easy to clean. Plus, it conducts heat evenly, which is great for proofing your dough.
But is stainless steel the only option? Not necessarily. Glass bowls are also popular because they allow you to see the dough rising. However, they can be heavier and more fragile. Plastic bowls are lightweight and affordable, but they might not last as long. Ultimately, it’s about what works best for you.
Measuring Tools: Precision Matters
Baking is a science, and precise measurements are crucial. Investing in a good set of measuring cups and spoons is a must. But here’s where I’m torn: should you go with traditional cups and spoons or a digital scale? Both have their merits. Measuring cups are easy to use and don’t require batteries, but a digital scale offers more accuracy, especially for recipes that require precise ratios.
If you’re serious about bread baking, a digital scale is worth the investment. It ensures consistency in your baking, which is particularly important for recipes that call for exact measurements. Maybe I should clarify, though, you don’t need the fanciest scale out there. A simple, reliable one will do the trick.
Stand Mixer: Your Kneading Companion
Kneading dough by hand can be therapeutic, but it’s also time-consuming and physically demanding. Enter the stand mixer, a game-changer for any baker. A stand mixer with a dough hook attachment can knead your dough effortlessly, saving you time and energy. But is it a necessity? Not really. If you’re on a budget or prefer the hands-on approach, kneading by hand is perfectly fine.
That said, if you plan to bake bread regularly, a stand mixer is a worthwhile investment. It’s not just about convenience; it’s also about consistency. A stand mixer ensures that your dough is kneaded evenly, which can lead to a better rise and a more uniform crumb. I’ve found that it’s particularly useful for heavier doughs like sourdough.
Baking Sheets and Pans: Where the Magic Happens
Once your dough is ready, it’s time to bake. The right baking sheet or pan can make a big difference in how your bread turns out. For free-form loaves like boules and baguettes, a baking sheet is essential. Look for one that’s sturdy and has a non-stick surface. Aluminum sheets are a popular choice because they conduct heat evenly.
But what about loaf pans? If you’re baking sandwich bread or other shaped loaves, a good loaf pan is crucial. Again, material matters. Aluminum and stainless steel are great options because they distribute heat evenly. Non-stick surfaces are convenient, but they might not last as long. Is this the best approach? Let’s consider the alternatives. Silicone pans are flexible and easy to clean, but they might not provide the same level of heat distribution.
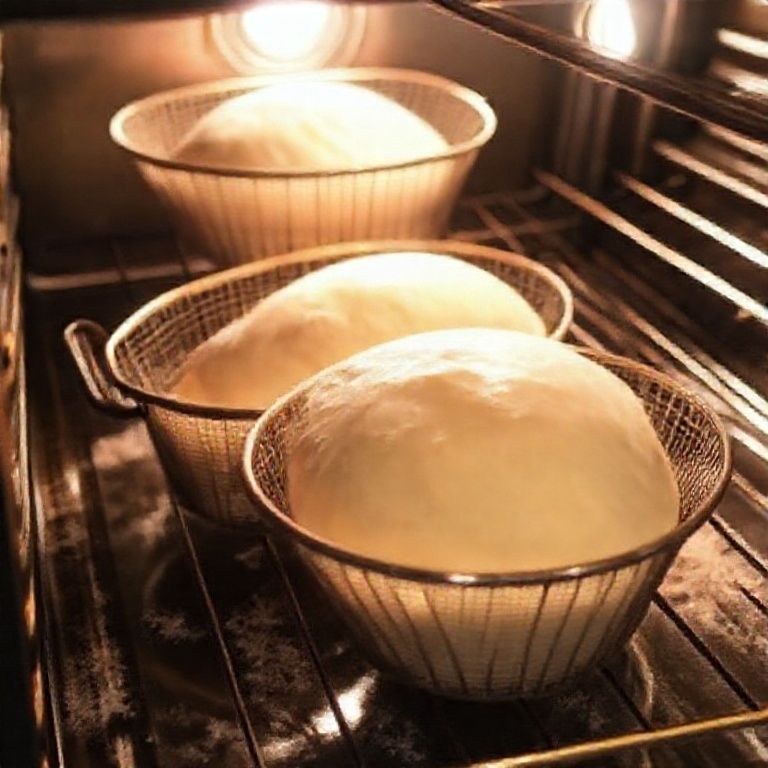
Proofing Basket: The Art of Shaping
Shaping your dough is an important step in bread baking, and a proofing basket can help you achieve the perfect form. Also known as a banneton, a proofing basket helps your dough maintain its shape during the final rise. Most bannetons are made of natural materials like cane or coiled wicker, which allow the dough to breathe.
But here’s where it gets interesting: some bakers prefer cloth-lined baskets. These baskets are lined with a cloth that helps wick away moisture, preventing a soggy bottom. I’ve used both types and found that it ultimately comes down to personal preference. Cloth-lined baskets are great for high-hydration doughs, while natural bannetons work well for most other types.
Dutch Oven: The Secret to a Perfect Crust
If you’re aiming for a crispy, golden crust, a Dutch oven is your best friend. Baking bread in a Dutch oven creates a steamy environment that mimics a professional bakery oven. The result? A beautiful, artisan-style loaf with a perfect crust. But is a Dutch oven a must-have? Not necessarily, but it’s a game-changer if you can afford it.
Here’s the thing: Dutch ovens can be pricey. If you’re on a budget, you can achieve similar results with a cast iron skillet and a baking sheet. Simply place a shallow pan of water in the oven to create steam. It might not be as convenient, but it’s a cost-effective solution. I’ve done this plenty of times, and the results are still impressive.
Baking Stone: Even Heat Distribution
For pizza lovers, a baking stone is a must. But did you know it’s also great for bread? A baking stone helps distribute heat evenly, ensuring a consistent bake. It’s particularly useful for free-form loaves like boules and baguettes. But is it a necessity? Not really, but it’s a nice addition if you bake frequently.
If you’re considering a baking stone, make sure to get one that’s at least 1/2 inch thick. Thinner stones can crack under high heat. Also, preheating your stone is crucial. Place it in the oven while it’s preheating to ensure even heat distribution. I’ve found that this makes a significant difference in the final product.
Thermometer: Temperature Matters
Temperature is a critical factor in bread baking, and a good thermometer can help you get it right. An oven thermometer ensures that your oven is at the correct temperature, while an instant-read thermometer helps you check the internal temperature of your bread. But do you need both? Not necessarily.
An oven thermometer is more of a necessity, especially if your oven’s temperature gauge is unreliable. An instant-read thermometer is handy for checking doneness, but you can also use the tap test (tapping the bottom of the loaf to hear a hollow sound) as a low-tech alternative. I’ve used both methods and found that they work well, but the thermometer offers more precision.
Cooling Rack: The Final Touch
Once your bread is out of the oven, it’s tempting to dig in right away. But allowing your bread to cool on a cooling rack is an important step. A cooling rack allows air to circulate around the bread, preventing it from becoming soggy. It’s a small investment that makes a big difference.
But do you really need a cooling rack? Technically, no. You can use a wooden cutting board or even a clean towel. However, a cooling rack is more efficient and ensures even cooling. I’ve found that it’s a worthwhile investment, especially if you bake frequently.
Storage Solutions: Keeping Your Bread Fresh
Once your bread is cooled, storing it properly is crucial to maintain freshness. A bread box or a large airtight container can help keep your bread fresh for longer. But here’s where it gets tricky: different types of bread require different storage methods. For example, crusty breads should be stored at room temperature, while softer breads can be refrigerated.
If you’re not planning to eat your bread right away, freezing is a good option. Simply slice the bread, wrap it tightly in plastic wrap, and store it in a freezer-safe bag. This method keeps the bread fresh for up to three months. I’ve found that this is a great way to have fresh bread on hand without the hassle of baking every day.
Your Bread Baking Journey: Where to Begin?
So, where do you start? If you’re new to bread baking, I recommend investing in a good mixing bowl, measuring tools, and a reliable oven thermometer. These are the basics that will set you up for success. As you gain more experience, you can gradually add more specialized tools like a stand mixer, Dutch oven, or proofing basket.
Remember, bread baking is a journey, and there’s always more to learn. Don’t be afraid to experiment and try new things. And most importantly, enjoy the process. There’s something incredibly satisfying about creating a beautiful loaf of bread from scratch. Happy baking!
FAQ
Q: What is the most essential piece of equipment for bread baking?
A: The most essential piece of equipment is a good mixing bowl. It’s the foundation of your baking adventure and will be used in almost every recipe.
Q: Do I need a stand mixer for bread baking?
A: No, a stand mixer is not a necessity. You can knead dough by hand, but a stand mixer can make the process easier and more consistent.
Q: What is the best material for a baking sheet?
A: Aluminum is a popular choice because it conducts heat evenly. However, stainless steel and silicone are also good options depending on your preferences.
Q: How can I store my bread to keep it fresh?
A: Store crusty breads at room temperature in a bread box or airtight container. For softer breads, you can refrigerate them. Freezing is also a good option for long-term storage.
@article{essential-equipment-for-bread-baking-a-comprehensive-guide,
    title   = {Essential Equipment for Bread Baking: A Comprehensive Guide},
    author  = {Chef's icon},
    year    = {2025},
    journal = {Chef's Icon},
    url     = {https://chefsicon.com/essential-equipment-for-bread-baking/}
}