
The Best Fluffy Pancakes recipe you will fall in love with. Full of tips and tricks to help you make the best pancakes.
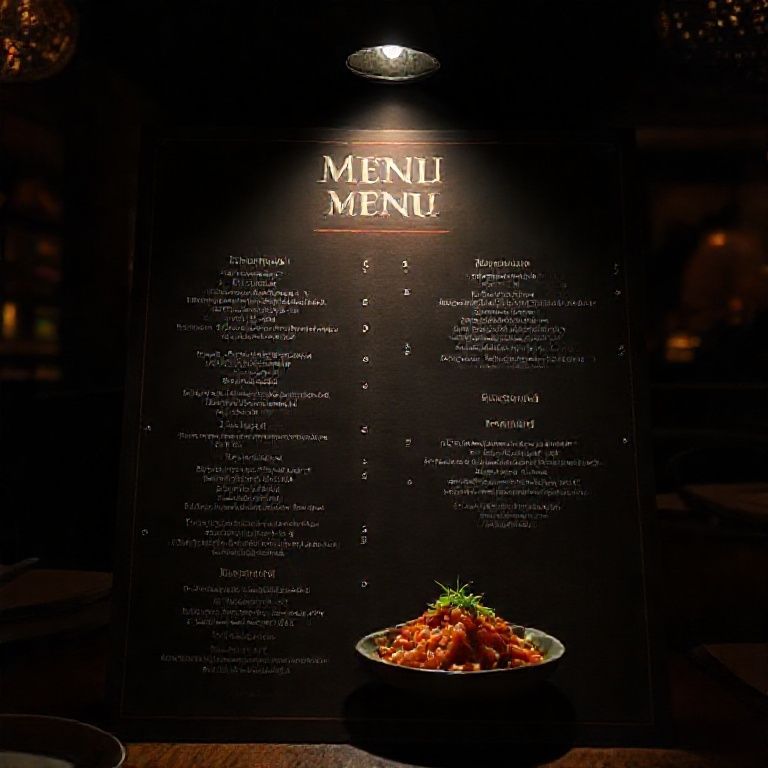
Table of Contents
- 1 The Psychology of Menu Design: Why Your Layout Is Costing You Money
- 2 Pricing Strategies That Actually Work (No, Just Adding 3x Your Cost Isn’t Enough)
- 3 Menu Engineering: The Data-Driven Approach to Maximizing Profits
- 4 Seasonal and Dynamic Menu Strategies: How to Keep Profits High Year-Round
- 5 The Digital Menu Revolution: How Tech Is Changing the Game
- 6 Putting It All Together: Your Step-by-Step Menu Optimization Plan
- 7 Final Thoughts: The Menu Is Your Silent Salesperson
- 8 FAQ
Let me start with a confession: I used to think menu optimization was just about slapping higher prices on the most popular dishes and calling it a day. Boy, was I wrong. After years of watching restaurants in Nashville, from the hole-in-the-wall hot chicken joints to the fancy steakhouses on Broadway, I’ve realized that menu optimization is part psychology, part data science, and part culinary storytelling. And if you’re not doing it right, you’re leaving money on the table. Literally.
I remember walking into this one place downtown, a trendy farm-to-table spot with a menu that read like a novel. Beautiful descriptions, locally sourced everything, but their profit margins were thinner than the paper they printed the menu on. Why? Because they’d fallen into the trap of designing for aesthetics instead of revenue. They had 42 items on the menu (yes, I counted), half of which were barely ordered, and their “signature” dish, a $28 heritage pork chop, cost them $22 to make after labor and overhead. Ouch.
That’s when I got obsessed with the idea of menu engineering-the art and science of structuring your menu to maximize profitability without alienating customers. And here’s the thing: it’s not about tricking people or sacrificing quality. It’s about understanding what your customers actually want, what they’re willing to pay for, and how to present it in a way that makes both them and your bank account happy. In this guide, I’m going to walk you through everything I’ve learned, from the psychology of menu design to the cold, hard math of pricing. By the end, you’ll know exactly how to turn your menu into a profit-generating machine.
But first, let’s get one thing straight: this isn’t just about raising prices. It’s about strategic positioning, cost control, and psychological triggers that make customers feel good about spending more. And yes, it works even if you’re running a food truck or a fine-dining establishment. So grab a coffee (or a whiskey, no judgment), and let’s dive in.
The Psychology of Menu Design: Why Your Layout Is Costing You Money
1. The Golden Triangle and Where Your Customers’ Eyes Go First
You’ve probably heard of the “Golden Triangle”-the area on a menu where customers’ eyes naturally gravitate first. It’s the top right corner, then the top left, then the center. But here’s what most people get wrong: it’s not just about placement; it’s about what you put in those spots. If you’re sticking your highest-margin items in the bottom left corner because “it looks balanced,” you’re shooting yourself in the foot.
I once worked with a sushi restaurant that had their $18 rainbow roll (which cost them $5 to make) buried at the bottom of the menu. Meanwhile, their $12 spicy tuna roll (which cost $8 to make) was front and center. We swapped them, added a little visual anchor (a small icon next to the rainbow roll to make it stand out), and within a month, their average order value jumped by 12%. No price changes. Just better placement.
Here’s how to use the Golden Triangle effectively:
- Top right corner: Your highest-margin dish. Not necessarily the most expensive, but the one with the best profit margin. If it’s a signature item, even better.
- Top left corner: A mid-priced, high-margin item. Something that feels like a “safe” choice but still pads your profits.
- Center: A visually striking dish (think a beautiful photo or illustration if you’re using one) that draws the eye downward. This is where you can place a “decoy” item-more on that later.
But wait, what if your menu is digital? The principles still apply, but the execution changes. On a tablet or online menu, the first three items a customer sees are your Golden Triangle. Make them count.
2. The Power of Decoy Items (or Why You Need a $50 Steak)
This is where things get interesting. A decoy item is a high-priced option that makes everything else look like a bargain. It’s not necessarily there to sell (though if it does, great); it’s there to anchor perceptions of value.
Let me give you an example. Suppose you have two burgers on your menu:
- Classic Cheeseburger: $12
- Wagyu Beef Burger: $22
Most customers will balk at the $22 burger and go for the $12 option. But what if you add a third burger?
- Classic Cheeseburger: $12
- Bacon Blue Cheese Burger: $16
- Wagyu Beef Burger with Truffle Aioli: $28
Now, the $16 burger looks like a reasonable middle ground, and suddenly, more people are upgrading from the $12 option. The $28 burger might only sell once a week, but it’s making you an extra $4–$6 per customer on average. That’s the power of a decoy.
I’ve seen this work in real time. A pizza place I consulted for added a $32 “Artisan White Truffle Pizza” to their menu. It sold maybe two a week, but their average order value went up by $3 because customers who would’ve ordered the $16 pepperoni now felt justified splurging on the $20 margherita. Genius.
But here’s where it gets tricky: the decoy has to be believable. If you’re a diner serving $10 meals, slapping a $50 lobster thermidor on the menu isn’t going to work. It has to fit your brand and your customer base. Which brings me to my next point…
3. The “Less Is More” Myth (and When to Ignore It)
You’ve probably heard that smaller menus are better. And in some cases, that’s true, especially if you’re a fast-casual spot or a food truck where speed and simplicity are key. But if you’re a full-service restaurant, cutting your menu too aggressively can backfire. Here’s why:
First, a smaller menu limits your ability to upsell and cross-sell. If you only have six entrees, customers have fewer opportunities to trade up to a higher-priced item. Second, it can make your restaurant feel less dynamic. People like choices, just not too many choices. The sweet spot? Around 10–12 entrees, depending on your concept.
But, and this is a big but, every item on your menu should have a purpose. It should either:
- Be a high-margin dish
- Be a loss leader that draws people in (but you better be upselling them on drinks or desserts)
- Be a signature item that defines your brand
- Serve as a decoy (as we discussed)
If an item doesn’t fit into one of those categories, ask yourself: why is it on the menu?
I once audited a menu for an Italian restaurant that had 18 pasta dishes. Eighteen! Only four of them had a margin above 60%, and the rest were just… there. We cut it down to eight, keeping the classics, the high-margin dishes, and a few seasonal specials, and their food cost percentage dropped by 8% overnight. Less waste, more profit.
Pricing Strategies That Actually Work (No, Just Adding 3x Your Cost Isn’t Enough)
4. The “Charm Pricing” Debate: Does $9.99 Really Work?
Ah, the age-old question: should you price your dishes at $10 or $9.99? The theory behind charm pricing (ending prices with .99 or .95) is that it makes the item feel cheaper because we read from left to right. But here’s the thing: it depends on your restaurant’s vibe.
For fast-casual or quick-service spots, charm pricing can work well. A $4.99 burger feels more accessible than a $5 burger, even though the difference is negligible. But if you’re running a high-end steakhouse, round numbers signal quality. A $48 ribeye feels more premium than a $47.99 ribeye. It’s all about perception.
Here’s what I recommend:
- Fast-casual/quick-service: Use charm pricing (.99, .95) for items under $20.
- Mid-range restaurants: Mix it up. Use round numbers for higher-end dishes and charm pricing for apps, drinks, and desserts.
- Fine dining: Stick to round numbers. $32, not $31.99.
But don’t stop there. The real magic happens when you bundle prices to encourage higher spending. For example:
- Instead of listing a burger for $12 and fries for $4, offer a “Burger & Fries Combo” for $15. Suddenly, you’ve increased the average order value by $1.
- Or, offer a “Chef’s Tasting Menu” for $45 that includes an app, entree, and dessert, even if those items would total $42 à la carte. People love feeling like they’re getting a deal.
5. The “Cost-Plus” Pricing Trap (and What to Do Instead)
Most restaurants use cost-plus pricing: take the cost of the dish, multiply it by 3 (or some other arbitrary number), and boom, there’s your price. But this is a huge mistake for two reasons:
- It ignores customer perception. If your customers think a dish is worth $15 but your cost-plus formula says $18, you’re overpricing and losing sales.
- It doesn’t account for labor, overhead, or opportunity cost. A dish that takes 20 minutes of prep time and ties up your line cook might “cost” $6 in ingredients but actually costs you $12 when you factor in labor.
Instead, use value-based pricing. Ask yourself:
- What are customers willing to pay for this dish?
- How does it compare to similar dishes at competing restaurants?
- Does it feel “premium” enough to justify the price?
For example, let’s say your chicken parmesan costs you $4 in ingredients and $3 in labor, so your food cost is $7. If you use a 3x multiplier, you’d price it at $21. But if every other Italian place in town charges $16–$18 for the same dish, you’re either going to:
- Lose customers who think you’re overpriced, or
- Have to discount it later, which erodes trust.
So what’s the solution? Tiered pricing. Offer:
- A basic chicken parm for $16 (standard portion, no frills)
- A “premium” version for $20 (larger portion, higher-quality cheese, side salad)
- A “family-style” version for $28 (serves 2, with garlic bread and a side of pasta)
Now, you’re catering to different budgets while maximizing revenue.
6. The Hidden Costs You’re Not Factoring Into Your Prices
Here’s a hard truth: your food cost percentage is lying to you. Most restaurants calculate food cost as:
(Cost of Ingredients / Menu Price) x 100
But that doesn’t account for:
- Labor costs (How long does it take to prep and cook this dish?)
- Waste (Are you throwing out 20% of your avocados because they brown too fast?)
- Storage costs (Does this ingredient require special refrigeration or dry storage?)
- Opportunity cost (Could your line cook be making something more profitable in the time it takes to plate this dish?)
Let me give you an example. A restaurant I worked with had a lobster bisque on the menu. The ingredients cost $5 per bowl, and they sold it for $14-a 64% margin, which looks great on paper. But here’s what they weren’t considering:
- The bisque took 45 minutes of prep time per batch.
- They had to buy whole lobsters, which meant shelling and storing the meat (more labor and waste).
- It was only ordered about 5 times a week, so the ingredients often spoiled before they could use them.
When we factored in labor and waste, the real cost per bowl was closer to $9, making the margin only 35%. Not worth it. They replaced it with a cream of mushroom soup that had a lower ingredient cost ($3), took 15 minutes to prep, and had a similar price point. Margin? 78%.
So how do you avoid this? Track “fully loaded” costs for each dish. That means:
Menu Price – (Ingredient Cost + Labor Cost + Waste Cost + Storage Cost) = True Profit
Yes, it’s more work. But it’s the difference between thinking you’re making a 60% margin and actually making a 30% margin.
Menu Engineering: The Data-Driven Approach to Maximizing Profits
7. The 80/20 Rule: How a Few Dishes Are Making (or Losing) You Most of Your Money
If you’ve been in the restaurant business for more than five minutes, you’ve heard of the Pareto Principle (the 80/20 rule): 80% of your profits come from 20% of your menu items. But here’s what most people don’t realize: the inverse is also true. 80% of your losses are probably coming from 20% of your menu items, too.
I once did an audit for a Mexican restaurant where three dishes (their carne asada tacos, chile relleno, and margarita pitcher) accounted for 65% of their profits. Meanwhile, their “authentic” mole poblano, which took hours to prepare and required 12 ingredients, was ordered twice a week and had a negative margin after labor. They were losing money every time someone ordered it.
So how do you find your 20%? Track sales data religiously. You need to know:
- Which items sell the most (by volume)
- Which items have the highest profit margins
- Which items are rarely ordered but take up prep time
- Which items have high waste or spoilage rates
Once you have that data, categorize every item on your menu into one of four quadrants:
- Stars: High sales, high margin (these are your moneymakers, promote them!)
- Plowhorses: High sales, low margin (these are your volume drivers, can you tweak the recipe to improve margins?)
- Puzzles: Low sales, high margin (these have potential, can you reposition them or bundle them with other items?)
- Dogs: Low sales, low margin (these are draining your profits, cut them or rework them)
For the Mexican restaurant, we:
- Moved the carne asada tacos to the top of the menu (Golden Triangle, remember?) and added a “Taco Tuesday” special to drive even more sales.
- Repriced the chile relleno from $12 to $14 (it was already a high-margin item, so why not?).
- Replaced the mole poblano with a simpler, higher-margin dish (a chipotle chicken bowl that used overlapping ingredients from other dishes).
- Bundled the margarita pitcher with a “Fiesta Platter” to increase average order value.
Result? A 22% increase in profits in three months, with no increase in food costs.
8. The Art of the Upsell: How to Get Customers to Spend More Without Feeling Pressured
Upselling gets a bad rap because people associate it with sleazy car salesmen. But in restaurants, upselling is just good hospitality-if you do it right. The key is to frame additions as enhancements, not extras.
Here are some of my favorite upselling techniques:
- The “Would You Like” Technique: Instead of asking, “Do you want fries with that?” (which invites a “no”), say, “Would you like our hand-cut truffle fries with that, or the seasonal veggie medley?” Now, the question isn’t if they want a side, but which one.
- The “Signature Pairing”: “Our chef recommends pairing the ribeye with our roasted garlic mashed potatoes and a glass of Cabernet. Can I bring you that?”
- The “Limited Availability” Play: “We only have a few orders left of the fresh crab cakes tonight, would you like to add them as an appetizer?”
- The “Value Bundle”: “For just $5 more, you can upgrade to our premium cut, which includes an extra side.”
But here’s the thing: your staff has to believe in what they’re selling. If your servers don’t genuinely think the truffle fries are worth the upgrade, they won’t sell them with conviction. That’s why it’s crucial to:
- Train your staff on the story behind each dish (where the ingredients come from, how it’s prepared).
- Let them taste everything so they can describe it passionately.
- Incentivize upselling with small bonuses or recognition (e.g., “Server of the Month” for the highest average check).
I saw this in action at a seafood restaurant in Charleston. Their servers were trained to say, “Our oysters were shucked this morning from the Cape Romaine beds, some of the best in the Lowcountry. Would you like to start with a half-dozen?” Not only did oyster sales skyrocket, but customers loved the personal touch. It felt like a recommendation, not a sales pitch.
9. The Menu Description Makeover: How to Write Copy That Sells
Your menu descriptions aren’t just there to tell people what’s in the dish. They’re there to sell the experience. And yet, so many restaurants treat them as an afterthought. Here’s how to fix that.
First, avoid these common mistakes:
- Being too vague: “Chicken with vegetables” doesn’t make my mouth water.
- Being too technical: “Pan-seared, sous-vide breast of free-range chicken” is overkill unless you’re a Michelin-starred restaurant.
- Ignoring sensory words: If I can’t taste, smell, or see the dish in my mind, you’re not doing your job.
Instead, follow this formula for high-converting menu descriptions:
- Start with the name of the dish (keep it simple but evocative).
- Add a sensory-rich description (focus on taste, texture, and aroma).
- Highlight the origin or story (if applicable).
- End with a subtle call to action (e.g., “Our most popular dish!” or “Chef’s recommendation”).
Here’s a before-and-after example:
- Before: “Grilled Salmon with Asparagus”
- After: “Wild-Caught Alaskan Salmon, char-grilled over oak and finished with lemon-beurre blanc, served with spring asparagus and fingerling potatoes. Our guests can’t get enough!”
Notice the difference? The second version:
- Uses sensory words (“char-grilled,” “lemon-beurre blanc”).
- Highlights quality (“wild-caught,” “Alaskan”).
- Includes a social proof cue (“Our guests can’t get enough”).
But be careful: don’t overdo it. If every dish is “our most popular” or “a customer favorite,” none of them will stand out. Pick one or two signature items per category to highlight.
And here’s a pro tip: use boxed or highlighted sections for your highest-margin items. A small border, a different font, or even a chef’s hat icon can draw attention and increase sales by 10–15%.
Seasonal and Dynamic Menu Strategies: How to Keep Profits High Year-Round
10. The Seasonal Menu Shuffle: How to Keep Things Fresh Without Alienating Regulars
Seasonal menus are a double-edged sword. On one hand, they let you take advantage of cheaper, fresher ingredients and keep your menu exciting. On the other hand, if you change things too often, you risk losing regulars who have their favorites.
Here’s how to strike the balance:
- Keep 60–70% of your menu constant. These are your core items-the dishes people expect when they walk in. Think: your famous burger, that pasta dish everyone raves about, or your signature cocktail.
- Rotate 30–40% seasonally. These are your flexible items-soups, specials, or dishes that can adapt to what’s fresh and affordable. For example:
- Spring: Asparagus risotto, strawberry shortcake
- Summer: Heirloom tomato salad, peach cobbler
- Fall: Butternut squash ravioli, apple crisp
- Winter: Braised short ribs, chocolate peppermint tart
But here’s the secret: use seasonal items to upsell your core menu. For example:
- “Our winter special is the braised short ribs, but if you love rich flavors, you might also enjoy our signature beef bourguignon (which is on the menu year-round).”
- “The peach cobbler is amazing, but have you tried our classic bread pudding? It’s a guest favorite.”
This way, you’re introducing new items while reinforcing your high-margin staples.
And don’t forget about limited-time offers (LTOs). These create urgency and can drive traffic during slow periods. For example:
- “Summer Lobster Fest: Every Thursday in July, enjoy our Maine lobster roll for $22 (normally $28)!”
- “Winter Truffle Menu: For the month of December, we’re featuring black truffle-infused dishes, ask your server for details!”
LTOs also let you test new dishes without committing to them long-term. If something sells well, consider adding it to your core menu. If not, no harm done.
11. Dynamic Pricing: Should You Charge More on Weekends?
Dynamic pricing, changing prices based on demand, is controversial in the restaurant world. Some people think it’s greedy; others see it as smart business. I’m in the latter camp, but with caveats.
First, let’s talk about when dynamic pricing makes sense:
- Peak times: Friday/Saturday nights, holidays, or during local events (e.g., a concert or sports game).
- High-demand items: If you have a dish that’s constantly selling out, it’s probably underpriced.
- Seasonal ingredients: If the cost of a key ingredient spikes (e.g., lobster in winter), you may need to adjust prices temporarily.
But here’s how to do it without pissing off your customers:
- Be transparent. If you’re raising prices on weekends, say so: “Weekend Pricing Applies” at the bottom of the menu. People understand supply and demand.
- Offer added value. Instead of just raising prices, bundle items. For example, “Our weekend brunch special includes a mimosa or Bloody Mary with any entree.”
- Focus on high-demand items. Don’t raise the price of your entire menu, just the items that are selling out fastest. For example, if your crab cakes are flying out of the kitchen on Fridays, bump them up by $2.
- Use “market price” for volatile items. For dishes with ingredients that fluctuate in cost (like seafood or truffles), list them as “MP” (market price) and adjust daily.
I worked with a brunch spot in Nashville that was packed every weekend but struggling with margins. They were selling $12 chicken and waffles like crazy, but their food cost was 40% (way too high). Instead of raising the price to $15 and risking backlash, they:
- Kept the chicken and waffles at $12 but reduced the portion size slightly (still generous, but more in line with costs).
- Added a “Premium Chicken & Waffles” for $16 with an extra piece of chicken and a side of bacon.
- Introduced a “Weekend Brunch Combo” for $20: chicken and waffles + a mimosa.
Result? Their average check increased by $3, and no one complained because they still had the $12 option.
But be careful: dynamic pricing can backfire if it feels unfair. If you’re a neighborhood joint where regulars come in every week, suddenly charging them more on Saturdays might rub them the wrong way. Know your audience.
The Digital Menu Revolution: How Tech Is Changing the Game
12. QR Code Menus: Blessing or Curse?
QR code menus became the norm during the pandemic, and they’re not going away. But are they helping or hurting your profits? The answer: it depends on how you use them.
Pros of QR code menus:
- Lower printing costs (no more reprinting menus every time you change a price).
- Easier updates (swap out a dish or adjust a price in real time).
- Upsell opportunities (you can add pop-ups like “Pair this with our house red for $5 more”).
- Data collection (track which items are being viewed the most but not ordered, this tells you where your menu might be confusing or unappealing).
Cons of QR code menus:
- Less control over the customer journey (people might skip straight to the cheapest item).
- Tech issues (old phones, bad Wi-Fi, dead batteries).
- Less personal touch (no physical menu to hand to guests, which can feel impersonal).
So how do you make QR menus work for you?
- Design for mobile. Your digital menu should be easy to navigate on a phone. Big buttons, clear categories, and minimal scrolling.
- Use high-quality photos. People eat with their eyes first. A blurry photo of your burger isn’t going to sell it.
- Add strategic pop-ups. For example, when someone clicks on a steak, a pop-up could say, “Add a loaded baked potato for just $3 more!”
- Track analytics. See which items are being viewed but not ordered. This could indicate a pricing issue or a poorly written description.
- Offer a physical menu as a backup. Not everyone is tech-savvy, and you don’t want to frustrate guests.
One restaurant I know in Austin uses their QR menu to highlight daily specials with a flashing “New!” badge. They also added a “Chef’s Picks” section at the top, which rotates based on what’s fresh. Their average order value increased by 18% after the switch.
13. The Rise of AI and Personalized Menus
This might sound like sci-fi, but AI-powered menus are already here. Some high-end restaurants are using AI to:
- Analyze customer data (e.g., if you always order the ribeye, the menu might highlight a new steak special).
- Adjust pricing dynamically based on demand, weather, or even the time of day.
- Suggest pairings (“Customers who ordered the salmon also loved our Pinot Noir”).
Now, I’m not saying you need to invest in AI tomorrow. But here’s what you can do right now to personalize the experience:
- Train your staff to make recommendations based on what the customer orders. For example, if someone orders a spicy dish, the server could say, “Our mango habanero margarita pairs perfectly with that, would you like to try it?”
- Use loyalty programs to track preferences. If a regular always orders the same thing, surprise them with a free appetizer or dessert on their next visit. They’ll feel valued and spend more.
- Offer customizable options. For example, “Build Your Own Bowl” lets customers feel in control while you upsell premium ingredients (avocado +$2, shrimp +$4).
And here’s a futuristic thought: what if your menu changed based on the weather? On a cold day, the menu could highlight soups and stews. On a hot day, it could push salads and chilled dishes. Some restaurants are already doing this with digital menus, and it’s increasing sales by 10–20% in off-peak times.
Putting It All Together: Your Step-by-Step Menu Optimization Plan
Step 1: Audit Your Current Menu
Before you change anything, you need to know what’s working and what’s not. Here’s how:
- Pull sales data for the last 3–6 months. What’s selling? What’s not?
- Calculate profit margins for each dish (ingredient cost + labor + waste).
- Identify your “Stars” and “Dogs” (using the quadrant system from earlier).
- Talk to your staff. What do they hear from customers? Are people asking for items you don’t have? Complaining about prices?
- Mystery shop your competitors. What are they charging? What’s missing from their menus that you could offer?
Step 2: Redesign for Profit (Not Just Aesthetics)
Now, apply what you’ve learned:
- Place your high-margin items in the Golden Triangle.
- Add a decoy item to make other dishes look more appealing.
- Cut or rework low-margin, low-sales items.
- Bundle high-margin items (e.g., “Dinner for Two” specials).
- Use sensory-rich descriptions for your top dishes.
- Highlight 1–2 signature items per category with boxes or icons.
Step 3: Train Your Staff to Sell
Your menu can be perfectly optimized, but if your servers don’t know how to guide customers toward high-margin items, you’re missing out. Here’s how to train them:
- Hold a tasting. Let them try every dish so they can describe it passionately.
- Teach the “why.” Why is the ribeye $32? Because it’s dry-aged for 28 days and sourced from a local farm. Customers will pay more if they understand the value.
- Role-play upselling. Practice phrases like, “Our truffle fries are a guest favorite, would you like to add them to your order?”
- Incentivize upselling. Offer a small bonus or recognition for servers who consistently hit higher average checks.
Step 4: Test, Track, and Tweak
Menu optimization isn’t a one-and-done deal. You need to constantly test and refine. Here’s how:
- Run A/B tests. Try two different menu layouts or descriptions for a week and see which performs better.
- Track changes in sales. Did moving the pasta to the top increase orders? Did the new description for the salmon boost sales?
- Ask for feedback. Put a short survey on the check: “How was your meal? What would you like to see more of on our menu?”
- Adjust seasonally. Swap out ingredients based on cost and availability.
- Monitor food costs monthly. If the price of chicken spikes, can you temporarily adjust your menu or portion sizes?
And remember: small changes can have big impacts. Sometimes, just rewriting a description or moving an item to a different spot on the menu can increase sales by 10–20%.
Final Thoughts: The Menu Is Your Silent Salesperson
Here’s the thing about menu optimization: it’s not about tricking customers. It’s about understanding what they want, presenting it in a way that feels valuable, and making sure your business stays profitable while delivering an amazing experience.
I’ve seen restaurants double their profits just by rearranging their menu, tweaking descriptions, and training staff to upsell effectively. And I’ve seen others struggle because they refused to cut low-margin items or adjust prices, even when their food costs were skyrocketing.
The difference between these two outcomes? A willingness to experiment, track data, and make data-driven decisions. Your menu isn’t just a list of dishes, it’s your most powerful sales tool. Treat it that way.
So here’s my challenge to you: pick one thing from this guide and implement it this week. Maybe it’s moving your highest-margin dish to the top right corner. Maybe it’s adding a decoy item. Maybe it’s rewriting the descriptions for your top three sellers. Start small, track the results, and build from there.
And if you’re feeling overwhelmed, remember: you don’t have to do everything at once. Menu optimization is a process. The restaurants that thrive are the ones that constantly tweak, test, and refine. So grab your sales data, look at your menu with fresh eyes, and start making changes. Your bottom line will thank you.
Now, if you’ll excuse me, I’m off to convince Luna (my cat) that she doesn’t need to “help” me by sitting on my keyboard. Happy optimizing!
FAQ
Q: How often should I update my menu for optimal profits?
A: It depends on your restaurant type, but a good rule of thumb is:
- Fast-casual/quick-service: Update seasonally (every 3–4 months) and adjust prices as needed based on food costs.
- Mid-range/fine dining: Update 2–3 times a year, with minor tweaks (like specials) more frequently.
- High-end/tasting menus: Update more frequently (monthly or even weekly) to keep things fresh and exciting.
The key is to keep your core items consistent while rotating in new, high-margin dishes to keep customers engaged.
Q: Should I list prices with dollar signs ($) or without? Does it make a difference?
A: Yes, it does! Studies show that menus without dollar signs (or with prices listed as “14” instead of “$14”) tend to increase sales because they feel less transactional. The theory is that dollar signs remind people they’re spending money, which can make them more price-sensitive. However, if your restaurant is very casual (like a diner or food truck), dollar signs might feel more appropriate. Test both and see what works for your audience.
Q: How do I handle customers who complain about price increases?
A: Price increases are inevitable, especially with rising food costs. Here’s how to handle pushback:
- Be transparent. If the cost of beef has gone up 20%, say so: “We’ve had to adjust our prices slightly due to rising ingredient costs, but we’re committed to keeping our quality the same.”
- Offer alternatives. “We’ve added a smaller portion of the ribeye at $28 if you’d prefer.”
- Focus on value. Highlight what hasn’t changed: “Our famous mac and cheese is still just $8, and it’s as cheesy as ever!”
- Train your staff. They should know how to explain price changes confidently and empathetically.
Most customers will understand if you’re upfront and continue to deliver great food and service.
Q: Is it better to have a large menu with lots of options or a small, focused menu?
A: It depends on your restaurant’s concept and operations. Here’s a quick breakdown:
- Large menu (20+ items): Best for restaurants with a broad appeal (e.g., diners, family-style places) where customers expect variety. However, large menus often lead to higher food waste and slower service. If you go this route, make sure you’re tracking sales data to identify and cut low-performing items.
- Small menu (10–12 items): Ideal for fast-casual, fine dining, or specialty restaurants (like a ramen shop or pizza place). A smaller menu allows for better quality control, lower waste, and faster service. It also forces you to focus on high-margin, high-demand items.
If you’re unsure, start with a smaller menu and add items based on customer demand. It’s easier to expand than to cut back.
@article{how-to-optimize-your-restaurant-menu-for-profit-a-no-nonsense-guide-from-someone-whos-seen-it-all,
    title   = {How to Optimize Your Restaurant Menu for Profit: A No-Nonsense Guide from Someone Who’s Seen It All},
    author  = {Chef's icon},
    year    = {2025},
    journal = {Chef's Icon},
    url     = {https://chefsicon.com/how-to-optimize-your-restaurant-menu-for-profit/}
}