The Best Fluffy Pancakes recipe you will fall in love with. Full of tips and tricks to help you make the best pancakes.

Table of Contents
- 1 The Psychology of Small Kitchens: Why We Hate Them (and How to Stop)
- 2 Storage Wars: How to Store More Than You Thought Possible
- 3 Tools of the Trade: What to Keep, What to Ditch, and What to Hack
- 4 Workflow Hacks: How to Move Like a Pro in a Closet
- 5 Layout Hacks: Renter-Friendly Fixes for Awkward Kitchens
- 6 Cooking Strategies: How to Make Restaurant-Quality Food in a Shoebox
- 7 The Mental Game: How to Stop Hating Your Small Kitchen
- 8 Final Challenge: Can You Cook a Full Thanksgiving Dinner in Your Tiny Kitchen?
- 9 FAQ: Your Small Kitchen Questions, Answered
Let’s be honest, small kitchens are the universe’s way of testing our patience. One wrong move and you’ve knocked over the olive oil, singed your forearm on a rogue pan handle, or realized, yet again, that your cutting board doesn’t actually fit *anywhere* when you’re trying to chop onions. I’ve been there. My first Nashville apartment had a kitchen so cramped that opening the fridge and the oven at the same time was a physics-defying act. (Luna, my rescue cat, still gives me judgmental side-eye when I curse at the lack of counter space.)
But here’s the thing: small kitchens force creativity. They turn cooking into a puzzle, and if you solve it right, you might end up working *more efficiently* than you ever did in a sprawling chef’s kitchen. This isn’t about accepting limitations, it’s about outsmarting them. Over the years, I’ve picked up tricks from professional chefs, tiny-home dwellers, and my own trial-and-error disasters (RIP, my first attempt at homemade pasta in a 2×2 foot workspace). Below, I’m dumping *everything* I’ve learned-no fluff, no unrealistic “just declutter” advice, just real strategies for real cooks who refuse to let square footage dictate their culinary ambitions.
By the end of this, you’ll know how to:
- Maximize vertical and hidden storage (because cabinets are a lie)
- Choose tools that pull double (or triple) duty (your wallet will thank you)
- Rethink your workflow to avoid the “kitchen tetris” chaos
- Hack your layout-even if you’re renting and can’t renovate
- Cook like a pro in a closet (yes, it’s possible)
Fair warning: Some of these ideas might sound extreme at first. (You want me to *hang my pots where*?) But trust me, when you’re sautéing garlic in one hand while washing greens in a colander balanced on the sink divider, you’ll understand. Let’s dive in.
The Psychology of Small Kitchens: Why We Hate Them (and How to Stop)
Before we talk tactics, let’s address the elephant in the room: small kitchens feel claustrophobic because they violate our expectations. We’ve been conditioned by cooking shows and Pinterest boards to believe that a “real” kitchen has acres of marble countertops, a six-burner stove, and enough cabinetry to hide a small appliance hoarding problem. When reality falls short, it’s not just inconvenient, it feels *personal*. Like the universe is saying, “You don’t deserve to make good food.”
But here’s the secret: the best cooks I know have worked in tiny spaces. Line cooks in cramped restaurant kitchens, food truck operators, even my grandma in her 1950s galley kitchen-constraints breed efficiency. When you don’t have room to spread out, you learn to:
- Prep ingredients in the order you’ll use them (no more digging for the chopped cilantro under a pile of dirty bowls)
- Clean as you go (because if you don’t, you’ll literally have nowhere to put the finished dish)
- Prioritize tools that actually earn their keep (sorry, unitaskers like avocado slicers)
I’m not saying you’ll love your small kitchen by the end of this. But you might start to respect it. And hey, if nothing else, you’ll stop resenting it quite so much when you’re able to pull off a three-course meal without setting anything on fire.
The “One-Butt Kitchen” Rule
Here’s a hard truth: if your kitchen can’t comfortably fit two people, it’s a one-butt kitchen. That means:
- No hovering guests “just watching” (they’re lying; they’re judging your knife skills).
- No partner “helping” by washing dishes while you’re trying to sear steak (unless you enjoy third-degree burns).
- You are the sole commander of this ship, and everyone else needs to clear out or be put to work *outside* the kitchen.
This isn’t antisocial, it’s strategic. The faster you accept that your kitchen is a one-person operation, the faster you’ll stop trying to accommodate extra bodies and start optimizing for *your* workflow. Pro tip: If someone offers to “help,” hand them a glass of wine and a seat at the table. Their presence in the kitchen is a liability, not an asset.
Storage Wars: How to Store More Than You Thought Possible
Vertical Space: Your New Best Friend
If you’re not using your walls, you’re wasting at least 30% of your kitchen’s potential. I didn’t believe this either until I installed a pegboard in my rental (more on how to do that without losing your security deposit later). Here’s how to exploit vertical real estate:
- Pegboards: Not just for tools, hang colanders, measuring cups, even small baskets for spices. I use the IKEA SKÅDIS system because it’s renter-friendly and won’t collapse under the weight of your cast-iron skillet.
- Magnetic strips: For knives, spice jars (use small magnetic containers), or even metal utensils. Bonus: No more digging through the “junk drawer” for a spoon.
- Over-the-sink shelves: That dead space above your sink? It’s prime real estate for drying racks, cutting boards, or a slim spice organizer.
- Ceiling-mounted racks: If you’re bold (and your landlord is lenient), hang a rack for pots and pans. Just measure twice, nothing kills the vibe like a skillet concussion.
But what if you can’t drill holes? Velcro strips, adhesive hooks (the heavy-duty kind), and tension rods can work wonders. I once used a tension rod under my sink to hang spray bottles and free up cabinet space. Is it pretty? No. Does it work? Absolutely.
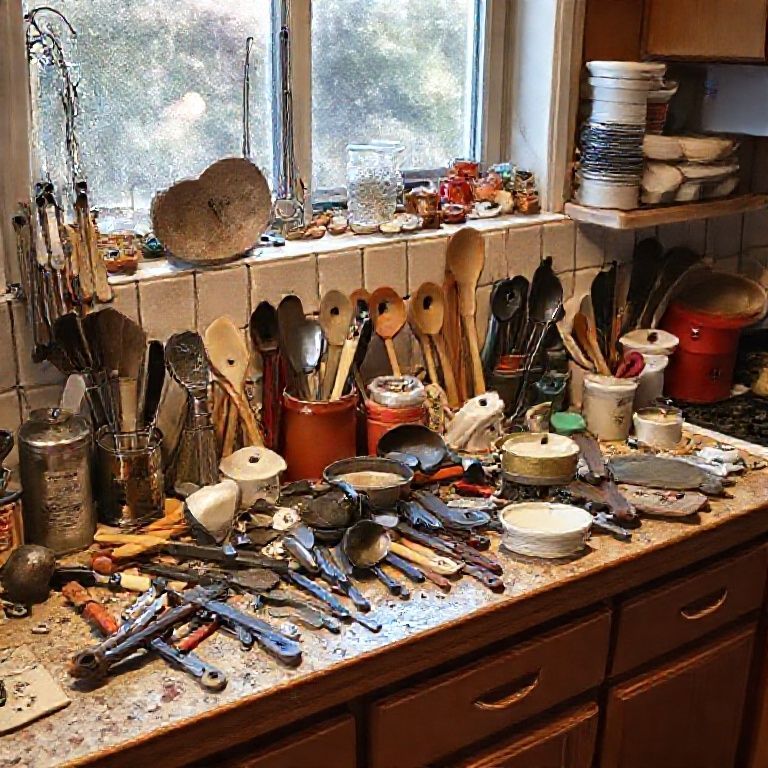
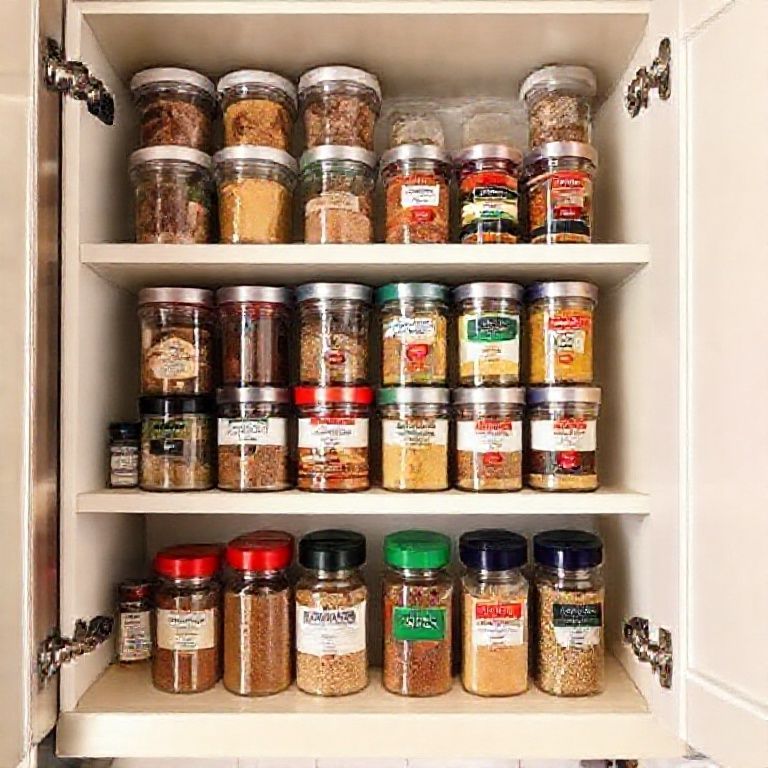
The Cabinet Illusion: They’re Lying to You
Cabinets are the greatest lie ever sold to home cooks. They look spacious until you realize that half the depth is unusable because you can’t reach the back without performing a contortionist act. Here’s how to fix that:
- Turntables: Lazy Susans aren’t just for your grandma’s dining table. Put one in a corner cabinet, and suddenly, that black hole of forgotten cans becomes accessible.
- Stackable shelves: Double your cabinet space by adding stackable organizers. I use them for plates, bowls, and even pots, just make sure they’re sturdy enough to handle the weight.
- Door space: The inside of cabinet doors is prime territory for hooks (for measuring cups), small baskets (for packets of spices), or even a hanging trash bag dispenser.
- Drawers > shelves: If you have a choice, deep drawers are *always* better than shelves. You can see everything at once, and nothing gets lost in the abyss.
Pro move: Take everything out of your cabinets. Everything. Now, put back only what you’ve used in the last month. The rest? Donate, store elsewhere, or admit you’re never going to use that fondue set.
Underutilized Spaces You’re Ignoring
You’ve got hidden storage you don’t even know about. Let’s play a game: Where can you stash stuff that isn’t a cabinet or drawer? Here’s my list:
- The space between your fridge and wall: Slim rolling carts or pull-out shelves can fit here. I store baking sheets and cutting boards vertically in mine.
- Above the fridge: If you can reach it (safely!), this is great for rarely used items like holiday serving platters or backup appliances.
- Inside your oven: When not in use, the oven is a great place to store baking dishes or sheet pans. Just remember to check before preheating-ask me how I know.
- The top of your cabinets: If you’ve got a gap between your cabinets and the ceiling, use decorative boxes or baskets to store lightweight items (like extra napkins or cookbooks).
- The side of your sink: A slim tension rod can hold sponges or small bottles of soap, freeing up counter space.
Warning: Don’t go overboard. If you have to perform a 10-minute Tetris maneuver to access your blender, you’ve defeated the purpose. The goal is accessible efficiency, not a storage puzzle that requires an instruction manual.
Tools of the Trade: What to Keep, What to Ditch, and What to Hack
The 80/20 Rule of Kitchen Tools
You’ve heard of the 80/20 rule (Pareto Principle), right? 80% of your results come from 20% of your efforts. In kitchen terms: You use 20% of your tools for 80% of your cooking. The trick is identifying that 20% and ruthlessly eliminating the rest.
Here’s my on-negotiable shortlist for a small kitchen:
- A good chef’s knife (8-10”): If you only own one knife, make it this. Learn to sharpen it. Love it. Never put it in the dishwasher.
- A large cutting board: Big enough to hold a whole chicken or a pile of veggies. Get one with a juice groove if you’re messy (no judgment).
- A 10-12” cast-iron skillet: It goes from stovetop to oven, sears like a dream, and doubles as a serving dish. Plus, it’s basically indestructible.
- A 3-4 quart saucepan: For pasta, soups, sauces, anything that needs simmering.
- A sheet pan: Roasting, baking, even as a makeshift tray for serving. Get a half-sheet pan (18×13”) if you have the space.
- A microplane: For zesting, grating garlic, hard cheeses, it’s a flavor powerhouse.
- Tongs and a fish spatula: Tongs are versatile (salads, flipping meat, serving pasta). A fish spatula is thin enough to slide under delicate foods without destroying them.
- A Dutch oven: If you can swing it, a 5-6 quart Dutch oven is a soup pot, a braiser, a bread bakery, and a deep fryer all in one.
What to ditch:
- Unitaskers (avocado slicers, egg separators, garlic presses, learn to use a knife).
- Duplicate sizes (you don’t need three different saute pans).
- Gadgets you’ve used less than 3 times in a year (looking at you, waffle maker).
But Sammy, what about [insert niche tool here]? Ask yourself: *Can I do this with something I already own?* If the answer is yes, ditch it. If you’re unsure, store it outside the kitchen for a month. If you don’t miss it, it’s gone.
The Multitool Mindset: One Tool, Three Jobs
In a small kitchen, every tool should earn its keep by doing at least three things. Here’s how to make that happen:
- Cast-iron skillet: Sear, bake, fry, serve, and if you’re desperate, it can even press sandwiches.
- Mixing bowls with lids: Prep, store leftovers, or use as a makeshift double boiler.
- Mason jars: Store dry goods, hold leftovers, measure liquids (1 cup = 8 oz), or even use as a shaker for dressings.
- A bench scraper: Chop herbs, divide dough, transfer food from cutting board to pan, and scrape up stuck-on bits.
- A rimmed baking sheet: Roast veggies, bake cookies, catch drips under messy prep, or use as a makeshift tray for serving.
Pro hack: Your instant-read thermometer isn’t just for meat. Use it to check:
- Oil temp for frying (350°F is the sweet spot)
- Water temp for yeast (110°F is ideal)
- Even the temp of your fridge (should be 35-38°F)
Appliances: The Small Kitchen Dilemma
Appliances are the biggest space hogs in a small kitchen. Here’s how to handle them:
- Microwave: If you have one, can it live *outside* the kitchen? On a cart in the dining area? Under a desk? Mine lives on a shelf in the hallway. Unconventional? Yes. Effective? Absolutely.
- Toaster oven: A toaster oven can replace a full-size oven for most tasks (toasting, baking, roasting small batches). I use mine more than my actual oven.
- Blender vs. Immersion blender: Unless you make smoothies daily, an immersion blender takes up less space and can handle soups, sauces, and even small batches of pesto.
- Instant Pot/Electric pressure cooker: If you’re tight on space but love slow-cooked meals, this is a game-changer. It replaces a slow cooker, rice cooker, and steamer.
- Air fryer: Only worth it if you use it at least once a week. Otherwise, your oven’s convection setting can do 80% of what an air fryer can.
Hard truth: If an appliance doesn’t get used at least once a week, it’s a space vampire. Either commit to using it or let it go. (Yes, that includes the bread machine you bought during quarantine.)
Workflow Hacks: How to Move Like a Pro in a Closet
The “Zones” System: Treat Your Kitchen Like a Restaurant
Ever notice how restaurant kitchens are tiny but insanely efficient? That’s because they’re organized into zones based on workflow. You can steal this idea. Here’s how:
- Prep Zone: Where you chop, measure, and assemble. Keep your cutting board, knives, mixing bowls, and trash/compost bin here.
- Cooking Zone: Stove, oven, and the tools you use while cooking (tongs, spatulas, timers). Store pots and pans nearby.
- Cleaning Zone: Sink, dish soap, drying rack, and trash. If possible, keep a small compost bin here too.
- Storage Zone: Pantry, fridge, and dry goods. Organize by frequency of use (daily items at eye level, rare items up high or down low).
Why this works: You’re not wasting time walking back and forth. Everything you need for a task is within arm’s reach. In a small kitchen, every step counts.
My setup: I keep a small cart (like the IKEA RÅSKOG) on wheels next to my prep zone. It holds my most-used tools (knives, cutting board, oil, salt) and can be rolled out of the way when not in use. Game. Changer.
The “One In, One Out” Rule for Counters
Here’s a rule that’ll save your sanity: For every item you take out, put one away. Sounds simple, right? But in practice, it’s revolutionary. Here’s how it plays out:
- Take out the cutting board? Put away the toaster.
- Grab the blender? Store the colander.
- Pull out the Dutch oven? Nest the mixing bowls inside it and tuck them away.
This does two things:
- Prevents the “countertop avalanche” where suddenly every surface is buried under tools and ingredients.
- Forces you to clean as you go, so you’re not left with a mountain of dishes at the end.
Does this slow you down at first? Yes. Does it save you hours of cleanup later? Absolutely. It’s like flossing, annoying in the moment, but you’ll thank yourself later.
The “Mise en Place” Mindset (Even If You’re Not a Chef)
Mise en place (French for “everything in its place”) is the practice of prepping all your ingredients before you start cooking. In a small kitchen, this isn’t just a fancy technique, it’s a survival skill. Here’s how to adapt it:
- Prep in the order you’ll cook. Chop onions first if they need to caramelize for 20 minutes. Measure spices into small bowls or ramekins so you’re not digging through the cabinet mid-recipe.
- Use your sink as a prep station. Wash and chop veggies over a colander in the sink to catch scraps (compost later).
- Stack prep containers. Nest small bowls inside larger ones to save space. A set of stackable glass containers is worth its weight in gold here.
- Prep on plates. If you’re short on bowls, use dinner plates to hold prepped ingredients. They’re flat, stable, and easy to slide into the fridge if you get interrupted.
But what if I don’t have room to prep everything at once? Then prep in stages. Chop veggies first, then store them in the fridge while you prep proteins. The key is to avoid having everything out at the same time, which is how countertop chaos starts.
Layout Hacks: Renter-Friendly Fixes for Awkward Kitchens
When Your Kitchen Was Designed by Someone Who Hates Cooking
Some kitchens are just… *wrong*. The stove is next to the fridge (so the door blocks the burners when open). The sink is in the corner (so you have to reach across the stove to wash hands). The cabinets are placed where no human could reasonably access them. If you’re stuck with a bad layout, here’s how to mitigate the damage:
- Move your prep station. If your counters are unusable, use a foldable table or a rolling cart as an extra surface. I’ve seen people use a ironing board (covered with a cutting board) as a temporary prep area.
- Rearrange your appliances. If your microwave is hogging counter space, can it go on a shelf above the fridge? Or in the living room? (Yes, really.)
- Create a “landing strip.” Designate one spot (even if it’s a wall-mounted shelf) for keys, mail, and other non-kitchen clutter. This keeps it from spilling onto your counters.
- Use rugs to define zones. A small rug in front of the sink or stove can mentally separate spaces and make the kitchen feel more organized.
Renter-friendly modifications:
- Adhesive hooks for utensils or towels.
- Tension rods under sinks or inside cabinets for extra hanging space.
- Removable shelf liners to add grip and prevent items from sliding around.
- Over-the-door organizers for pantry items or cleaning supplies.
The “Triangle of Death” and How to Avoid It
In kitchen design, the “work triangle” (the path between stove, sink, and fridge) is supposed to be efficient. In a small kitchen, it’s often a triangle of death-a claustrophobic gauntlet where you’re constantly turning into appliances or bumping into cabinets. Here’s how to survive it:
- Minimize steps. Store dishes near the sink, trash near the prep area, and spices near the stove. Every extra step adds friction.
- Turn instead of walk. If your layout forces you to pivot (e.g., fridge to stove), practice the turn so you’re not wasting motion.
- Use the “one-hand rule.” Can you open the fridge, grab an egg, and close the door without putting down your whisk? If not, reorganize.
- Avoid the “cross traffic” trap. If your kitchen is a thoroughfare (e.g., the only way to the bathroom is through the kitchen), set up a physical barrier (like a folding screen or a strategically placed cart) to signal “do not enter” when you’re cooking.
Pro tip: If your stove and sink are too close, invest in a splash guard to keep water from landing on hot burners. (Ask me how I learned this the hard way.)
Cooking Strategies: How to Make Restaurant-Quality Food in a Shoebox
One-Pot Meals: Your Small Kitchen’s Superpower
If you’re not leaning into one-pot meals, you’re missing out on the easiest way to cook in a small kitchen. These dishes minimize cleanup, reduce the number of tools you need, and often taste better the next day. Here are my go-tos:
- Stir-fries: Protein + veggies + sauce = dinner in 15 minutes. Use your largest skillet and cook in batches if needed.
- Sheet pan dinners: Toss everything (protein, veggies, potatoes) on a sheet pan, season, and roast. One pan, zero stress.
- Soups and stews: A Dutch oven or large pot can handle everything from chili to curry to pasta. Bonus: Leftovers freeze well.
- Pasta dishes: Cook pasta in a large skillet (use less water, add more salt), then toss with sauce in the same pan.
- Skillet pizzas: No pizza stone? No problem. A cast-iron skillet makes a killer crispy-crust pizza.
Pro move: Keep a “pantry meal” list on your fridge-5-10 meals you can make with ingredients you always have on hand (canned beans, rice, pasta, frozen veggies). When you’re too tired to think, pick one and go.
The “Batch and Freeze” Lifesaver
Small kitchens hate last-minute cooking. The more you can prep ahead, the less you’ll resent your space. Here’s how to make it work:
- Double recipes. If you’re making soup, make enough for two meals. Freeze half in portion-sized containers.
- Pre-chop veggies. Spend 30 minutes on Sunday chopping onions, peppers, and carrots. Store them in airtight containers for quick meals.
- Pre-cook proteins. Roast a big batch of chicken, shred it, and freeze in 1-cup portions. Same for ground beef or lentils.
- Freeze herbs in oil. Chop fresh herbs, mix with olive oil, and freeze in ice cube trays. Pop a cube into your pan when cooking.
- Make “kitchen sink” stocks. Save veggie scraps, chicken bones, and herb stems in a freezer bag. When full, simmer into stock.
Freezer organization tip: Use masking tape and a Sharpie to label everything with the date. If it’s been in there more than 3 months, toss it. Freezer burn is the enemy of small spaces.
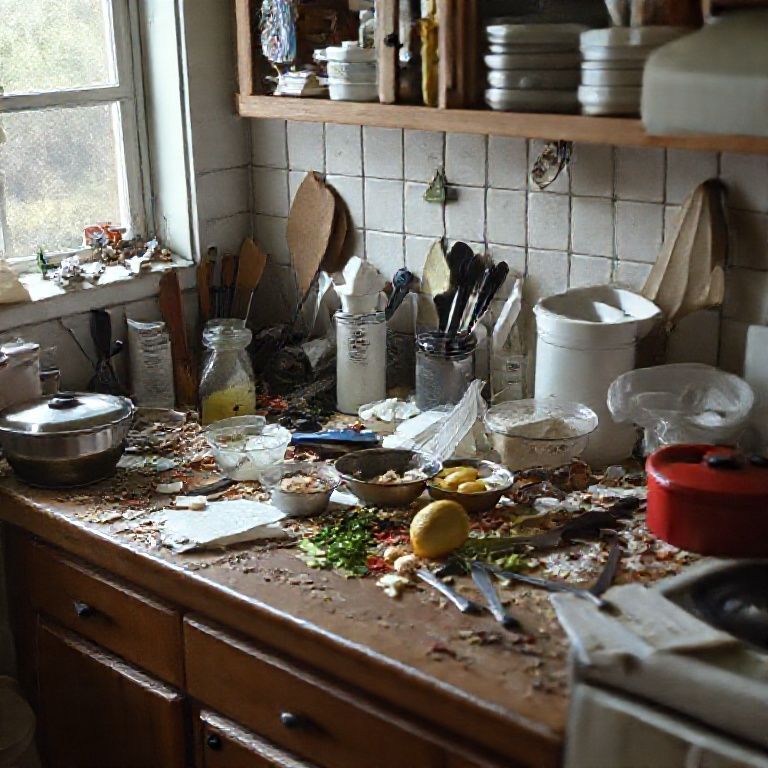
Clean-as-You-Go: The Small Kitchen’s Golden Rule
In a tiny kitchen, dirty dishes are the enemy. They pile up fast, take over counters, and make cooking feel like a chore. The solution? Clean as you go. Here’s how to make it painless:
- Fill the sink with soapy water. As you finish with a tool (knives, measuring cups, bowls), toss it in to soak. Wash when you have a free hand.
- Use a “dirty dish bin.” A small plastic bin on the counter catches scraps and utensils, keeping the sink clear for washing.
- Wipe counters between tasks. A quick swipe with a damp cloth prevents sticky buildup and keeps things sanitary.
- Run the dishwasher mid-cook. If you have one, load it as you go and run it while you’re still cooking. Unload when done.
Mindset shift: Cleaning isn’t a separate task, it’s part of cooking. Treat it like mise en place. The goal is to finish cooking with *zero* cleanup left. (Okay, maybe one pot. I’m not a monster.)
The Mental Game: How to Stop Hating Your Small Kitchen
Reframing the Narrative
It’s easy to resent a small kitchen. But what if, instead of seeing it as a limitation, you treated it like a challenge to cook smarter? Here’s how to flip the script:
- It’s not small, it’s “cozy.” (Okay, fine, it’s small. But “cozy” sounds better.)
- Less space = less to clean. No sprawling countertops to wipe down or miles of cabinets to organize.
- You’re forced to be creative. Ever tried making a soufflé in a toaster oven? It’s weirdly satisfying when it works.
- It’s a great excuse to eat out more. (Just kidding. Sort of.)
Seriously, though: Some of my best meals have come from working within constraints. When you don’t have room for 20 ingredients, you learn to maximize flavor with fewer components. That’s a skill that’ll serve you well even if you upgrade to a bigger kitchen someday.
The “5-Minute Reset” Habit
Here’s a habit that’ll change your life: Before you go to bed, spend 5 minutes resetting your kitchen. That means:
- Wipe down counters.
- Put away any stray tools.
- Run the dishwasher or hand-wash the last few dishes.
- Take out the trash if it’s full.
Why? Because walking into a clean kitchen in the morning sets the tone for the day. You’re not starting from behind, you’re starting fresh. And in a small space, that mental clarity is everything.
When to Accept Defeat (and Order Takeout)
Look, I’m all for making the most of a small kitchen, but sometimes, the kitchen wins. Maybe you’ve been cooking all day and the thought of washing one more dish makes you want to scream. Maybe your stove has two burners and one’s broken. Maybe you just *don’t feel like it*.
That’s okay. Give yourself permission to order takeout, eat cereal for dinner, or throw a frozen pizza in the oven. A small kitchen shouldn’t make you miserable, it should make you resourceful. And sometimes, the most resourceful thing you can do is know when to tap out.
Final Challenge: Can You Cook a Full Thanksgiving Dinner in Your Tiny Kitchen?
I’m not saying you *should*. But could you? That’s the ultimate test of a small kitchen’s potential. Here’s how I’d approach it:
- Prep ahead. Make pies, stuffing, and cranberry sauce the day before.
- Use the oven strategically. Turkey goes in first (it needs the longest time). While it’s roasting, use the stovetop for sides.
- Repurpose appliances. Slow cooker for mashed potatoes. Instant Pot for green beans. Toaster oven for reheating rolls.
- Serve buffet-style. Set up a serving station in the living room to keep people out of the kitchen.
- Embrace disposable. Paper plates, aluminum pans, whatever makes cleanup easier. You’re not a monster; you’re a strategist.
Would it be stressful? Absolutely. Would it be impressive? Hell yes. And if you can pull off Thanksgiving, you can handle *anything* your small kitchen throws at you.
FAQ: Your Small Kitchen Questions, Answered
Q: I have *zero* counter space. How do I even chop vegetables?
A: Get a large cutting board that can sit across your sink (if it’s clean) or your stove (if it’s off). Alternatively, use a foldable table or a rolling cart as a temporary prep station. And if all else fails? Chop on a stable plate-it’s not ideal, but it works in a pinch.
Q: My kitchen has no pantry. Where do I store dry goods?
A: Think outside the (pantry) box:
- Use stackable bins on top of the fridge.
- Store dry goods in clear, airtight containers on open shelving (bonus: they look intentional).
- Repurpose a bookshelf or dresser in a nearby room for overflow storage.
- Keep frequently used items (pasta, rice, cans) in drawers with dividers.
Q: How do I keep my small kitchen from smelling like last night’s dinner?
A: Small spaces trap odors, but here’s how to fight back:
- Simmer a pot of “stovetop potpourri” (citrus peels, cinnamon sticks, cloves) for 10 minutes.
- Keep a small bowl of baking soda in the corner to absorb smells.
- Use a splash guard when cooking smelly foods (like fish or cabbage) to contain odors.
- Open windows and run a fan to circulate air.
- Wipe down surfaces with a mix of vinegar and water, it neutralizes odors.
Q: I love baking, but my oven is tiny and uneven. Help!
A: Small ovens are tricky, but not impossible:
- Rotate your pans halfway through baking for even cooking.
- Use a baking stone or steel to help distribute heat (and double as a pizza stone).
- Bake in batches-better to have fresh cookies in waves than a burnt mess all at once.
- Invest in an oven thermometer-many small ovens run hot or cold. Adjust recipes accordingly.
- Try no-bake desserts (like mousse, pudding, or icebox cakes) when the oven’s being stubborn.
@article{how-to-make-the-most-of-your-small-kitchen-a-realists-guide-to-cooking-big-in-tiny-spaces,
    title   = {How to Make the Most of Your Small Kitchen: A Realist’s Guide to Cooking Big in Tiny Spaces},
    author  = {Chef's icon},
    year    = {2025},
    journal = {Chef's Icon},
    url     = {https://chefsicon.com/making-the-most-of-your-small-kitchen/}
}