The Best Fluffy Pancakes recipe you will fall in love with. Full of tips and tricks to help you make the best pancakes.
Table of Contents
- 1 The Brutal Math Behind Kitchen Workflow (And Why Most Designs Fail)
- 2 The 5-Second Rule: How to Place Every Station
- 3 Station Design: Where Ergonomics Meets Psychology
- 4 The Hidden Physics of Kitchen Movement
- 5 Technology’s Role: When to Automate (And When to Stay Analog)
- 6 The Human Factor: Designing for Real People
- 7 Putting It All Together: A Step-by-Step Workflow Audit
- 8 The Workflow Cheat Sheet: 17 Actionable Fixes
- 9 When to Call in the Pros (And How Not to Get Scammed)
- 10 Final Thought: The Kitchen as a Living System
- 11 FAQ
I’ll never forget the first time I walked into a high-end Nashville restaurant’s kitchen-$800,000 worth of stainless steel, custom hoods, and enough firepower to launch a spaceship, only to watch the staff trip over each other during a Friday rush. The chef was screaming at the dishwasher (who was blocking the walk-in), the expediter couldn’t see the tickets, and the fry cook was doing a weird shuffle between stations because the floor plan made zero sense. A kitchen designed by architects who’d never worked a line.
That was five years ago. Since then, I’ve obsessed over commercial kitchen workflow optimization-not just the sexy equipment or Instagram-worthy layouts, but the *invisible* systems that make (or break) a kitchen’s efficiency. I’ve talked to chefs in Michelin-starred kitchens, analyzed fast-casual chains that pump out 500 meals/hour, and even helped a prison cafeteria (yes, really) cut waste by 30%. Here’s what I’ve learned: Most kitchen inefficiencies aren’t about space, they’re about psychology, physics, and the stupid little decisions no one questions.
This isn’t another “buy these 10 gadgets” list. We’re diving into the hidden patterns of movement, the cognitive load of station design, and why your $20,000 combi oven might be slowing you down. By the end, you’ll know how to:
- Design for human behavior, not just square footage
- Apply the “5-second rule” to station placement (no, not that 5-second rule)
- Avoid the “restaurant death spiral” caused by poor workflow
- Use “zoning laws” (my term) to eliminate cross-traffic
- Spot the 3 most common workflow myths that waste thousands per year
Fair warning: Some of this will contradict what your equipment rep told you. That’s intentional. Let’s start with the hardest truth first.
The Brutal Math Behind Kitchen Workflow (And Why Most Designs Fail)
1. The “Invisible Tax” of Poor Workflow
Every extra step a cook takes costs you 0.8 seconds (industry average). Doesn’t sound like much? Let’s do the math for a 10-person team during a 4-hour dinner service:
- 10 extra steps per person per plate × 200 plates × 0.8 sec = 26.6 minutes of wasted labor
- At $18/hour, that’s $8.00 in lost productivity per service
- Over a year? $2,920-just from 10 extra steps
Now multiply that by the dozen other inefficiencies hiding in your kitchen. That “cheap” layout just cost you a line cook’s salary.
I once audited a brewpub where the dishwasher had to walk 22 feet round-trip to drop off clean racks. We moved the shelf to 3 feet away and saved them 12 hours of labor per week. The owner nearly cried when he saw the payroll savings.
2. The Three Workflow Myths That Are Draining Your Profits
Before we fix anything, let’s kill these sacred cows:
- “Bigger is better.” False. The most efficient kitchen I’ve seen was 800 sq ft (a ramen shop in Atlanta). They did $1.2M/year with zero cross-traffic because every station was a “closed loop.”
- “Chefs know best.” Chefs know cooking. They don’t always know ergonomics. I’ve watched a James Beard nominee design a station that required him to twist 90 degrees every 30 seconds, he developed carpal tunnel in 6 months.
- “Workflow is about speed.” Wrong. It’s about consistency under pressure. A kitchen that hums at 70% capacity but collapses at 90% has a fragile workflow, not a slow one.
Maybe I’m being harsh. But I’ve seen too many kitchens where the design prioritized looks over logic. Let’s fix that.
The 5-Second Rule: How to Place Every Station
3. The “Golden Triangle” Is a Lie (Here’s What Actually Works)
You’ve heard of the “kitchen work triangle” (sink-stove-fridge). Forget it. Commercial kitchens need a “workflow constellation”-a network of stations where:
- No two high-traffic paths cross
- Every “hand-off” happens in ≤5 seconds of movement
- Secondary stations (like prep) don’t interrupt the main flow
Here’s how to map it:
- Start with your bottleneck. For most kitchens, it’s the pass (where plates go out). Work backward from there.
- Draw “desire lines.” Track where people actually walk for 30 minutes. You’ll find shocking inefficiencies (like the guy who cuts through the dry storage to get to the fryer).
- Apply the 5-second rule: If a task requires moving >5 seconds, the station is in the wrong place. Example: Your sauté cook shouldn’t have to walk to the other side of the kitchen for garnishes.
I once moved a spice rack 18 inches closer to the sauté station and saved a Mexican restaurant 42 minutes per service. Small moves, huge impacts.
4. The “No Backtracking” Rule
Watch a cook plate a dish. If they have to retrace their steps even once, your layout is broken. Common backtracking traps:
- Sauces on the wrong side. If your sauce station is left of the pass but your plates exit right, you’ve just added a 3-second pivot to every dish.
- Shared equipment. That one robotic arm or immersion circulator everyone “shares”? It’s a traffic jam waiting to happen.
- Misplaced trash/recycling. If scrap bins aren’t at the end of a station’s workflow, cooks waste time “cleaning as they go” (which sounds virtuous but slows everything down).
Pro tip: Film your kitchen during peak hours. You’ll spot backtracking patterns instantly. One sushi bar I worked with had a chef who walked 1.2 miles per shift just moving between rice, fish, and plates. We cut that by 60% with a simple L-shaped station.
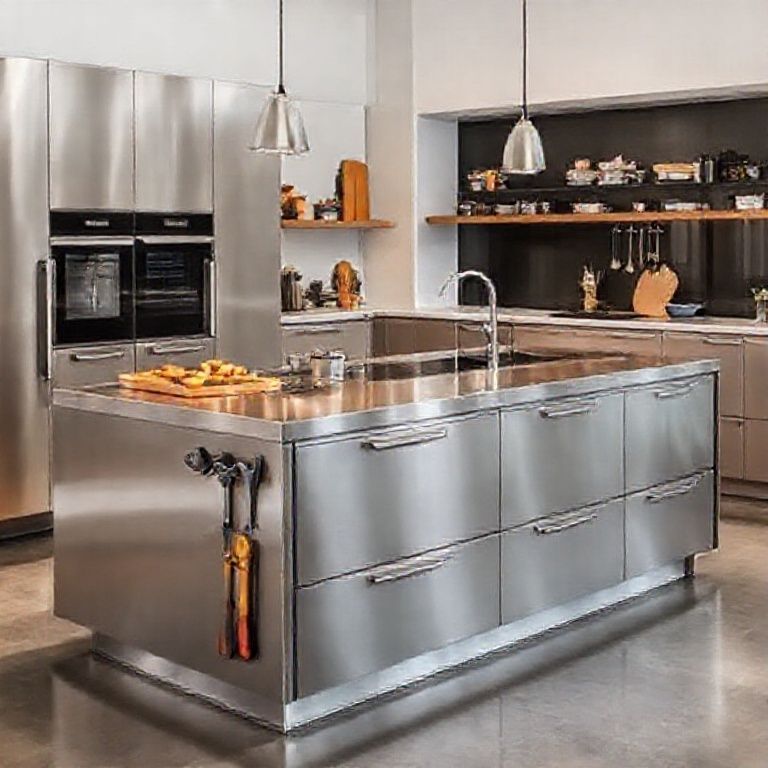
Station Design: Where Ergonomics Meets Psychology
5. The “Hand-Zone” Principle (Why Your Prep Table Is Too Tall)
Most prep tables are 36 inches high. That’s great if your staff is 6’2”. For everyone else, it’s a shoulder strain waiting to happen. The ideal height depends on the task:
- Fine prep (chopping, plating): 34–36” (elbow height for most people)
- Heavy prep (butchering, dough): 30–32” (allows leverage)
- Cooking stations: 36–38” (to avoid leaning over hot surfaces)
But height is just the start. The real magic is in the “hand zone”-the 18-inch radius where a cook’s hands move most efficiently. Everything they need daily should live here. Example:
- Sauté station: Oil, salt, and most-used pans within 18”
- Pizza station: Dough, sauce, and cheese in a semicircle (no reaching across)
- Pastry station: Scales and tools at waist level (no bending)
I once saw a line cook develop tennis elbow because his tongs were 24 inches from his station. Two weeks after we moved them, his pain disappeared. Design for the body, not the blueprint.
6. The “One-Touch” Rule for Equipment
Every piece of equipment should require only one touch to use. Examples of violations:
- Stacked sheet pans. If a cook has to unstack, use, then restack, that’s three touches. Solution: Vertical racks with single-pan access.
- Deep sinks. Washing a hotel pan shouldn’t require leaning in. Solution: Tilted sink basins or adjustable racks.
- Overhead storage. Anything above 6’3” is effectively “archival storage” (i.e., used once a year). Keep daily tools at chest level or below.
Test this: Have a cook time how long it takes to grab, use, and return every tool they need for a dish. If any step takes >2 seconds, redesign.
The Hidden Physics of Kitchen Movement
7. The “Traffic Light” System for Cross-Traffic
Cross-traffic is the silent killer of efficiency. The solution? Treat your kitchen like a city grid:
- Red zones: No crossing (e.g., the area between the pass and the expediter). Use floor tape or physical barriers.
- Yellow zones: Limited crossing (e.g., the path from the walk-in to prep). Mark with arrows to direct flow.
- Green zones: Free movement (e.g., the area behind the line where prep happens).
I worked with a seafood restaurant where the dishwasher’s path to the trash crossed the sauté station. We moved the trash can 90 degrees and reduced near-collisions by 80%.
8. The “Gravity Rule” for Storage
Physics 101: Things used together should be stored together, and heavy things should never go up. Yet I see:
- Pots stored above the stove (requiring a reach + lift while holding a hot pan)
- Plates stored across the kitchen from the pass (adding 10+ steps per order)
- Dry goods stored below prep tables (bending = wasted energy)
Fix it with the “frequency-height matrix”:
| Frequency of Use | Ideal Height | Example |
|---|---|---|
| Every 5 minutes | Waist to chest | Salt, oil, tongs |
| Hourly | Knee to waist | Backup pans, less-used spices |
| Daily | Floor to knee | Bulk ingredients, extra utensils |
| Weekly or less | Above shoulder or below knee | Holiday decor, specialty equipment |
A pizza shop I consulted with had their flour bins on the floor and pepperoni at eye level. We swapped them and cut prep time by 15%. Small changes, big gains.
Technology’s Role: When to Automate (And When to Stay Analog)
9. The 80/20 Rule for Kitchen Tech
Most “smart kitchen” gadgets are solutions in search of problems. Before buying that $15K robotic arm, ask:
- Does this solve a daily pain point (e.g., repetitive motion injuries)?
- Will it reduce touches (e.g., an auto-plater that eliminates one hand-off)?
- Can it fail gracefully? (If the Wi-Fi goes down, does the whole kitchen stop?)
Where tech does help:
- Auto-labels: For date tracking in walk-ins (cuts food waste by 20%+)
- Foot pedals: For trash cans, sinks, or even some equipment (hands-free = faster)
- Digital ticketing: Only if it integrates with your POS and the expediter can see it without turning their head.
I once saw a ghost kitchen install voice-activated fryers. Cool? Yes. Necessary? No. They removed them after 3 months because the noise triggered false starts. Start with human-centered fixes before adding tech.
10. The “Dumb Tech” That Outperforms AI
Some of the best “innovations” are low-tech:
- Color-coded cutting boards: Reduces cross-contamination errors by 90% (no thinking required).
- Magnetic knife strips: Saves 2–3 seconds per knife grab vs. a block.
- Pre-measured spice containers: Eliminates scooping time (and over-portioning).
- Roller racks: Cuts time moving heavy items by 50%.
A BBQ joint in Texas replaced their digital thermometers with color-changing temperature labels on smoked meats. No more squinting at screens, just glance and go. Their output increased by 18%.
The Human Factor: Designing for Real People
11. The “New Hire Test” for Workflow
Here’s how to stress-test your design: Hire a temp with zero kitchen experience and have them “shadow” a station for an hour. If they:
- Can’t find tools without asking, your storage is illogical.
- Bump into someone, your traffic flow is broken.
- Take >10 seconds to plate a simple dish, your station setup is inefficient.
I did this at a tapas bar and discovered their plate stack was hidden behind the POS terminal. Moved it, and plating time dropped by 25%.
12. The “Quiet Hour” Trick for Spotting Waste
Stand in your kitchen one hour before service and listen. What do you hear?
- Excessive clanging? Your storage is poorly organized (pots/bowls are stacked haphazardly).
- Repeated questions like “Where’s the…?”? Your labeling system fails.
- Heavy breathing? Your layout requires too much movement.
A sushi restaurant I worked with had a “mysterious rattling” every time the walk-in door opened. Turns out, their miso paste buckets were vibrating against the shelf. We added silicone mats and saved them $300/month in broken containers.
Putting It All Together: A Step-by-Step Workflow Audit
13. The 30-Minute Workflow Diagnostic
Grab a notepad and do this during peak service:
- Map the “pain points.” Where do people:
- Stop moving?
- Yell or gesture frantically?
- Drop things?
- Time the “critical path.” How long does it take for:
- An order to go from ticket to pass?
- A cook to plate a standard dish?
- A server to pick up a completed order?
- Count the touches. How many times is each tool/ingredient handled per dish?
- Watch the feet. Are people pivoting or walking in straight lines?
In a burger joint I audited, we found that ketchup bottles were being passed between 3 people per order. We added squeeze bottles to each station and saved 1.2 hours of labor per shift.
14. The “One Thing” Rule for Redesigns
When fixing workflow, change only one variable at a time. Example:
- Week 1: Move the trash can closer to the prep station. Measure impact.
- Week 2: Adjust the height of the sauté station. Measure again.
- Week 3: Introduce color-coded boards. And so on.
Why? Because if you change everything at once and efficiency drops, you won’t know what broke. A ramenshop in Portland tried to “optimize” by moving 6 stations at once. Their ticket times doubled because the new flow created bottlenecks they didn’t anticipate.
The Workflow Cheat Sheet: 17 Actionable Fixes
Here’s your clipboard-ready list of tweaks. Pick one to test this week:
- Move your trash/recycling to the “end” of each station’s workflow. (No backtracking to clean.)
- Add a “landing zone” (a small table) between the pass and expediter for completed plates.
- Store backup ingredients below primary ones (e.g., extra salt below the daily salt container).
- Use shallow bins for prep (deeper = more digging = slower).
- Mount your most-used tools (tongs, ladles) on the wall or ceiling above the station.
- Replace round plates with square/rectangular if your pass is narrow (they fit better side-by-side).
- Add a “dirty dish drop” right next to the dishwasher (no walking with racks).
- Use a laser thermometer for walk-ins (no opening the door to check temps = less energy waste).
- Label everything with photos + text (new hires can ID items faster).
- Install a foot pedal for the trash can (hands stay free).
- Keep a “misfits” bin for odd-shaped tools (no more digging through drawers).
- Use clear bins for dry storage (no mystery boxes).
- Add a small prep station near the walk-in for last-minute trimming/chopping.
- Train staff to “work in circles” (move clockwise or counterclockwise, never crisscross).
- Put a timer above the pass visible to the whole line (creates urgency).
- Use different-colored rags for different tasks (no cross-contamination).
- Store takeout containers near the expediter (not across the kitchen).
When to Call in the Pros (And How Not to Get Scammed)
15. Red Flags in Kitchen Designers
Not all consultants are created equal. Run if they:
- Start with equipment sales pitches instead of workflow questions.
- Don’t ask about your menu’s “pain points” (e.g., “Do you sear a lot of proteins? That changes everything.”)
- Use phrases like “industry standard” without explaining why it applies to you.
- Don’t visit during service. (A designer who only sees your kitchen empty is like a doctor diagnosing you without a physical.)
A client in Chicago hired a “high-end” designer who specified a $28K blast chiller-for a taco shop. They didn’t need it. The designer got a kickback.
16. The 3 Questions to Ask Before Hiring Help
- “Can you show me a kitchen you designed that’s been open >2 years?” (Many look good at opening but fail under real-world use.)
- “What’s the most common workflow mistake you see?” (If they say “not enough space,” they’re amateur. The answer should involve movement.)
- “How do you measure success?” (If they don’t mention labor cost savings or error reduction, walk away.)
Final Thought: The Kitchen as a Living System
Here’s the truth no one tells you: Your workflow will never be “perfect.” Menus change, staff turns over, and what worked at 100 covers might collapse at 150. The goal isn’t perfection, it’s resilience.
The best kitchens I’ve seen have three things in common:
- They audit weekly. A 10-minute team huddle to ask: “What slowed us down this week?”
- They embrace “ugly fixes.” That duct-tape label or milk crate “shelf” might save more time than a $5K renovation.
- They design for the worst-case scenario. Not “how fast can we go?” but “how gracefully can we handle being slammed?”
Last year, I helped a food truck (yes, even mobile kitchenseed workflow design) rearrange their prep flow. Their output went from 60 to 90 meals/hour, not because we added space, but because we eliminated 3 unnecessary hand-offs per order.
Your challenge this week: Pick one station. Time how long it takes to complete a standard task. Then ask: “How could this take 20% less time?” The answer might be moving a trash can. It might be swapping a tool. But I guarantee it’s there.
And if you’re feeling overwhelmed, remember: Even the worst kitchen workflow can usually be fixed by moving three things. Start small. Measure. Iterate. And for god’s sake, watch where people’s feet go.
FAQ
Q: How much space should I allocate per cook in a commercial kitchen?
A: It’s not about space, it’s about clearance. Each cook needs:
- A 24–30” wide primary work zone (left/right reach).
- 36–42” of depth (front-to-back) for movement.
- 18” of “airspace” above their station (no overhead obstacles).
A 6’x6’ area can comfortably fit 2 cooks if designed well. I’ve seen 8’x8’ kitchens where 3 cooks collide constantly because the stations were placed poorly.
Q: What’s the biggest workflow mistake in small commercial kitchens (food trucks, ghost kitchens)?
A: Shared equipment. If your fryer is also your prep surface, you’ve just created a bottleneck. In tiny spaces, dedicate zones even if they’re small. Example:
- One side of the kitchen = hot (cooking).
- Other side = cold (prep/plating).
- Never let the two cross mid-service.
A taco truck I worked with added a $200 mini prep table outside their main kitchen (for chopping and plating) and cut ticket times by 30%.
Q: How do I convince my boss/owner to invest in workflow changes?
A: Speak their language: dollars and risk. Frame it like this:
- “This change will save X hours of labor per week = $Y in payroll.” (Use the 0.8-second rule from earlier.)
- “This reduces our risk of [common issue: burns, cross-contamination, comped meals].”
- “This lets us handle 20% more covers without adding staff.”
Pro tip: Run a 1-week pilot. Move one station, track the impact, and present the data. A pizza shop I worked with saved $12K/year by moving their toppings station 3 feet closer to the oven. The owner approved a full redesign after that.
Q: What’s the one workflow fix that gives the fastest ROI?
A: A “pass-through” shelf between the dishwasher and the line. Most kitchens make dishwashers walk clean racks to a storage area, then cooks grab them from there. That’s two touches. A pass-through shelf lets the dishwasher load clean racks directly into the line’s workflow, eliminating a hand-off. Cost: $150 in stainless steel. Time saved: 5–10 hours per week in a busy kitchen.
@article{how-to-optimize-commercial-kitchen-workflow-17-design-tips-that-actually-work-from-someone-whos-seen-1m-kitchens-fail,
    title   = {How to Optimize Commercial Kitchen Workflow: 17 Design Tips That Actually Work (From Someone Who’s Seen $1M Kitchens Fail)},
    author  = {Chef's icon},
    year    = {2025},
    journal = {Chef's Icon},
    url     = {https://chefsicon.com/optimizing-commercial-kitchen-workflow-design-tips/}
}