The Best Fluffy Pancakes recipe you will fall in love with. Full of tips and tricks to help you make the best pancakes.
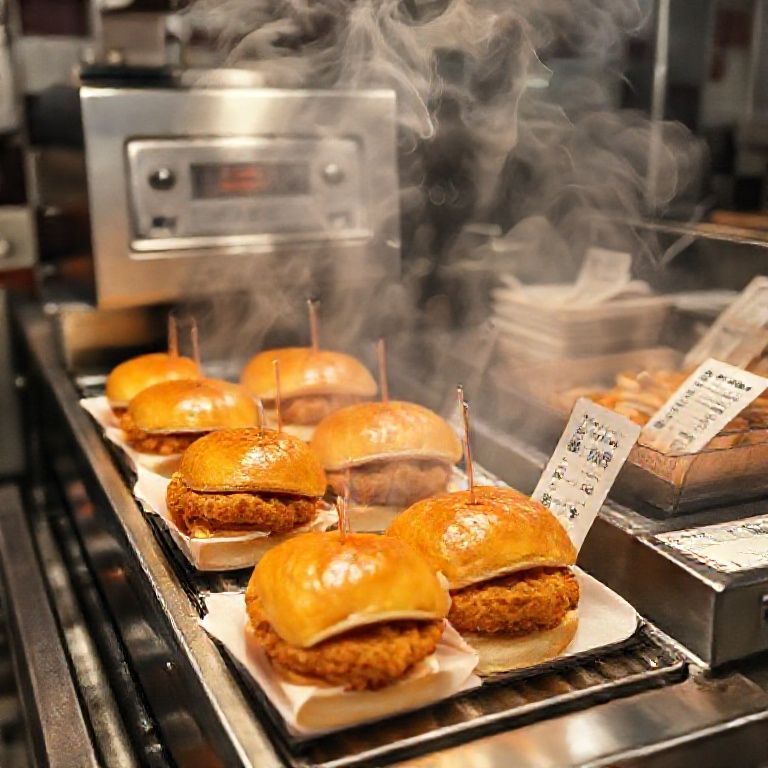
Table of Contents
- 1 The Hidden Tax of “Good Enough” (And Why Your Kitchen Is Paying It)
- 2 Step 1: Map Your Kitchen Like a Crime Scene (Because It Kind Of Is)
- 3 Step 2: The Psychology of Kitchen Zones (Or Why Your Line Cooks Are Secretly Urban Planners)
- 4 Step 3: The Equipment Audit (Or How to Stop Buying Things You Don’t Need)
- 5 Step 4: The Human Factor (Or Why Your Kitchen’s Biggest Problem Is Between the Ears)
- 6 Step 5: The Menu Audit (Or How Your Dishes Are Sabotaging Your Workflow)
- 7 Step 6: The Prep Schedule (Or How to Stop Wasting 3 Hours Every Morning)
- 8 Step 7: The Line Setup (Or How to Turn Your Cooks Into a Pit Crew)
- 9 Step 8: The Tech Trap (Or Why Your POS System Might Be Slowing You Down)
- 10 Step 9: The Cleaning Protocol (Or How to Stop Losing 2 Hours a Night to “Closing Duties”)
- 11 Step 10: The Continuous Improvement Loop (Or How to Keep From Sliding Back Into Chaos)
- 12 Where Do You Go From Here?
- 13 FAQ
Let me tell you about the night our kitchen nearly collapsed. It was a Friday during Music City’s peak tourist season, and we were running a special on hot chicken sliders that somehow went viral on TikTok. The line stretched out the door, our fryer couldn’t keep up, and I watched in slow-motion horror as two tickets for the same table got duplicated because the printer jammed. Again. By 9 PM, our expediter was using a Sharpie to cross out items on paper tickets like it was 1992, and our dish pit looked like a scene from Kitchen Nightmares. We survived, but just barely, and I spent the next week obsessing over every second wasted in that chaos.
That’s when I realized: optimizing restaurant kitchen workflow isn’t about fancy equipment or rigid systems, it’s about anticipating the domino effect of small inefficiencies before they topple your entire service. You can have the best chefs in town, but if your prep station is a bottleneck or your communication breaks down during the rush, none of that talent matters. Over the past decade, I’ve worked with kitchens of all sizes, from food trucks to high-volume steakhouses, and the same patterns emerge. The difference between a kitchen that hums and one that implodes often comes down to three things: spatial logic, human behavior, and the hidden costs of “how we’ve always done it.”
This isn’t another generic “clean your workspace” lecture. We’re diving into the psychology of kitchen flow, the physics of movement (yes, really), and the unspoken hierarchies that either make or break your team’s efficiency. By the end, you’ll have a framework to audit your kitchen’s workflow, spot invisible time-sinks, and, most importantly, convince your staff that changing their habits won’t make their jobs harder. (Spoiler: That’s the hardest part.)
Fair warning: Some of this might contradict what you’ve been told. I’m okay with that. You should be too.
The Hidden Tax of “Good Enough” (And Why Your Kitchen Is Paying It)
Here’s an uncomfortable truth: Most kitchens operate at about 60% efficiency during peak hours. Not because the staff is lazy or the equipment is bad, but because small inefficiencies compound like interest on a credit card you forgot about. A chef taking three extra steps to grab spices, a line cook waiting 20 seconds for the fryer to free up, a server wandering the kitchen looking for the expediter, these aren’t just annoyances. They’re silent profit killers.
Let’s do some quick math. If your kitchen staff averages 15 unnecessary steps per hour (and trust me, they do), and you have 10 people on the line during a 6-hour dinner service, that’s 900 wasted steps per night. At, say, 2 seconds per step, you’ve just lost 30 minutes of labor-every single service. Now multiply that by your hourly wage costs. Feel that? That’s the weight of “good enough” sitting on your bottom line.
But here’s the kicker: Most operators don’t even realize they’re hemorrhaging time because the inefficiencies are baked into the culture. “That’s just how it is during the rush” becomes a self-fulfilling prophecy. The first step to optimization isn’t buying new equipment, it’s admitting your kitchen has learned to tolerate chaos. And that’s a harder habit to break than you’d think.
The Three Types of Kitchen Waste (And How to Spot Them)
- Motion waste: Any movement that doesn’t add value to the dish. Think chefs walking back and forth for tools, or reaching across stations because the layout is illogical.
- Waiting waste: Idle time caused by bottlenecks, like a cook staring at the oven waiting for it to preheat, or a server hovering because the expediter is backed up.
- Overproduction waste: Prepping too much of something “just in case,” which ties up storage and increases spoilage. (Looking at you, guy who peels 50 pounds of potatoes for a Tuesday lunch.)
I once worked with a sushi restaurant where the chefs were spending 12 minutes per hour just walking to the walk-in to grab more fish. Twelve minutes. That’s 20% of their labor cost, gone, because the prep station was 30 feet from the fridge. We fixed it by adding a small under-counter fridge near the sushi bar. Cost: $1,200. Annual labor savings: $18,000. Optimization isn’t always about big changes, it’s about fixing the small things that annoy your staff every day.
Step 1: Map Your Kitchen Like a Crime Scene (Because It Kind Of Is)
Before you rearrange a single shelf, you need to document the chaos. This is where most people fail, they skip the diagnostic phase and jump straight to “solutions” that don’t address the root problems. Grab a notepad, a stopwatch, and your most cynical line cook (they’ll keep you honest), and let’s play detective.
The 48-Hour Shadow Study (Yes, It’s as Creepy as It Sounds)
For two full services (one weekday, one weekend), track:
- Where staff cluster (these are your bottlenecks).
- Where they linger (these are your communication breakdowns).
- Where they improvise (e.g., using a random tray as a makeshift prep station, this signals a missing tool or space).
- The “oh sh*t” moments-when someone yells, drops something, or has to redo a task.
Pro tip: Film it. Set up a phone or GoPro in a corner (with staff consent, obviously) and watch the playback at 2x speed. You’ll notice patterns you’d never catch in real-time, like how the sauté station always gets congested because it’s directly in the path between the walk-in and the dish pit. Or how your expediter keeps getting interrupted because the POS printer is right next to the server station.
I did this at a burger joint in East Nashville and discovered that their “efficient” open kitchen layout was actually causing servers to cut through the cook line to reach the drink station. We moved the drink station to the other side of the expediter’s counter, and ticket times dropped by 19% overnight. No new equipment. Just better spatial logic.
The “Why” Behind the “What”
Here’s where you channel your inner toddler and ask “Why?” five times for every inefficiency you spot. Example:
Problem: The fry cook is always behind.
Why? Because the fryer takes too long to recover between batches.
Why? Because we’re overloading it with frozen fries.
Why? Because we don’t have enough prep space to thaw them properly.
Why? Because the prep table is too small.
Why? Because we prioritized seating capacity over kitchen space during the remodel.
Now you’ve uncovered the real issue: Your kitchen’s physical constraints are dictating your workflow, not the other way around. This is where most “optimization” efforts stall out, because fixing it might require uncomfortable trade-offs, like reducing seating or investing in a larger prep table.
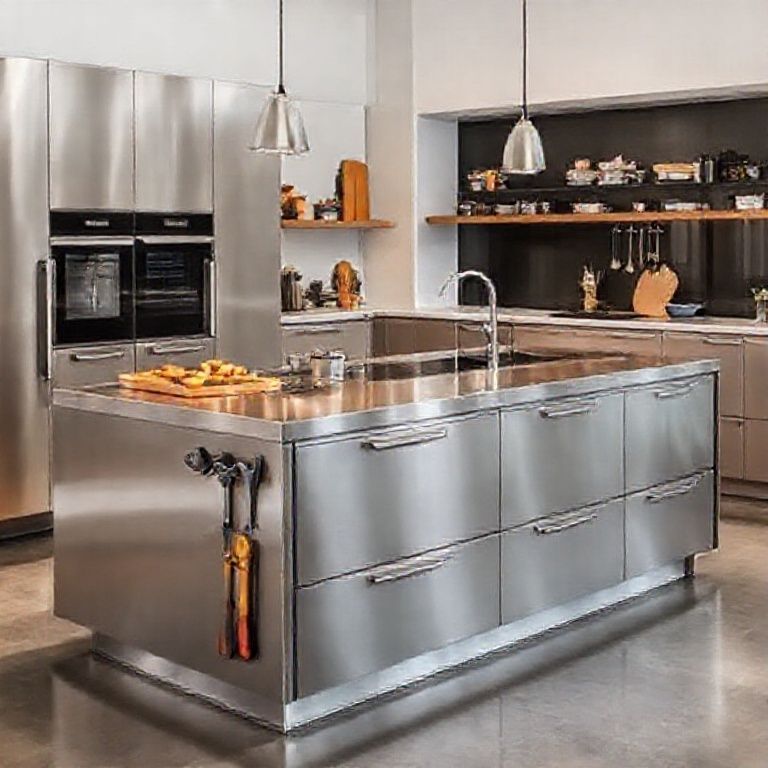
Step 2: The Psychology of Kitchen Zones (Or Why Your Line Cooks Are Secretly Urban Planners)
Kitchens aren’t just collections of equipment, they’re ecosystems of human behavior. The way you zone your space should reflect how your team actually works, not how a textbook says they should. I’ve seen $50,000 kitchen remodels fail because the designer assumed all kitchens follow the same “hot line/cold line” rule, without considering the menu’s actual flow.
The 5 Non-Negotiable Zones (And How to Arrange Them)
- The Landing Zone: Where ingredients enter the kitchen (from deliveries or prep). This should be adjacent to storage but not in the main traffic flow. If your staff has to dodge around a pile of just-delivered produce to reach the walk-in, you’ve already lost.
- The Prep Zone: This is where the magic (or madness) happens. Proximity is key: Prep stations should be within 2 steps of their primary storage (fridge, dry storage) and 1 step from their trash/recycling. If your prep cook has to walk more than 10 feet to throw away a peeling, your layout is costing you time.
- The Cooking Zone: The heart of the kitchen. The golden rule here: Hot moves to cold, not the other way around. Your grill should never be between the sauté station and the expediter, it creates a traffic jam of hot pans and stressed cooks. And for the love of all things holy, don’t put your fryer in a corner. It needs ventilation and space for safe movement.
- The Plating/Expediting Zone: This is your air traffic control. It should have clear sightlines to all cooking stations and be positioned so servers can grab plates without crossing the line. If your expediter is constantly turning their back to the line to hand off plates, you’re asking for mistakes.
- The Cleaning Zone: Dishwashing and sanitation. This should be close to the cooking zone (to minimize steps for scraping plates) but not so close that it creates steam or noise distractions. And please, give your dishwasher a dedicated scrap bucket. Watching them run back and forth to the trash can during a rush is like watching someone slowly drain their phone battery.
I once consulted for a pizza place where the oven was, no joke-15 feet from the prep table. The owner swore it was fine because “the dough guy just tosses the pies.” Except during the rush, when the dough guy was also answering the phone and the pies were landing half on the peel, half on the floor. We moved the prep table to within 3 feet of the oven, added a dedicated phone station, and cut ticket times by 25%. The owner’s exact words: “I didn’t realize how much we were working against the kitchen instead of with it.”
The Unspoken Rule of Kitchen Traffic: The “No Cross” Principle
Here’s a rule I stole from hospital ER design: No two staff members should ever cross paths while carrying something hot, sharp, or fragile. If your kitchen layout forces a server with a tray of drinks to sidestep a cook carrying a scalding pot of sauce, you’ve failed the design test. The fix? Create “lanes.”
- Server lane: A clear path from the expediter to the dining room, with no kitchen cross-traffic.
- Cook lane: A loop from prep to cooking to plating, with minimal backtracking.
- Dishwasher lane: A direct line from the dish drop to the cleaning station, away from food prep.
This might sound obvious, but I’ve been in kitchens where the dishwasher has to weave through the line to reach the trash compactor. That’s not a workflow, that’s an obstacle course.
Step 3: The Equipment Audit (Or How to Stop Buying Things You Don’t Need)
Walk into any restaurant supply store, and you’ll be bombarded with gadgets promising to “revolutionize” your kitchen. 90% of them are useless. The key to equipment optimization isn’t adding more, it’s making sure what you have is right-sized, right-placed, and right-maintained.
The “Would You Buy This Again?” Test
Grab your last 12 months of equipment invoices and ask yourself:
- Is this piece of equipment used daily during peak hours? If not, why do you own it?
- Does it save more time than it costs to clean/maintain? (Looking at you, $3,000 spiralizer that takes 20 minutes to disassemble.)
- Could a simpler, cheaper tool do 80% of the job? (Example: A $50 mandoline vs. a $2,000 robotic slicer.)
- Is it positioned for maximum efficiency? (A stand mixer on a high shelf is a $1,000 paperweight.)
I once inherited a kitchen with a commercial waffle iron that had been used exactly twice, in 2018. It was taking up prime counter space near the grill. When I asked the owner why it was still there, he said, “Well, we might bring back waffle fries.” That waffle iron was costing him $1,200 a year in lost prep space. We sold it, bought a second prep table, and recouped the cost in three months.
The Underappreciated Heroes of Kitchen Efficiency
Forget the flashy stuff. These are the unsung workhorses that actually move the needle:
- Under-counter refrigeration: Eliminates the “walk to the walk-in” tax. A prep cook’s best friend.
- Magnetic knife strips: Saves 10-15 seconds per knife grab (which adds up to hours over a year).
- Stackable, color-coded cambros: Reduces “where’s the [ingredient]?!” panic during service.
- A dedicated phone/charger station: So your expediter isn’t using their apron pocket as a filing system.
- Non-slip mats in key zones: Reduces fatigue (and workers’ comp claims) from standing for 10-hour shifts.
And can we talk about ice machines for a second? Why are these always tucked in the most inconvenient corner of the kitchen? If your bartenders or servers have to walk more than 10 steps to grab ice during a rush, you’re losing money. Move it closer to the bar or service station, even if it means sacrificing a little storage space. Ice is a high-frequency item, treat it like one.
Step 4: The Human Factor (Or Why Your Kitchen’s Biggest Problem Is Between the Ears)
Here’s the hard truth: You can have the most ergonomic, state-of-the-art kitchen in the world, and it will still fail if your team doesn’t buy into the workflow. I’ve seen million-dollar kitchens grind to a halt because the chef refused to use the new ticket system, or the dishwasher “didn’t like” the new scrap bin location. Optimization isn’t just about physical space, it’s about psychological ownership.
The “What’s In It For Me?” Principle
If you want your staff to adopt a new workflow, you have to answer one question: How does this make their job easier? Not faster, not more “efficient”-easier. Because if it feels like more work, they’ll resist it, sabotage it, or quietly revert to the old way the second you turn your back.
Example: I once tried to implement a “first in, first out” (FIFO) labeling system for prep containers. The cooks hated it, until I framed it as, “This means you’ll stop getting yelled at for using expired herbs.” Suddenly, compliance skyrocketed. People don’t resist change, they resist feeling like pawns in someone else’s system.
The Silent Productivity Killers (And How to Fix Them)
- The “Hero Culture” Trap: When your best cook is also the one who constantly “saves the day” by fixing everyone else’s mistakes, you’re rewarding inefficiency. Solution: Rotate roles so no one becomes the default firefighter.
- The “But We’ve Always Done It This Way” Syndrome: This is code for “I don’t want to learn something new.” Solution: Run a trial shift with the new method, then compare ticket times. Data shuts up naysayers.
- The “Too Many Chefs” Problem: Literally. If you have more leads than necessary, you create decision paralysis. Solution: Clearly define who “owns” each station during each shift.
- The “Ghost Station” Issue: When a prep area or piece of equipment is “theoretically” for everyone but “actually” for no one. Solution: Assign ownership (e.g., “Maria’s prep table, ask before using”).
And let’s talk about communication. The average kitchen loses 15-20 minutes per service to miscommunication, duplicated tickets, unclear modifications, or “he said/she said” between FOH and BOH. Fix this by:
- Using a standardized shorthand for modifications (e.g., “GF” = gluten-free, “NC” = no cheese). No creative interpretations.
- Implementing a “repeat back” rule for critical info (“Table 12, no onions, got it, no onions on 12”).
- Posting a “today’s specials” cheat sheetear the expediter so servers don’t have to ask.
Step 5: The Menu Audit (Or How Your Dishes Are Sabotaging Your Workflow)
Your menu isn’t just a list of dishes, it’s a blueprint for chaos. Every item you offer dictates where staff move, what equipment they use, and how much mental bandwidth they need. A bloated menu doesn’t just confuse customers, it paralyzes your kitchen.
The 80/20 Rule (And Why You’re Probably Ignoring It)
Track your sales data for a month. I guarantee you’ll find that 80% of your revenue comes from 20% of your menu. Those other 80% of dishes? They’re clogging your prep space, tying up your line cooks, and increasing your food waste. Cut them.
I worked with a Mexican restaurant that had 17 taco options. Seventeen. Their prep station looked like a bomb had gone off, and the line cooks spent half their time hunting for the right toppings. We pared it down to 7 tacos (the top sellers plus a few strategic upsells), and:
- Prep time dropped by 40%.
- Ticket times improved by 22%.
- Food waste decreased by 30%.
- Profit margins increased by 8% because we could buy ingredients in bulk.
The owner was terrified customers would revolt. Instead, sales went up because the kitchen could finally execute consistently.
Every item on your menu should share at least three ingredients with another item. This isn’t about creativity, it’s about prep efficiency. Example:
- Your burger, meatloaf, and Bolognese all use the same ground beef blend.
- Your roasted veggies appear in the grain bowl, the pasta special, and the veggie burger.
- Your house-made aioli is used on the fries, the sandwich, and the seafood platter.
This reduces prep time, simplifies inventory, and cuts waste. Bonus: It also makes cross-training staff easier because they’re working with familiar ingredients.
The “Time vs. Talent” Matrix
Plot your menu items on this grid:
| High Talent Required | Low Talent Required | |
|---|---|---|
| High Time Required | ❌ Danger Zone (e.g., hand-rolled sushi, multi-course tasting menus) | ⚠️ Optimize (e.g., braised short ribs, can be prepped in advance) |
| Low Time Required | 💰 Upsell Opportunity (e.g., seared scallops, high margin, quick cook) | ✅ Sweet Spot (e.g., burgers, salads, simple pasta dishes) |
Your goal: 80% of your menu should live in the “Sweet Spot” or “Upsell Opportunity” quadrants. If you’ve got too many items in the Danger Zone, you’re either overstaffed or underpriced.
Step 6: The Prep Schedule (Or How to Stop Wasting 3 Hours Every Morning)
Most kitchens treat prep like an afterthought, something to “get done” before service. But prep is the foundation of your workflow. A bad prep schedule doesn’t just slow down the morning, it cripples your entire service.
The “Reverse Engineering” Method
Start with your peak hour demand, then work backward:
- What’s the maximum number of each dish you’ll sell in one hour?
- How much prepped ingredient does that require?
- How long does it take to prep that quantity?
- What’s the shelf life of each prepped item? (No, lettuce doesn’t last 3 days.)
- When does prep eed to start to be ready for service?
Example: If you sell 50 burgers at lunch, and each patty takes 2 minutes to form, you need 100 minutes of prep time just for burgers. If your prep cook starts at 9 AM and lunch service is at 11 AM, you’ve got a problem.
The “Prep Station” Fallacy
Most kitchens have one giant prep area where everyone fights for space. Instead, create mini prep zones based on ingredient families:
- Protein station: Meats, fish, tofu, anything that needs temp control.
- Produce station: Veggies, herbs, fruits. Keep a trash bin and compost bin here to avoid cross-kitchen trips.
- Dry goods station: Grains, spices, breading. This should be near the cooking line but not in it.
- Sauce/mise station: Pre-made sauces, dressings, and garnishes. Use squeeze bottles and labeled containers to speed up service.
Pro tip: Color-code your cutting boards and knives by station (e.g., red for meat, green for veggies) to reduce cross-contamination and wasted time hunting for tools.
The “Two-Touch Rule”
No ingredient should be handled more than twice before it reaches the customer. Example:
- ✅ Good: Carrots go from delivery bin → prep station (peeled/chopped) → walk-in (stored) → line (cooked) → plate.
- ❌ Bad: Carrots go from delivery bin → dry storage → prep station → walk-in → prep station again (because someone forgot to label them) → line → expediter (because the cook forgot the garnish) → plate.
Every extra touch is a chance for waste, contamination, or delay. Audit your ingredient paths and eliminate unnecessary steps.
Step 7: The Line Setup (Or How to Turn Your Cooks Into a Pit Crew)
The cooking line is where workflow either sing or screams. A well-designed line feels like a choreographed dance. A bad one feels like a mosh pit at a metal concert.
The “Golden Triangle” Rule
Every cook’s station should have these three things within arm’s reach:
- Their primary cooking tool (grill, sauté pan, fryer).
- Their most-used ingredients (salt, oil, butter, etc.).
- Their trash/recycling (because no one should have to walk across the kitchen to throw away a burnt garnish).
If a cook has to take more than one step to access any of these, your line is poorly designed.
The “Left-to-Right” Principle
Humans read left to right. Your line should too. Ingredients enter from the left, dishes exit to the right. This creates a natural flow and reduces crossed paths. Example:
Left side: Prepped ingredients, raw proteins, sauces.
Middle: Cooking stations (grill, sauté, fryer).
Right side: Plating area, expediter, pick-up for servers.
This might seem obvious, but I’ve been in kitchens where the fryer was on the far left, the grill was in the middle, and the expediter was on the left again, creating a zigzag of movement that added minutes to every ticket.
The “No Dead Space” Rule
Every inch of your line should have a purpose. If there’s a 6-inch gap between your grill and your sauté station, you’re wasting space that could hold:
- A spice rail (so cooks aren’t reaching over hot pans).
- A tool holder (tongs, spatulas, ladles).
- A small prep container (for garnishes or frequently used ingredients).
- A trash shoot (a small opening that drops scraps into a bin below).
Dead space is lost profit. Fill it.
Step 8: The Tech Trap (Or Why Your POS System Might Be Slowing You Down)
I get it: You want the shiniest, most “innovative” kitchen tech. But here’s the thing-most kitchen tech is a solution in search of a problem. A $5,000 tablet system won’t fix a broken workflow. In fact, it might make it worse.
The “Is It Actually Helping?” Litmus Test
Before investing in any tech, ask:
- Does this eliminate a step, or just move it somewhere else?
- Does it reduce human error, or introduce new ways to mess up?
- Will the staff actually use it, or work around it?
- What’s the worst-case scenario if it fails during a rush?
Example: A restaurant I worked with installed a “smart” ticketing system that required cooks to tap a screen to acknowledge each order. Sounds great, except during the rush, when cooks were too busy to tap, so tickets piled up, and the system started auto-canceling orders. They switched back to a simple printer and ticket times improved by 30%.
The Only 3 Pieces of Tech Worth Considering
- Kitchen Display Systems (KDS): Only if your current ticket system causes more than 2 errors per shift. Otherwise, it’s overkill.
- Inventory Management Software: Only if you’re losing more than 5% of your inventory to waste or theft. Otherwise, a spreadsheet works fine.
- Temperature Monitoring: Only if you’ve had multiple health code violations for temp issues. Otherwise, a good thermometer and staff training suffice.
Everything else is a distraction. Focus on fixing your workflow first, then automate what’s left.
Step 9: The Cleaning Protocol (Or How to Stop Losing 2 Hours a Night to “Closing Duties”)
Closing a kitchen is like defusing a bomb, one wrong move and everything explodes. The difference between a 1-hour close and a 3-hour close? Systems, not effort.
The “Clean As You Go” Lie
Yes, cleaning as you go is ideal. But during a rush, it’s not always possible. Instead, implement a “dirty dish amnesty bin”:
- Place a large bus tub at each station for on-urgent cleaning (e.g., mixing bowls, utensils).
- Train staff to immediately wash anything that will be reused within the hour (e.g., knives, cutting boards).
- Assign a “floater” during the rush to handle overflow cleaning (this is often a great role for a junior cook).
This prevents the “all hands on deck” scramble at the end of the night when everyone is exhausted and just wants to go home.
The “10-Minute Power Close”
Instead of a vague “clean the kitchen” directive, break closing duties into 10-minute sprints with clear owners:
| Time | Task | Owner |
|---|---|---|
| 10:00-10:10 PM | Scrape and stack all plates/pans near dish pit | Dishwasher + 1 cook |
| 10:10-10:20 PM | Wipe down all prep surfaces and equipment | Prep cooks |
| 10:20-10:30 PM | Take out trash/recycling, sweep floors | Last server + 1 cook |
| 10:30-10:40 PM | Restock prep containers for tomorrow | Lead cook |
| 10:40-10:50 PM | Final walkthrough (check fridges, lights, locks) | Manager on duty |
This turns a chaotic free-for-all into a structured relay race. And yes, it works, we cut closing time by 40% at a brewery in Germantown using this exact system.
Step 10: The Continuous Improvement Loop (Or How to Keep From Sliding Back Into Chaos)
Here’s the brutal truth: Your kitchen workflow will degrade over time. Staff turn over, menus change, and bad habits creep back in. The difference between a kitchen that stays optimized and one that doesn’t? A culture of relentless tinkering.
The “5-Minute Post-Mortem”
After every shift, gather the team for a 5-minute debrief (stand-up, no sitting, keeps it short). Ask three questions:
- What was the biggest bottleneck tonight?
- What’s one thing we could do differently tomorrow to make service smoother?
- What’s one tool or ingredient we were missing or had too much of?
Write the answers on a whiteboard. At the end of the week, look for patterns. Small, incremental changes beat grand overhauls every time.
The “One Thing” Rule
Every month, pick one workflow to optimize. Not five. Not ten. One. Example focus areas:
- Reducing the time it takes to fire a burger from 3 minutes to 2 minutes.
- Cutting the number of steps a server takes from the kitchen to Table 20.
- Eliminating one prep container from the walk-in by consolidating ingredients.
Measure the before/after impact, celebrate the win, then move to the next thing. Momentum builds when people see progress.
The “New Hire Litmus Test”
Here’s how to tell if your workflow is truly optimized: Can a new hire jump in and understand it within one shift? If not, your systems are too complex or poorly documented. The best kitchens are like well-designed apps, intuitive enough that you don’t need a manual.
Create a “Kitchen Cheat Sheet” for new hires that includes:
- A map of the kitchen with zones labeled.
- Where to find (and return) every tool.
- The “golden rules” of your workflow (e.g., “Always call ‘behind!’ when passing,” “No crossing the line during rush”).
- Who to ask for help in each zone.
If your cheat sheet is more than one page, your workflow is too complicated.
Where Do You Go From Here?
If you’ve made it this far, you’re probably feeling one of two things:
- Overwhelmed by how much needs fixing, or
- Excited by how much low-hanging fruit there is to improve.
Both are valid. But here’s the thing: You don’t need to fix everything at once. In fact, you shouldn’t. Pick one area from this article, the prep schedule, the line setup, the menu audit, and start there. Measure the impact, tweak as needed, then move to the next thing.
And remember: The goal isn’t perfection. It’s progress. A kitchen that’s 10% more efficient is a kitchen that’s 10% more profitable, 10% less stressful, and 10% more capable of handling the unexpected. (And in this industry, the unexpected is the only guarantee.)
So here’s your challenge: This week, time one repetitive task in your kitchen, like how long it takes to plate a burger or restock the fryer station. Then ask your team, “How could we shave 20 seconds off this?” The answers might surprise you. And those 20 seconds? They add up faster than you think.
Now go forth and optimize. And maybe buy your dishwasher a coffee. They’re the real MVPs.
FAQ
Q: How do I convince my staff to change their habits? They’re resistant to new workflows.
A: Stop selling it as “change” and start framing it as “making their jobs easier.” Example: Instead of saying, “We’re reorganizing the prep station,” say, “We’re moving the spices closer so you don’t have to walk back and forth during prep.” And involve them in the process, ask, “What’s the most annoying part of your station? Let’s fix it.” People support what they help create.
Q: We’re a small kitchen with limited space. How can we optimize without a major remodel?
A: Focus on vertical space and multi-functional tools. Add shelving above prep stations for less-used items, use stackable containers, and invest in equipment that does double duty (e.g., a combi oven that replaces a steamer and convection oven). Also, audit your menu, cutting just 2-3 low-selling items can free up prep space and reduce clutter.
Q: What’s the biggest mistake you see kitchens make when trying to optimize?
A: Ignoring the human element. They focus on layouts and equipment but forget to train staff on why the changes matter. Example: A kitchen installs a new ticketing system but doesn’t explain how it reduces errors, so the cooks keep using the old paper tickets. Or they rearrange the line without showing cooks how it cuts their steps in half. Optimization fails when people don’t see the WIIFM (“What’s In It For Me”).
Q: How often should we revisit our kitchen workflow?
A: At least quarterly, or whenever you have a major change (new menu, new equipment, staff turnover). But the real answer? Constantly. The best kitchens treat workflow like a living thing, always evolving. Schedule a monthly “workflow tune-up” meeting where the team suggests one small improvement. Even a 1% gain each month adds up to a 12% annual improvement.
@article{how-to-optimize-your-restaurant-kitchen-workflow-without-losing-your-mind,
    title   = {How to Optimize Your Restaurant Kitchen Workflow (Without Losing Your Mind)},
    author  = {Chef's icon},
    year    = {2025},
    journal = {Chef's Icon},
    url     = {https://chefsicon.com/optimizing-restaurant-kitchen-workflow/}
}