The Best Fluffy Pancakes recipe you will fall in love with. Full of tips and tricks to help you make the best pancakes.
Table of Contents
- 1 The Psychology of Kitchen Space (Why Your Brain Lies to You About What You Need)
- 2 1. The 80/20 Rule: How to Identify What Actually Deserves Space
- 3 2. Vertical Space: The Most Underutilized Resource in Your Kitchen
- 4 3. The Rolling Cart Revolution (Why Every Kitchen Needs at Least Three)
- 5 4. The Art of the Fold: Collapsible and Nesting Equipment
- 6 5. The Walk-In Fridge Tetris Masterclass
- 7 6. The “One In, One Out” Rule for Equipment
- 8 7. The Hidden Power of Multi-Functional Equipment
- 9 8. The “Invisible” Storage Solutions You’re Not Using
- 10 9. The Flow Diagram: How to Design for Movement, Not Just Space
- 11 10. The “Five-Minute Reset” Rule (How to Keep Clutter from Creeping Back)
- 12 11. The “What If We Didn’t?” Exercise (Questioning Sacred Cows)
- 13 12. The “Borrowed Space” Trick (When Your Kitchen Just Isn’t Big Enough)
- 14 13. The “Invisible” Equipment Upgrades That Save Space
- 15 14. The “Shadowing” Technique (How to Find Wasted Motion)
- 16 15. The “If I Had to Start Over” Thought Experiment
- 17 16. The “One Weird Trick” That Actually Works (Wall-Mounted Everything)
- 18 17. The “Last Resort” Hacks (When All Else Fails)
- 19 Final Thought: The Space You Save Might Be Your Sanity
- 20 FAQ: Your Burning Questions About Commercial Kitchen Space
Let me paint you a picture: It’s 7:30 PM on a Friday, your dinner rush is in full swing, and your kitchen staff is doing that awkward dance where three people try to occupy the same two square feet of space. The expediter is yelling over the fryer, the sauté cook just dropped a tray of garnishes because there’s literally nowhere to set it down, and you, you’re standing there wondering why, in a room full of expensive equipment, there’s never enough actual space to work. Sound familiar?
I’ve lost count of how many commercial kitchens I’ve walked into where the layout made zero sense. Like that one place in San Francisco where they’d crammed a $12,000 combi oven into a corner so tight you needed a shoehorn to load trays. Or the Nashville BBQ joint where the walk-in fridge door swung directly into the prep station. (Pro tip: If your staff starts referring to your kitchen as “the gauntlet,” you’ve got a problem.)
Here’s the thing: Commercial kitchen space isn’t just about square footage, it’s about how you use it. And after years of watching chefs and owners bang their heads against poorly designed layouts, I’ve picked up a few tricks. Some are obvious (once someone points them out), some are counterintuitive, and a few might make you question why no one told you this sooner. By the end of this, you’ll know how to squeeze 20% more efficiency out of your kitchen without adding a single square foot. Maybe more. Let’s dig in.
Oh, and before we start, yes, I know every kitchen is different. What works for a high-volume pizzeria won’t fly in a fine-dining setup. So I’ll call out where certain tips apply best. Deal?
-
The Psychology of Kitchen Space (Why Your Brain Lies to You About What You Need)
First, we need to talk about the illusion of space. Most kitchen designers (and chefs) make the same mistake: they assume that “more space” means “better workflow.” But here’s the dirty secret: A bigger kitchen often just means more distance between stations, which slows everything down. What you actually need is strategic density-the right tools and storage in the right places, so your team isn’t wasting steps or playing Tetris with ingredients.
I once worked with a restaurant group that had two locations with identical menus. One kitchen was 1,200 sq ft, the other was 800 sq ft. Guess which one had faster ticket times? The smaller one. Why? Because the chef had mapped workflows to proximity. In the bigger kitchen, the sauté station was 15 feet from the walk-in. In the smaller one? Six feet. That’s 9 fewer steps per trip, multiplied by 50 trips during service. You do the math.
Here’s another mind-bender: Your kitchen isn’t just a place to cook, it’s a system for managing time. Every extra second spent walking, reaching, or searching for tools is time not spent cooking. So when we talk about “saving space,” what we’re really talking about is saving motion. Keep that in mind as we go through these tips.
One last thing before we get tactical: Clutter is the enemy of space. And I don’t just mean physical clutter, I mean visual clutter. A kitchen with too many things in the line of sight creates cognitive overload for your staff. They spend mental energy filtering out the noise instead of focusing on the food. We’ll circle back to this later when we talk about storage.
-
1. The 80/20 Rule: How to Identify What Actually Deserves Space
You’ve probably heard of the Pareto Principle (the 80/20 rule), but have you applied it to your kitchen? Here’s how it works: 80% of your output comes from 20% of your tools/ingredients. The trick is figuring out which 20% that is, and then giving those things prime real estate.
Start by tracking usage for a week. Which stations get the most traffic? Which ingredients are used in the highest volume of dishes? Which tools are grabbed most often? For example: – If your fryer is used for 70% of your appetizers, it should be center-stage, not tucked in a corner. – If your most-used spices are buried in a cabinet behind the prep station, you’re wasting seconds every time someone reaches for them. – If your chef’s knife block is on the other side of the kitchen from the prep table, you’ve got a problem.
I had a client in Chicago who swore he needed a dedicated pasta station. But when we audited his menu, only 3 out of 24 dishes required fresh pasta. Meanwhile, his sauté station was constantly backed up because it was too small. We repurposed the pasta station into a second sauté setup, and his ticket times dropped by 18%. Moral of the story: Let data dictate your layout, not assumptions.
Pro tip: Use a heat map approach. Sketch your kitchen and mark high-traffic zones in red, medium in yellow, and low in green. Then ask: Are my most-used tools in the red zones? If not, rearrange.
-
2. Vertical Space: The Most Underutilized Resource in Your Kitchen
Chefs are obsessed with counter space (and rightfully so), but vertical space is where the real magic happens. Most commercial kitchens waste 30-40% of their potential storage by ignoring everything above eye level or below waist level.
Let’s break it down by zone:
Above the Line: The Goldmine You’re Ignoring
- Pegboards: Not just for tools, use them for hanging baskets of frequently used ingredients (garlic, shallots, herbs). Label everything with chalk or magnetic tags.
- Magnetic strips: For knives, metal tools, or even spice tins. Free up drawer space instantly.
- Stackable wire shelves: Add an extra shelf above your prep table for ingredients or tools. Just make sure it’s not so high that shorter staff can’t reach it.
- Ceiling-mounted racks: For pots, pans, or even drying herbs. Restaurants in Hong Kong and Tokyo do this all the time, it’s a game-changer for small spaces.
Below the Line: The Forgotten Frontier
Most kitchens have dead space under counters or shelves. Fix that with: – Rolling carts (more on these later) that fit under tables when not in use. – Pull-out drawers in lower cabinets (way easier to access than digging through a deep shelf). – Under-shelf baskets for storing bulk ingredients like onions or potatoes.
Warning: Don’t go overboard with vertical storage. If your staff has to climb or stretch for things during service, you’ve defeated the purpose. The goal is efficiency, not a circus act.
-
3. The Rolling Cart Revolution (Why Every Kitchen Needs at Least Three)
If I could mandate one piece of equipment for every commercial kitchen, it would be high-quality rolling carts. They’re the Swiss Army knife of space-saving: mobile storage, extra prep space, and a way to reconfiguring your layout on the fly.
Here’s how to use them like a pro:
- Prep carts: Load one with all the mise en place for a station (chopped veggies, sauces, garnishes). Roll it to the line during service, then wheel it back to the prep area afterward.
- Equipment carts: Need an extra burner or a second fryer during peak hours? Roll it in. Some carts even come with built-in power sources.
- Storage carts: Use them for bulk ingredients (flour, rice, canned goods) that don’t need refrigeration. Park them along walls or in corners when not in use.
- Cleaning carts: Stock one with spray bottles, towels, and sanitizer. Roll it to wherever the mess is instead of running back and forth to the sink.
I visited a kitchen in New Orleans where the chef used rolling carts as modular stations. During brunch, they’d roll out a cart with waffle irons and toppings. For dinner service, they’d swap it for a cart with sauté pans and proteins. Same square footage, totally different functionality. Brilliant.
Pro tip: Invest in carts with locking wheels and stainless steel construction. The cheap ones wobble and rust, and you’ll end up replacing them every year.
-
4. The Art of the Fold: Collapsible and Nesting Equipment
Not all kitchen tools need to be rigid. Collapsible and nesting equipment can free up shocking amounts of space when you’re not using them. Here’s what to look for:
Prep Tables and Cutting Boards
– Fold-down prep tables: Mount them to the wall and fold them up when not in use. Great for small prep kitchens or food trucks. – Stackable cutting boards: Get ones with different colors for different proteins (red for meat, green for veg, etc.) to save on cross-contamination and space. – Over-the-sink cutting boards: Turns your sink into extra prep space when you’re not washing dishes.
Cookware and Bakeware
– Nesting mixing bowls: They take up 1/3 the space of regular bowls. – Stackable steam table pans: If you’re doing buffet service or batch cooking, these are a must. – Collapsible colanders and strainers: They flatten to about an inch thick when not in use.
Storage Containers
– Square or rectangular containers: They pack tighter than round ones in fridges and on shelves. – Modular container systems: Like Cambro’s camwear line, where lids and bases stack uniformly. – Vacuum-seal bags: For bulk ingredients that don’t need to be in rigid containers (think grains, nuts, dried fruits).
I’ll admit, some of these feel like “home kitchen” solutions, but I’ve seen them work in commercial settings too. A sushi restaurant in LA used nesting bowls to store rice, fish, and garnishes in their tiny prep area. A bakery in Brooklyn swapped their clunky dough bins for collapsible ones and gained an extra 10 sq ft of floor space. Sometimes the simplest fixes are the most effective.
-
5. The Walk-In Fridge Tetris Masterclass
Walk-ins are where space goes to die. I’ve seen $30,000 worth of ingredients crammed into a fridge so poorly organized that half of it was unusable. Here’s how to fix that:
Zone Your Fridge Like a Grocery Store
Grocery stores don’t just toss everything in randomly, they organize by usage frequency and temperature needs. Steal their approach: – Top shelves (easiest to reach): Daily-use ingredients (dairy, eggs, herbs, prepped veggies). – Middle shelves: Less frequent but still important (backstock proteins, sauces, cheeses). – Bottom shelves: Bulk or long-term storage (large cuts of meat, bulk dairy, backup ingredients). – Door: Condiments, drinks, and anything that can handle slight temp fluctuations.
Use the Right Containers
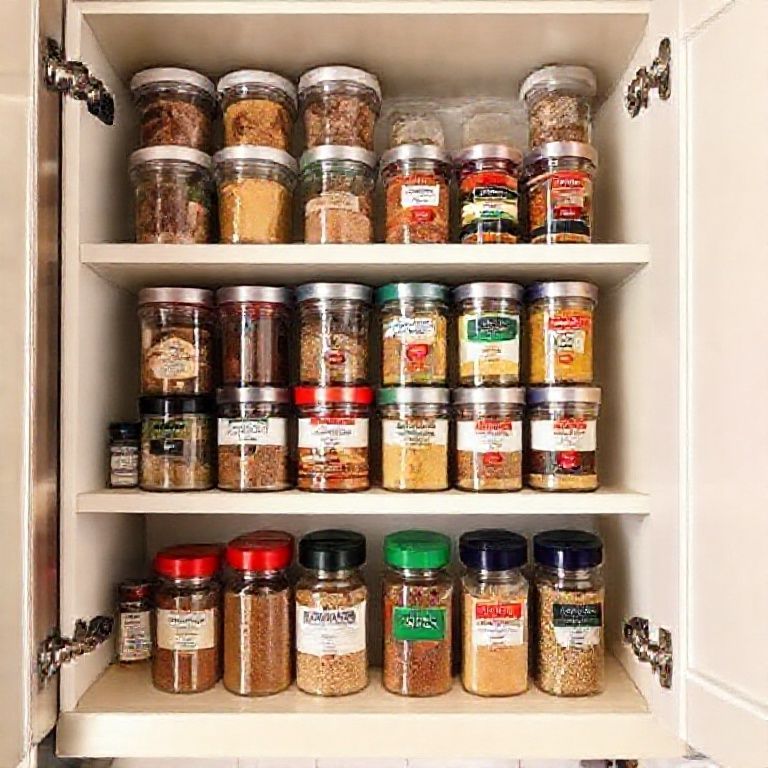
– Clear, labeled bins: No more mystery bags of “something white and creamy.” – Stackable pans with lids: For liquids or delicate ingredients. – Hanging baskets: For small items like herbs, citrus, or garnishes. – Magnetic labels: Write the item and date with a dry-erase marker. No more wasted food from forgotten leftovers.
Maximize Airflow
If your fridge is packed too tightly, air can’t circulate, and you get hot spots where food spoils faster. Leave at least 2 inches between items and the back wall, and don’t block vents. Yes, this means you might need to do a weekly “fridge edit” to toss expired items. Deal with it.
Bonus hack: Use a fridge thermometer in multiple zones to check for temp variations. I’ve found fridges where one corner was 10°F warmer than the rest, no wonder the chef was throwing out so much product.
-
6. The “One In, One Out” Rule for Equipment
Here’s a hard truth: Most commercial kitchens are hoarders. They’ve got gadgets they haven’t used in years, duplicate tools “just in case,” and equipment that made sense for a menu that changed three iterations ago.
Implement a “one in, one out” policy: For every new piece of equipment or tool you bring in, one has to go. This forces you to: 1. Audit what you actually use (see the 80/20 rule above). 2. Avoid duplicate tools (do you reallyeed three different mandolines?). 3. Keep your space lean and functional.
I worked with a restaurant in Denver that had a pasta extruder</em collecting dust in the corner. Turns out, they’d bought it for a single seasonal dish two years prior and never used it again. It was taking up 4 sq ft of prime real estate. We sold it, used the cash to buy a better immersion blender (which they used daily), and suddenly their prep station felt twice as big.
Ask yourself: – When was the last time we used this? – Could we achieve the same result with something else we already own? – Is this taking up more space than it’s worth?
If you can’t answer “yes” to at least two of these, it’s time to let it go.
-
7. The Hidden Power of Multi-Functional Equipment
In a small kitchen, every piece of equipment should earn its keep by doing at least two jobs. Here’s what I mean:
Combi Ovens
These are the ultimate space-savers. A good combi can: – Steam – Roast – Bake – Proof dough – Hold food at safe temps – Even smoke (with the right accessories) That’s six appliances in one. Yes, they’re expensive, but if you’re tight on space, they’re worth it.
Immersion Circulators
Not just for sous vide. Use them to: – Hold sauces at precise temps – Poach proteins – Infuse oils or spirits – Even make yogurt or custards One tool, endless applications.
Food Processors with Multiple Attachments
Swap out blades for: – Slicing/shredding – Dough mixing – Pureeing – Even spiralizing (if you’re into that) No need for separate mandolines, mixers, or blenders.
Induction Burners
Portable, powerful, and they can turn any flat surface into a cooking station. Need an extra burner during peak hours? Plug one in. Done.
I get it, some chefs are purists. “But Sammy, a combi oven can’t replace my deck oven for pizza!” Fine. But if you’re working in a 500 sq ft kitchen, you don’t have the luxury of single-purpose tools. Compromise is the name of the game.
-
8. The “Invisible” Storage Solutions You’re Not Using
Some of the best storage isn’t storage at all, it’s repurposing existing space in ways you haven’t considered. Here are a few of my favorites:
Under-utilized Walls
– Magnetic knife strips (free up drawer space) – Hooks for utensils, towels, or aprons – Chalkboard or whiteboard panels for daily specials or prep lists (no more lost papers)
Inside Cabinet Doors
– Over-the-door organizers for spices, small tools, or cleaning supplies – Magnetic sheets to hold metal tools or knife strips – Pocket organizers for gloves, thermometers, or pens
Ceiling Space
– Hanging pot racks (if your ceiling height allows) – Retractable drying racks for utensils or linens – Bungee cords to hang lightweight items like strainers or whisks
Floor Space
– Flat storage bins that slide under shelves or tables – Low-profile dollies to move heavy items (like bags of flour) without lifting – Stackable step stools (doubles as extra storage when not in use)
I once saw a kitchen in Portland where the chef had mounted a bike rack to the wall to hold sheet pans. Genius. It kept them vertical, easy to grab, and off the counters. Sometimes the best solutions come from outside the culinary world.
-
9. The Flow Diagram: How to Design for Movement, Not Just Space
Here’s where most kitchen designs fail: They focus on static space instead of dynamic flow. A kitchen isn’t a storage unit, it’s a dance floor. If your staff is constantly crisscrossing, backtracking, or playing chicken around the fryer, your layout is working against you.
Grab a piece of paper and map out your kitchen’s three key flows: 1. Ingredient flow: Where do items enter the kitchen, and how do they move to prep/stations? 2. Cooking flow: How do dishes progress from prep to cook to plate? 3. Cleaning flow: Where do dirty dishes go, and how do clean ones return?
Now ask: – Are these flows crossing each other? (Bad.) – Are there bottlenecks where multiple people need to be at once? (Worse.) – Can you rearrange stations to create a loop instead of a zigzag?
Example: In a well-designed kitchen, the prep station feeds directly into the cook line, which feeds into the expediter, which feeds into the dish pit. No backtracking. In a poorly designed kitchen, the prep station is on the opposite side of the room from the cook line, so every time a cook needs more mise, someone has to run across the kitchen. That’s wasted time and energy.
Pro tip: Watch your staff during service. Where are they congregating? Where are they getting stuck? Those are your problem areas. Fix the flow, and the space will feel bigger.
-
10. The “Five-Minute Reset” Rule (How to Keep Clutter from Creeping Back)
Here’s the thing about space-saving: It’s not a one-time fix. If you don’t have systems to maintain order, your kitchen will descend back into chaos within a week. That’s where the five-minute reset comes in.
At the end of every shift (or at least once a day), assign someone to: 1. Clear counters: Nothing should live on prep surfaces overnight unless it’s actively being used. 2. Restock stations: Refill salt, pepper, oil, and other high-use items so the next shift isn’t scrambling. 3. Consolidate ingredients: Combine half-empty containers, toss expired items, and reorganize the walk-in. 4. Wipe down shelves and storage areas: Crumbs and spills attract pests and make everything feel dirtier than it is. 5. Check the “clutter zones”: That one corner where everyone dumps random stuff? Yeah, clean it out.
This isn’t just about cleanliness, it’s about mental bandwidth. When your staff starts their shift with a clean, organized space, they’re less stressed and more efficient. And when everything has a designated home, people are less likely to leave stuff lying around.
I know, I know-“But Sammy, we’re too busy for this!” Trust me, the 5 minutes you spend resetting will save you 30 minutes of frustration during service. Discipline equals freedom.
-
11. The “What If We Didn’t?” Exercise (Questioning Sacred Cows)
Sometimes the best space-saving solutions come from asking: “What if we didn’t [assumption]?” Here are a few sacred cows worth questioning:
What if we didn’t have a dedicated prep station?
In some kitchens, prep happens in the same area where cooking happens. If your prep needs are minimal (e.g., a sandwich shop or food truck), could you eliminate a separate prep table and just use the line?
What if we didn’t store dry goods in the kitchen?
Could you move bulk dry storage (flour, rice, cans) to a nearby closet or basement? Some restaurants use a satellite pantry outside the main kitchen to free up space for cooking.
What if we didn’t have a traditional dish pit?
Some high-volume kitchens use under-counter dishwashers or conveyor-style washing stations to save space. Others outsource dishwashing entirely (if local laws allow).
What if we didn’t have a walk-in fridge?
For very small operations, reach-in fridges or under-counter refrigeration might be enough. I’ve seen food trucks and ghost kitchens thrive with just a few high-quality reach-ins.
This exercise isn’t about eliminating essentials, it’s about challenging assumptions. Maybe you doeed all those things. But maybe you don’t. The only way to know is to ask.
-
12. The “Borrowed Space” Trick (When Your Kitchen Just Isn’t Big Enough)
Sometimes, no matter how well you organize, you just don’t have enough square footage. That’s when you get creative with borrowed space-using areas outside the kitchen for storage or prep.
Options to consider: – Hallway or backroom storage: For dry goods, extra equipment, or bulk ingredients. – Outdoor storage: Weatherproof cabinets or sheds for non-perishables (check local codes first). – Shared prep space: If you’re in a food hall or shared kitchen, can you negotiate shared prep time with another vendor? – Mobile prep: Some restaurants use food trucks or trailers as overflow prep space during peak times.
I worked with a ramen shop in Austin that had a tiny kitchen but a large patio. They installed a weatherproof prep station outside (with proper permits) for chopping veggies and prepping garnishes. It added 50 sq ft of functional space for a fraction of the cost of expanding the kitchen.
Warning: If you go this route, make sure you’re compliant with health codes. No one wants a shutdown because you stored flour next to the dumpster.
-
13. The “Invisible” Equipment Upgrades That Save Space
Not all space-saving solutions involve rearranging what you have. Sometimes, upgrading to smarter equipment can free up room without changing your layout.
Slimmer Refrigeration
– Under-counter fridges (instead of reach-ins) can free up wall space. – Draw-style fridges (like in lab settings) take up less depth than swing-door models. – Glass-door fridges let you see contents at a glance, reducing the need to open doors and block aisles.
Compact Cooking Equipment
– Induction ranges are flatter and more energy-efficient than gas. – Countertop convection ovens can replace full-size models if you’re not baking in bulk. – Stackable steamers save vertical space while adding capacity.
Space-Efficient Sinks
– Corner sinks fit into unused nooks. – Low-profile sinks (shallow basins) work for handwashing or quick rinses without taking up depth. – Combination sink tables (sink + prep surface in one) kill two birds with one stone.
I’m not saying you should replace all your equipment, just be aware that newer models are often designed with space efficiency in mind. If you’re due for an upgrade, prioritize compact, multi-functional pieces.
-
14. The “Shadowing” Technique (How to Find Wasted Motion)
Here’s a trick I borrowed from lean manufacturing: Shadow a staff member for 10 minutes during service. Follow their every move and ask: – How many steps do they take between stations? – How often do they have to reach, bend, or stretch for tools? – Where do they pause or hesitate (a sign of confusion or obstruction)?
You’ll quickly spot wasted motion-the invisible time-sucks that add up over a shift. For example: – If your sauté cook has to walk to the other side of the kitchen to grab oil, that’s 10 seconds wasted per trip. – If your prep cook is constantly moving bowls out of the way to access the sink, that’s a layout problem. – If your dishwasher has to dodge around a cart to get to the trash bin, that’s a flow issue.
Fix these, and your kitchen will feel bigger and run faster. Small tweaks, big impact.
-
15. The “If I Had to Start Over” Thought Experiment
Here’s a brutal but effective exercise: Pretend your kitchen burned down tomorrow. How would you rebuild it with what you know now?
Ask yourself: – What equipment would I ot replace? (Because we never used it.) – What layout mistakes would I avoid? – What workflows would I design differently? – What “nice-to-haves” would I skip in favor of essentials?
This isn’t about doom and gloom, it’s about clarity. When you strip away the “sunk cost” of your current setup, you can see what really matters. I’ve done this with clients, and it’s amazing how many “must-haves” turn out to be optional when you’re forced to prioritize.
Try it. You might surprise yourself.
-
16. The “One Weird Trick” That Actually Works (Wall-Mounted Everything)
If you take nothing else from this article, remember this: If it can hang on a wall, it should.
Examples: – Spice racks (magnetic or wall-mounted) – Utensil holders (no more cluttered drawers) – Paper towel holders (free up counter space) – Tool hooks (tongs, ladles, whisks) – Knife strips (safer and more accessible than blocks) – Bulk ingredient dispensers (flour, sugar, rice, no more bags taking up shelf space)
Why does this work? Because horizontal surfaces attract clutter. The more you can move to vertical storage, the cleaner your counters stay. And clean counters = more usable space.
I visited a kitchen in Seattle where the chef had mounted everything-even the microwave was on a wall bracket. It looked a little extreme at first, but during service, the place ran like a well-oiled machine. No one was digging through drawers or moving stuff out of the way. Everything was visible and within reach.
-
17. The “Last Resort” Hacks (When All Else Fails)
If you’ve tried everything and still need more space, here are a few emergency tactics:
- Rent off-site storage: For bulk non-perishables or seasonal equipment (like a peach pitter you only use in summer).
- Go digital with recipes: Replace binders and printed sheets with tablets mounted on walls. Saves shelf space and reduces paper clutter.
- Use the ceiling: Install a pulley system for rarely used items (like a second mixer bowl or backup cutting boards).
- Share with neighbors: If you’re in a shared building, see if you can borrow space from a neighboring business during off-hours.
- Go mobile: Some cities allow commissary kitchens or shared prep spaces for overflow work.
Are these ideal? No. But when you’re desperate, they work.
-
Final Thought: The Space You Save Might Be Your Sanity
Look, I get it. Reorganizing a kitchen is a pain. It takes time, money, and a lot of trial and error. But here’s the thing: A well-organized kitchen isn’t just more efficient, it’s less stressful. When your staff isn’t fighting the layout, they can focus on the food. When everything has a place, service runs smoother. And when you’re not wasting space, you’re not wasting money.
Start small. Pick one or two ideas from this list and try them for a week. See what works, what doesn’t, and iterate. Maybe it’s adding a rolling cart. Maybe it’s reorganizing your walk-in. Maybe it’s just decluttering one station. Progress, not perfection.
And if all else fails? Remember: Some of the best restaurants in the world operate out of kitchens smaller than your walk-in. Space isn’t the limiting factor, creativity is.
Now go forth and reclaim your kitchen. And if you figure out a trick I didn’t mention, let me know, I’m always looking for new hacks.
-
FAQ: Your Burning Questions About Commercial Kitchen Space
Q: We have a tiny kitchen but high volume. What’s the one thing we should prioritize for space-saving?
A: Workflow over storage. Focus on arranging stations so your team isn’t crisscrossing. Even in a small space, if the flow is logical (prep → cook → plate → expedite), you’ll save more time than any storage hack could. Start by mapping out the path of a single dish from start to finish. Where are the bottlenecks? Fix those first.
Q: Our walk-in fridge is a disaster. How do we reorganize it without losing a whole shift?
A: Do it in phases. Day 1: Toss expired items and consolidate duplicates. Day 2: Group like items together (dairy, proteins, veg, etc.). Day 3: Label everything and assign zones (e.g., “top shelf = daily use”). Day 4: Train staff on the new system. Don’t try to do it all at once-you’ll overwhelm yourself and disrupt service. And for the love of all things holy, take before and after photos so your team sees the difference.
Q: We’re a bakery with limited space. How do we store bulk flour/sugar without taking up half the kitchen?
A: Three words: Vacuum-seal bags. Transfer flour, sugar, and other dry goods into large vacuum bags (like the ones used for sous vide) and store them flat under shelves or in thin bins. You can also use stackable, airtight containers that fit snugly against walls. For yeast and other temperature-sensitive items, a small under-counter fridge dedicated to dry storage can work wonders. And if you’re really tight on space, consider a wall-mounted flour dispenser (like the ones in pizzerias).
Q: Our dish pit is a bottleneck. How can we make it more efficient without expanding?
A: First, separate scraping from washing. Have a dedicated scrape station (with a trash bin and compost bucket) before dishes hit the sink. This prevents clogs and speeds up washing. Second, use a three-compartment sink with vertical dividers to maximize space. Third, install a shelf above the sink for clean dishes to air-dry (freeing up counter space). Finally, if you’re hand-washing, train your staff to wash in batches (all plates, then all bowls, then utensils) to minimize handling. And if you’re still overwhelmed, look into under-counter dishwashers-they’re pricier but save a ton of space.
@article{17-space-saving-secrets-for-commercial-kitchens-that-actually-work-from-someone-whos-seen-too-many-chaotic-kitchens,
    title   = {17 Space-Saving Secrets for Commercial Kitchens That Actually Work (From Someone Who’s Seen Too Many Chaotic Kitchens)},
    author  = {Chef's icon},
    year    = {2025},
    journal = {Chef's Icon},
    url     = {https://chefsicon.com/space-saving-tips-for-commercial-kitchens/}
}