The Best Fluffy Pancakes recipe you will fall in love with. Full of tips and tricks to help you make the best pancakes.
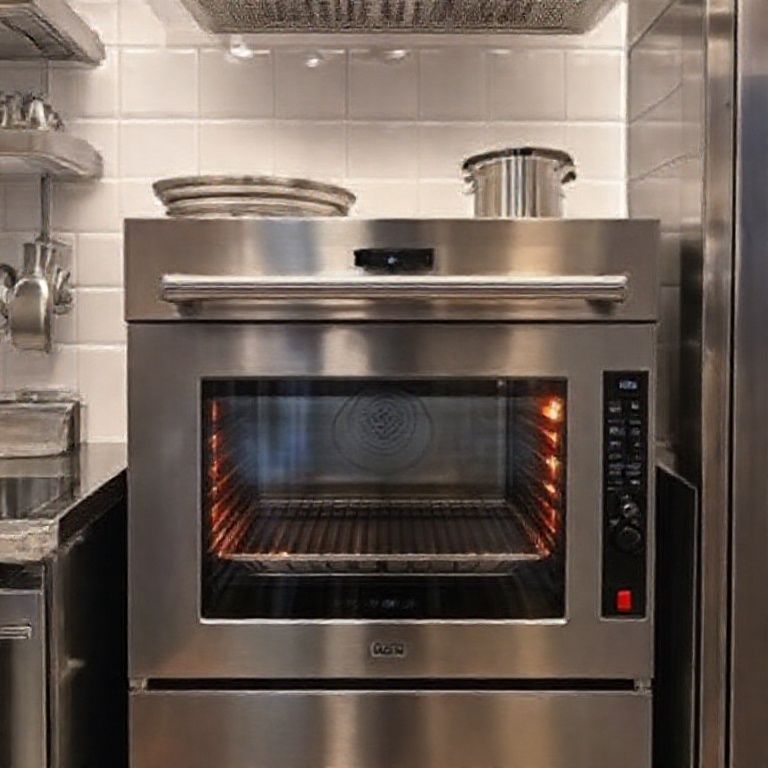
Table of Contents
- 1 Top Equipment Choices for Small Commercial Kitchens: What Actually Works (And What Doesn’t)
- 2 The Core Philosophy: Less Is More (But Not Too Little)
- 3 Tier 1: The Non-Negotiables (aka “Don’t Even Think About Skipping These”)
- 4 Tier 2: The Smart Upgrades (Where to Spend for Maximum Impact)
- 5 Tier 3: The “Nice-to-Haves” (But Only If You’ve Nailed the Basics)
- 6 The Hidden Costs No One Talks About (Until It’s Too Late)
- 7 The Small Kitchen Survival Guide: Workflows That Actually Work
- 8 The Mistakes I See Over and Over (And How to Avoid Them)
- 9 Final Thoughts: The Small Kitchen Mindset
- 10 FAQ: Your Burning Questions Answered
Top Equipment Choices for Small Commercial Kitchens: What Actually Works (And What Doesn’t)
Let me start by admitting something: I’ve made so many mistakes when it comes to outfitting small commercial kitchens. Like the time I convinced a client to splurge on a high-end combi oven for their 800 sq. ft. bistro, only to realize six months later that their staff couldn’t even operate half its functions. Or when I overlooked the importance of under-counter refrigeration in a food truck build, leading to a meltdown (literally) during a summer festival rush. These aren’t just hypotheticals; they’re the kind of lessons that stick with you after you’ve had to explain to a tearful chef why their $12,000 investment is now a very expensive paperweight.
Here’s the thing about small commercial kitchens: they’re not just tiny versions of big ones. The constraints, space, budget, staffing, utility capacity, force you to make choices that big operations never have to consider. You can’t just throw money at the problem and call it a day. Every inch of counter space, every amp of electrical draw, every second saved during service matters in ways that are hard to appreciate until you’ve watched a line cook try to plate dishes in a space the size of a walk-in closet.
So this isn’t just another list of “best commercial kitchen equipment.” This is a battle-tested guide to what actually works in real-world small kitchens, the stuff that survives the chaos of a Friday night rush, the equipment that doesn’t require an engineering degree to maintain, and the tools that won’t leave you crying when the health inspector shows up. We’ll cover the non-negotiables (because yes, some things are worth the splurge), the smart compromises (where you can save without sabotaging yourself), and the hidden game-changers (the stuff no one tells you about until you’re knee-deep in regret).
By the end, you’ll know exactly what to prioritize, what to skip, and, maybe most importantly, how to avoid the kind of mistakes that turn a tight space into a daily nightmare. Let’s dig in.
The Core Philosophy: Less Is More (But Not Too Little)
Before we talk specifics, we need to address the biggest mental hurdle when equipping a small commercial kitchen: the temptation to cram in as much as possible. I get it. You’re working with 500 square feet, and every time you look at a menu item, you think, “But what if we want to offer that someday?” So you start justifying a planetary mixer “for future expansion” or a second fryer “just in case.”
Here’s the hard truth: Every extra piece of equipment is a trade-off. More gear means less workspace, higher utility costs, more cleaning, and more points of failure. In a small kitchen, flexibility beats specialization almost every time. That’s why my golden rule is:
If a piece of equipment doesn’t serve at least three purposes or get used daily, it doesn’t belong in a small kitchen.
Does this mean you’ll have to make sacrifices? Absolutely. But here’s the silver lining: constraints breed creativity. Some of the most efficient kitchens I’ve seen operate with half the equipment of their peers because the team has mastered the art of multi-functional tools and smart workflows. We’ll talk about how to make that happen.
Now, let’s break this down by category. I’m organizing this by priority tier-starting with the stuff you cannot skimp on, moving to the smart upgrades, and ending with the “nice-to-haves” that might not be worth it until you’re established.
Tier 1: The Non-Negotiables (aka “Don’t Even Think About Skipping These”)
1. Commercial Refrigeration: The Silent Workhorse
If you take one thing away from this article, let it be this: Your refrigeration is the backbone of your kitchen. I’ve seen more small restaurants fail because of poor refrigeration choices than for almost any other reason. Why? Because in a tiny space, every degree of temperature fluctuation and every cubic inch of wasted storage space compounds exponentially.
Here’s what you need to know:
- Under-counter refrigerators are your best friend. They maximize vertical space and keep everything within arm’s reach. Look for models with self-closing doors (trust me, your staff won’t remember to shut them) and digital temperature displays (so you’re not guessing if your chicken is at 41°F or 45°F).
- Reach-in coolers should be 27” deep or less unless you have a unusually large space. Deeper units eat into your workflow and create “dead zones” where food gets forgotten.
- Blast chillers aren’t just for high-end kitchens. If you’re doing any volume of meal prep or batch cooking, a countertop blast chiller (like the Turbo Air TBC-24) can be a game-changer for food safety and shelf life.
- Avoid residential-grade anything. That “great deal” on a Home Depot fridge will cost you in energy bills, repairs, and health code violations. Commercial units are built for constant opening/closing and high ambient temperatures-something residential models can’t handle.
Pro tip: If you’re really tight on space, consider a combo fridge/freezer unit with a split door design. They’re not ideal for high-volume operations, but for a small café or food truck, they can save precious inches.
I’m torn on whether to recommend glass-door merchandisers here. They’re fantastic for grab-and-go items and can double as display cases, but they also let in more warm air every time the door opens. If you go this route, opt for low-E glass and LED lighting to minimize heat gain.
2. The Right Range for Your Menu
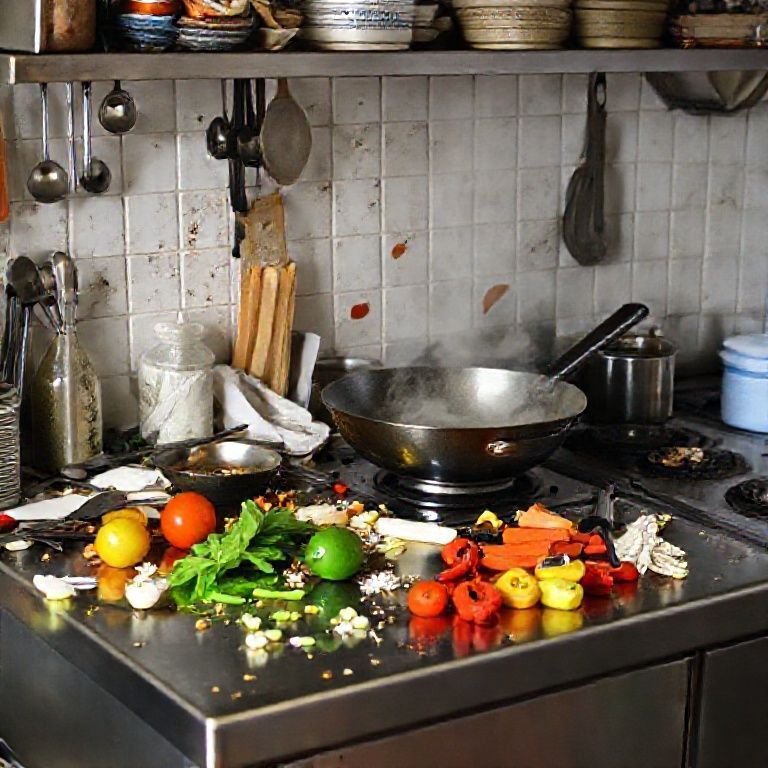
This is where I see the most overkill. Chefs love the idea of a six-burner range with a griddle and a salamander, but in a small kitchen, that’s often a colossal waste of space and money. Here’s how to choose wisely:
- For most small restaurants: A 36” range with 4 burners and a 12” griddle is the sweet spot. It gives you enough flexibility for sautéing, boiling, and grilling without overwhelming your space. Brands like Vulcan and Southbend make reliable models that last.
- For bakeries or pizza spots: Skip the range entirely and go for a deck oven (like the Baker’s Pride Y-600) or a conveyor oven if you’re doing high-volume pizza. These take up less floor space and are more energy-efficient for their purpose.
- For food trucks or ghost kitchens: A countertop induction burner (like the True Induction TI-36) can replace a full range if you’re mostly doing prep ahead of time. They’re faster to heat, easier to clean, and don’t require a hood in some jurisdictions (check local codes!).
- Avoid: Residential-style ranges (they won’t hold up), and oversized griddles unless you’re doing a dedicated burger or breakfast spot. A 24” griddle is usually plenty for most operations.
One thing I’ve changed my mind on over the years: gas vs. electric. Used to be that gas was the only serious option, but with the improvements in induction technology and the rising cost of gas line installations, electric (especially induction) is becoming a viable alternative for small kitchens. Just make sure your electrical panel can handle it, more on that later.
3. Ventilation: The Invisible Hero
Here’s where things get tricky. Ventilation is often the most overlooked, and most critical, system in a small kitchen. A poorly designed hood can turn your space into a sauna, trigger fire code violations, or even shut you down. And in a small kitchen, every cubic foot of air matters.
Key considerations:
- Type I vs. Type II hoods: If you’re cooking with grease (frying, grilling, sautéing), you must have a Type I hood with a fire suppression system. No exceptions. Type II hoods are for steam and heat (like over a dishwasher or coffee machine).
- Sizing: Your hood should extend 6 inches beyond the cooking surface on all sides. So if you have a 36” range, your hood should be at least 48” wide. Yes, this eats into space, but it’s non-negotiable for safety and code compliance.
- Makeup air: This is where small kitchens often fail. Every cubic foot of air your hood exhausts must be replaced, or you’ll create negative pressure that makes doors hard to open and HVAC systems work overtime. Solutions include direct makeup air units or passive makeup air via gaps under doors (check local codes).
- Ductless hoods: These are tempting for tiny spaces, but they’re only approved for very low-heat, low-grease applications (like a coffee shop with a toaster). Don’t risk it unless you’ve confirmed with your local health department.
I’ll be honest, I used to think I could cut corners here. Then I watched a client get shut down for three days because their hood wasn’t properly balanced, and the health inspector measured CO2 levels that were off the charts. Don’t skimp on ventilation. If you’re unsure, hire a hood specialist to design your system. It’s worth every penny.
4. The Workhorse: Commercial Dishwasher
In a small kitchen, your dishwasher isn’t just a dishwasher, it’s a bottleneck manager. A slow or inefficient unit can bring your entire operation to a halt during peak hours. Here’s what to look for:
- Under-counter vs. door-type: For most small kitchens, an under-counter model (like the Hobart LXE) is the way to go. They’re compact, efficient, and can handle 20-30 racks per hour, plenty for a 50-seat restaurant. Door-type washers are overkill unless you’re doing banquets or high-volume catering.
- Energy and water efficiency: Look for ENERGY STAR-certified models. They might cost more upfront, but the savings on utilities add up fast. Some newer models use as little as 0.6 gallons per rack, which is a game-changer for water bills.
- Heat recovery: If you’re in a cold climate, a dishwasher with heat recovery can reduce your hot water costs by up to 30%. It captures heat from the wash cycle to preheat incoming cold water.
- Avoid: Residential dishwashers (they won’t last), and anything without a built-in booster heater (you need water at least 180°F to sanitize properly).
Pro tip: If space is really tight, consider a combo dishwasher/glasswasher. They’re not as fast as dedicated units, but they can save you 12-18 inches of precious real estate.
Tier 2: The Smart Upgrades (Where to Spend for Maximum Impact)
5. The Combi Oven: A Love Letter to Small Kitchens
I’ll admit it: I was a combi oven skeptic for years. They seemed like overkill for small operations, too expensive, too complex. Then I worked with a chef who ran an entire 40-seat restaurant out of a single combi oven and a two-burner induction cooktop. I’ve been a convert ever since.
Why? Because a combi oven (like the Rational SelfCookingCenter or the more affordable Blodgett Combi) replaces a convection oven, steamer, smoker, and dehydrator in one footprint. For a small kitchen, that’s gold. Here’s how to decide if it’s right for you:
- Yes, get one if:
- Your menu includes roasted meats, braised dishes, steamed veggies, or baked goods (so, most menus).
- You’re doing batch cooking or meal prep (combis hold temperature and humidity perfectly for hours).
- You want to reduce labor costs (they’re basically set-and-forget).
- Maybe skip it if:
- You’re running a burger joint or fry-heavy menu (you’ll still need a griddle and fryer).
- Your budget is extremely tight (though used/refurbished units can be a great deal).
The learning curve is real, combi ovens have more settings than a spaceship, but once your team gets the hang of it, they’ll wonder how they ever lived without it. And in a small kitchen, reducing the number of appliances is a huge win.
6. The Underrated MVP: Immersion Circulator
Stick with me here. I know sous vide might sound like a fancy technique reserved for high-end restaurants, but in a small kitchen, an immersion circulator (like the Anova Precision Cooker) is one of the most space-efficient, labor-saving tools you can buy.
Why?
- Consistency: No more overcooked chicken or unevenly cooked steaks. Sous vide lets you hold proteins at perfect temps for hours, which is a lifesaver during a rush.
- Space savings: You can cook in stackable polycarbonate containers or even vacuum-sealed bags in a cambro, freeing up burner space.
- Labor savings: Prep proteins ahead of time, then finish them to order with a quick sear. This is especially valuable if you’re short-staffed.
- Versatility: Use it for infusions, yogurt, custards, and even proofing bread in a pinch.
I’ve seen food trucks run entire menus off a single induction burner and an immersion circulator. For $200–$400, it’s one of the best bang-for-your-buck upgrades in a small kitchen.
7. The Space-Saving Prep Station
Prep space is the first casualty in a small kitchen. You start with grand plans for a dedicated prep area, and suddenly it’s overtaken by a stack of sheet pans and a tower of cambros. That’s why a well-designed prep station is worth its weight in gold.
Here’s what to look for:
- Modular cutting boards: Systems like John Boos’ stainless steel tables with drop-in cutting boards let you switch between prep tasks without cross-contamination. Plus, you can pop the boards in the dishwasher.
- Under-shelf storage: Look for prep tables with shelves or drawers underneath to store tools, containers, and smallwares. Every inch counts.
- Refrigerated prep tables: If you’re doing a lot of cold prep (salads, sandwiches, sushi), a refrigerated prep table (like the True TPP-48) keeps ingredients at safe temps while you work. No more shuffling back and forth to the walk-in.
- Mobile prep carts: If your layout is tight, a rolling prep cart can serve as an extra workspace during prep and then be tucked away during service.
Pro tip: Color-code your cutting boards (red for meat, green for veg, etc.) to streamline prep and pass health inspections with flying colors.
8. The Fryer Dilemma: To Fry or Not to Fry?
Fryers are a double-edged sword in small kitchens. They’re essential for certain menus (I’m looking at you, wings and fries), but they’re also space hogs, grease magnets, and fire hazards. Here’s how to decide:
- If you must have a fryer:
- Go for a countertop electric fryer (like the Vulcan CF14) if you’re doing low-volume frying. They’re easier to clean and don’t require a dedicated gas line.
- For higher volume, a floor-model gas fryer is more efficient, but make sure you have proper ventilation (see: hood requirements above).
- Consider an air fryer for small batches, some newer commercial models (like the Henny Penny Evolution Elite) can handle light frying with less oil and mess.
- If you can avoid a fryer:
- Use an oven-fry technique (toss food in oil, bake at high heat). It’s not the same, but it works for items like sweet potato fries or chicken tenders.
- Offer baked or grilled alternatives to fried items. Sometimes, the menu can adapt to the space.
One thing I’ve learned the hard way: Fryers require more maintenance than almost any other piece of equipment. If you’re not willing to commit to daily filtering, weekly oil changes, and deep cleaning, don’t get one. A neglected fryer is a fire hazard and a health code violation waiting to happen.
Tier 3: The “Nice-to-Haves” (But Only If You’ve Nailed the Basics)
9. The Espresso Machine Conundrum
If you’re running a café or a restaurant that serves coffee, an espresso machine can be a great revenue driver, but it’s also a space and utility hog. Here’s how to approach it:
- For low-volume coffee service: A semi-automatic machine (like the Nuova Simonelli Appia II) is a good middle ground. It’s compact, reliable, and doesn’t require a full barista setup.
- For high-volume or specialty coffee: You’ll need a dual-boiler machine (like the La Marzocco Linea Mini), but be prepared for the water line requirements, drainage, and counter space it demands.
- Alternative: If space is tight, consider a high-end batch brewer (like the Fetco CBS-2131) for pour-over quality without the espresso machine footprint.
Pro tip: If you’re adding coffee service to an existing restaurant, run the numbers first. Coffee stations require dedicated water lines, drainage, and often a separate grinder. It’s not just about the machine, it’s about the entire workflow.
10. The Ice Machine: More Complicated Than You Think
Ice machines are one of those things no one thinks about until they’re broken, and then suddenly, it’s all anyone can think about. In a small kitchen, you need to be strategic about your ice setup:
- Under-counter models: These are ideal for small spaces. Look for air-cooled units (like the Manitowoc UY-0300A) that don’t require a remote condenser.
- Capacity: Calculate 1.5–2 lbs of ice per seat per day for a restaurant. For a 50-seat place, that’s 75–100 lbs/day. Don’t skimp, running out of ice during service is a nightmare.
- Water filtration: Non-negotiable. Hard water will destroy your ice machine in months. Install a dedicated filter system and change the cartridges religiously.
- Backup plan: Always have a bag of ice in the freezer for emergencies. Trust me.
One thing to watch out for: Ice machines need proper airflow. If you tuck one into a tight corner without ventilation, it’ll overheat and shut down. Follow the manufacturer’s clearance requirements to the letter.
The Hidden Costs No One Talks About (Until It’s Too Late)
Alright, let’s get real for a minute. When you’re budgeting for a small commercial kitchen, the sticker price of equipment is just the tip of the iceberg. Here are the hidden costs that have burned me (and my clients) in the past:
1. Utility Upgrades: The Silent Budget Killer
You can have the perfect layout and the best equipment, but if your electrical panel, gas lines, or plumbing can’t handle it, you’re sunk. Here’s what to watch for:
- Electrical: Most small kitchens need at least 200-amp service, but if you’re adding a combi oven, multiple refrigeration units, or an espresso machine, you might need 400 amps. An electrical upgrade can cost $5,000–$15,000-and that’s before you even plug anything in.
- Gas lines: If you’re switching from electric to gas (or adding gas equipment), you may need to upgrade your gas meter or run new lines. This can add $3,000–$10,000 to your budget.
- Plumbing: Grease interceptors, floor drains, and dedicated water lines for ice machines or coffee equipment can add $2,000–$8,000 depending on your space.
Pro tip: Hire an engineer to do a load calculation before you buy a single piece of equipment. It’s worth the $500–$1,000 fee to avoid a $10,000 surprise.
2. Permits and Inspections: The Paperwork Nightmare
Every city has different rules, but here are some common permit costs that catch people off guard:
- Hood permits: $500–$2,000 (and that’s after you’ve installed the hood).
- Health department fees: $200–$1,000 for plan reviews and inspections.
- Fire suppression system: If you have a Type I hood, you’ll need a fire suppression system (like Ansul or Pyro-Chem). Installation runs $3,000–$8,000.
- ADA compliance: If your kitchen serves a public space, you may need ADA-compliant sinks, floor space, and equipment heights. Retrofitting can be expensive.
I once had a client who didn’t realize their city required a separate handwashing sink within 10 feet of every prep station. They had to replumb the entire kitchen two weeks before opening. Don’t be that person.
3. Maintenance and Repairs: The Gift That Keeps on Giving
Commercial kitchen equipment is built to last, but it’s not indestructible. Here’s what you should budget for annually:
- Refrigeration: $500–$1,500/year for coil cleaning, gasket replacement, and compressor checks.
- Hood cleaning: $300–$800 every 3–6 months (required by fire code in most areas).
- Fryer maintenance: $200–$500/year for oil disposal, filter changes, and burner cleaning.
- Preventative maintenance contracts: $1,000–$3,000/year for a service to inspect all equipment. It’s cheaper than emergency repairs.
Pro tip: Train your staff on basic maintenance. Show them how to clean condenser coils, check door gaskets, and descale coffee machines. A little prevention goes a long way.
The Small Kitchen Survival Guide: Workflows That Actually Work
Equipment is only half the battle. The other half is how you arrange and use it. In a small kitchen, workflow is everything. Here’s how to set yourself up for success:
1. The Golden Triangle Rule
In residential kitchens, designers talk about the “work triangle” (sink, stove, fridge). In a commercial kitchen, it’s more like a golden rectangle, and it looks like this:
- Prep station (where ingredients are prepped and plated).
- Cooking station (range, oven, fryer).
- Cleaning station (dishwasher, sinks, trash).
- Storage (fridge, dry storage, smallwares).
The goal is to minimize steps between these zones. In a small kitchen, you want to be able to turn around and reach the next station without taking more than two steps. Here’s how to apply this:
- Place your prep station next to the cooking line so ingredients can flow directly into pans.
- Keep your dishwasher within 10 feet of the cooking line to minimize plate-stacking chaos.
- Store dry goods above or below prep stations to avoid cross-kitchen trips.
I once worked in a kitchen where the dishwasher was 30 feet from the line. During a rush, we spent more time running dishes back and forth than actually cooking. Don’t do this to yourself.
2. Vertical Space: Your Secret Weapon
In a small kitchen, floor space is limited, but vertical space is often underutilized. Here’s how to maximize it:
- Wall-mounted shelves: Use stainless steel shelving above prep stations for smallwares, spices, and tools. Just keep them at least 18” away from heat sources to avoid fire hazards.
- PEG boards: Install a PEG board wall for hanging utensils, ladles, and whisks. It keeps them organized and within reach.
- Stackable cambros: Use clear, stackable cambros for ingredient storage. Label them and stack them by station (e.g., all prep ingredients in one stack, all line ingredients in another).
- Overhead pot racks: If you have high ceilings, an overhead pot rack can free up cabinet space. Just make sure it’s secured properly-falling pots are no joke.
Pro tip: Use the space above your walk-in cooler. Many small kitchens waste the 12–18 inches of space between the top of the cooler and the ceiling. Add a shelf for less frequently used items like backup smallwares or bulk dry goods.
3. The One-In, One-Out Rule
Clutter is the enemy of a small kitchen. Implement a strict “one-in, one-out” policy for equipment and tools:
- Before buying a new gadget, get rid of something else.
- If a tool hasn’t been used in 30 days, donate it or sell it.
- Keep a “maybe box” for items you’re unsure about. If you don’t reach for something in the box within a month, it goes.
This sounds simple, but it’s amazing how quickly small kitchens accumulate junk. I’ve seen kitchens with three different types of mandolines because no one could find the one they needed in the clutter. Don’t let this happen to you.
The Mistakes I See Over and Over (And How to Avoid Them)
After years of consulting on small kitchen builds, I’ve noticed the same mistakes crop up again and again. Here’s your cheat sheet to avoid disaster:
1. Overestimating Your Space
The mistake: Drawing up a layout on paper and thinking, “Yeah, that’ll fit!” only to realize on install day that you forgot to account for door swings, clearance for fire codes, and actual human bodies moving around.
How to avoid it:
- Use blue painter’s tape to mark equipment footprints on the floor before buying anything. Walk through the space to test workflows.
- Leave at least 36” of clearance between stations for staff to move. 42” is better if you can swing it.
- Remember that doors need to open 90 degrees (or more, per fire code). If a fridge door can’t open fully because it hits a prep table, you’ve failed.
2. Underestimating Your Power Needs
The mistake: Plugging in a new combi oven and blowing a fuse because your 20-amp circuit can’t handle the load.
How to avoid it:
- Hire an electrician to do a load calculation before purchasing equipment.
- Spread high-draw equipment across multiple circuits. Don’t put your fridge, dishwasher, and oven on the same circuit.
- Consider phasing your equipment purchases if your electrical panel can’t handle everything at once.
3. Ignoring the Health Department Until It’s Too Late
The mistake: Assuming that “close enough” is good enough when it comes to health code requirements, then getting hit with a $5,000 replumbing bill because your three-compartment sink is 2 inches too small.
How to avoid it:
- Get a pre-inspection from your local health department before finalizing your layout. Many offer this service for free or a small fee.
- Know the exact requirements for your area. For example, some cities require a dedicated mop sink, while others don’t.
- Document everything. Keep receipts, permits, and inspection reports in a binder. If an inspector questions something, you want proof that it was approved.
4. Sacrificing Ergonomics for Space
The mistake: Cramming in so much equipment that your staff is bending, reaching, and twisting all day, leading to injuries and turnover.
How to avoid it:
- Prioritize counter heights that match your staff. Standard is 36” for prep tables, but adjust if your team is taller or shorter.
- Avoid placing heavy equipment (like mixers) on high shelves. If it’s not at waist height, it’s a strain risk.
- Invest in anti-fatigue mats for stations where staff stand for long periods (like the dishwasher or prep area).
Final Thoughts: The Small Kitchen Mindset
Here’s the truth: Small commercial kitchens aren’t just scaled-down versions of big ones. They’re a different beast entirely, with their own rules, challenges, and opportunities. The key to success isn’t just picking the right equipment, it’s adopting the right mindset.
That mindset starts with embracing constraints. Instead of fighting the limited space, ask: *How can I make this work for me?* Maybe that means batch-cooking in a combi oven to free up burner space. Maybe it’s using stackable cambros to maximize vertical storage. Or maybe it’s training your team to clean as they go so the kitchen doesn’t descend into chaos by the end of service.
It also means being ruthless about priorities. In a small kitchen, you can’t do everything, so focus on what you do best. If fried foods aren’t your specialty, skip the fryer. If you’re not baking from scratch, don’t waste space on a sheeter. Double down on your strengths and outsource the rest.
Finally, remember that a small kitchen can be an advantage. Less space means lower overhead, faster communication between staff, and a tighter, more efficient operation. Some of the best meals I’ve ever had came out of kitchens no bigger than a walk-in closet, run by chefs who turned limitations into creativity.
So as you’re planning your space, ask yourself: *What’s the simplest, most efficient way to achieve my goals?* Not *What’s the most impressive setup I can cram in here?* Because at the end of the day, a well-run small kitchen isn’t about having everything, it’s about having exactly what you need, exactly where you need it.
Now, go forth and build something amazing. And for the love of all that’s holy, measure your door swings.
FAQ: Your Burning Questions Answered
Q: I have a tiny kitchen (under 500 sq. ft.). What’s the one piece of equipment I should splurge on?
A: Hands down, a combi oven. It replaces a convection oven, steamer, and in some cases, even a smoker. For a small space, the versatility and space savings are unmatched. If you can’t swing a combi, invest in a high-quality range with a powerful oven-it’ll be your workhorse.
Q: How do I know if my electrical panel can handle my equipment?
A: You don’t, at least, not without help. Hire an electrician to do a load calculation before you buy anything. They’ll look at your panel’s capacity (usually measured in amps) and the draw of each piece of equipment. As a rough guide, most small commercial kitchens need at least 200-amp service, but if you’re running a combi oven, multiple refrigeration units, and an espresso machine, you might need 400 amps. Don’t guess, this is one area where cutting corners can literally burn your kitchen down.
Q: Can I use residential equipment to save money?
A: No. Just… no. I know it’s tempting, especially when you see a “commercial-style” range at Home Depot for half the price of a real commercial unit. But residential equipment isn’t built for constant use, high heat, or the wear and tear of a professional kitchen. You’ll end up spending more on repairs, replacements, and health code violations (since residential fridges, for example, don’t meet commercial temperature requirements). The only exception? Smallwares like knives, mixing bowls, and utensils, where commercial-grade isn’t always necessary.
Q: What’s the biggest mistake you see in small kitchen layouts?
A: Ignoring workflow. I’ve seen kitchens where the dishwasher is on the opposite side of the room from the line, or the prep station is tucked in a corner far from the cooking equipment. In a small space, every extra step adds up. Before finalizing your layout, simulate a service rush: Where will plates go after they’re dirty? Where will clean plates be stored? How will ingredients flow from prep to cooking to plating? If the answer involves a lot of backtracking or crowded spaces, rethink your design. A well-planned 10’ x 10’ kitchen can outperform a poorly laid-out 20’ x 20’ one every time.
@article{top-equipment-choices-for-small-commercial-kitchens-a-no-nonsense-guide-from-someone-whos-been-there,
    title   = {Top Equipment Choices for Small Commercial Kitchens: A No-Nonsense Guide from Someone Who’s Been There},
    author  = {Chef's icon},
    year    = {2025},
    journal = {Chef's Icon},
    url     = {https://chefsicon.com/top-equipment-choices-for-small-commercial-kitchens/}
}