The Best Fluffy Pancakes recipe you will fall in love with. Full of tips and tricks to help you make the best pancakes.
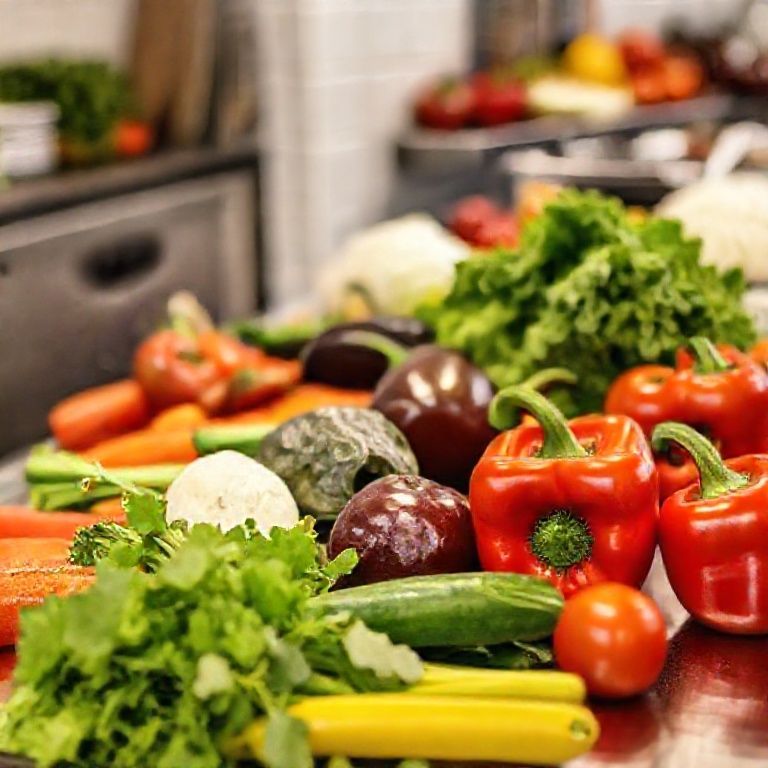
Table of Contents
- 1 The Philosophy Behind the Design: Why Vegan Kitchens Are Different
- 2 Equipment Essentials: What to Splurge On, What to Skip, and What You Didn’t Know You Needed
- 3 Layout and Workflow: Designing for Speed, Safety, and Sanity
- 4 Material Matters: Choosing Surfaces and Tools That Last
- 5 Lighting, Ventilation, and the Stuff No One Thinks About
- 6 Tech and Innovation: The Future of Vegan Kitchen Design
- 7 Putting It All Together: A Step-by-Step Design Checklist
- 7.1 Step 1: Define Your Menu (Seriously, Do This First)
- 7.2 Step 2: Map Your Workflow
- 7.3 Step 3: Choose Your Equipment
- 7.4 Step 4: Design Your Stations
- 7.5 Step 5: Plan Your Storage
- 7.6 Step 6: Ventilation and Utilities
- 7.7 Step 7: Tech and Automation
- 7.8 Step 8: Staff Training and SOPs
- 7.9 Step 9: Test and Iterate
- 7.10 Step 10: Plan for Growth
- 8 The Human Element: Designing for Your Team
- 9 Common Mistakes (And How to Avoid Them)
- 9.1 Mistake #1: Underestimating Prep Space
- 9.2 Mistake #2: Skimping on Refrigeration
- 9.3 Mistake #3: Ignoring Cross-Contamination
- 9.4 Mistake #4: Overlooking Compost Logistics
- 9.5 Mistake #5: Forgetting About Noise
- 9.6 Mistake #6: Not Planning for Delivery
- 9.7 Mistake #7: Assuming All Vegan Equipment Is the Same
- 10 Final Thoughts: The Kitchen as a Living System
- 11 FAQ
I’ll admit it, I used to think vegan restaurant kitchens were just regular kitchens with tofu instead of steak. Boy, was I wrong. After spending the last year digging into the nuances of plant-based culinary spaces (and burning my share of chickpea flour pancakes in my own tiny Nashville kitchen), I’ve realized that designing a vegan restaurant kitchen isn’t just about swapping ingredients. It’s about rethinking workflow, equipment, and even the psychology of cooking from the ground up.
Here’s the thing: vegan kitchens face unique challenges. No, I’m not talking about the age-old “but where do you get your protein?” debate, though, honestly, I still get that question at parties. I’m talking about cross-contamination risks that make gluten-free kitchens look like a walk in the park, the sheer volume of prep work required for plant-based dishes, and the fact that your walk-in fridge suddenly needs to accommodate everything from fermented cashew cheese to three types of plant milk. Oh, and did I mention the compost system? Because if you’re not composting in a vegan kitchen, are you even trying?
This guide isn’t just a checklist of equipment or a Pinterest-worthy mood board (though I’ll admit, I’ve lost hours scrolling through images of sleek, stainless-steel vegan prep stations). It’s a deep dive into the philosophy, logistics, and hidden details that separate a functional vegan kitchen from one that’s truly exceptional. Whether you’re opening a fast-casual vegan taqueria in Austin or a high-end plant-based tasting menu spot in Brooklyn, these are the essentials you can’t afford to overlook. And yes, I’ll share where I’ve seen restaurants mess this up, because nothing teaches like someone else’s mistakes.
By the end of this, you’ll know how to design a kitchen that doesn’t just accommodate vegan cooking but elevates it. You’ll understand why your prep station layout might be the difference between a 30-minute ticket time and a 90-minute nightmare, why your choice of fryer could make or break your menu, and how to avoid the “vegan afterthought” trap that dooms so many well-intentioned restaurants. Let’s get into it.
The Philosophy Behind the Design: Why Vegan Kitchens Are Different
It’s Not Just About the Food, It’s About the System
When I first started researching this, I made the mistake of assuming a vegan kitchen was just a “lighter” version of a traditional kitchen. Fewer proteins, fewer allergens, fewer hassles, right? Wrong. What I didn’t grasp initially is that plant-based cooking often requires more steps, not fewer. Take something as simple as a vegan “chicken” sandwich. In a traditional kitchen, you’d pull pre-breaded tenders from the freezer, toss them in the fryer, and assemble. In a vegan kitchen? You might be:
- Soaking vital wheat gluten for seitan
- Blending chickpea flour for a batter
- Steaming or baking the protein before frying
- Prepping a separate breading station (because egg wash isn’t an option)
- Managing multiple fryers if you’re avoiding cross-contamination with non-vegan items
That’s five distinct processes where a traditional kitchen might have one. And that’s just for a single menu item. Multiply this across an entire menu, and you start to see why workflow and station design become make-or-break factors.
I’m torn between calling this a “challenge” and an “opportunity.” On one hand, yes, it’s more complex. On the other, this complexity forces you to be intentionally efficient in ways that lazy traditional kitchens never have to consider. The best vegan kitchens I’ve seen operate like Swiss watches, every movement, every station, every piece of equipment has a purpose. There’s no wasted space, no redundant steps. And that level of precision? It’s what allows them to turn tables faster than their omnivorous competitors, despite the extra prep.
The Cross-Contamination Conundrum: When “Vegan-Friendly” Isn’t Enough
Here’s where things get sticky, literally and figuratively. A shocking number of restaurants claim to be “vegan-friendly” but don’t actually have the infrastructure to back it up. I’ve lost count of how many times I’ve heard stories like:
- “The chef used the same tongs for the vegan burger and the beef patties.”
- “They fried our tofu in the same oil as the shrimp.”
- “Our ‘vegan’ pasta was cooked in water that had just boiled lobster.”
If you’re designing a dedicated vegan kitchen, this isn’t your problem, congrats, you’ve sidestepped a major headache. But if you’re operating in a shared space or a “flexitarian” concept, cross-contamination isn’t just a customer service issue; it’s a legal and ethical minefield. In some jurisdictions, mislabeling a dish as vegan when it’s been contaminated can open you up to lawsuits, especially if a customer has a severe allergy (looking at you, shellfish cross-contact).
So what’s the solution? It’s not just about separate prep areas, though those are non-negotiable. It’s about color-coded tools, designated storage, and even airflow control. For example:
- Cutting boards and knives: At minimum, you need separate sets for produce, proteins (like seitan or tempeh), and allergens (nuts, gluten). Color-coding is your friend here, red for meat analogs, green for veggies, blue for gluten-free, etc.
- Fryers: If you’re frying anything vegan, that fryer cannot be used for animal products. Ever. The oil absorbs flavors and proteins, and no amount of filtering will make it truly vegan again. I’ve seen restaurants try to get around this with “vegan fry days,” but that’s a logistical nightmare and a PR disaster waiting to happen.
- Storage: Raw meat (or meat analogs) should never be stored above produce. Drips happen. And if you’re using shared coolers, you’ll need clearly labeled, sealed containers, no “mystery tubs” allowed.
- Airflow: This one’s less obvious, but if you’re grilling vegan burgers next to beef burgers, the smoke and grease particles can contaminate the vegan items. Proper ventilation and strategic station placement are key.
Is this overkill? Maybe for a tiny café. But if you’re serious about serving vegan food, these aren’t suggestions, they’re on-negotiables. And trust me, the vegan community will find out if you cut corners. Yelp reviews are forever.
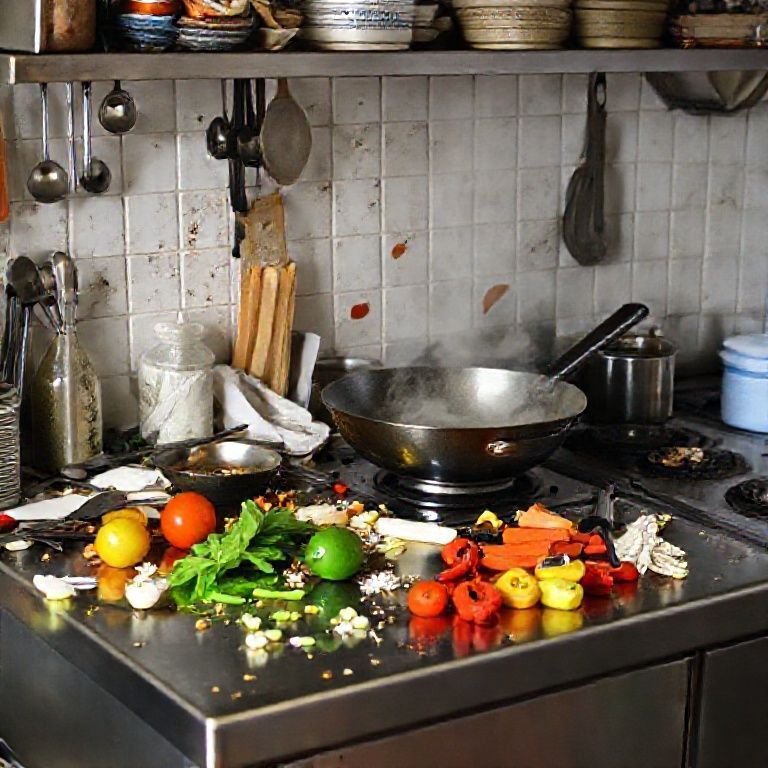
The Prep-Heavy Reality: Why Your Prep Station Is Your Kitchen’s MVP
Let me paint you a picture: It’s 4 p.m. on a Saturday, and your dinner rush is about to hit. In a traditional kitchen, your line cooks are portioning pre-cut steaks, grabbing pre-shucked oysters, and pulling pre-marinated chicken from the cooler. In a vegan kitchen? Your team might be:
- Rehydrating dried mushrooms for a “scallop” dish
- Blending cashews into cheese sauce
- Pressing tofu for the third time that day
- Julienning vegetables for a raw pad Thai
- Tempering aquafaba for a meringue
The point? Vegan cooking is prep-heavy. Like, “you might need an extra prep cook just to keep up” heavy. And if your prep station isn’t designed to handle this volume, you’re going to drown in a sea of half-chopped vegetables and unsoaked beans.
I visited a vegan ramen shop in Portland last year that had this down to a science. Their prep station was essentially a mini production line:
- A dedicated soaking station with timed bins for mushrooms, seaweed, and wheat gluten
- A blending hub with three Vitamixes running simultaneously (one for sauces, one for nut milks, one for purees)
- A fermentation corner with temperature-controlled drawers for miso, kimchi, and cashew yogurt
- A tofu press station with stacked weights and drainage racks
Was it overkill for a 50-seat restaurant? Maybe. But their ticket times were half of the industry average for vegan concepts. And their food cost? Lower than most, because they’d optimized prep to minimize waste.
So how do you replicate this? Start by mapping your menu’s prep demands. For every dish, list:
- Every ingredient that requires advance prep (soaking, marinating, fermenting, etc.)
- Every piece of equipment needed for that prep (blenders, food processors, mandolines)
- The time required for each step
Then, design your prep station around the most time-consuming and equipment-intensive tasks. If you’re doing a lot of nut-based cheeses, you’ll need space for soaking, blending, and culturing. If fermented foods are a staple, you’ll need temperature-controlled zones. And if you’re making everything from scratch (which, let’s be honest, is the vegan restaurant ethos), you’ll need more prep space than you think-probably 30-40% more than a traditional kitchen of the same size.
Equipment Essentials: What to Splurge On, What to Skip, and What You Didn’t Know You Needed
I’ll cut to the chase: If you’re serving fried food in a vegan restaurant, you need a dedicated vegan fryer. No exceptions. No “but it’s expensive” excuses. Here’s why:
- Flavor transfer: Oil is porous. If you fry fish in it, everything else you fry will taste like fish. Vegan customers willotice.
- Allergen risk: Shellfish proteins can survive in oil even after filtering. For customers with severe allergies, this isn’t just a preference, it’s a health hazard.
- Ethical integrity: If you’re marketing yourself as a vegan restaurant, using shared fryers is false advertising. The vegan community talks. You will get called out.
Now, the good news: you don’t necessarily need a bigger fryer, just a smarter one. Look for:
- High-efficiency models with fast recovery times (vegan foods often fry at lower temps than meat, so you need precise control)
- Built-in filtration systems to extend oil life (vegan frying oil lasts longer than meat-contaminated oil, but you still need to filter frequently)
- Compact footprints if space is tight, some newer models are designed for small kitchens without sacrificing capacity
Pro tip: If you’re doing a lot of fried items (think vegan “chicken,” tempura, or donuts), consider a countertop fryer for small batches. It’s easier to clean and maintain than a floor model, and you can dedicate it solely to vegan use without breaking the bank.
But here’s where it gets tricky: what if you’re not a fully vegan restaurant? Maybe you’re a burger joint adding a vegan option, or a diner with a few plant-based dishes. In that case, you have two choices:
- Dedicate a fryer to vegan-only items (and clearly label it). This is the gold standard, but it’s not always feasible for small operations.
- Use a separate, smaller fryer just for vegan items (like an air fryer or a countertop model). This is a compromise, but it’s better than nothing.
Whatever you do, do not assume filtering the oil is enough. It’s not. And if you’re caught cutting corners, the backlash will be swift and brutal. Trust me, I’ve seen it.
The Blender Battle: Why Your $200 Vitamix Won’t Cut It
I’ll say it: if you’re opening a vegan restaurant and you’re not investing in commercial-grade blenders, you’re setting yourself up for failure. I made the mistake of thinking my home Vitamix could handle restaurant volume when I was testing recipes for a pop-up. By the third batch of cashew cheese, the motor was smoking, and I was on the phone with customer service, begging for mercy.
Here’s the thing: vegan cooking relies heavily on blended ingredients. Nut milks, cheese sauces, purees, batters, ice creams, you name it, you’re probably blending it. And unlike a smoothie bar where you’re blending soft fruits, vegan prep often involves:
- Soaked nuts (which are dense and sticky)
- Frozen fruits (for nice cream and sorbets)
- Fibrous vegetables (like kale or celery for green juices)
- Thick doughs (for vegan pastries or bread)
Your average blender isn’t built for this kind of abuse. You need:
- At least one high-powered commercial blender (Vitamix Commercial, Blendtec Stealth, or Robot Coupe) for heavy-duty tasks
- A secondary blender for lighter jobs (sauces, dressings) to avoid burnout
- Soundproofing if you’re in a small space, these machines are loud
- Easy-clean designs (look for blenders with removable blades and dishwasher-safe jars)
And here’s a pro tip: get a tamper. Vegan blends are often thick and require constant pushing down. A tamper saves time and prevents air pockets, which can ruin textures (ever had grainy cashew cheese? Yeah, that’s why).
But wait, what about food processors? Aren’t they the same thing? Nope. Blenders are for liquids and semi-liquids; food processors are for solids. You’ll need at least one robust food processor for:
- Chopping vegetables (mirepoix, salsas, garnishes)
- Making nut butters
- Grinding grains or seeds for flours
- Shredding vegetables (for slaw, hash, or “pulled pork” textures)
If you’re doing a lot of raw or fermented foods, consider a spiralizer attachment for your processor. Zucchini noodles, beet ribbons, and carrot “pasta” are staple menu items in many vegan restaurants, and hand-spiralizing is a nightmare during service.
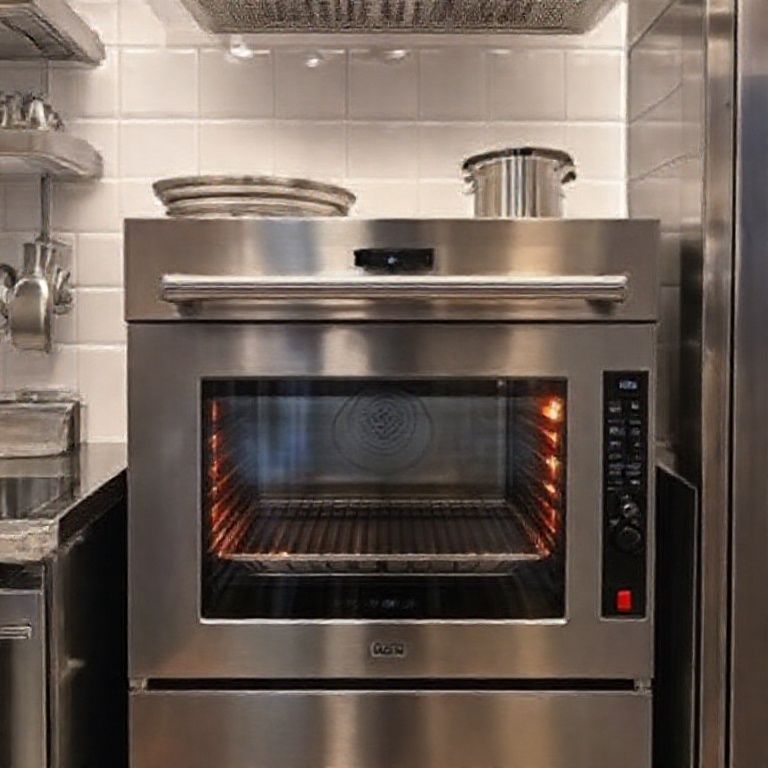
The Underappreciated Workhorse: The Steam Convection Oven
Confession: I didn’t “get” steam ovens until I worked a shift in a vegan fine-dining kitchen in LA. I’d always seen them as a fancy gadget for high-end restaurants, not a necessity. Then I watched a line cook steam-bake a batch of vegan “scallops” (made from king oyster mushrooms) in under 10 minutes, with zero oil and perfect texture. I was converted.
Here’s why steam convection ovens are a game-changer for vegan kitchens:
- Moisture control: Vegan proteins (like seitan, tempeh, or tofu) dry out easily. Steam keeps them juicy without adding oil.
- Versatility: You can steam, bake, roast, or even sous vide in some models. One machine replaces three.
- Energy efficiency: They cook faster than conventional ovens, reducing utility costs.
- Health appeal: Steaming preserves nutrients and colors, which is a big selling point for health-conscious customers.
But here’s the catch: not all steam ovens are created equal. For a vegan kitchen, look for:
- High-capacity models (you’ll be steaming large batches of grains, vegetables, and proteins)
- Precise temperature control (vegan baking is finicky, too hot, and your aquafaba meringues will collapse)
- Self-cleaning functions (because scrubbing mineral deposits from steam ovens is a special kind of hell)
Is it a splurge? Yes. But if you’re doing any volume of vegan baking, steamed buns, or delicate proteins, it’ll pay for itself in reduced waste and labor costs. And if you’re in a small space, some combi ovens (which combine steam, convection, and sometimes even microwave) can replace a conventional oven entirely, saving you precious square footage.
The Cold Hard Truth About Refrigeration
Vegan kitchens have very different refrigeration needs than traditional kitchens. For starters, you’re not storing large cuts of meat, which means your coolers don’t need to be as cold (meat requires lower temps to prevent bacterial growth). But you are storing a lot of:
- Fresh produce (which needs high humidity)
- Plant milks (which separate if stored too cold)
- Fermented foods (which need consistent, slightly warmer temps)
- Prepped ingredients (like chopped veggies, which wilt if not stored properly)
This means you need a more uanced refrigeration setup. Here’s how to approach it:
Walk-In Cooler: The Humidity Question
Most walk-ins are designed for meat and dairy, low humidity, cold temps. But vegetables? They hate that. Leafy greens turn to sludge, herbs wilt, and root vegetables lose their crispness. The solution:
- Humidity-controlled zones: Ideally, you’d have separate sections for high-humidity (greens, herbs) and low-humidity (onions, garlic, squash) items.
- Ethylene gas management: Some fruits (like apples and bananas) release ethylene, which speeds up spoilage in other produce. Store them separately.
- Temperature stratification: The top of your cooler is warmer than the bottom. Use the colder lower shelves for delicate items like berries, and the upper shelves for hardier produce like cabbage.
If you can’t afford a custom walk-in, at least invest in perforated storage bins (for airflow) and separate containers for ethylene producers.
Reach-In Fridge: The Plant Milk Problem
Ever noticed how almond milk separates in your home fridge? Now imagine that happening to 10 gallons of house-made cashew milk. To prevent this:
- Store plant milks at 38-40°F (colder than most fridges, but not freezing).
- Use airtight containers to minimize oxidation (which causes separation).
- Avoid placing them near the fridge’s cooling vents (temperature fluctuations = separation city).
Also, if you’re making your own nut milks, dedicate a small undercounter fridge just for them. It’s easier to control the temp and humidity in a smaller space.
Fermentation Station: The Forgotten Fridge
If you’re doing any fermented foods (kimchi, sauerkraut, vegan cheeses, kombucha), you need a separate fermentation fridge. Why? Because fermentation requires:
- Consistent, slightly warmer temps (usually 60-70°F, depending on the culture)
- Humidity control (too dry, and your kimchi will shrivel; too wet, and mold takes over)
- Airflow (but not too much-you don’t want your cultures drying out)
You can DIY this with a mini-fridge and an external thermostat controller (like an Inkbird), but if you’re serious about fermentation, invest in a dedicated unit. And keep it away from your main prep area-fermenting foods smell, and you don’t want that aroma mingling with your desserts.
Layout and Workflow: Designing for Speed, Safety, and Sanity
The Golden Rule: Minimize Cross-Traffic
In a traditional kitchen, the flow is usually:
- Prep →
- Cook →
- Plate →
- Expo
In a vegan kitchen, it’s more like:
- Prep (soaking, blending, chopping) →
- Secondary prep (marinating, fermenting, pressing) →
- Cook (steaming, frying, baking) →
- Assembly (sauces, garnishes, final touches) →
- Expo
That’s an extra step, which means more movement, more stations, and more potential for bottlenecks. The key is to design your layout so that:
- Prep cooks aren’t constantly crossing paths with line cooks.
- High-traffic areas (like the fry station or the steam oven) aren’t in the middle of the kitchen.
- Dirty dishes and compost have a dedicated return path that doesn’t interfere with food prep.
I once consulted for a vegan restaurant where the compost bin was placed right next to the salad station. Sounds fine, right? Wrong. Every time someone tossed in a melon rind or a pile of veggie scraps, fruit flies swarmed the greens. We moved the compost to a corner near the dish pit with a sealed, vented lid, and the problem vanished.
Here’s a rough sketch of an efficient vegan kitchen layout (adjust based on your menu):
- Dry storage and soaking station (near the back, away from cooking heat)
- Prep station (central, with easy access to storage and cooking stations)
- Cooking line (steam oven, fryer, induction burners, arranged in order of use)
- Assembly/plating station (close to expo, with sauces and garnishes within arm’s reach)
- Dish pit and compost (near the back, with a clear path for bussers)
Notice what’s missing? A giant grill or flat-top. Unless you’re doing a lot of vegan burgers or seared items, these take up valuable space and aren’t always necessary. A good induction burner or two can handle most sautéing needs without the heat and cleanup hassle of gas.
The Induction Revolution: Why Gas Is Overrated
I know, I know, chefs love their gas burners. The instant heat control! The flame! The drama! But here’s the thing: in a vegan kitchen, induction cooktops are often the smarter choice. Here’s why:
- Precision: Vegan cooking often requires exact temperatures (ever tried tempering chocolate with aquafaba? It’s a nightmare on gas). Induction gives you degree-by-degree control.
- Safety: No open flames mean less risk of oil fires (a big deal when you’re frying a lot of starch-heavy foods).
- Cleanliness: Gas burners are grease traps. Induction tops are flat and easy to wipe down, critical when you’re working with sticky ingredients like agave or nut butters.
- Energy efficiency: Induction heats up faster and wastes less energy than gas.
- Ventilation savings: No combustion means you can sometimes downsize your hood system, saving space and money.
But, there’s always a but, induction isn’t perfect for everything. If you’re doing a lot of wok cooking or high-heat searing, you might still want a gas burner or two. And if your building’s electrical system isn’t up to code, retrofitting for induction can be costly.
My advice? Start with two induction burners for sauces, soups, and delicate cooking, and keep one gas burner for high-heat tasks. Over time, you can phase out gas as you refine your menu. And if you’re in a new build, go all-induction, you won’t miss the gas.
The Compost Conundrum: Where Does It All Go?
In a traditional kitchen, trash is trash. In a vegan kitchen, compost is a major logistical consideration. Here’s what most people don’t realize:
- Vegan kitchens produce way more compostable waste than traditional kitchens (peels, stems, pulp from nut milks, etc.).
- Compost smells. If not managed properly, your kitchen will reek of rotting vegetables.
- Municipal compost rules vary wildly. Some cities mandate separation; others don’t offer pickup at all.
So how do you handle it?
Option 1: On-Site Composting
If you have outdoor space, a compost tumbler or bokashi bin system can work. Pros:
- No hauling bags to a compost facility.
- You can use the finished compost for an on-site garden (great for herbs and microgreens).
Cons:
- Requires staff training (and someone to turn the compost regularly).
- Can attract pests if not managed properly.
- Not feasible in urban areas with no outdoor space.
Option 2: Commercial Compost Pickup
Most cities have commercial compost services that will pick up your scraps for a fee. Pros:
- No maintenance on your end.
- Often includes compostable packaging (like PLA to-go containers).
Cons:
- Can be expensive (expect to pay $50-$200/month depending on volume).
- You’ll need sealed, leak-proof bins to prevent odors and pests.
Option 3: The “No-Waste” Approach
Some restaurants (like Zero-Waste Daniel in NYC) have built their entire concept around repurposing “waste.” For example:
- Vegetable peels → crispy garnishes or broth
- Stale bread → croutons or breadcrumbs
- Nut pulp → crackers or flour
- Citrus rinds → cleaning vinegar or candied garnishes
This reduces compost volume and can even lower your food costs by turning trash into menu items. But it requires extra labor and creativity, so it’s not for everyone.
Regardless of which method you choose, design your kitchen with compost in mind:
- Place compost bins ear prep stations (but not too close, you don’t want peels flying into your mise en place).
- Use foot-pedal or motion-sensor lids to keep hands free.
- Ventilate the compost area (a small fan above the bin can help with odors).
- Train staff to rinse compostables before tossing (this reduces pests and smells).
Material Matters: Choosing Surfaces and Tools That Last
Countertops: The Great Debate (Stainless vs. Butcher Block vs. Quartz)
I’ve seen vegan kitchens with all three, and each has pros and cons. Here’s the breakdown:
Stainless Steel
Pros:
- Durable and easy to clean.
- Non-porous (no bacteria or stains).
- Heat-resistant (you can place hot pots directly on it).
Cons:
- Can dent or scratch over time.
- Noisy (dropping a metal bowl on stainless is like a dinner gong).
- Cold to the touch (not ideal for pastry work).
Best for: Cooking lines, prep stations where sanitation is critical.
Butcher Block (Wood)
Pros:
- Gentler on knives (less dulling than stainless).
- Warmer surface (better for pastry and chocolate work).
- Aesthetic appeal (great for open kitchens).
Cons:
- Porous (can harbor bacteria if not sealed properly).
- Requires regular oiling and maintenance.
- Not heat-resistant (can scorch or warp).
Best for: Pastry stations, cheese aging, or front-of-house prep where appearance matters.
Quartz or Solid Surface
Pros:
- Non-porous and easy to clean.
- Heat-resistant (better than wood, not as good as stainless).
- Customizable colors/patterns (if you care about aesthetics).
Cons:
- Can stain from turmeric, beet juice, etc.
- Not as durable as stainless (can chip).
- More expensive upfront.
Best for: Prep stations where you’re working with colorful ingredients (like juices or natural dyes).
My recommendation? Combine materials based on station needs. For example:
- Cooking line: Stainless steel (durable, easy to clean).
- Prep station: Quartz (non-porous, but gentler on knives than stainless).
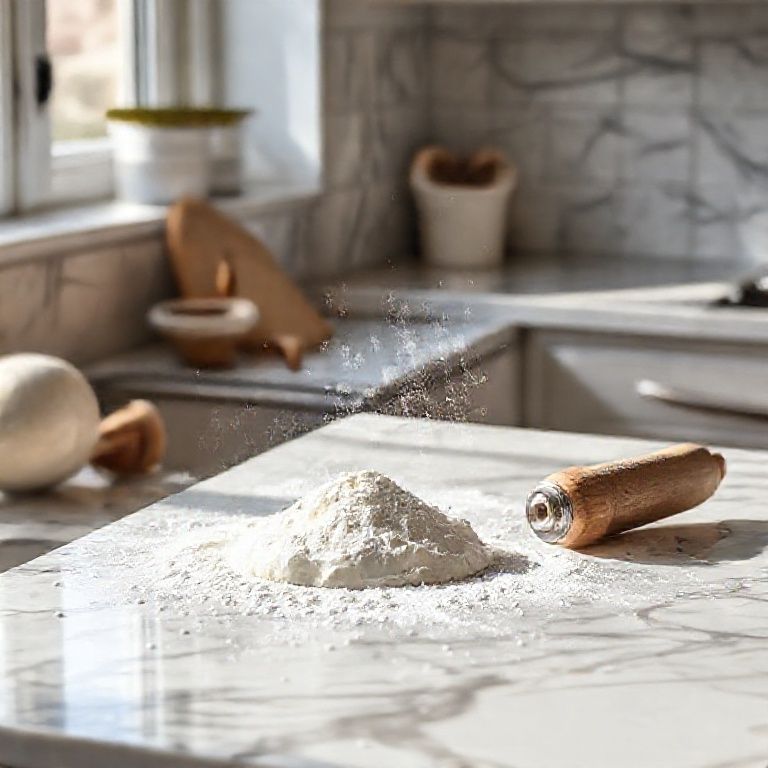
- Pastry/bakery area: Butcher block (better for rolling dough).
Knives: The Vegan Kitchen’s Secret Weapon
Here’s a hot take: Vegan kitchens need more specialized knives than traditional kitchens. Why? Because you’re working with a wider variety of textures:
- Delicate herbs and microgreens (require a fine, sharp blade)
- Tough root vegetables (like celeriac or rutabaga, which can dull a knife fast)
- Sticky ingredients (like dates or nut butters, which gum up blades)
- Frozen fruits (for nice cream or sorbets, which require a sturdy cleaver-like knife)
At minimum, you’ll need:
- A 10” chef’s knife (for general prep)
- A 8” santoku knife (great for fine chopping and vegetables)
- A paring knife (for garnishes and small tasks)
- A serrated knife (for bread, tomatoes, and delicate skins)
- A heavy cleaver or nakiri knife (for smashing garlic, chopping hard veggies, or frozen fruits)
And here’s a pro tip: Invest in ceramic knives for sticky ingredients. They don’t rust, they stay sharp longer, and they’re easier to clean when you’re working with things like caramel or nut butters. Just be careful, they’re brittle and can chip if dropped.
Also, knife storage matters. In a vegan kitchen, you’re likely switching knives more often (to avoid cross-contamination between allergens, like nuts and gluten). Magnetic strips are great for easy access, but if you’re tight on space, a knife roll or block with labeled slots (e.g., “gluten-free only,” “nut knife”) can prevent mix-ups.
Cutting Boards: The Unsung Heroes of Cross-Contamination Prevention
I’ve seen restaurants spend thousands on high-end equipment, then cheap out on cutting boards. Big mistake. In a vegan kitchen, your cutting boards are your first line of defense against cross-contamination and food waste. Here’s what you need to know:
Material Matters
Plastic (HDPE or Polyethylene):
- Pros: Lightweight, dishwasher-safe, color-coded options.
- Cons: Knife marks harbor bacteria; needs frequent replacing.
Wood (Maple or Bamboo):
- Pros: Naturally antibacterial (studies show wood kills bacteria faster than plastic), gentler on knives.
- Cons: Heavy, requires oiling, can warp if not dried properly.
Rubber (Sanicut or similar):
- Pros: Durable, knife-friendly, dishwasher-safe.
- Cons: Expensive upfront; can stain.
My pick? A mix of color-coded plastic for high-risk items (allergens, raw vs. cooked) and wood for general prep. But if you’re doing a lot of butchery (yes, vegan butchery, think jackfruit “pulled pork” or seitan carving), rubber boards are worth the investment.
Size and Shape
Biggest mistake I see? Boards that are too small. You need space to prep without crowding, especially when working with large vegetables like cabbages or winter squash. Aim for:
- At least 18”x24” for main prep boards (bigger if you’re doing volume).
- Smaller boards (12”x18”) for garnishes or quick tasks.
- Boards with handles or non-slip feet (to prevent sliding during chopping).
And if you’re tight on space, consider over-the-sink cutting boards. They maximize counter space and make cleanup easier.
Storage and Sanitation
Cutting boards should be stored vertically (to allow airflow and prevent warping) and sanitized after each use. In a vegan kitchen, I recommend:
- A dedicated board washing station (with a scrub brush and sanitizer bucket).
- A UV sanitizing cabinet if you’re in a high-volume operation (kills bacteria without chemicals).
- Color-coded racks to keep boards organized by use (e.g., red for meat analogs, green for veggies).
Lighting, Ventilation, and the Stuff No One Thinks About
Lighting: The Difference Between “Cozy” and “Can’t See What I’m Chopping”
Kitchen lighting is often an afterthought, but in a vegan kitchen, it’s critical. Why? Because you’re working with more colors and textures than a traditional kitchen. A poorly lit station can make it hard to:
- Spot bruises on fruit or wilting greens.
- Judge the doneness of plant-based proteins (no “juices running clear” rule here).
- Detect cross-contamination (e.g., a stray sesame seed on a nut-free board).
Here’s how to get it right:
- Task lighting: Install LED strip lights under shelves and inside prep stations. Avoid fluorescent, it casts a greenish tint that makes food look unappetizing.
- Adjustable brightness: Dim lights for early prep, bright lights for service.
- Natural light: If possible, position prep stations near windows. It’s easier on the eyes and makes ingredients look more vibrant.
- Color temperature: Aim for 4000-5000K (cool white) for prep areas and 2700-3000K (warm white) for dining areas.
And if you’re in an open kitchen, consider pendant lights with dimmers. They create a warm ambiance for diners while keeping the workspace well-lit.
Ventilation: The Silent Killer of Small Kitchens
Vegan kitchens have different ventilation needs than traditional kitchens. For starters, you’re not dealing with as much grease (unless you’re deep-frying a lot), but you are dealing with:
- Steam: From blanching veggies, steaming dumplings, or cooking grains.
- Smoke: From high-heat searing (like vegan steaks or charred vegetables).
- Odors: Fermented foods, spices, and nut butters can linger.
Here’s what most people get wrong:
- They oversize their hood for grease when they should be focusing on steam and odor control.
- They forget to ventilate the prep area, leading to a foggy, humid workspace.
- They don’t account for makeup air (replacing the air sucked out by the hood), which can create negative pressure and make doors hard to open.
So what’s the fix?
- Demand-control ventilation: Hoods that adjust airflow based on heat/smoke levels. Saves energy and reduces noise.
- Separate exhaust for prep areas: If you’re blanching a lot of veggies, a small exhaust fan over the prep sink can prevent foggy goggles (yes, that’s a real problem).
- Carbon filters: If you’re working with strong-smelling ingredients (like durian or fermented foods), these help neutralize odors.
- Ceiling fans: In small kitchens, a high-velocity fan can help circulate air and prevent heat buildup.
And if you’re in a shared space (like a food hall or commissary kitchen), talk to your neighbors. The last thing you want is your vegan kitchen’s ventilation system pulling in smoke from the BBQ joint next door.
The Sound of Silence: Why Noise Control Matters
Vegan kitchens can be loud. Blenders, food processors, compost grinders, induction burners, it adds up. And unlike a traditional kitchen where the sizzle of a grill is part of the ambiance, a vegan kitchen’s noise is often high-pitched and grating (thanks, Vitamix).
Here’s how to keep the decibels down:
- Soundproofing panels: Install them on walls near blenders or dish pits.
- Rubber mats: Under equipment to dampen vibration.
- Quiet equipment: Look for “silent” or “low-decibel” models of blenders and food processors.
- White noise: A small fan or white noise machine can mask abrupt sounds.
And if you’re in an open kitchen, consider glass partitions to contain noise while keeping the space visible. Your front-of-house staff (and customers) will thank you.
Tech and Innovation: The Future of Vegan Kitchen Design
Smart Scales and Portion Control
Vegan cooking often relies on precise measurements-especially for baking, fermentation, and protein substitutes. A smart scale (like the Escali Primo or Acaia Pearl) can:
- Sync with recipe software to adjust batch sizes automatically.
- Track ingredient usage to reduce waste.
- Convert between grams, ounces, and volume measurements (critical for scaling recipes).
Some high-end models even have moisture sensors to help with dough proofing or cheese aging. Overkill? Maybe. But if you’re doing a lot of baked goods or cultured foods, it’s a game-changer.
AI and Inventory Management
I’ll admit, I was skeptical about AI in the kitchen until I saw it in action at a vegan fast-casual spot in Denver. They used a system that:
- Tracked ingredient usage in real-time (via scales and POS integration).
- Predicted demand based on weather, day of the week, and local events.
- Automatically generated prep lists and orders.
The result? 20% less food waste and 15% lower labor costs because staff weren’t over-prepping. For a vegan restaurant where ingredients are often perishable (looking at you, avocados), this kind of system can pay for itself in months.
Some options to explore:
- MarketMan (inventory and ordering)
- Crafty (recipe costing and scaling)
- Toast or Square (POS with inventory integration)
3D Food Printing: Gimmick or Game-Changer?
Okay, this one’s still in the “maybe” column, but I’ve seen some fascinating applications of 3D food printing in vegan kitchens:
- Custom-shaped plant-based meats (like “ribs” or “fish fillets”).
- Intricate dessert designs (chocolate, sugar, or even fruit purees).
- Personalized nutrition (printing vitamin-fortified gels or supplements into meals).
Is it practical for most restaurants? Not yet, the machines are expensive, and the learning curve is steep. But if you’re in a high-end or experimental space, it’s worth keeping an eye on. Companies like Natural Machines (Foodini) and Redefine Meat are pushing the boundaries of what’s possible.
The Rise of “Dark Kitchens” for Vegan Delivery
With the explosion of vegan delivery and ghost kitchens, more restaurants are designing delivery-only vegan kitchens. These spaces prioritize:
- Packaging efficiency: Dedicated stations for compostable containers, sauces, and utensils.
- Speed: Streamlined workflows with minimal movement.
- Tech integration: Tablets for delivery apps, automated labeling systems.
If you’re considering a delivery-focused model, think about:
- Modular equipment: Stackable steamers, countertop fryers, and induction burners that can be rearranged as needed.
- Packaging storage: A climate-controlled area for compostable containers (they can warp in heat or humidity).
- Delivery staging: A heated shelf for waiting orders, and a fridge for cold items.
And if you’re doing both dine-in and delivery, keep the workflows separate. Nothing slows down a kitchen faster than line cooks tripping over delivery drivers.
Putting It All Together: A Step-by-Step Design Checklist
Alright, let’s get practical. Here’s your step-by-step checklist for designing a vegan restaurant kitchen, from concept to opening day.
Step 1: Define Your Menu (Seriously, Do This First)
You can’t design a kitchen without knowing what you’ll cook. Ask yourself:
- What’s the core of your menu? (Burgers? Bowls? Fine dining?)
- What are your top 5 most prep-intensive dishes?
- What equipment is non-negotiable? (e.g., a high-speed blender for nut milks, a steam oven for dumplings)
- What are your peak service demands? (Brunch rush? Late-night delivery?)
Pro tip: Mock up a week’s worth of prep lists before finalizing your layout. You’ll quickly see where bottlenecks will occur.
Step 2: Map Your Workflow
Grab a piece of paper and sketch:
- The path an ingredient takes from delivery to plate.
- The path a dirty dish takes from table to clean.
- The path a staff member takes during a rush.
Look for:
- Crossing paths (e.g., prep cooks and servers colliding).
- Dead zones (areas where nothing happens, can you repurpose them?).
- Chokepoints (like a single sink for both handwashing and dishwashing).
Step 3: Choose Your Equipment
Based on your menu, make a list of:
- Essentials: Steam oven, high-speed blender, dedicated vegan fryer.
- Nice-to-haves: Spiralizer, dehydrator, sous vide machine.
- Maybe-laters: 3D printer, fancy fermentation chamber.
Then, prioritize by ROI. A $3,000 blender might seem expensive, but if it saves you 2 hours of labor a day, it’ll pay for itself in months.
Step 4: Design Your Stations
For each station (prep, cooking, plating, etc.), ask:
- What equipment is needed here?
- What storage is needed (refrigeration, dry goods, tools)?
- What are the ergonomics? (Can a 5’2” cook reach everything without straining?)
- What’s the cleanup process? (Is there a sink or trash bin nearby?)
Step 5: Plan Your Storage
Vegan ingredients take up more space than you think. You’ll need:
- Dry storage: For grains, legumes, nuts, and seeds (keep in airtight containers to prevent pests).
- Refrigeration: Separate zones for produce, prepared foods, and fermented items.
- Freezer space: For bulk items like frozen fruit or vegan meats (but minimize this, fresh is better).
- Non-food storage: Compostable packaging, cleaning supplies, etc.
Step 6: Ventilation and Utilities
Work with an HVAC specialist to:
- Size your hood based on steam and odor, not just grease.
- Ensure proper makeup air to prevent negative pressure.
- Install energy-efficient lighting and appliances to cut costs.
Step 7: Tech and Automation
Decide what tech will streamline your operation:
- Inventory management software?
- Smart scales or portion control tools?
- Automated ordering systems?
Step 8: Staff Training and SOPs
Design your kitchen with training in mind:
- Where will new hires learn prep techniques?
- How will you enforce cross-contamination protocols?
- What’s the cleanup routine between shifts?
Step 9: Test and Iterate
Before opening, do a full service simulation:
- Run a mock dinner rush with your full menu.
- Time each station’s output.
- Look for bottlenecks or safety hazards.
Adjust as needed. It’s cheaper to move a shelf now than after you’re open.
Step 10: Plan for Growth
Leave room (literally and figuratively) for:
- Menu expansion (will you add a bakery section later?).
- Equipment upgrades (like a second steam oven).
- Staff growth (more prep cooks, a dedicated pastry chef?).
The Human Element: Designing for Your Team
Ergonomics: Because Happy Cooks = Better Food
Vegan prep is physically demanding. Chopping mountains of veggies, pressing tofu, blending nut butters, it’s a workout. To keep your team happy and injury-free:
- Adjustable-height tables: For prep stations, so cooks can alternate between sitting and standing.
- Anti-fatigue mats: Non-slip, cushioned mats for stations where staff stand for long periods.
- Tool accessibility: Heavy items (like bags of flour or cases of produce) should be stored at waist height to avoid lifting.
- Knife sharpness: Dull knives cause more injuries than sharp ones. Invest in a diamond sharpening stone and train staff to use it.
Morale Boosters: Small Touches That Make a Big Difference
A well-designed kitchen isn’t just functional, it’s a space where your team wants to work. Consider:
- A staff meal area with a microwave and fridge (vegan cooks need to eat too!).
- A charging station for phones and tablets.
- Natural light if possible, studies show it boosts mood and productivity.
- A whiteboard or digital screen for daily specials, prep lists, and shout-outs.
Training and Culture: Building a Vegan Kitchen Mindset
Not every cook is familiar with vegan techniques. Plan for:
- Cross-training: Teach line cooks how to prep, and prep cooks how to plate.
- Tasting sessions: Help staff understand the flavors and textures of plant-based ingredients.
- Sustainability education: Explain why composting or reducing waste matters.
And if you’re hiring cooks from traditional kitchens, be patient. It takes time to unlearn habits like “butter makes everything better.”
Common Mistakes (And How to Avoid Them)
Mistake #1: Underestimating Prep Space
Problem: You designed your kitchen based on a traditional ratio of prep to cooking space (usually 60/40). But vegan cooking requires closer to 70/30 prep-to-cooking space.
Fix: Dedicate at least one-third of your kitchen to prep, and include specialized zones (soaking, blending, fermentation).
Mistake #2: Skimping on Refrigeration
Problem: You assumed a standard walk-in would suffice, but now your greens are wilting and your nut milks are separating.
Fix: Invest in humidity-controlled drawers and a separate fridge for plant milks.
Mistake #3: Ignoring Cross-Contamination
Problem: You thought “vegan-friendly” meant just not putting meat in the dishes. Now you’re dealing with angry customers and bad reviews.
Fix: Implement color-coded tools, dedicated prep areas, and clear labeling from day one.
Mistake #4: Overlooking Compost Logistics
Problem: You didn’t plan for compost storage, and now your kitchen smells like a landfill.
Fix: Designate a ventilated compost area with sealed bins and a cleaning routine.
Mistake #5: Forgetting About Noise
Problem: Your blenders and food processors are so loud that staff can’t hear orders, and customers complain about the racket.
Fix: Invest in soundproofing panels and “quiet” equipment models.
Mistake #6: Not Planning for Delivery
Problem: You designed your kitchen for dine-in only, but now 40% of your orders are delivery, and your packaging station is a chaotic mess.
Fix: Dedicate a separate area for packaging with heated shelves and labeled bins for utensils/sauces.
Mistake #7: Assuming All Vegan Equipment Is the Same
Problem: You bought a cheap blender because “how different can they be?” Now it’s burning out every other day.
Fix: Invest in commercial-grade equipment designed for heavy use. A $600 Vitamix is cheaper than replacing a $200 blender every six months.
Final Thoughts: The Kitchen as a Living System
Here’s what I’ve learned after years of obsessing over vegan kitchen design: The best kitchens aren’t static, they evolve. Your menu will change. Your volume will fluctuate. New equipment will come out. The key is to design a space that’s flexible, efficient, and humane-for both your staff and your ingredients.
And here’s the truth no one tells you: Your kitchen will never be perfect. There will always be something you wish you’d done differently. Maybe the prep sink is too far from the cutting boards. Maybe the compost bin smells no matter what you do. Maybe you realize too late that you need a second steam oven. That’s okay. The goal isn’t perfection, it’s creating a space where great food can happen consistently, where your team feels respected, and where the ethics of your menu are reflected in every detail of the design.
So as you’re sketching out your layout or shopping for equipment, ask yourself:
- Does this design honor the ingredients we’re using?
- Does it respect the people who will work here?
- Does it align with the values we’re trying to embody?
If the answer to all three is yes, you’re on the right track.
And if you’re feeling overwhelmed? Start small. Pick one station, say, the prep area, and make it the best damn prep station it can be. Then move to the next. Before you know it, you’ll have a kitchen that doesn’t just work, but one that feels like the heart of something special.
Now go build it. And when you do, invite me for a meal, I’ll be the one geeking out over your compost system.
FAQ
Q: Do I really need a dedicated vegan fryer, or can I just filter the oil really well?
A: Nope, filtering isn’t enough. Animal proteins and flavors linger in the oil, even after filtering. If you’re serving vegan food, you need a dedicated fryer, no exceptions. Think of it this way: would you serve a gluten-free customer food fried in the same oil as breaded chicken? Same principle applies here.
Q: How much extra prep space do I need compared to a traditional kitchen?
A: Plan for about 30-40% more prep space than a traditional kitchen of the same size. Vegan cooking involves more chopping, soaking, blending, and fermenting, all of which require dedicated areas. If space is tight, prioritize vertical storage (shelving, hanging racks) and multi-functional stations (like a prep table that doubles as a fermentation station with added temperature control).
Q: What’s the one piece of equipment you see vegan restaurants skimp on that they shouldn’t?
A: Hands down, a high-quality blender. I’ve seen too many restaurants try to get by with a cheap $200 blender, only to have it burn out after a month of making nut milks and sauces. A commercial-grade blender (like a Vitamix Commercial or Blendtec Stealth) is a workhorse that will save you time, labor, and frustration in the long run. Consider it an investment, not an expense.
Q: How do I handle staff who are skeptical about working in a vegan kitchen?
A: First, lead by example. If you’re excited about the food, that energy is contagious. Second, educate them-host tastings, explain the “why” behind plant-based cooking, and show them how versatile the ingredients can be. Third, make it easy: ensure the kitchen is well-organized, tools are sharp, and workflows are logical. A frustrated cook in a poorly designed kitchen will resent vegan food; a supported cook in a well-designed space will take pride in it. And finally, listen to their feedback. They might spot inefficiencies or opportunities you missed.
@article{vegan-restaurant-kitchen-design-essentials-building-a-space-thats-ethical-efficient-and-irresistible,
    title   = {Vegan Restaurant Kitchen Design Essentials: Building a Space That’s Ethical, Efficient, and Irresistible},
    author  = {Chef's icon},
    year    = {2025},
    journal = {Chef's Icon},
    url     = {https://chefsicon.com/vegan-restaurant-kitchen-design-essentials/}
}