
Table of Contents
Let’s be honest, even the most seasoned home cooks can feel like they’re wrestling an octopus in a phone booth sometimes. Dishes piled high, ingredients mysteriously disappearing, and that nagging feeling that there *has* to be a better way. I’ve been there. As a food blogger and, frankly, a bit of a kitchen efficiency fanatic, I’ve spent years tweaking and refining my own workflow. It all started when I moved from the Bay Area to Nashville. My kitchen shrunk considerably, and my rescue cat, Luna, seemed determined to ‘help’ with every meal. This forced me to get serious about optimizing my kitchen workflow for maximum efficiency. It’s not about being a robot chef; it’s about creating a space and a system that works *with* you, not against you.
This isn’t just about saving time, although that’s a huge perk. It’s about reducing stress, minimizing food waste, and, ultimately, making cooking more enjoyable. Whether you’re prepping for a weeknight dinner or tackling a holiday feast, a streamlined workflow can make all the difference. We’ll delve into everything from smart layout tweaks to clever tools and techniques. Prepare to transform your kitchen from a chaotic battleground into a well-oiled culinary machine.
Throughout this guide, I’ll share my personal journey, including some epic fails and hard-won lessons. I’ll also challenge some common kitchen assumptions. I’m a big believer in questioning *why* we do things a certain way. Sometimes, the traditional approach isn’t the most efficient. And who knows, maybe we’ll even discover a new favorite cooking hack along the way. Ready to dive in?
Redesigning Your Kitchen Space for Flow
The Foundation: Work Zones
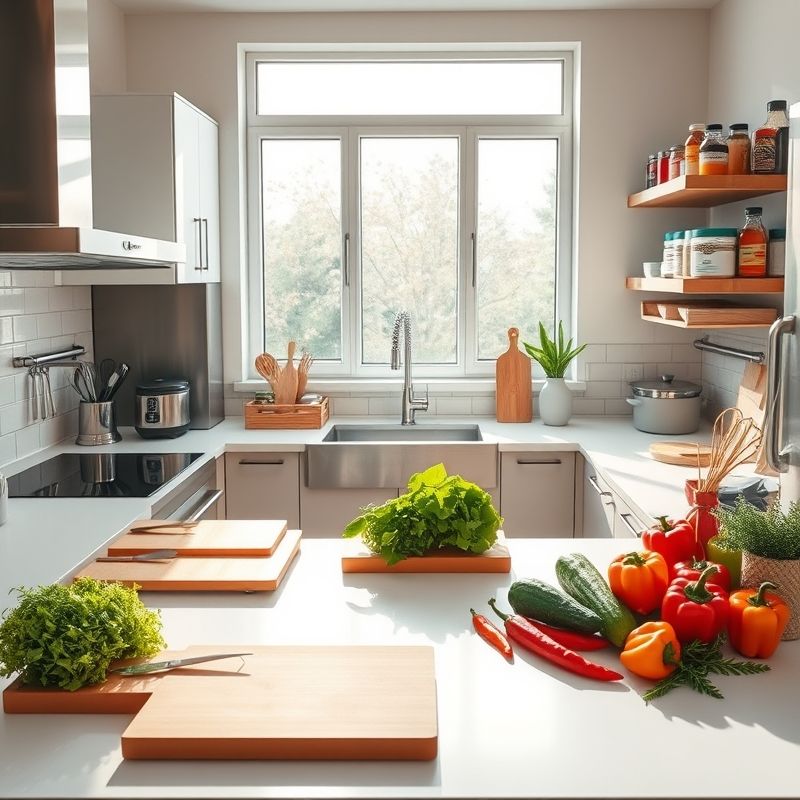
Before we even touch a knife, let’s talk about the overall layout. The core concept here is work zones. Think of your kitchen as a series of interconnected stations, each dedicated to a specific task. The most common zones are: Preparation (chopping, mixing), Cooking (stove, oven), Cleaning (sink, dishwasher), and Storage (pantry, refrigerator). Ideally, these zones should flow logically into each other, minimizing unnecessary steps. For example, your prep zone should be close to both your storage (for easy access to ingredients) and your cooking zone (to quickly transfer prepped food).
It took a few iterations to get my Nashville kitchen zones right. At first, I had my prep area crammed in a corner, far from the fridge. It was a constant back-and-forth, a real recipe for frustration (and dropped onions, thanks to Luna’s ‘assistance’). Now, I have a dedicated island that serves as my primary prep zone. It’s directly across from the fridge and within arm’s reach of the stove. This simple change alone has probably saved me hours of walking over the years.
Consider the classic “work triangle” – the imaginary lines connecting your sink, stove, and refrigerator. While it’s a useful starting point, don’t be afraid to adapt it to your specific needs and space. My kitchen, for instance, is more of a “work rectangle,” but it works because it reflects how *I* cook. The key is to minimize the distance between these core elements. Think efficiency, not geometry. Also, don’t overlook vertical space! Shelves, hooks, and magnetic strips can drastically increase storage and keep frequently used items within easy reach.
Another crucial, often overlooked, aspect is lighting. Good lighting, particularly in the prep zone, is essential for safety and accuracy. I invested in some under-cabinet LED lights, and it’s made a world of difference. No more squinting to see if my onions are finely diced or just… onion-shaped.
Smart Storage: Everything in Its Place
A cluttered kitchen is an inefficient kitchen. It’s a simple equation, but one that’s surprisingly easy to overlook. Effective storage isn’t just about having enough space; it’s about organizing that space intelligently. Start by decluttering ruthlessly. Do you really need three different types of vegetable peelers? (I’m guilty of this one, I confess.) Be honest with yourself about what you actually use and donate or discard the rest. And it is 2025, so ask yourself is this tool still relevant?.
Next, group similar items together. Keep all your baking supplies in one cabinet, your spices in another, and your cooking utensils within easy reach of the stove. Use clear containers for pantry staples like flour, sugar, and pasta. This not only looks neater but also allows you to quickly see what you have on hand. I’m a big fan of labeling everything, even if it seems obvious. It prevents those “Wait, is this baking soda or baking powder?” moments. Labeling is your friend.
Think about accessibility. Store frequently used items at eye level and within easy reach. Less frequently used items can go on higher shelves or in deeper cabinets. Consider pull-out shelves or drawers for lower cabinets, which make it easier to access items in the back. I also use drawer dividers to keep utensils and gadgets organized. No more rummaging through a jumbled mess to find the whisk.
Don’t forget about your refrigerator! This is often a major source of clutter and food waste. Use clear containers to store leftovers and prepped ingredients. Label them with the contents and date. This simple step can significantly reduce food waste and make it easier to plan meals. I also have designated zones within my fridge – one for produce, one for dairy, one for leftovers, etc. It might sound overly organized, but it truly makes a difference.
Mastering Your Prep Workflow
Mise en Place: The Secret Weapon
If there’s one culinary technique that epitomizes efficiency, it’s mise en place. This French term translates to “everything in its place,” and it’s the cornerstone of any well-run kitchen, professional or home. The concept is simple: before you start cooking, gather and prepare all your ingredients. Chop the vegetables, measure the spices, preheat the oven – do everything you can *before* you turn on the stove.
Mise en place might seem like extra work upfront, but it actually saves time and reduces stress in the long run. It allows you to focus on the cooking process itself, without having to stop and scramble for ingredients mid-recipe. It also helps prevent mistakes. How many times have you realized you’re out of a key ingredient halfway through a recipe? Mise en place eliminates that problem.
I used to be a “fly by the seat of my pants” cook, grabbing ingredients as I needed them. But embracing mise en place has completely transformed my cooking experience. It’s made me more organized, more efficient, and, honestly, a better cook. It’s like having a culinary assistant, except that assistant is just… a more organized version of myself.
To make mise en place even easier, invest in a set of small, stackable bowls or containers. These are perfect for holding prepped ingredients. I also use a large cutting board with a built-in well for catching scraps. This minimizes mess and makes cleanup a breeze. Small tools, big impact.
Batch Cooking and Prep: Your Future Self Will Thank You
Another game-changer for kitchen efficiency is batch cooking and prep. This involves preparing large quantities of food components – cooked grains, roasted vegetables, chopped onions, etc. – ahead of time and storing them for later use. It’s a fantastic way to save time and effort during the week, especially if you have a busy schedule.
I typically dedicate a few hours on Sunday afternoon to batch cooking. I’ll roast a big batch of vegetables, cook a pot of quinoa or rice, and maybe make a soup or stew. I then portion these out into individual containers and store them in the fridge or freezer. This gives me a head start on meals throughout the week. I can quickly assemble salads, bowls, or stir-fries using these prepped components.
Batch prepping ingredients is another great strategy. Chop a bunch of onions and bell peppers and store them in the fridge. They’ll be ready to go when you need them for a quick stir-fry or omelet. You can also pre-portion snacks like nuts, fruits, or vegetables into individual bags or containers. This makes it easy to grab a healthy snack on the go.
Batch cooking and prepping is also a great way to minimize food waste. If you have a lot of vegetables that are about to go bad, roast them or turn them into a soup. This extends their shelf life and prevents them from ending up in the trash. It’s a win-win for your wallet and the environment. I used to throw away so much produce before I started batch prepping – it’s a habit I’m definitely glad to have broken.
Essential Tools and Gadgets (and Some to Skip)
Quality Over Quantity: Invest Wisely
When it comes to kitchen tools, it’s tempting to accumulate every gadget under the sun. But trust me, a drawer full of rarely used tools is more of a hindrance than a help. Focus on quality over quantity. Invest in a few essential, high-quality tools that will last for years and make your cooking life easier.
A good chef’s knife is arguably the most important tool in any kitchen. It’s worth investing in a high-quality knife that feels comfortable in your hand and holds its edge well. I also recommend a good paring knife, a serrated knife, and a sturdy cutting board. These are the workhorses of your kitchen.
Other essential tools include a good set of mixing bowls, measuring cups and spoons, a whisk, a spatula, and a good quality pot and pan. These are the basics, and you can build from there based on your specific cooking needs. I’m a big fan of my stand mixer, but it’s not essential for everyone. Think about what you cook most often and invest accordingly.
And as for those “as seen on TV” gadgets? Be skeptical. Many of them are gimmicky and end up collecting dust in a drawer. Do your research before you buy, and don’t be afraid to ask for recommendations. I’ve learned the hard way that a cheap garlic press is more trouble than it’s worth.
Embrace Technology (Judiciously)
While I’m a bit of a traditionalist in some ways, I’m also a big believer in embracing technology when it can genuinely improve efficiency. There are some amazing smart kitchen appliances and gadgets on the market these days, from sous vide machines to instant pots to smart ovens.
I’m particularly fond of my immersion blender, which is incredibly versatile for making soups, sauces, and smoothies. It’s much easier to clean than a traditional blender, and it takes up less space. I also use a digital kitchen scale for precise measurements, especially when baking. It’s much more accurate than using measuring cups.
But again, be judicious. Don’t buy a gadget just because it’s trendy. Think about whether it will actually solve a problem or make your cooking life easier. A smart oven that preheats itself remotely might be cool, but is it really worth the investment if you’re usually home to preheat it yourself? Ask yourself: Will this *really* make a difference?
One technology I’m still on the fence about is recipe apps. While they can be helpful for finding new recipes and organizing your favorites, I still prefer the tactile experience of cooking from a physical cookbook. But that’s just me. Maybe I’m just old-fashioned.
Cleaning as You Go: The Unsung Hero of Efficiency
The Two-Minute Rule
This might sound obvious, but it’s a game-changer: clean as you go. Don’t let dishes pile up in the sink. Wash them as you use them, or at least rinse them and put them in the dishwasher. Wipe down counters and spills immediately. This simple habit can prevent your kitchen from becoming a disaster zone and make the final cleanup much easier.
I’m a big proponent of the “two-minute rule.” If a task takes less than two minutes, do it immediately. Wipe down the counter, rinse a dish, put away an ingredient – these small actions add up and prevent clutter from accumulating.
Keep cleaning supplies readily accessible. I have a spray bottle of all-purpose cleaner and a roll of paper towels under my sink. This makes it easy to quickly wipe down surfaces and spills. I also keep a small container of soapy water near the sink for washing utensils as I cook.
Another tip: use a “garbage bowl.” Instead of constantly walking back and forth to the trash can, keep a bowl on your counter to collect food scraps. This saves time and keeps your workspace tidy. I learned this trick from a professional chef, and it’s been a lifesaver.
The Power of a Clean Slate
There’s something incredibly satisfying about starting a cooking session with a clean kitchen. It sets the stage for a more organized and efficient workflow. I always make sure to clean up completely after each meal, so that the next time I cook, I’m starting with a blank slate.
A clean kitchen is also a more inspiring kitchen. It’s easier to get creative and experiment when you’re not surrounded by clutter and mess. It’s like a mental reset button. I find that I’m much more likely to try a new recipe or tackle a challenging dish when my kitchen is clean and organized.
And let’s be honest, nobody wants to cook in a dirty kitchen. It’s just… unappetizing. A clean kitchen is a happy kitchen, and a happy kitchen is a more efficient kitchen. It’s all connected. Even Luna seems to appreciate a clean kitchen (although she still tries to ‘help’ with the dishwashing).
Conclusion: Embrace the Journey, Not the Destination
Optimizing your kitchen workflow is a journey, not a destination. It’s an ongoing process of experimentation, refinement, and adaptation. There’s no one-size-fits-all solution. What works for me might not work for you, and that’s okay. The key is to find what works best for *your* space, *your* cooking style, and *your* needs.
Don’t be afraid to try new things, make mistakes, and adjust your approach. It’s all part of the learning process. And remember, the goal isn’t perfection; it’s progress. Even small changes can make a big difference. So, start small, be patient, and enjoy the process of transforming your kitchen into a more efficient and enjoyable space.
I challenge you to pick one thing from this guide – just one – and implement it this week. Maybe it’s reorganizing your pantry, embracing mise en place, or simply committing to cleaning as you go. Whatever it is, take that first step and see how it impacts your cooking experience. You might be surprised at the difference it makes. Will it be perfect at the first try? Probably not but that is okay.
FAQ
Q: I have a really small kitchen. Can I still optimize my workflow?
A: Absolutely! In fact, small kitchens often *demand* greater efficiency. Focus on maximizing vertical space, using multi-functional tools, and decluttering ruthlessly. Every inch counts in a small kitchen.
Q: I’m not a very organized person. Is there hope for me?
A: Yes! Kitchen efficiency isn’t about being naturally organized; it’s about creating systems that work for you. Start with small, manageable changes and build from there. Even small improvements can make a big difference.
Q: I’m on a tight budget. Can I still improve my kitchen workflow?
A: Definitely! Many of the most effective strategies, like decluttering, organizing, and cleaning as you go, don’t cost a thing. You can also find affordable kitchen tools and storage solutions at discount stores or online.
Q: How do I deal with a shared kitchen space (roommates, family, etc.)?
A: Communication is key! Talk to your housemates about establishing shared zones and responsibilities. Consider creating a cleaning schedule and labeling shared items. It might take some negotiation, but it’s possible to create a more efficient and harmonious kitchen environment.
You Might Also Like
@article{optimize-kitchen-workflow-slash-prep-time-boost-efficiency,
    title   = {Optimize Kitchen Workflow: Slash Prep Time & Boost Efficiency},
    author  = {Chef's icon},
    year    = {2025},
    journal = {Chef's Icon},
    url     = {https://chefsicon.com/optimizing-your-kitchen-workflow-for-maximum-efficiency/}
} 