
Table of Contents
Alright, let’s talk kitchens. Not the cozy kind where you maybe burn toast on a Sunday morning (guilty!), but the high-pressure, high-stakes world of commercial kitchen layouts. It sounds kind of dry, doesn’t it? Layouts, zones, workflow… But stick with me here. Before I dove headfirst into the food and lifestyle scene here in Nashville – trading Bay Area fog for Tennessee sunshine, a move my cat Luna seems to *mostly* approve of – I spent years in marketing. And you know what marketing taught me? Systems matter. Flow matters. How things are arranged dictates how effectively they function, whether it’s a website funnel or, yes, a professional kitchen.
I remember consulting for this one restaurant back in the day… gorgeous front-of-house, really nailed the ambiance. But backstage? It was pure chaos. The dish pit was miles from the main cooking line, the walk-in cooler door opened right into a major traffic path, and chefs were practically doing pirouettes around each other just to reach the spice rack. The stress was palpable, the ticket times were lagging, and you could just *feel* the inefficiency costing them money and sanity. It was a classic case of form completely ignoring function. It made me realize that a poorly designed kitchen isn’t just an inconvenience; it’s a fundamental business problem. Maybe thinking about this stuff is why I find patterns everywhere now.
So, why should you care about the nitty-gritty of commercial kitchen layout? Because getting it right is foundational to everything: operational efficiency, staff safety and morale, food quality, speed of service, and ultimately, your bottom line. A well-designed kitchen is like a well-oiled machine; a poorly designed one is like throwing sand in the gears. In this piece, we’re going to break down some essential tips and considerations for planning or optimizing your commercial kitchen layout. We’ll look at workflow, different layout styles, equipment placement, safety, and all that good stuff. Think of it as building the functional heart of your culinary operation. It’s less about aesthetics (though that can play a role) and more about pure, unadulterated practicality. Let’s get into it.
Decoding the Kitchen Workflow: The Foundation of Good Layout
Before you even think about where to put the fryer, you absolutely *have* to understand the journey food takes through your kitchen. This is the workflow, and it’s the bedrock of any logical layout. Get this wrong, and everything else feels awkward and inefficient. It generally follows a logical progression, minimizing backtracking and cross-contamination risks. Think about it linearly, even if the physical layout isn’t a straight line. It starts with receiving goods, then moves to storage, preparation, cooking, plating/service, and finally, warewashing. Each step needs its dedicated space and should ideally flow smoothly into the next.
1. Receiving and Storage: The Gateway
This is where everything enters your operation. Your receiving area needs to be easily accessible for delivery trucks, ideally with a dedicated entrance separate from customer or staff entrances if possible. Think about proximity to storage areas – dry storage, refrigerated storage (walk-ins, reach-ins), and frozen storage. You don’t want staff hauling heavy boxes of produce across the entire kitchen during peak service. Proximity is key here. Consider space for checking invoices, weighing goods, and breaking down bulk packaging. Storage areas themselves need careful planning. Shelving should be sturdy and accessible, FIFO (First-In, First-Out) should be easy to implement, and temperature controls must be accurate and reliable. A poorly planned receiving and storage setup creates bottlenecks right from the start. It’s the first domino; if it falls wrong, the rest often follow. I sometimes wonder if the stress of a bad receiving setup contributes more to kitchen tension than we realize.
2. Preparation Stations: Mise en Place Matters
Once ingredients are retrieved from storage, they head to prep. This area can be broken down further depending on your menu – vegetable prep, meat/fish fabrication, pastry, etc. Each station needs adequate counter space, dedicated sinks (handwashing and food prep sinks are distinct!), access to necessary smallwares (knives, cutting boards, bowls), and often, nearby refrigeration for holding prepped items. Cross-contamination prevention is paramount here. Think separate cutting boards and utensils for raw meats vs. vegetables. The layout should support this separation naturally. Consider the flow *from* storage *to* prep, and then *from* prep *to* the main cooking line. Is it logical? Does it minimize unnecessary steps? Are tools easily accessible? A cramped or illogical prep area slows down the entire process and increases the risk of errors. This stage is all about setting the cooks up for success during service.
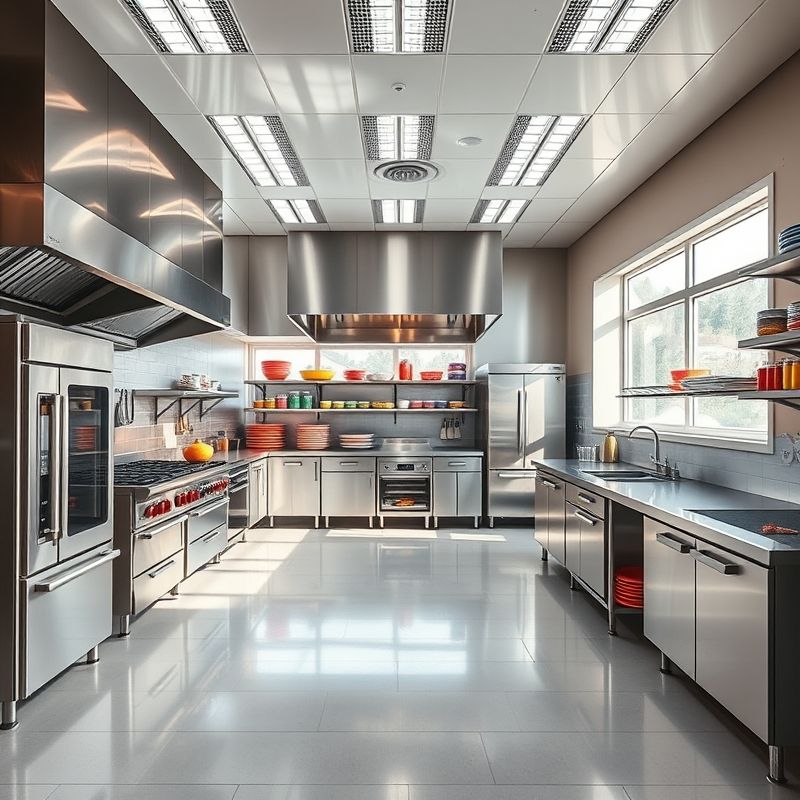
3. The Cooking Line: Heart of the Operation
This is where the magic (and the heat) happens. The layout of the cooking line – often called ‘the line’ – is critical. Equipment placement here needs meticulous thought based on your menu. Items cooked most frequently or requiring multiple steps should be positioned strategically. Think about the sequence of cooking. Does the station flow naturally from, say, sauté to grill to oven? Common configurations include the island layout (cooking equipment clustered in the center), the zone layout (stations grouped by function – fry station, grill station), or the assembly line layout (linear flow, often used in high-volume or specific menu types like pizza or sandwiches). Ventilation is non-negotiable here – proper hoods are essential for removing heat, smoke, and grease-laden vapors. There needs to be enough space for cooks to work without constantly bumping into each other, yet close enough for communication and passing items. Access to holding equipment (hot wells, heat lamps) and plating areas is also crucial. Is this the most complex part to design? Probably. It demands a deep understanding of your specific menu and service style.
4. Plating and Service Area: The Final Touch
After cooking comes plating and dispatch. This area acts as the bridge between the back-of-house and the front-of-house (or the delivery driver). It needs space for plates, garnishes, and final touches. Heat lamps or warming shelves are often necessary to keep food at the correct temperature before it goes out. Communication is key here – how do orders come in (ticket system, KDS screen)? How does the expo or chef communicate with servers or packers? The layout needs to facilitate this communication and provide a clear path for servers or delivery personnel to pick up orders without interfering with the cooking line. Consider the flow for both outgoing food and incoming dirty dishes – they shouldn’t collide. This area needs to be efficient and organized to ensure food gets to the customer quickly and looking its best. Sometimes I think this is the most underestimated zone, the final handover point where speed and presentation are everything.
5. Warewashing: Closing the Loop
Often relegated to a back corner, the warewashing (dishwashing) area is critical for sanitation and keeping the kitchen supplied with clean tools and dishes. It needs to be separate enough to contain noise and moisture but accessible for staff dropping off dirty items. The ideal flow is dirty drop-off -> scraping/pre-rinsing -> washing (dish machine) -> drying/cooling -> clean storage. There needs to be adequate space for dish racks, chemical storage (safely!), and the machine itself, including clearance for opening doors and maintenance. Ventilation is important here too, to handle steam and heat. Ensure there’s a clear separation between the dirty drop-off and the clean storage areas to prevent re-contamination. A bottleneck in the dish pit can bring the entire kitchen to a halt faster than almost anything else. You run out of clean pans or plates, and service grinds to a stop. It’s not glamorous, but it’s absolutely essential.
Choosing Your Layout Style: Finding the Right Fit
Okay, we’ve talked workflow, but how does that translate into physical shapes? There isn’t a single ‘best’ layout; the optimal choice depends heavily on the available space, the type of foodservice operation (fine dining vs. QSR vs. catering), menu complexity, and budget. Understanding the common styles can help you determine what might work best for your specific needs. It’s about matching the form to your unique function. You wouldn’t use the same layout for a ghost kitchen primarily doing delivery as you would for a high-end restaurant with intricate plating, right? Seems obvious, but you’d be surprised.
6. Assembly Line Layout: Streamlined for Speed
Think fast food, high-volume cafeterias, or concepts with a very linear production process (like build-your-own bowl places). The assembly line layout arranges equipment and workstations in a sequence that follows the flow of production. Ingredients start at one end, and the finished product comes out the other. It’s highly efficient for repetitive tasks and minimizing movement. The downside? It can be less flexible if the menu changes significantly, and it requires a relatively long, narrow space. It excels at throughput but can sometimes feel a bit… well, like an assembly line for the staff. Is maximizing speed always the ultimate goal? It depends on the concept, I suppose. Sometimes a little flexibility is worth sacrificing a few seconds per order.
7. Island Layout: Centralized Cooking Power
This popular layout groups major cooking equipment (ranges, ovens, fryers, grills) in a central block or ‘island’, with prep stations, storage, and warewashing typically arranged around the perimeter walls. It facilitates communication between cooks working on the line and can create efficient workflows around the central hub. Good ventilation over the island is absolutely critical. This layout often works well in larger, more square-shaped kitchens. It allows for distinct zones around the perimeter while keeping the main cooking action contained. However, it can sometimes create traffic jams around the island if not planned carefully. Where do the prep tables fit best? How does the flow from prep to island actually work in practice? These are key questions. The island layout often feels like the classic ‘chef’s kitchen’.
8. Zone Layout: Functionally Focused
Similar to the island layout in some ways, the zone layout organizes the kitchen into distinct areas based on task or function. You’ll have a dedicated prep zone, a soup and sauce zone, a grill zone, a fry zone, a salad/cold prep zone, a baking zone, etc. Equipment and storage for each specific function are located within that zone. This helps specialists stay in their area and become highly efficient at their tasks. It can work well in various kitchen shapes and sizes and is adaptable to complex menus. The key is ensuring smooth flow *between* the zones – how does a component move from the prep zone to the grill zone to the plating area? Careful planning of these pathways is needed to avoid inefficiency and collisions. This feels very logical, very organized, almost like specialized departments within the kitchen.
Essential Considerations Beyond Workflow and Style
Getting the workflow and basic layout style right is huge, but there are other critical factors that layer on top of this foundation. Neglecting these can undermine even the best-planned flow. We’re talking safety, flexibility, storage again (it’s *that* important), and the invisible elements like air and light. It’s the details that elevate a functional layout to a truly effective and even pleasant working environment. And let’s be honest, a more pleasant environment often translates to better retention and performance. Who wants to work in a dungeon?
9. Safety, Sanitation, and Codes: Non-Negotiables
This cannot be overstated. Your kitchen layout *must* comply with all local health and safety codes. This includes things like specified distances between equipment and walls, proper placement of hand sinks and sanitation stations, adequate aisle widths for safe movement and emergency egress, non-slip flooring, correct fire suppression systems (like Ansul systems over cooking equipment), and appropriate lighting levels. Think about preventing cross-contamination through layout – separating raw and cooked food prep areas. Consider ergonomics too; designing workstations to minimize strain can reduce injuries and fatigue. Are emergency shut-offs easily accessible? Is there clear signage? Building safety into the design from the start is far easier and cheaper than retrofitting later. Don’t treat codes as a hurdle; treat them as a baseline for a safe operation. I always advise clients to consult with local health department officials *during* the design phase, not just before opening.
10. Flexibility and Future-Proofing: Planning for Change
Menus evolve, trends shift, operations scale up or down. A kitchen layout that is too rigid can become a liability. Where possible, build in some flexibility. Can stations be multi-purpose? Is there space to add or swap out equipment later? Using mobile equipment tables or equipment on casters can provide adaptability. Maybe leave some ‘flex space’ in the design if possible. While you need structure, designing with potential future changes in mind can save significant headaches and expense down the road. Think about modular solutions. Is this always possible with tight space constraints? Maybe not entirely, but even small considerations for adaptability can make a difference. It’s like future-proofing your investment. You wouldn’t buy a computer expecting it to *never* need an upgrade, right? Same principle applies, just with fryers instead of RAM.
Bringing It All Together: The Synthesis
So, we’ve dissected workflow, explored layout styles, and touched on crucial details like safety and flexibility. Designing a commercial kitchen layout is a complex puzzle with many interlocking pieces. It requires a deep understanding of your specific menu, service style, volume expectations, and available space. It’s part science, part art, and heavily reliant on practical, real-world considerations. Don’t just copy a layout you saw somewhere else; analyze *why* it works (or doesn’t) and adapt the principles to your unique situation. It’s tempting to focus solely on the shiny equipment, but the invisible flow and spatial relationships are arguably more important in the long run.
Remember that restaurant I mentioned earlier? The one with the chaotic back-of-house? They eventually did a minor renovation, focusing purely on improving the layout based on workflow analysis. They moved the dish pit closer to the line, reconfigured prep stations, and created clearer pathways. It wasn’t a massive overhaul, but the difference was night and day. Ticket times improved, stress levels visibly dropped, and even the food seemed better (maybe happier cooks?). It underscored for me that thoughtful layout design is a powerful lever for operational success. It’s not just about arranging boxes in a room; it’s about orchestrating movement, efficiency, and safety.
My challenge to you, if you’re planning or refining a kitchen space, is this: truly walk through the journey of your ingredients and your staff. Use tape on the floor, sketch it out, simulate the movements. Where are the bottlenecks? Where does frustration occur? Where are steps being wasted? Question every placement. Is this the *absolute* best spot for the combi oven, considering flow from prep and to plating? Could the storage be more accessible? Don’t settle for ‘good enough’. Strive for a layout that actively supports your team and your goals. Will it ever be perfect? Probably not, compromises are often necessary. But aiming for optimal makes a world of difference.
FAQ
Q: What’s the most common mistake people make in commercial kitchen layout?
A: Honestly, I think the most common mistake is underestimating the importance of workflow and focusing too much on fitting in equipment without considering how staff will actually move and work within the space. Poor flow leads to inefficiency, safety hazards, and stress. Another big one is not planning enough storage, both refrigerated and dry.
Q: How much space do I really need between equipment and for walkways?
A: This often depends on local health and safety codes, which are the minimum standard. Generally, main traffic aisles should be at least 4 feet wide, preferably 5 feet, to allow staff to pass each other, even with carts. Working aisles between equipment might be slightly less, maybe 3.5 to 4 feet, but enough for doors to open fully and staff to work without bumping into hot surfaces. Always check your local regulations!
Q: Island, Zone, or Assembly Line – which is best for a small kitchen?
A: For very small kitchens, a pure island layout is often difficult due to space constraints. Zone or modified assembly line layouts tend to work better. You might have zones along the walls, utilizing vertical space for storage, and creating a linear flow as much as possible. Maximizing counter space and using under-counter refrigeration becomes crucial. Sometimes a galley kitchen style (two parallel counters/equipment lines) is the most practical for narrow spaces.
Q: How important is ventilation in the layout planning?
A: Extremely important. Ventilation, primarily hood systems over cooking equipment, dictates placement in many ways due to ducting requirements and fire safety codes. You need to plan for adequate makeup air as well. Poor ventilation affects air quality, staff comfort, safety (grease buildup), and can even lead to equipment malfunction. It should be one of the first technical considerations integrated into your layout plan, not an afterthought.
You might also like
- Choosing the Right Commercial Oven for Your Needs
- Small Commercial Kitchen Design: Maximizing Tight Spaces
- Understanding Health Code Basics for Kitchen Design
@article{smart-commercial-kitchen-layout-tips-for-better-flow,
    title   = {Smart Commercial Kitchen Layout Tips for Better Flow},
    author  = {Chef's icon},
    year    = {2025},
    journal = {Chef's Icon},
    url     = {https://chefsicon.com/commercial-kitchen-layout-essential-tips/}
} 

