
The Best Fluffy Pancakes recipe you will fall in love with. Full of tips and tricks to help you make the best pancakes.
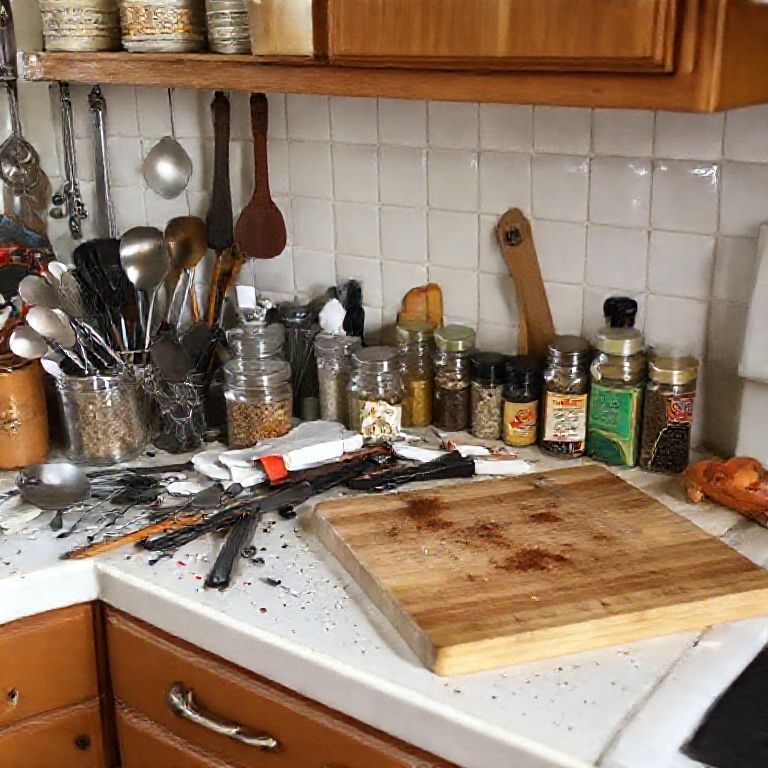
Table of Contents
- 1 My Kitchen Decluttering Playbook: From Chaos to Calm
- 1.1 1. The Mental Game: Setting Your Decluttering Intentions
- 1.2 2. Arming Yourself: Gathering the Decluttering Essentials
- 1.3 3. The Countertop Conquest: Reclaiming Prime Real Estate
- 1.4 4. Pantry Raid: Excavating Your Food Storage
- 1.5 5. Utensils & Gadgets: Taming the ‘Drawer of Doom’
- 1.6 6. Pots, Pans, and Bakeware: The Heavy Lifters
- 1.7 7. Dishes and Glassware: Confronting the Chipped and Unloved
- 1.8 8. Small Appliances: The Counter Hoggers and Cupboard Lurkers
- 1.9 9. Under the Sink: Navigating the Abyss
- 1.10 10. The Finishing Touches & The Keep-It-Up Plan
- 2 Keeping the Kitchen Kingdom Calm
- 3 FAQ
Alright, let’s talk kitchens. Specifically, decluttering your kitchen. If you’re anything like me, this space can go from a culinary sanctuary to a scene of utensil chaos in, oh, about twenty-four hours. It’s the heart of the home, they say, but sometimes my heart feels a bit…congested. When I first moved to Nashville from the Bay Area, unpacking felt like an archaeological dig. Boxes everywhere, stuff I hadn’t seen in years, and a kitchen that, while lovely, quickly became ground zero for ‘I’ll deal with this later.’ Luna, my rescue cat, seemed to think the overflowing countertops were a new adventure park, which, while adorable, wasn’t exactly conducive to making dinner. So, I had to get serious about reclaiming my space, and let me tell you, the peace of mind that comes with an organized kitchen is something else. It’s not just about having a pretty space; it’s about making your daily life smoother, less stressful, and honestly, more enjoyable. Think about it – less time hunting for that one specific lid, more time actually enjoying your coffee or whipping up a meal.
This isn’t going to be one of those hyper-minimalist, ‘throw away everything you own’ manifestos. I’m a marketing guy by trade, but my passion for food and all things culinary means I *have* stuff. Good stuff! Stuff I use! But even the most beloved collection of gadgets and gizmos can become overwhelming if it’s not managed. What I want to share with you is a practical, step-by-step approach to decluttering your kitchen that’s worked for me, not just once, but as an ongoing practice. We’ll break it down into manageable chunks, because staring at the entire kitchen and thinking ‘I have to declutter ALL of this’ is enough to make anyone want to order takeout for a week. We’re aiming for functional, joyful, and sustainable – a kitchen that works for *you*, not against you. Is this the absolute only way? Probably not, but it’s a system that acknowledges we’re human, we get busy, and sometimes we just need a clear path through the clutter.
So, what will you get out of this? We’re going to walk through the entire process, from the initial mental game of psyching yourself up, to tackling specific zones like the dreaded pantry and those overflowing drawers. I’ll share some of the tough questions I ask myself when deciding what stays and what goes, and maybe even a few embarrassing confessions about the weirdest things I’ve found lurking in the back of my own cupboards. My hope is that by the end of this, you’ll feel empowered to not just declutter your kitchen, but to create a system that helps you keep it that way. Or, at least, mostly that way. Perfection is overrated, but a functional, less chaotic kitchen? That’s gold. Luna still tries to ‘help’ sometimes, usually by batting around a stray bottle cap she’s unearthed, but overall, kitchen life is much more serene. Let’s dive in, shall we?
My Kitchen Decluttering Playbook: From Chaos to Calm
1. The Mental Game: Setting Your Decluttering Intentions
Before you even think about opening a cupboard, let’s talk about the ‘why’. Seriously, why are you doing this? For me, a cluttered kitchen equals a cluttered mind. It’s hard to feel creative or even just relaxed when you’re surrounded by stuff that doesn’t have a place or, worse, stuff you don’t even use anymore. My Nashville kitchen is where I unwind, experiment with new recipes, and often, where I do some of my best thinking for Chefsicon.com. If it’s a mess, my whole vibe is off. So, my primary intention is usually to create a more efficient and inspiring workspace. What’s yours? Do you want to save time in the mornings? Make it easier to cook healthy meals? Reduce food waste? Or maybe you’re just tired of the visual noise. Whatever your reasons, get clear on them. Write them down if it helps. This isn’t just about tidying; it’s about aligning your physical space with your lifestyle goals. I find that having a clear ‘why’ makes it so much easier to make those tough decisions later on – you know, when you’re holding that chipped mug from your college days and sentimentality is screaming louder than logic. It’s a bit like developing a marketing strategy: you need to know your objective before you can pick the right tactics. Is this the best approach for everyone? Maybe not, some people can just dive in. But for me, a little mental prep goes a long way in preventing overwhelm and ensuring I actually finish the job. It helps to visualize the end result – a kitchen where everything has its place, where countertops are clear, and where you feel a sense of calm, not chaos. That vision can be a powerful motivator.
2. Arming Yourself: Gathering the Decluttering Essentials
Okay, intentions set? Good. Now, let’s talk logistics. You wouldn’t go into a culinary battle without your knives sharpened, right? Same principle applies here. Before you start pulling everything out, gather your supplies. Trust me, it makes the whole process smoother and less… frantic. Here’s what I usually get ready: Boxes or bags – and lots of them. I label them clearly: ‘Keep (in kitchen)’, ‘Keep (relocate elsewhere)’, ‘Donate’, ‘Recycle’, and ‘Toss’. Having these categories defined upfront prevents you from just making a giant pile of ‘stuff to sort later,’ which is basically just postponing the decision. You’ll also want some good cleaning supplies: all-purpose cleaner, microfiber cloths, maybe some degreaser for those grimy spots you’re about to uncover. Don’t forget a vacuum with a hose attachment for crumbs in drawers and a trash can (or two) nearby. Some people like to play music; I personally find it helps keep the energy up. Luna, my cat, usually just finds a sunbeam to nap in, blissfully unaware of the impending upheaval. Oh, and snacks and water! Decluttering can be surprisingly tiring. I also find it helpful to have a notepad and pen handy. Why? Sometimes you’ll identify things you need – like a new drawer organizer or a better spice rack – and it’s good to jot those down as you go rather than trying to remember them later. This isn’t about buying more stuff right away, but about identifying genuine needs that will support your newly decluttered space. It’s about being prepared for the process so you can focus on the task at hand: making decisions about your belongings.
3. The Countertop Conquest: Reclaiming Prime Real Estate
This is where you get your first big win, and it’s super motivating. Kitchen countertops are like the headline of your kitchen – they make the first impression. If they’re cluttered, the whole kitchen feels cluttered, even if the cupboards are pristine (which, let’s be honest, they probably aren’t if the counters are buried). So, the goal here is to clear *everything* off your countertops. Yes, everything. The toaster, the coffee maker, the fruit bowl that’s currently holding more mail than fruit, that pile of cookbooks you mean to use… all of it. Place items on your dining table or another temporary staging area. Once the surfaces are bare, give them a really good clean. You might be surprised (or horrified) by what you find underneath. This step alone can make your kitchen feel twice as big and a whole lot calmer. Now, the crucial part: be ruthless about what goes back. The rule of thumb I try (keyword: *try*) to follow is that only items used daily or almost daily earn a spot on the counter. For me, that’s the coffee maker, the electric kettle (I’m a big tea drinker, a habit from my Bay Area days), and maybe a small, decorative bowl for keys if it’s near the entrance. Things like the stand mixer, the blender, the air fryer – if you don’t use them every single day, they need to find a home in a cupboard or pantry. It might feel weird at first, seeing so much empty space, but embrace it! This is about creating visual calm and functional workspace. The less stuff on your counters, the easier they are to clean, and the more space you have for actual food prep. It’s a game-changer, truly. And it sets a strong precedent for the rest of the decluttering journey. It’s what I call a ‘quick win’ in marketing – something that shows immediate positive results and builds momentum for the harder tasks ahead.
4. Pantry Raid: Excavating Your Food Storage
Ah, the pantry. Or, if you’re like me in my previous, smaller apartments, the ‘cupboard-that-acts-as-a-pantry.’ This is where the real archaeology begins, folks. It’s often a dark, forgotten space where good intentions (and half-eaten bags of chips) go to die. First step, as always: take everything out. Everything. Group items by category as you go – canned goods, grains, pasta, snacks, baking supplies, spices. This will help you see exactly what you have. Now, the purge. Check every single expiration date. Be honest: if that can of artichoke hearts expired in 2022, you’re not going to use it. Toss it. Same goes for that fancy spice blend you bought for one recipe and haven’t touched since. Spices lose their potency, people! If it doesn’t smell like anything, it won’t taste like anything. Then there’s the stuff that’s not expired but you know, deep down, you’ll never eat. That bag of quinoa you bought during a health kick? The specialty flour from that one time you tried to make sourdough? If it’s unopened and still good, consider donating it to a local food bank. Many places in Nashville are happy to take unexpired, non-perishable goods. Once you’ve whittled down your stash, wipe down the shelves. Now, think about optimizing storage. Clear containers are your friend here – they let you see what you have, keep food fresher, and often stack more efficiently than original packaging. Consider decanting things like flour, sugar, pasta, and cereal. Group like items together. Maybe a shelf for breakfast stuff, another for dinner staples, a section for snacks. The goal is visibility and accessibility. No more buying a third jar of paprika because you couldn’t find the first two. This part can be time-consuming, I won’t lie, but the payoff in terms of reduced food waste and easier meal planning is huge. I always find a few surprises – like that packet of astronaut ice cream someone gave me as a joke. Definitely past its prime.
5. Utensils & Gadgets: Taming the ‘Drawer of Doom’
Let’s be real, we all have one: the utensil drawer. Or, as I affectionately call it in my Nashville home, the ‘Drawer of Doom’ (though it’s much less doom-laden these days, I promise). This is where spatulas go to multiply, where whisks get tangled in a forbidden embrace, and where you can find at least three can openers, none of which work particularly well. So, empty it. All of it. Dump it onto a clean counter or towel. First, get rid of the obvious culprits: broken utensils, anything rusted, multiples of things you only need one of. How many potato peelers does one person *really* need? I’m asking for a friend… and myself. I once found I owned five. Five! I now have two, and that feels like plenty. Then, look at the gadgets. That avocado slicer you used once? The melon baller that seemed like a good idea? The garlic press that’s impossible to clean? If you haven’t used it in the last year, or if it’s a uni-tasker that a simple knife could do the job of, seriously consider letting it go. Streamlining your tools makes finding what you need so much quicker. Once you’ve culled the collection, invest in a good drawer organizer. This is non-negotiable for utensil sanity. Compartmentalize! Spatulas with spatulas, spoons with spoons. If you have a lot of larger utensils like ladles and serving spoons that don’t fit well in a drawer, consider a countertop crock or a wall-mounted rack if you have the space and like that look. The key is to make everything easy to see and grab. No more rummaging. This is also a good time to assess the quality of what’s left. Maybe it’s time to replace that flimsy spatula with a sturdy silicone one. Think of it as curating your collection – keeping only the tools that are a joy to use. My marketing brain sees this as refining your toolkit: keeping the high-performers and ditching the underachievers.
6. Pots, Pans, and Bakeware: The Heavy Lifters
Moving on to the heavyweights: pots, pans, and bakeware. These items take up a lot of space, so an efficient system here is crucial. Like before, pull everything out. Yes, even that giant roasting pan you only use at Thanksgiving. Assess each piece. Is it warped? Is the non-stick coating scratched and flaking (which can be unhealthy)? Do you have three 8-inch frying pans when you only ever use one? It’s time to be honest about what you truly use and what’s just taking up valuable real estate. My Bay Area apartment kitchen was tiny, so I learned a thing or two about vertical storage and nesting. If your pans are designed to nest, make sure they are. For lids, it’s often a nightmare. Consider a lid organizer rack that can sit in the cupboard or be mounted on the door. Some people swear by storing lids upside down on their corresponding pots, but that only works if you have ample height. I’ve found that dedicating one specific, easily accessible spot for all lids is a game-changer. For bakeware – cookie sheets, muffin tins, cake pans – storing them vertically, like files in a filing cabinet, often works best. You can use tension rods or specialized bakeware organizers to achieve this. It makes it so much easier to grab the one you need without unstacking everything. Again, if you have pieces you haven’t used in years (that Bundt pan you swore you’d use for elaborate cakes?), it might be time to donate them. Someone else might get great joy from it. The goal is a collection that’s functional, in good condition, and doesn’t cause an avalanche every time you open the cupboard. It’s about making these essential, bulky items as easy to access and store as possible.
7. Dishes and Glassware: Confronting the Chipped and Unloved
Dishes and glassware – the everyday workhorses of the kitchen. But even these can accumulate into an overwhelming collection. Start by emptying your dish cupboards and any glass storage areas. As you handle each item, inspect it. Any chips? Cracks? That chipped mug you keep meaning to glue but never do? Let it go. It’s a safety hazard, and honestly, you deserve to drink your coffee from a mug that isn’t actively trying to cut you. Then, think about quantity. Do you really need 24 dinner plates if you’re a household of two and rarely entertain large groups? How many coffee mugs have you accumulated? I’m guilty of this one – mugs seem to appear like magic. The ‘I might need this someday’ collection of chipped or promotional mugs has got to go. Keep your favorites, the ones you actually use and love, and a reasonable number for guests. Consider matching sets versus eclectic collections. There’s no right answer here; it’s about what works for your style and your storage. If you have fine china or special occasion dishes that you rarely use, are they taking up prime real estate in your everyday cupboards? If so, could they be stored elsewhere, perhaps in a dining room hutch or a higher, less accessible kitchen cabinet? For glassware, check for cloudiness that won’t wash off or, again, chips. Do you have a dozen mismatched wine glasses from various events? Maybe pick your favorites and donate the rest. The aim is to have enough for your daily needs and for entertaining a reasonable number of guests, without having teetering stacks of plates or a precarious jumble of glasses. Making these items easy to reach and put away simplifies daily tasks like setting the table and emptying the dishwasher. It’s one of those small things that contributes to a larger sense of order.
8. Small Appliances: The Counter Hoggers and Cupboard Lurkers
Small appliances can be a tricky category. They’re often expensive, and we buy them with the best of intentions. That bread maker I swore I’d use every week… yeah, it’s been a while. That juicer that’s a nightmare to clean? The ice cream maker that only comes out once a summer, if that? It’s time for an honest assessment. Pull them all out – the ones on the counter, the ones in the cupboards, the ones in the pantry, even the ones lurking in the garage or basement that were ‘temporarily’ stored there. For each appliance, ask yourself: When did I last use this? How often do I realistically use it? Does it genuinely make my life easier or better? If the answer to ‘when did I last use this’ is over a year ago (with some exceptions for truly seasonal items like maybe a turkey roaster), it’s a strong candidate for decluttering. If it’s a pain to use or clean, you’re less likely to use it, no matter how great its theoretical function. Be honest. That pasta maker might be beautiful, but if you’ve made fresh pasta exactly twice in five years, is it worth the space it occupies? For the appliances you decide to keep, find logical homes. As mentioned, daily-use items can (maybe) live on the counter if space allows and you don’t mind the look. Everything else should be stored in an accessible cupboard or on a pantry shelf. If an appliance is heavy, store it on a lower shelf to make it easier to get out. Make sure cords are neatly wrapped or secured. It might be that you realize you have two blenders, or a food processor and a mini-chopper that do very similar jobs. Could you consolidate? This isn’t about deprivation; it’s about making sure the tools you have are serving you well and not just creating clutter. Sometimes, I find it helpful to think about the ‘cost per use’ not just in money, but in terms of the space it takes up in my valuable Nashville kitchen.
Deep breath. We’re going in. The cabinet under the kitchen sink can be… an adventure. It’s often dark, damp-ish, and a magnet for half-empty cleaning bottles, old sponges, and that mysterious sticky patch you’ve been avoiding. First, take everything out. Everything. You’ll probably find things you forgot you even owned. Sort through your cleaning supplies. Are there multiple bottles of the same cleaner, half-used? Consolidate them if you can. Check for any products that are ancient or that you simply don’t use anymore. Be careful with disposal – some cleaning chemicals have specific disposal instructions. Look them up if you’re unsure. Old, grimy sponges? Toss ’em. That collection of plastic bags you swore you’d reuse but is now a sentient being? Recycle them (if your local facility takes them) or keep only a manageable amount. Now, clean the cabinet itself. This area can get pretty gross. Once it’s clean and dry, think about organization. This is a prime spot for tension rods or stackable organizers. A tension rod can be used to hang spray bottles by their triggers, freeing up floor space in the cabinet. Small plastic drawers or caddies can corral smaller items like dishwasher pods, extra sponges, and trash bags. If you store your trash can or recycling bin under here, make sure there’s easy access. One thing I learned, especially with Luna being curious, is to ensure all cleaning products are securely closed and, if necessary, consider a childproof lock if you have pets or little ones. The goal is a functional, organized space where you can quickly find what you need without knocking over a cascade of bottles. It’s not the most glamorous part of kitchen decluttering, but taming the under-sink abyss makes a surprisingly big difference to your overall kitchen Zen. It’s like ensuring your website’s backend code is clean – not visible to everyone, but crucial for smooth operation.
10. The Finishing Touches & The Keep-It-Up Plan
Okay, so we’ve conquered the major zones: counters, pantry, drawers, cupboards, appliances, and even the dreaded under-sink area. High five! Now for the ‘everything else’ and, crucially, how to stop this from becoming an annual crisis. What’s left? Maybe your spice collection (if not tackled with the pantry), cookbooks, a junk drawer that might have migrated to the kitchen, pet food supplies if you have a furry friend like my Luna. Apply the same principles: assess, purge, organize. For spices, check freshness and consider a consistent set of jars or a good rack. For cookbooks, keep the ones you truly use or cherish; others can be donated. That kitchen junk drawer? Be ruthless. It should only hold genuinely useful, kitchen-related small items. Once everything has a place, the final step is to establish some habits to maintain your decluttered kitchen. This is where the real work – or rather, the consistent small effort – comes in. Try the ‘one-in, one-out’ rule: if you buy a new mug, an old one has to go. Clean as you go when cooking. Put things away immediately after use. Schedule a mini-declutter session once a month or once a quarter – maybe just 15-30 minutes to quickly tackle a drawer or a shelf that’s starting to look a bit wild. It’s much easier to maintain than to do a massive overhaul. Is this the best approach? For me, it is, because big purges are exhausting. Little and often is key. I also find it helps to regularly reassess. Are my systems still working? Has a new clutter hotspot emerged? It’s an ongoing process, not a one-time fix. But with these steps, you’ve laid a fantastic foundation for a kitchen that feels spacious, efficient, and genuinely enjoyable to be in. And maybe, just maybe, Luna will stick to batting her actual toys around instead of my rediscovered bottle caps.
Keeping the Kitchen Kingdom Calm
So, there you have it – my deep dive into decluttering your kitchen, straight from my own experiences navigating this here in Nashville. It’s a process, for sure, and sometimes it feels like two steps forward, one step back, especially when life gets hectic. But the cumulative effect of these steps, of making conscious choices about what earns a place in this vital hub of your home, is profound. It’s not just about having less stuff; it’s about creating more space – for cooking, for connecting, for creativity, for peace.
I’m not gonna lie, there are moments when I look at a perfectly curated kitchen on Instagram and think, ‘Wow, mine will never look like that.’ And that’s okay! The goal isn’t sterile perfection; it’s functional harmony that suits *your* life. Maybe your challenge, if you’re feeling up to it, is to pick just one of these areas this coming weekend. Not the whole kitchen, just one drawer, one shelf. See how it feels. Does making that small change spark a little bit of joy, a little bit of calm? I bet it will. And who knows, that one small step might just be the catalyst for reclaiming your entire kitchen, one organized utensil at a time.
FAQ
Q: How often should I really declutter my kitchen?
A: Well, a deep declutter like the one described might be an annual or bi-annual thing. But for maintenance, I’d say do mini-declutters much more frequently. Maybe a quick 15-minute tidy-up of a problem spot (like that pesky utensil drawer or a pantry shelf) once a month. The key is consistency to prevent major build-up. Think of it like weeding a garden; little and often is way less overwhelming than tackling a jungle!
Q: What’s the hardest part about decluttering the kitchen for most people, in your opinion?
A: Oh, that’s a good one. I think for many, myself included, it’s twofold. First, it’s the sentimental items – that mug from a special trip, or a gadget someone gifted you that you never use but feel guilty discarding. Second, it’s the ‘just in case’ items. We hold onto things thinking ‘I might need this someday,’ even if ‘someday’ hasn’t come in five years. It takes a bit of mental discipline to overcome those hurdles.
Q: Any specific tips for decluttering a very small kitchen, like an apartment kitchen?
A: Absolutely! I’ve lived in my share of small Bay Area kitchens. Vertical space is your best friend. Think wall-mounted racks for spices or utensils, over-the-door organizers for pantry items, and stacking shelves within cupboards to maximize height. Be even *more* ruthless about what you keep – uni-taskers are rarely worth the space. And really embrace the ‘one-in, one-out’ rule. Every square inch counts!
Q: What should I do with all the items I declutter that are still in good condition?
A: Please don’t just trash them if they’re usable! There are so many great options. You can donate kitchenware, small appliances, and unexpired, non-perishable food to local charities, shelters, or food banks – Nashville has quite a few. Consider selling more valuable items online or at a consignment shop. You could also offer them to friends or family, or list them on a ‘Buy Nothing’ group in your community. It feels good to know your unwanted items are getting a new life elsewhere.
@article{nashville-kitchen-decluttering-my-step-by-step-guide-to-calm,
    title   = {Nashville Kitchen Decluttering: My Step-By-Step Guide to Calm},
    author  = {Chef's icon},
    year    = {2025},
    journal = {Chef's Icon},
    url     = {https://chefsicon.com/decluttering-your-kitchen-a-step-by-step-guide/}
}