
Table of Contents
- 1 Demystifying Your Kitchen Dance: Understanding Workflow and Zones
- 2 Reaching New Heights: Smart Storage Solutions and Appliance Placement
- 3 The Landing Strip & Illumination: Counter Space and Lighting Essentials
- 4 The Kitchen Highway & Ergonomics: Smooth Flow and Comfort
- 5 Making It Yours: The Art of Kitchen Personalization
- 6 Wrapping It Up: Your Kitchen, Your Efficiency
- 7 FAQ: Your Kitchen Efficiency Questions Answered
Hey folks, Sammy here from Chefsicon.com. Let’s talk about something that’s near and dear to my heart – and probably yours if you spend any time wrestling with your pots and pans: streamlining your kitchen layout for maximum efficiency. It’s one of those things that can make a monumental difference in your day-to-day life, transforming a chore into a joy, or at least, something far less frustrating. We’ve all been there, right? That frantic search for the right spice while something’s about to burn, or the awkward dance around an open dishwasher door. It’s not just about aesthetics; a well-thought-out kitchen is a well-oiled machine.
When I first moved to Nashville from the Bay Area a few years back, my rental kitchen was… let’s just say, ‘character-building.’ It was a classic example of form over function, or perhaps, no thought given to function at all. I was constantly bumping into poorly placed cabinets, doing the kitchen cha-cha with the refrigerator door blocking the main pathway, and Luna, my ever-present rescue cat, seemed to find the most inconvenient spots to nap right where I needed to step. It really forced me to get analytical about how a kitchen *should* work, not just how it looks on Pinterest. That experience, as irritating as it was at times, became a bit of a pet project for me, digging into the principles of efficient design. It’s amazing how much psychology and systems thinking goes into something as seemingly simple as arranging your cooking space. I mean, we spend a significant chunk of our lives in this room, preparing meals, grabbing snacks, sometimes even working (guilty!). So making it work *for* us is paramount.
So, in this post, I want to dive deep into how we can transform our kitchens from chaotic obstacle courses into havens of culinary productivity. We’re going to unpack the core ideas behind kitchen efficiency, look at everything from classic theories that still hold water to more modern, flexible approaches suited for today’s lifestyles. My goal isn’t just to throw a bunch of rules at you, but to give you a solid toolkit to critically rethink your own space. Whether you’re embarking on a full-blown remodel, just moved into a new place, or simply looking for some smart, actionable tweaks to make your current setup less of a headache, there should be something here for you. We’ll cover workflow, zones, storage, and all those little details that add up to a big impact. Let’s get cooking, or rather, let’s get *thinking* about how we cook.
Demystifying Your Kitchen Dance: Understanding Workflow and Zones
Alright, let’s get into the nitty-gritty. The very first step, before you even think about moving a single appliance or buying a fancy new organizer, is to understand your own kitchen workflow. This sounds a bit corporate, I know, but trust me, it’s fundamental. It’s about observing and analyzing how *you* move and operate in your kitchen. Think of it like choreographing a dance – you want smooth moves, not awkward stumbles. What are the tasks you perform most frequently? Are you a quick breakfast and coffee person, an elaborate weekend meal prepper, a passionate baker, or all of the above? The path you take from fridge to counter to stove, the sequence of actions for your go-to meals, these are all clues. For instance, if you make coffee every morning, having your coffee maker, beans, grinder, mugs, and even sugar or milk in close proximity makes a huge difference to starting your day smoothly. It seems obvious, but how many of us have the coffee filters stashed across the room from the machine? I’ve been guilty of that in past setups.
This kind of task analysis helps you identify your personal high-traffic zones and the natural sequence of your culinary operations. Maybe you always grab vegetables from the fridge, then move to a specific spot by the sink to wash them, then to a cutting board. That’s a mini-workflow. Documenting these patterns, even mentally, can reveal major inefficiencies. Sometimes we develop these ingrained, slightly awkward habits without even realizing they’re making things harder. It’s like taking the scenic route to work every day when a shortcut exists, just because that’s the way you first learned. I remember watching a friend cook once, and they crisscrossed their kitchen about a dozen times just to make a simple salad because things were stored so illogically. It was exhausting just to observe! A little bit of self-observation can be incredibly illuminating. Don’t just think about *what* you do, but *how* and *where* you do it. This understanding is the bedrock upon which an efficient kitchen is built.
The Timeless Triangle: Friend or Foe in Modern Kitchens?
Now, if you’ve ever dipped a toe into kitchen design articles, you’ve undoubtedly heard about the kitchen work triangle. This is the classic concept, developed way back in the 1940s, that connects the three main work areas: the sink, the stove (or cooktop), and the refrigerator. The idea is that these three points should form a triangle, with clear paths between them, to minimize steps and make cooking more efficient. Each leg of the triangle should ideally be between 4 and 9 feet, and the total sum of the three legs shouldn’t be less than 13 feet or more than 26 feet. It’s all based on ergonomic principles and aimed at streamlining the core cooking processes of preparation, cooking, and cleaning.
For decades, the work triangle was the undisputed king of kitchen layout. And you know what? For many kitchens, especially smaller, U-shaped or L-shaped ones with a single cook, it still makes a lot of sense. It provides a compact and efficient core. However, kitchens have evolved. They’re often larger now, sometimes with islands or peninsulas, and frequently accommodate more than one person cooking or helping out. My Nashville kitchen, for example, is a galley style, so a strict triangle is a bit forced, but the principle of proximity between those key elements still guides my placement. I used to be a die-hard triangle evangelist, honestly. I’d look at floor plans and immediately try to spot it. But living in different spaces, seeing how families *actually* use their kitchens today… well, it’s made me reconsider its universal applicability. Is it the be-all and end-all? Maybe not anymore. It’s a foundational concept from kitchen design history, super important to understand, but it might not be the complete picture for your specific needs in 2025.
Zoning Out (In a Good Way!): Creating Efficient Work Zones
So if the triangle isn’t always the perfect solution, what is? Enter the concept of work zones. This is a more flexible and often more practical approach for modern kitchens. Instead of just three points, you think about areas dedicated to specific types of tasks. Common zones include a prep station (ideally with counter space, near the sink and fridge, with easy access to knives, cutting boards, and compost/trash), a cooking hub (stove, oven, microwave, with nearby storage for pots, pans, and cooking utensils), and a cleaning center (sink, dishwasher, trash/recycling, and storage for cleaning supplies). But you can get more granular depending on your habits! If you bake a lot, a dedicated baking zone with space for your mixer, ingredients like flour and sugar, and baking sheets makes a world of sense. If you’re a coffee aficionado like me, a coffee station is non-negotiable.
My Nashville kitchen, while not palatial, is way more functional now that I’ve mentally (and physically) mapped out these zones. My coffee gear is all clustered in one corner, baking supplies are consolidated, and the path from fridge to prep counter to stove is clear. Luna, my cat, still tries to integrate herself into the ‘treat zone’ which is conveniently located near her food bowl, but that’s another story of feline ergonomics. The beauty of dedicated zones is that they can reduce traffic jams if multiple people are in the kitchen. Someone can be making a salad at the prep zone while another person is at the cooking hub, without constantly bumping into each other. It also helps with organization, as tools and ingredients are stored at their point of use. It’s a more organic way to think about kitchen flow, adapting to the realities of our varied culinary lives. It’s less about rigid geometry and more about functional clusters. I kind of wish I’d grasped this earlier; would have saved me some headaches in previous apartments!
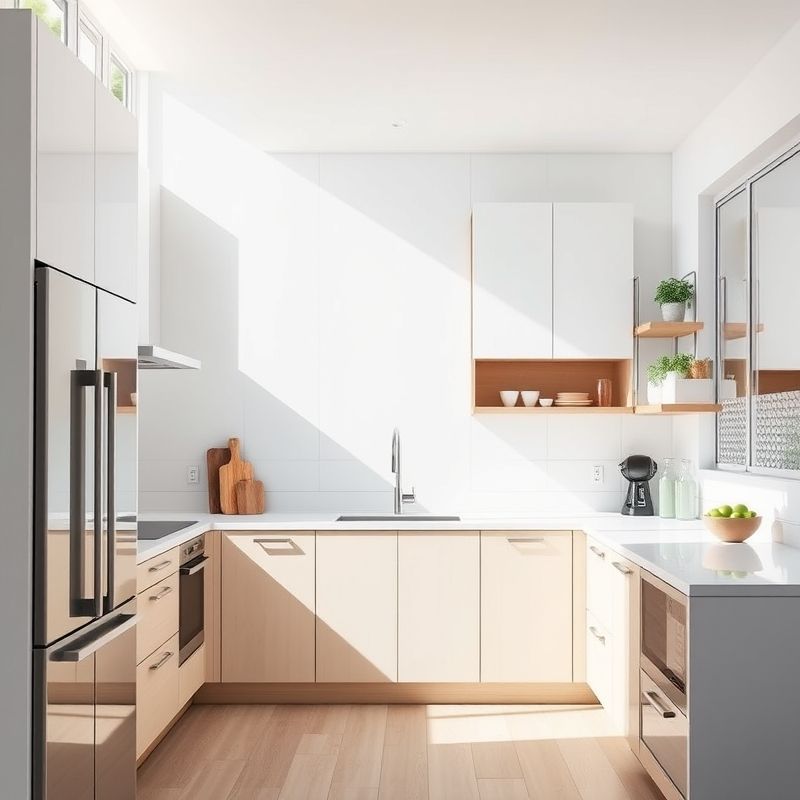
Reaching New Heights: Smart Storage Solutions and Appliance Placement
Okay, let’s talk about one of the biggest culprits of kitchen chaos: storage. Or rather, the lack of *efficient* storage. It’s amazing how much stuff we accumulate, right? Gadgets, specialty ingredients, that one pan you use twice a year but can’t part with. Without a good system, it all becomes a jumbled mess. This is where thinking vertically and prioritizing accessibility comes in. Vertical storage solutions are your best friend, especially in smaller kitchens. Think shelves that go up to the ceiling, pot racks hanging above an island or a section of counter, wall-mounted magnetic knife strips, or organizers on the inside of cabinet doors. Every bit of unused vertical space is a missed opportunity.
Then there’s accessibility. What good is storing something if you need a stepladder and a map to find it? This is where things like pull-out drawers in base cabinets (so much better than deep, dark cupboards where things go to die), lazy Susans or D-shaped shelves in corner cabinets, and clear, stackable containers for pantry items become invaluable. I’m a big believer in the mantra ‘a place for everything, and everything in its place’ – sounds cliché, I know, but it’s a game-changer for efficiency and sanity. Using drawer organizers for cutlery and utensils, and even for spices if you have a wide enough drawer, can make a huge difference. And let’s not forget well-planned pantry systems, whether it’s a walk-in pantry or a dedicated cabinet with rollout shelves. The psychological relief of an organized kitchen where you can find what you need without a frantic search is immense. It makes cooking less of a battle and more of a creative process. Plus, you’re less likely to buy duplicate ingredients if you can actually see what you have.
Appliance Tetris: Where Things *Should* Go for Smooth Operations
Appliance placement is another crucial piece of the efficiency puzzle. It’s not just about finding a spot where they fit; it’s about strategic positioning. Think about how and when you use each appliance. Your microwave, for instance. Is it primarily for reheating leftovers or defrosting? Placing it near the refrigerator and an area where you can easily plate food makes sense. Your toaster or toaster oven, if used daily for breakfast, should be in an accessible spot, not buried behind other things. My coffee maker, as I mentioned, has its own little command center. It’s all about point-of-use storage and placement for frequently used items.
Heavier or more cumbersome appliances should ideally be located near where their output is needed, or where they are easiest to use without excessive hauling. And please, oh please, consider door swings! The number of times I’ve seen or experienced kitchens where the refrigerator door bangs into a wall or another appliance, or where opening the oven door completely blocks a major walkway, is just astounding. This is particularly critical for the dishwasher – you need enough clearance space to stand comfortably while loading and unloading it, preferably near the sink and your dish storage. It’s like a game of Tetris, but with real-world consequences for your daily frustration levels. A little foresight here in appliance ergonomics goes a very long way in creating a kitchen that feels intuitive and easy to work in, rather than a daily obstacle course.
The Landing Strip & Illumination: Counter Space and Lighting Essentials
If there’s one thing that can make or break kitchen functionality, it’s counter space. I call it the ‘landing strip’ because you need adequate landing zones next to all your key appliances and work areas. Think about it: when you take something hot out of the oven or microwave, you need a safe place to put it down immediately. Same goes for items from the refrigerator, or dishes heading into or out of the sink. The National Kitchen & Bath Association (NKBA) has guidelines for this, typically recommending at least 15-18 inches of counter on one side of a cooktop (and ideally both), next to the fridge handle side, and on each side of the sink. For your primary work surface, where you do most of your chopping and prep, you ideally want a continuous stretch of at least 36 inches wide and 24 inches deep.
The debate between keeping counters completely clear versus having essential tools and ingredients handy is a constant one in my mind. I *love* the look of perfectly uncluttered counters, it feels so serene. But in reality, I also love having my most-used olive oil, salt cellar, and pepper grinder right by the stove. It’s a balance, isn’t it? The key is to be intentional. What truly needs to be out, and what can be conveniently stored but still easily accessible? Too much clutter eats up valuable workspace and makes cleaning a pain, but having to open a cabinet for every single item can also slow you down. It’s about finding that sweet spot that works for your cooking style and your tolerance for visual ‘noise’. Maybe rotating items based on what you’re cooking that week? Still figuring that perfect balance out myself, if I’m honest.
Let There Be Light (And Lots of It!): Illuminating Your Path to Productivity
You can have the most perfectly laid-out kitchen in the world, but if you can’t see what you’re doing, it’s all for naught. Good lighting is absolutely crucial for both efficiency and safety. We’re talking about layers of light here. First, there’s ambient illumination, the general, overall light that fills the room, often from ceiling fixtures or recessed cans. This sets the base level of brightness. Then, and this is super important, you need task lighting. This is focused light directed at your main work areas: over the countertops where you prep, above the sink, and over the cooktop. Under-cabinet lights are fantastic for this, as they illuminate the counter surface directly without creating shadows from your own body. I installed some LED strips under my cabinets here in Nashville, and wow, what a difference it made. Seriously, it was a relatively inexpensive upgrade with a huge payoff.
Bad lighting is not just an annoyance; it’s a genuine safety hazard. Trying to chop onions in a dimly lit corner, or discerning if chicken is cooked through under poor light? No thanks. Accent lighting, like spotlights on display shelving or inside glass-front cabinets, is more for aesthetics but can add depth and warmth to the space. And don’t underestimate the power of natural light if you’re lucky enough to have it. Position work areas to take advantage of windows where possible, but also consider glare and direct sun at certain times of day. The goal is a well-lit environment that’s comfortable to work in, reduces eye strain, and allows you to clearly see the beautiful food you’re creating. It’s one of those elements that often gets overlooked in budget planning but has a massive impact on the daily experience of using your kitchen.
The Kitchen Highway & Ergonomics: Smooth Flow and Comfort
Ever been in a kitchen where you feel like you’re constantly playing dodgeball with other people or an open cabinet door? That’s a sign of poor traffic flow. Managing kitchen traffic patterns is essential, especially if your kitchen is a busy hub or connects different parts of the house. You need clear pathways, especially between the main work areas. The general guideline is that walkways should be at least 36 inches wide, but for work aisles where you’re actively cooking or prepping, 42 inches for a one-cook kitchen and 48 inches for a two-cook kitchen is much more comfortable. This allows room to move, bend, and open appliance doors without feeling cramped or causing a bottleneck.
Islands can be fantastic additions for counter space and storage, but their placement is critical. A poorly placed island can be a major obstruction. You need adequate clearance all around it – again, think about those 36 to 48-inch rules depending on what’s on the other side of the aisle. This is where Luna, my cat, really tests my layout theories. If she can find a way to create a bottleneck by lounging in the narrowest part of a walkway, she absolutely will. It’s actually a good, albeit furry, test of efficient pathways and whether you’ve truly achieved bottleneck prevention. The aim is for movement to feel fluid and intuitive, not like navigating a maze. Think about the main routes: from the fridge to the sink, from the sink to the stove, from the dining area into the kitchen. Keep these as direct and unobstructed as possible.
Your Body Will Thank You: Ergonomics in Kitchen Design
We’ve touched on ergonomics a bit, but it deserves its own spotlight. Kitchen ergonomics is all about designing the space to fit the human body, minimizing strain and maximizing comfort and safety. This includes things like counter heights. The standard kitchen counter height is 36 inches, but if you’re significantly taller or shorter, or if you have specific tasks like kneading dough that benefit from a lower surface, you might consider varying heights in different zones if possible. It’s not always practical in a standard kitchen, but something to think about. Reach distances are also important – frequently used items should be within easy reach, generally between shoulder and knee height, to avoid excessive bending or stretching.
Reducing physical strain can involve simple additions like an anti-fatigue mat in front of the sink or the area where you stand the most. Proper tool storage, as we discussed, also plays a role – no one wants to be rummaging in a low cabinet for a heavy pot. Even the type of cabinet pulls and faucet handles can make a difference for people with grip issues. We spend so much time in our kitchens; it’s crazy not to think about how the design impacts our physical well-being. My back and shoulders definitely appreciate a well-designed space more these days than they did in my twenties! Considering counter height standards, ensuring good reachability, and aiming for physical strain reduction are not just buzzwords; they contribute to a kitchen you can enjoy working in for years to come, without undue aches and pains. It’s about long-term usability and comfort.
Making It Yours: The Art of Kitchen Personalization
Finally, after all the rules, guidelines, and theories, we arrive at what I think is the most important aspect: personalization. Ultimately, the ‘most efficient’ kitchen is the one that’s most efficient *for you* and your household. Don’t just blindly follow trends or copy a layout you saw in a magazine if it doesn’t genuinely suit your needs. This is where you take all the principles we’ve discussed and filter them through your own unique way of living and cooking. For example, are you left-handed? This might influence which side of the sink you prefer your dishwasher on, or how you arrange items in your prep zone. Do you have specific culinary hobbies that require dedicated space or equipment? If you’re an avid baker, you’ll prioritize different things than someone who mostly stir-fries or grills.
Consider who uses the kitchen. Is it just you? Do you cook with a partner? Do you have kids who help out (or just wander in looking for snacks)? A customized layout might involve creating a lower counter section for kids to participate, or ensuring wider aisles if multiple people are often cooking simultaneously. Think about your entertaining style. Do guests tend to congregate in the kitchen? Maybe an island with seating or a layout that’s more open to adjacent living spaces is important. The goal is lifestyle integration. Your kitchen should reflect and support your life, not force you into a mold. It’s your culinary command center, your morning coffee ritual spot, the heart of many homes. So, take the time to analyze your user-specific needs and preferences. It’s this thoughtful personalization, this flexible design approach, that truly elevates a kitchen from merely functional to joyfully efficient. It’s an ongoing process of tweaking and refining too, I find. What worked perfectly last year might need a little adjustment as habits change.
Wrapping It Up: Your Kitchen, Your Efficiency
So, we’ve journeyed from understanding your unique kitchen dance to the importance of zones, smart storage, strategic appliance placement, the often-underestimated power of counter space and lighting, ensuring smooth traffic flow, considering ergonomics, and finally, the crucial step of personalization. Phew! That was a lot, I know. But streamlining your kitchen layout for maximum efficiency isn’t about adhering to a rigid set of universal laws; it’s about applying sound principles in a way that makes sense for *your* life. It’s about reducing friction and frustration, and increasing ease and enjoyment in one of the most vital rooms in our homes.
My own kitchen journey, from chaotic Bay Area rentals to my more considered Nashville setup (still a work in progress, always!), has taught me that small changes, guided by thoughtful observation, can make a huge difference. It’s not always about big, expensive remodels. Sometimes, simply reorganizing a few cabinets, adding a shelf, or improving your lighting can revolutionize how your kitchen feels and functions. The key is to be analytical, be honest about your habits (the good, the bad, and the messy!), and be willing to experiment a little.
So, I challenge you: take a fresh, critical look at your kitchen this week. Grab a notepad, or just mentally observe your movements as you prepare a few meals. Ask yourself – is this space truly working *for* me, or am I constantly working *around* its limitations? Where are the pinch points? What tasks feel awkward or take longer than they should? Maybe it’s time for a little streamlining. You might be surprised at how much a few thoughtful changes can improve not just your cooking, but your overall enjoyment of your home. And who knows, maybe Luna will even find a new, less obstructive napping spot. One can dream, right?
FAQ: Your Kitchen Efficiency Questions Answered
Q: What’s the first step to making my kitchen more efficient if I can’t do a full remodel?
A: Start with decluttering and reorganizing your storage. Seriously, get rid of things you don’t use and find logical homes for what’s left. Then, observe your workflow for a few days and identify the biggest pain points or bottlenecks. Sometimes small changes like moving frequently used items to more accessible locations, adding a small shelf or drawer dividers, or even just clearing off your main prep counter can make a surprisingly big difference without costing much.
Q: Is the work triangle completely useless now with modern kitchen designs?
A: Not entirely! The work triangle (sink, stove, fridge) is still a useful concept for ensuring the basic proximity of these key elements, especially in smaller, single-cook kitchens or more traditional layouts. However, for larger kitchens, open-plan spaces, or households with multiple cooks, thinking in terms of broader, dedicated work zones (prep, cooking, cleaning, baking, etc.) is often more practical and leads to greater overall efficiency. It’s about adapting core principles, not rigidly adhering to one rule if it doesn’t fit your specific situation.
Q: How much counter space is ‘enough’ for good kitchen efficiency?
A: This can be a bit subjective and depends on how you cook, but there are general guidelines. You ideally want at least 15-18 inches of ‘landing space’ on either side of the cooktop and sink, and next to the refrigerator (on the handle side). A good, uninterrupted stretch of counter space for preparation, ideally at least 36 inches wide and 24 inches deep, is also crucial. Honestly, in my experience, most people feel like they could always use a little more dedicated prep space! The key is to ensure the space you *do* have is well-lit and kept as clear as possible.
Q: My kitchen is really tiny! Any specific tips for maximizing efficiency in small spaces?
A: Absolutely! Small kitchens require smart solutions. Maximize vertical storage – think tall, narrow cabinets, wall-mounted racks for spices or utensils, and over-the-door organizers. Use multi-functional items and appliances whenever possible (e.g., an oven with a microwave function). Keep counters as clear as humanly possible to maximize your working surface. Consider using rolling carts or butcher blocks that can be moved out of the way or provide flexible prep space. And, most importantly, be absolutely ruthless about decluttering! Every single inch counts in a small kitchen, so only keep what you truly need and use regularly.
@article{smart-kitchen-layouts-boost-your-cooking-efficiency-now,
    title   = {Smart Kitchen Layouts: Boost Your Cooking Efficiency Now},
    author  = {Chef's icon},
    year    = {2025},
    journal = {Chef's Icon},
    url     = {https://chefsicon.com/streamlining-your-kitchen-layout-for-maximum-efficiency/}
} 

