
Table of Contents
Best Kitchen Layouts for Small Restaurants
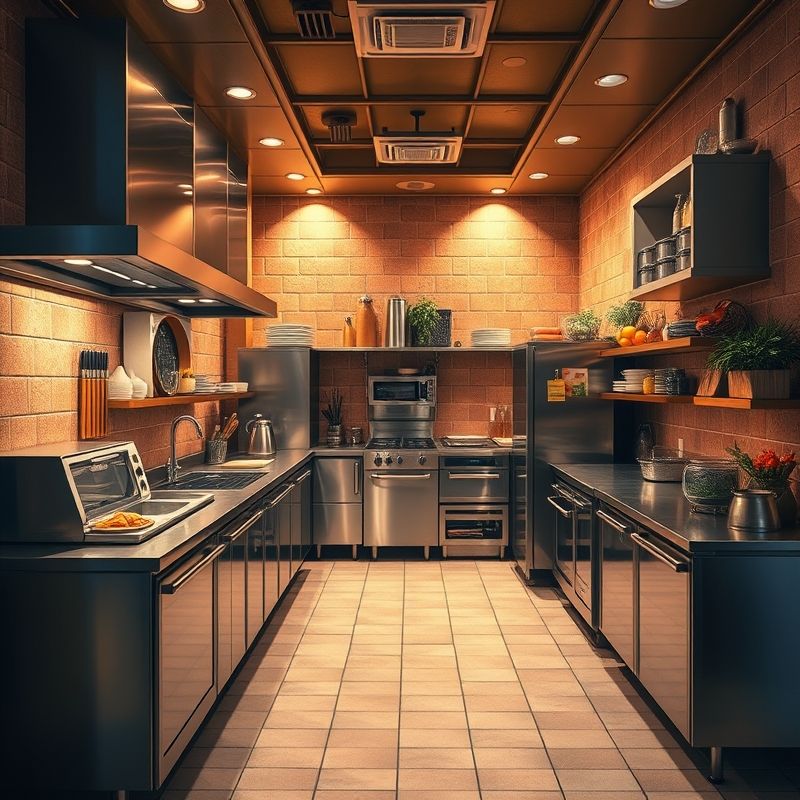
When it comes to running a small restaurant, efficiency is key. The kitchen layout can make or break your operation, affecting everything from food preparation to staff morale. As someone who’s seen both stellar and subpar kitchen designs, I can tell you that getting this right is crucial. In this article, we’re diving deep into the best kitchen layouts for small restaurants, sharing insights, and practical tips to help you maximize your space and streamline your workflow.
A few years back, when I first moved to Nashville, I remember walking into a tiny, bustling restaurant downtown. The place was a hit, but the kitchen was a nightmare—cramped, chaotic, and clearly not designed with efficiency in mind. It got me thinking: What makes a small restaurant kitchen truly functional? Since then, I’ve been on a bit of a mission to understand and share the best practices for small restaurant kitchens.
By the end of this article, you’ll have a solid grasp of different kitchen layouts, their pros and cons, and tips for optimizing your space. Whether you’re just starting out or looking to revamp your existing setup, there’s something here for everyone.
Understanding the Basics
The Importance of Kitchen Layout
The layout of your kitchen is more than just aesthetics; it’s about functionality and efficiency. A well-designed kitchen can help you serve more customers in less time, reduce waste, and keep your staff happy. Think about it: if your cooks are constantly bumping into each other or if the dishwasher is placed far from the sink, you’re adding unnecessary stress and inefficiency to your operations.
But here’s the thing: there’s no one-size-fits-all solution. The best layout depends on your menu, your staff, and your specific space constraints. Is this the best approach? Let’s consider the various layouts and see which might work best for you.
Key Considerations
Before we dive into the different layouts, let’s go over some key considerations:
- Space: Obviously, the size and shape of your kitchen will dictate many of your choices.
- Menu: The type of food you serve will influence your equipment needs and workflow.
- Staff: The number of staff and their roles will also play a part in your layout decisions.
- Budget: Your budget will determine how much you can invest in equipment and design.
The Assembly Line Layout
The assembly line layout is pretty straightforward: it organizes the kitchen in a linear fashion, with each station following the next in the order of food preparation. This layout is great for streamlining workflow and ensuring that each step of the process is handled efficiently.
Think of it like a conveyor belt in a factory. Start with prep, move to cooking, then plating, and finally, serving. Each station is dedicated to a specific task, reducing the chances of cross-contamination and confusion. I’ve seen this work really well in burger joints and sandwich shops where the menu is fairly simple and linear.
However, there are downsides. This layout can be inflexible and may not be suitable for more complex menus. Plus, if one station gets backed up, the whole line can grind to a halt. Maybe I should clarify: this layout is best for restaurants with a straightforward, linear menu.
The Island Layout
The island layout centers around a central workstation, with other stations arranged around it. This setup is fantastic for maximizing space and encouraging teamwork and communication. The central island can be used for prep, cooking, or even plating, depending on your needs.
I’ve seen this layout work wonders in small, upscale restaurants where the menu is diverse and the kitchen staff needs to be versatile. The open layout allows for easy movement and makes it simple for staff to help each other out. But be warned: this layout can get chaotic if not managed properly. Clear communication and a well-organized staff are essential.
The Zone Layout
The zone layout divides the kitchen into distinct zones, each dedicated to a specific function like prep, cooking, baking, and washing. This layout is excellent for organizing tasks and keeping everything in its place. It’s particularly useful for restaurants with a varied menu that requires different types of equipment and prep areas.
The downside? This layout can lead to a lot of movement between zones, which can be inefficient if not well-planned. Plus, it requires a bit more space than other layouts. I’m torn between the efficiency of the assembly line and the flexibility of the zone layout, but ultimately, the zone layout offers more versatility for complex menus.
The Galley Layout
The galley layout is designed like a ship’s galley, with two parallel counters and a walkway in between. This layout is perfect for maximizing space in narrow kitchens and can be very efficient for small teams. Each side of the galley can be dedicated to different tasks, such as prep on one side and cooking on the other.
I’ve seen this work really well in small cafes and bistros where space is at a premium. However, it can feel cramped if not designed carefully, and communication can be a challenge if the galley is too long. Is this the best approach? Let’s consider the pros and cons carefully.
The Open Kitchen Layout
The open kitchen layout is exactly what it sounds like: a kitchen that’s open to the dining area. This layout is great for engaging customers and creating a lively atmosphere. It can also help with ventilation and make the kitchen feel more spacious.
But there are drawbacks. Noise and smells from the kitchen can disturb diners, and the open layout can make it harder to keep the kitchen tidy. Plus, not all customers appreciate seeing the behind-the-scenes action. This layout works best in casual eateries where the atmosphere is part of the appeal.
Hybrid Layouts
Sometimes, the best solution is a hybrid layout that combines elements from different designs. For example, you might have an assembly line for main dishes with a zone for desserts. Or you could have an island layout with a galley for prep work.
The key is to think about your specific needs and constraints. What works for one restaurant might not work for another. Don’t be afraid to mix and match to create a layout that’s uniquely suited to your operation.
Optimizing Your Space
Equipment Placement
Regardless of the layout you choose, equipment placement is crucial. Here are some tips:
- Keep frequently used equipment within easy reach.
- Group similar equipment together to save space.
- Consider the workflow: place equipment in the order it will be used.
- Use vertical space with shelves and wall-mounted equipment.
Storage Solutions
Efficient storage is essential in a small kitchen. Some ideas include:
- Use deep shelves for bulky items and shallow shelves for smaller items.
- Install pull-out shelves to make the most of deep cabinets.
- Hang pots and pans from the ceiling or walls.
- Use clear containers to store ingredients, making it easy to see what you have.
Ergonomics
Don’t forget about ergonomics. A comfortable kitchen is a productive kitchen. Make sure countertops are at the right height, lighting is adequate, and there’s enough space for staff to move around comfortably. Happy staff means better service and happier customers.
Making It Work
So, you’ve chosen your layout and optimized your space. Now what? Here are some final tips to make it all work:
- Train your staff on the new layout and workflow.
- Encourage open communication to address any issues that arise.
- Regularly review and adjust the layout as needed.
- Keep the kitchen clean and organized to maintain efficiency.
Conclusion
Designing the best kitchen layout for a small restaurant is a balancing act. You need to consider space, menu, staff, and budget. But with careful planning and a bit of creativity, you can create a kitchen that’s efficient, productive, and a pleasure to work in.
So, here’s my challenge to you: take a good look at your kitchen and ask yourself, Is this layout really working for us? If not, maybe it’s time to make a change. Remember, a well-designed kitchen can transform your operation, making it more efficient, more profitable, and more enjoyable for everyone involved.
And who knows? Maybe in a few years, you’ll be the one writing about your kitchen layout success story. I, for one, would love to hear it.
Open-ended philosophical question: How might the evolution of dining trends influence kitchen layouts in the future? Will we see a shift towards more open, interactive spaces, or a return to more traditional, behind-the-scenes operations? Only time will tell.
Prediction with self-doubt qualifier: I predict that we’ll see more hybrid layouts in the future, as restaurants look to maximize space and efficiency. But who knows? The dining scene is always changing, and what works today might not work tomorrow. The key is to stay flexible and adaptable, ready to change with the times.
FAQ
Q: What is the most efficient kitchen layout for a small restaurant?
A: The most efficient kitchen layout depends on your specific needs, but the assembly line layout is generally considered very efficient for straightforward menus.
Q: How can I make the most of a small kitchen space?
A: Use vertical space, optimize equipment placement, and choose a layout that maximizes workflow efficiency.
Q: What are the benefits of an open kitchen layout?
A: An open kitchen layout can engage customers, improve ventilation, and make the kitchen feel more spacious.
Q: How can I improve communication in a galley kitchen layout?
A: Encourage clear communication, keep the galley short to minimize distance, and consider using a communication system like headsets if needed.
@article{best-kitchen-layouts-for-small-restaurants,
    title   = {Best Kitchen Layouts for Small Restaurants},
    author  = {Chef's icon},
    year    = {2025},
    journal = {Chef's Icon},
    url     = {https://chefsicon.com/best-kitchen-layouts-for-small-restaurants/}
} 
