
The Best Fluffy Pancakes recipe you will fall in love with. Full of tips and tricks to help you make the best pancakes.
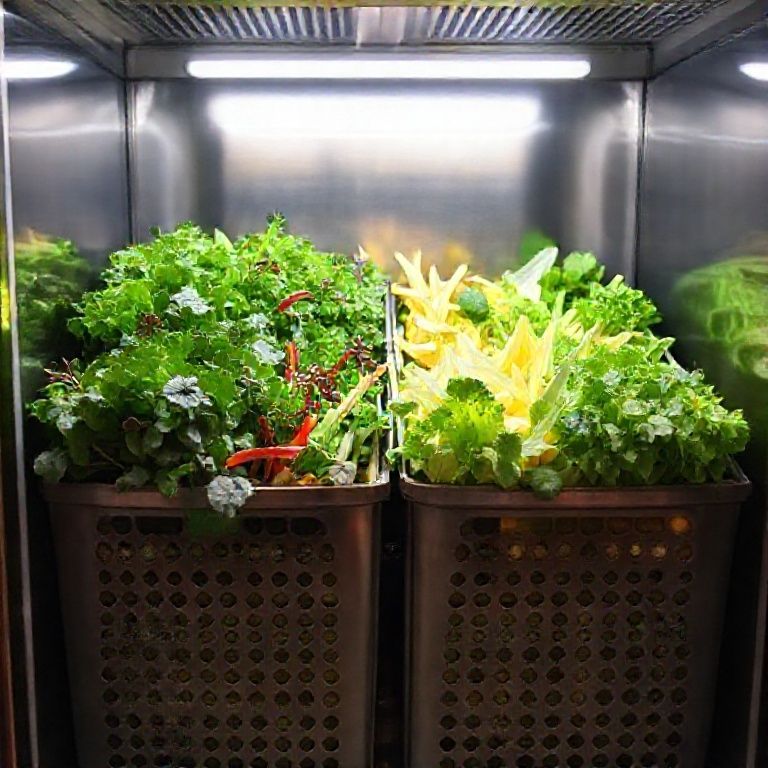
Table of Contents
- 1 Understanding Produce Spoilage: A Primer
- 2 The Lowdown on Low-Tech Storage Solutions
- 3 High-Tech Helpers: Gadgets for Optimal Freshness
- 4 The Great Debate: To Wash or Not to Wash?
- 5 Reviving Limp Veggies: A Tale of Redemption
- 6 Storing Herbs: The Forgotten Produce
- 7 The Freezer: Your Secret Weapon
- 8 Taking Matters into Your Own Hands: DIY Storage Solutions
- 9 Bringing It All Together: Your Produce Storage Plan
- 10 FAQ
Ever found yourself staring at a fridge full of wilted greens and mushy fruits? You’re not alone. Fresh produce storage is a eternal struggle, but it’s a battle we can win with the right strategies. Having moved from the Bay Area to Nashville, I’ve had to adapt my storage techniques to a whole new climate. So, let me walk you through some tried-and-true solutions that’ll keep your fruits and veggies fresh and crisp for days.
When I first moved to Nashville, I was shocked by how quickly my greens would wilt. I mean, it’s not like the Bay Area was a frozen tundra, but the humidity here was a game-changer. I realized that if I wanted to keep my produce fresh, I had to up my storage game. So, I dove headfirst into research and experimentation, and now, I’m spilling all my secrets right here.
In this article, we’re going to dive deep into the world of fresh produce storage. We’ll explore the science behind spoilage, the best storage solutions for different types of produce, and even some tips for reviving limp veggies. By the end, you’ll be a produce-storing pro, ready to tackle any farmers market haul with confidence. So, let’s get started!
Understanding Produce Spoilage: A Primer
Before we dive into storage solutions, it’s essential to understand why produce spoils. The culprits are primarily:
- Ethylene gas: Some fruits and vegetables produce ethylene gas as they ripen, which can accelerate spoilage in nearby produce.
- Moisture loss: Many fruits and veggies are high in water content, which can evaporate over time, causing them to shrivel and dry out.
- Microorganisms: Bacteria and fungi can cause produce to rot, especially in warm, humid conditions.
Now that we know the enemy, let’s talk strategy. Is this the best approach? Let’s consider…
The Lowdown on Low-Tech Storage Solutions
Plastic Bags: Friend or Foe?
Plastic bags are a popular choice for produce storage, but they’re not all created equal. Perforated bags allow for better air circulation, which can help prevent moisture buildup and mold growth. However, they might not be the best choice for everything. For instance, leafy greens tend to wilt when exposed to too much air, so they’re better off in sealed bags with a damp paper towel to maintain humidity. Maybe I should clarify that this method isn’t foolproof, though. You’ll still need to check your greens regularly for signs of spoilage.
The Crisper Drawer Dilemma
Most modern refrigerators come equipped with crisper drawers, but are you using them to their full potential? These drawers are designed to maintain optimal humidity levels for produce, with some even offering adjustable settings. As a general rule, high humidity is best for leafy greens, while low humidity is better for fruits and root vegetables. But ultimately, it’s all about finding that sweet spot for your specific fridge and produce.
I’ll admit, I was a bit skeptical about the power of crisper drawers at first. But after a bit of trial and error, I’ve seen a noticeable difference in the lifespan of my produce. The key is to avoid overcrowding the drawers, which can lead to poor air circulation and accelerated spoilage.
The Art of Countertop Storage
Not all produce belongs in the fridge. In fact, some fruits and veggies fare better when stored at room temperature. Potatoes, onions, and garlic, for instance, should be kept in a cool, dark, and dry place, like a pantry or cabinet. Tomatoes, on the other hand, should be stored on the countertop to maintain their flavor and texture. Just be sure to keep them out of direct sunlight, which can cause them to ripen too quickly.
I’m torn between the convenience of countertop storage and the clutter it can create. But ultimately, it’s worth the sacrifice for fresher, tastier produce. Plus, there are plenty of stylish storage solutions out there, like tiered baskets and hanging organizers, that can help keep your counters tidy.
High-Tech Helpers: Gadgets for Optimal Freshness
The Magic of Vacuum Sealing
Vacuum sealers have gained popularity in recent years, and for good reason. By removing air from the storage container, these devices can significantly extend the shelf life of produce. However, they’re not a one-size-fits-all solution. Some produce, like apples and bananas, may suffer from anaerobic respiration when vacuum-sealed, causing them to develop off-flavors and discoloration. So, do your research before you invest in one of these gadgets.
Ethylene Absorbers: Hype or Hero?
Ethylene absorbers, such as those found in produce saver containers, claim to extend the life of fruits and veggies by trapping and neutralizing ethylene gas. While the science behind these products is sound, their real-world effectiveness is still up for debate. Some users swear by them, while others see little to no difference in produce freshness. I’m still on the fence about these ones, but I’m willing to give them a shot to see if they live up to the hype.
The Smart Refrigerator Revolution
Smart refrigerators are changing the game when it comes to produce storage. With features like precise temperature control, adjustable humidity settings, and even built-in cameras for monitoring food freshness, these high-tech appliances offer unparalleled convenience and customization. But are they worth the hefty price tag? It ultimately depends on your budget and priorities, but there’s no denying that smart fridges are a worthy investment for serious food enthusiasts.
The Great Debate: To Wash or Not to Wash?
The question of whether to wash produce before storage is a hotly debated one. On one hand, washing can remove dirt and bacteria, potentially extending shelf life. On the other hand, excess moisture can promote mold growth and accelerate spoilage. So, what’s the verdict?
In my experience, it’s best to hold off on washing most produce until you’re ready to use it. The exception to this rule is leafy greens, which should be washed and dried thoroughly before storage. A salad spinner is an invaluable tool for this purpose, as it can help remove excess water and prevent wilting. Just be sure to line the spinner with paper towels for optimal moisture absorption.
Reviving Limp Veggies: A Tale of Redemption
We’ve all been there: you reach into the fridge, only to find that your once-crisp greens have turned into a sad, wilted mess. But before you toss them in the compost bin, know that all hope is not lost. There are a few tricks you can use to revive limp veggies and give them a new lease on life.
The Ice Bath Miracle
One of the simplest methods for reviving wilted greens is an ice bath. Simply submerge the greens in a bowl of ice water for about 15-20 minutes, then dry them thoroughly with a salad spinner or paper towels. You’ll be amazed at how quickly they perk up! This method works best for leafy greens like lettuce and spinach, but it can also be used to revive other veggies, like celery and carrots.
The Trick with Trimming
For root vegetables and stalks like asparagus or green onions, a simple trim can work wonders. Cut off the dried-out ends and place the vegetables in a glass of water, like a bouquet of flowers. Within a few hours, you should see a noticeable improvement in their firmness and hydration. Just be sure to change the water every few hours to prevent bacterial growth.
The Power of a Quick Blanch
For veggies that have lost their vibrant color, a quick blanch can help bring them back to life. Simply submerge them in boiling water for a minute or two, then shock them in an ice bath to stop the cooking process. This method works particularly well for broccoli, green beans, and other cruciferous vegetables.
Storing Herbs: The Forgotten Produce
When it comes to produce storage, fresh herbs often don’t get the attention they deserve. But with the right care, you can extend their lifespan significantly. Here are some tips for storing common herbs:
- Basil: Trim the stems and place them in a glass of water, like a bouquet of flowers. Cover the leaves loosely with a plastic bag and store at room temperature.
- Cilantro and Parsley: Trim the ends and store in the fridge with the stems submerged in a glass of water, covered loosely with a plastic bag.
- Rosemary and Thyme: Wrap loosely in a damp paper towel and store in the fridge in an airtight container.
I’ll admit, I’ve struggled with herb storage in the past. But with a bit of trial and error, I’ve found that these methods work consistently well for keeping my herbs fresh and flavorful.
The Freezer: Your Secret Weapon
When all else fails, remember that the freezer is your friend. Many fruits and veggies can be frozen for later use, either raw or after a quick blanch. Frozen produce is perfect for smoothies, soups, and stews, and it can save you a ton of money in the long run. Just be sure to label and date your frozen goods, and use them within a few months for optimal freshness.
I used to be skeptical about frozen produce, but I’ve since seen the error of my ways. Now, I always keep a stash of frozen fruits and veggies on hand for those days when I just can’t make it to the store. It’s a lifesaver!
Taking Matters into Your Own Hands: DIY Storage Solutions
If you’re feeling crafty, there are plenty of DIY produce storage solutions you can try. From macrame hanging baskets for onions and garlic to upcycled plastic bottle planters for herbs, the possibilities are endless. Not only are these projects a fun way to pass the time, but they also allow you to customize your storage solutions to fit your specific needs and space.
I’ve dabbled in DIY storage solutions myself, with mixed results. But ultimately, I’ve found that the process of creating something with my own two hands is incredibly rewarding, even if the end result isn’t perfect. So, don’t be afraid to get creative and have some fun with it!
Bringing It All Together: Your Produce Storage Plan
So, there you have it: a comprehensive guide to fresh produce storage solutions.
It took some time to get into the swing of things, and now I have a good system. I do a weekly inventory of my produce, checking for signs of spoilage and rotating older items to the front. I also make an effort to plan my meals around the produce I have on hand, which helps reduce waste and ensures that nothing goes to waste.
By combining these strategies and finding what works best for you, you’ll be well on your way to becoming a produce-storing pro. And who knows? You might even find that the process of caring for your fruits and veggies brings you a little closer to the earth and the food you eat. So, what are you waiting for? Get out there and give it a shot! Your wallet, your taste buds, and the planet will thank you.
FAQ
Q: What’s the best way to store fresh berries?
A: For optimal freshness, store berries in the fridge in a single layer on a paper towel, inside a sealed container. This helps prevent moisture buildup and mold growth.
Q: Can you really regrow green onions in water?
A: Yes! Simply place the trimmed ends in a glass of water, change the water every few days, and watch as they regrow right before your eyes.
Q: How can I tell if my produce has gone bad?
A: Signs of spoilage include wilting, discoloration, mushiness, and foul odors. When in doubt, trust your senses – if something looks, feels, or smells off, it’s best to toss it.
Q: Is it safe to eat produce past its expiration date?
A: Expiration dates are more of a guideline than a hard-and-fast rule. If your produce looks, feels, and smells okay, it’s probably safe to eat. However, it’s always better to err on the side of caution and use your best judgment.
@article{mastering-fresh-produce-storage-solutions-for-every-kitchen,
    title   = {Mastering Fresh Produce Storage: Solutions for Every Kitchen},
    author  = {Chef's icon},
    year    = {2025},
    journal = {Chef's Icon},
    url     = {https://chefsicon.com/fresh-produce-storage-solutions/}
}