
The Best Fluffy Pancakes recipe you will fall in love with. Full of tips and tricks to help you make the best pancakes.
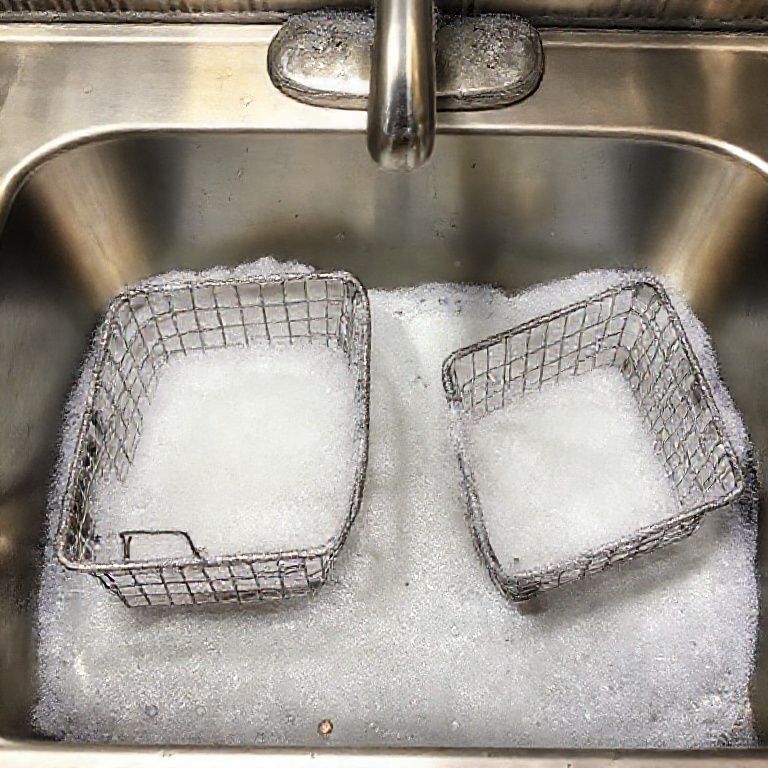
Table of Contents
Ever walked into your favorite restaurant and wondered how they keep their fryers sparkling clean? As someone who’s spent countless hours in both bustling kitchens and cozy home setups, I can tell you that cleaning a fryer is an art form in itself. It’s not just about aesthetics; it’s about safety, efficiency, and the quality of your food. Whether you’re a seasoned chef or a home cooking enthusiast, this guide will walk you through the best way to clean a fryer, ensuring your fried delights are always top-notch.
When I first moved to Nashville from the Bay Area, I was blown away by the city’s love for fried chicken. But with great fried food comes great responsibility, namely, keeping your fryer in tip-top shape. I remember the first time I tackled a commercial fryer; it was intimidating, but with the right techniques, it became a breeze. So, let’s dive in and explore the best methods to keep your fryer clean and your food delicious.
Understanding Your Fryer
Before we get into the nitty-gritty of cleaning, it’s crucial to understand your fryer. Commercial fryers come in various shapes and sizes, but they all share common components: the frypot, heating elements, baskets, and control panels. Knowing how these parts work together will help you clean more effectively.
Types of Fryers
There are several types of fryers, each with its own cleaning needs:
- Open-pot fryers: These are the most common and straightforward to clean.
- Tube-type fryers: These have heating elements inside the oil, requiring extra care during cleaning.
- Flat-bottom fryers: These are easier to clean due to their flat surface.
- Pressure fryers: These need special attention to ensure all parts are clean and functional.
Is this the best approach? Let’s consider the specifics of each type and how they might affect your cleaning routine.
Importance of Regular Cleaning
Regular cleaning isn’t just about appearances; it’s about the longevity and performance of your fryer. Oil buildup can affect heat distribution, leading to uneven cooking and increased energy consumption. Plus, a clean fryer ensures that your food tastes as good as it looks.
I’m torn between daily and weekly cleaning routines, but ultimately, a combination of both is ideal. Daily maintenance keeps things running smoothly, while weekly deep cleans tackle tougher buildup.
Preparing to Clean Your Fryer
Before you start, gather your tools. You’ll need:
- Safety gloves and goggles
- A degreasing solution
- A scrub brush
- A scraper
- A hose or bucket for rinsing
- Clean towels or cloths
Maybe I should clarify that safety is paramount. Always turn off and unplug the fryer before cleaning, and ensure it has cooled down completely to avoid burns.
Daily Cleaning Routine
Your daily routine should focus on quick, effective cleaning to keep the fryer in good working order. Here’s a step-by-step guide:
Step 1: Drain the Oil
Start by draining the oil from the fryer. Most fryers have a drain valve at the bottom. Make sure to collect the oil in a suitable container for disposal or reuse.
Step 2: Wipe Down the Surfaces
Using a clean cloth or paper towel, wipe down the exterior surfaces of the fryer. This includes the control panel, handles, and any other areas that might have oil splatter.
Step 3: Clean the Fry Baskets
Remove the fry baskets and soak them in hot, soapy water. Use a scrub brush to remove any stuck-on food particles. Rinse and dry thoroughly before putting them back.
Step 4: Quick Interior Clean
For a quick daily clean, use a degreaser to wipe down the interior of the fryer. This helps prevent oil buildup and keeps the fryer running efficiently.
Is this enough? For most days, yes. But for a deeper clean, you’ll need to go further.
Weekly Deep Cleaning
A weekly deep clean is essential for maintaining the overall health of your fryer. Here’s how to do it:
Step 1: Boil Out the Fryer
Fill the fryer with water and add a degreasing solution. Boil the mixture for about 15-20 minutes. This process, known as ‘boiling out,’ helps break down oil and grease buildup.
Step 2: Scrub the Interior
After boiling out, let the fryer cool down. Use a scrub brush to clean the interior surfaces, paying special attention to the heating elements and corners where grease can accumulate.
Step 3: Rinse Thoroughly
Rinse the fryer thoroughly with clean water to remove any remaining degreaser. Use a hose or bucket to ensure all surfaces are rinsed.
Step 4: Dry and Inspect
Dry the fryer completely with clean towels. Inspect all parts for any signs of wear or damage. This is a good time to replace any worn-out components.
I’m always amazed at how much better the fryer performs after a deep clean. It’s like giving it a fresh start.
Tackling Stubborn Buildup
Sometimes, even with regular cleaning, you might encounter stubborn buildup. Here are some tips to handle it:
Using a Scraper
A scraper can be helpful for removing tough, caked-on grease. Be gentle to avoid damaging the fryer’s surface.
Soaking in Degreaser
For particularly stubborn spots, soak them in a degreasing solution for a longer period. This can help loosen the buildup, making it easier to scrub off.
Vinegar and Baking Soda
A natural alternative is to use a mixture of vinegar and baking soda. The acidity of the vinegar and the abrasiveness of the baking soda can cut through grease effectively.
But is this always necessary? Not always, but it’s good to have these tricks up your sleeve for those tougher jobs.
Maintaining Your Fryer
Beyond cleaning, regular maintenance is key to keeping your fryer in good condition. Here are some tips:
Check the Oil Quality
Regularly check the quality of your frying oil. Dark, smoky oil indicates it’s time for a change. Fresh oil ensures better-tasting food and easier cleaning.
Inspect Heating Elements
Periodically inspect the heating elements for any signs of wear or damage. Replace them as needed to maintain consistent heating.
Keep the Area Clean
Maintain a clean workspace around the fryer. This includes keeping the floor and surrounding counters free of grease and debris, which can help prevent accidents and make cleaning easier.
Maybe I should clarify that these steps aren’t just about the fryer; they’re about the overall kitchen environment.
Common Mistakes to Avoid
Even with the best intentions, mistakes can happen. Here are some common pitfalls to avoid:
Not Letting the Fryer Cool Down
Cleaning a hot fryer can lead to burns and damage. Always let it cool down completely before starting.
Using Harsh Chemicals
Some chemicals can damage the fryer’s surface. Stick to approved degreasers and natural solutions when possible.
Neglecting Regular Maintenance
Skipping regular cleaning and maintenance can lead to bigger problems down the line. Consistency is key.
I’m torn between being overly cautious and too laid-back, but ultimately, finding a balance is crucial.
The Benefits of a Clean Fryer
A clean fryer isn’t just about aesthetics; it’s about performance and safety. Here are some benefits:
Improved Food Quality
Clean oil and a well-maintained fryer ensure that your food tastes great every time.
Energy Efficiency
A clean fryer heats more evenly, saving energy and reducing costs.
Longer Lifespan
Regular cleaning and maintenance extend the lifespan of your fryer, saving you money in the long run.
Is this worth the effort? Absolutely. The benefits far outweigh the time and effort involved.
Wrapping Up: Your Fryer Cleaning Challenge
So there you have it, a comprehensive guide to cleaning your fryer. Whether you’re a professional chef or a home cook, keeping your fryer clean is essential for great-tasting food and a safe kitchen environment. So, why not set yourself a challenge? Commit to a regular cleaning routine and see the difference it makes.
And remember, every time you fry something, think about the journey that food takes from the fryer to your plate. It’s a journey worth savoring, and a clean fryer is the first step.
FAQ
Q: How often should I clean my fryer?
A: A daily quick clean and a weekly deep clean are ideal for most commercial fryers. This ensures optimal performance and food quality.
Q: Can I use regular dish soap to clean my fryer?
A: While dish soap can help, a degreasing solution is more effective for breaking down oil and grease. Natural alternatives like vinegar and baking soda can also work well.
Q: Is it safe to clean the fryer while it’s still hot?
A: No, it’s not safe. Always let the fryer cool down completely before cleaning to avoid burns and damage.
Q: How do I know when to change the frying oil?
A: Dark, smoky oil is a sign that it’s time to change it. Fresh oil ensures better-tasting food and easier cleaning.
@article{the-ultimate-guide-to-cleaning-your-commercial-fryer-in-2025,
    title   = {The Ultimate Guide To Cleaning Your Commercial Fryer in 2025},
    author  = {Chef's icon},
    year    = {2025},
    journal = {Chef's Icon},
    url     = {https://chefsicon.com/best-way-to-clean-a-fryer/}
}