The Best Fluffy Pancakes recipe you will fall in love with. Full of tips and tricks to help you make the best pancakes.
Smart Kitchen Zones for Food Safety Compliance: Why Your Kitchen Might Be Failing You (And How to Fix It)
Let me tell you about the time I walked into a high-end Nashville restaurant, one of those places with a James Beard-nominated chef and a waitlist longer than my patience on a Monday morning. The hostess smiled, the ambiance was perfect, and the menu promised a culinary experience. But when I peeked into the kitchen (old habits die hard), I saw something that made my stomach turn. Not the food, the workflow. Or, more accurately, the lack of it.
Raw chicken juices dripping near the salad prep station. A line cook using the same cutting board for fish and vegetables without so much as a rinse. And don’t even get me started on the handwashing sink, which was buried behind a mountain of dirty dishes like some kind of culinary afterthought. I wanted to grab the manager by the shoulders and shout, “Do you want a health violation? Because this is how you get a health violation.”
But here’s the thing: I get it. Running a kitchen is chaotic. Orders are flying, tickets are piling up, and the last thing anyone wants to think about is whether the smart kitchen zones are properly designated for food safety compliance. But here’s the hard truth, if you’re not thinking about it, you’re playing Russian roulette with your customers’ health, your reputation, and your bottom line. And in 2026, with foodborne illness outbreaks making headlines and diners becoming more educated (and paranoid) than ever, that’s a risk you can’t afford to take.
So, what’s the solution? It’s not just about slapping up a few signs or reminding your staff to wash their hands (though, yeah, that’s still important). It’s about rethinking your kitchen layout from the ground up, designing smart zones that don’t just meet compliance standards but actually make your team’s job easier. Because let’s be real: if your food safety measures feel like a hindrance, your staff is going to find a way to work around them. And that’s when things go sideways.
In this guide, I’m going to walk you through everything you need to know about creating smart kitchen zones for food safety compliance. We’ll cover the basics, sure, but we’re also going to dive into the nitty-gritty, the stuff most guides gloss over. Like how to balance efficiency with safety, how to train your team without making them roll their eyes, and how to future-proof your kitchen so you’re not scrambling every time the health inspector shows up. By the end, you’ll have a blueprint for a kitchen that’s not just compliant, but smarter. And who knows? Maybe you’ll even sleep a little better at night.
The Psychology of Kitchen Zones: Why Your Brain (and Your Staff’s) Is Wired for Chaos
Before we talk about the how, let’s talk about the why. Why is it so hard to maintain food safety compliance in a busy kitchen? Is it just laziness? A lack of training? Or is there something deeper at play?
Turns out, it’s a little bit of all three, but mostly the latter. Our brains are wired to take shortcuts. It’s called cognitive load theory, and it basically means that when we’re bombarded with too much information or too many tasks at once, our brains start cutting corners to conserve energy. In a kitchen, that might look like a line cook skipping handwashing because they’re in the weeds, or a prep chef using the same knife for raw meat and veggies because they don’t want to walk across the kitchen to grab a clean one.
And here’s the kicker: the more chaotic your kitchen is, the more your staff’s brains will default to these shortcuts. It’s not that they don’t know the rules, it’s that their brains are screaming, “We don’t have time for this!” So, the first step in designing smart kitchen zones isn’t about the layout or the equipment. It’s about reducing cognitive load. It’s about creating a space where the path of least resistance is also the path of compliance.
Think about it like this: if your handwashing sink is tucked away in a corner where no one can see it, your staff is going to treat it like an optional stop on the way to the walk-in. But if it’s right in the middle of the action, visible, accessible, and maybe even equipped with a motion-activated soap dispenser-suddenly, washing hands becomes as automatic as grabbing a towel. That’s the power of smart design.
So, how do you apply this to your kitchen? Start by observing your staff. Where are they cutting corners? What tasks are they avoiding because they’re inconvenient? Those are the pain points you need to address. Because if you can make compliance easier than non-compliance, you’ve already won half the battle.
The Five Zones Every Kitchen Needs (And Why Most Get Them Wrong)
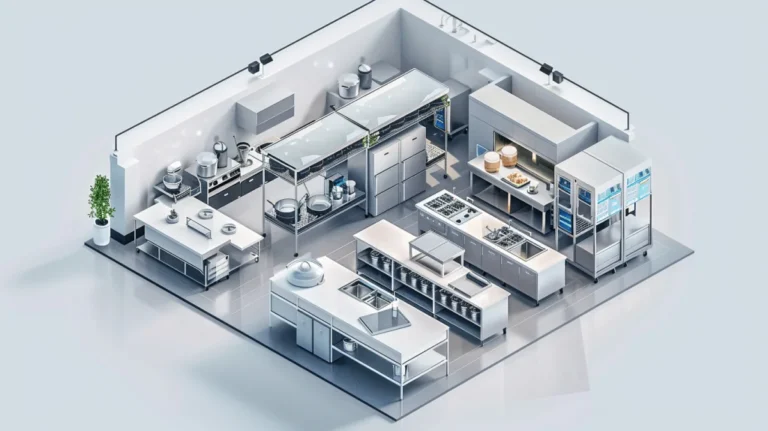
Alright, let’s get into the meat of it. When it comes to smart kitchen zones for food safety compliance, there are five core areas you need to nail. Miss one, and you’re leaving the door wide open for cross-contamination, temperature abuse, or worse. But here’s the thing: most kitchens don’t just miss one, they miss all of them, at least in some capacity. Why? Because they’re either stuck in the past (“This is how we’ve always done it!”) or they’re trying to cram too much into too little space.
So, what are these five zones? Let’s break them down:
- Receiving Zone: Where deliveries come in and are inspected.
- Storage Zone: Where food is stored at the correct temperatures.
- Prep Zone: Where ingredients are prepped for cooking.
- Cooking Zone: Where the magic (and heat) happens.
- Service Zone: Where food is plated and sent out to customers.
Sounds simple, right? But here’s where most kitchens go wrong: they treat these zones as isolated islands rather than parts of a flow. For example, the receiving zone might be right next to the prep zone, which is a recipe for cross-contamination. Or the storage zone might be so far from the cooking zone that staff are constantly running back and forth, increasing the risk of temperature abuse. It’s not enough to have these zones, you need to design them to work together.
Let’s take a closer look at each zone and how to optimize it for food safety compliance.
1. The Receiving Zone: Your First Line of Defense (And Where Most Kitchens Drop the Ball)
I’ll be honest: the receiving zone is the most overlooked part of any kitchen. It’s where deliveries come in, and let’s face it, it’s not exactly glamorous. But here’s the thing: if you’re not inspecting deliveries properly, you’re basically inviting contaminants into your kitchen. And once they’re in, they’re in.
So, what makes a smart receiving zone? First, it needs to be separate from the rest of the kitchen. That means no sharing space with prep, cooking, or storage. Why? Because you don’t want raw ingredients (especially meat, poultry, or seafood) contaminating areas where ready-to-eat food is being handled. Second, it needs to be well-lit and well-organized. You can’t inspect what you can’t see, and if your receiving area looks like a tornado hit it, your staff is going to rush through inspections just to get the chaos over with.
Here’s what your receiving zone should include:
- A dedicated scale for checking weights (because shorted deliveries are a thing, and they’re not just annoying, they can throw off your entire prep process).
- A thermometer for checking temperatures of refrigerated and frozen items. If that chicken arrives at 50°F, it’s going straight back to the supplier.
- A handwashing station (yes, really). Your staff should be washing their hands before they start inspecting deliveries, not after.
- A logbook for recording inspections. This isn’t just for compliance, it’s for your own records. If you start noticing that a supplier’s deliveries are consistently off-temperature, it’s time to have a conversation.
And here’s a pro tip: train your staff to reject deliveries that don’t meet standards. I know, I know, it’s a pain to send something back, especially when you’re in a rush. But trust me, it’s a lot less painful than dealing with a foodborne illness outbreak.
2. The Storage Zone: Where Temperature Control Meets Organizational Zen
If your storage zone is just a walk-in fridge and a shelf full of dry goods, you’re doing it wrong. A smart storage zone is all about temperature control, organization, and accessibility. And no, that doesn’t mean you need to invest in a bunch of fancy equipment (though, let’s be real, a smart fridge with temperature monitoring wouldn’t hurt).
First, let’s talk temperature. Your walk-in fridge should be set to 41°F or below, and your freezer should be at 0°F or below. But here’s the thing: just setting the temperature isn’t enough. You need to monitor it. That means regular checks with a calibrated thermometer, not just trusting the digital readout on the fridge. And if you’re still using a manual logbook for temperature checks, it’s time to upgrade to a digital monitoring system. Because let’s be honest, no one remembers to check the temperature at the same time every day, and if they do, they’re probably fudging the numbers.
Now, let’s talk organization. Your storage zone should follow the FIFO rule (First In, First Out), which means that older items should be at the front and newer items at the back. But here’s where most kitchens mess up: they don’t label anything. And no, scribbling the date on a piece of tape doesn’t count. You need a clear, consistent labeling system that includes the item name, the date it was received, and the date it should be used by. And if you’re not using color-coded labels for different types of food (raw meat, poultry, seafood, etc.), you’re missing out on an easy way to prevent cross-contamination.
Finally, let’s talk accessibility. Your storage zone should be easy to navigate. That means no overcrowding, no blocking access to items, and no storing heavy items on high shelves (because, let’s be real, no one’s going to climb a ladder to grab a case of tomatoes). And if your walk-in fridge is so packed that your staff has to play Tetris to find anything, it’s time to rethink your storage strategy.
3. The Prep Zone: Where Cross-Contamination Goes to Die (If You Do It Right)
The prep zone is where the magic happens, or where things go horribly wrong. It’s where raw ingredients are transformed into culinary masterpieces, but it’s also where cross-contamination rears its ugly head. And let me tell you, nothing ruins a dinner service faster than a health inspector finding raw chicken juice on the lettuce.
So, how do you design a smart prep zone that keeps cross-contamination at bay? First, you need to separate raw and ready-to-eat foods. That means no using the same cutting board, knife, or prep surface for raw meat and vegetables. And no, rinsing a cutting board with water doesn’t count as sanitizing it. You need dedicated tools for each type of food, and you need to sanitize them properly between uses.
Here’s what your prep zone should include:
- Color-coded cutting boards: One for raw meat, one for poultry, one for seafood, one for vegetables, and one for ready-to-eat foods. And no, you don’t need to buy a new set every week, just make sure they’re in good condition and sanitized after each use.
- Separate prep stations: If possible, designate different areas of your prep zone for different types of food. For example, keep raw meat prep on one side of the kitchen and vegetable prep on the other. And if you’re tight on space, at least make sure raw meat prep is below ready-to-eat prep to prevent drips.
- Handwashing stations: I know, I know, you’re sick of hearing about handwashing. But here’s the thing: if your staff has to walk across the kitchen to wash their hands, they’re not going to do it. Your prep zone should have multiple handwashing stations, and they should be easily accessible.
- Sanitizing stations: Every prep zone should have a three-compartment sink for washing, rinsing, and sanitizing tools. And no, a spray bottle of sanitizer doesn’t count. You need a dedicated sanitizing solution, and you need to train your staff on how to use it properly.
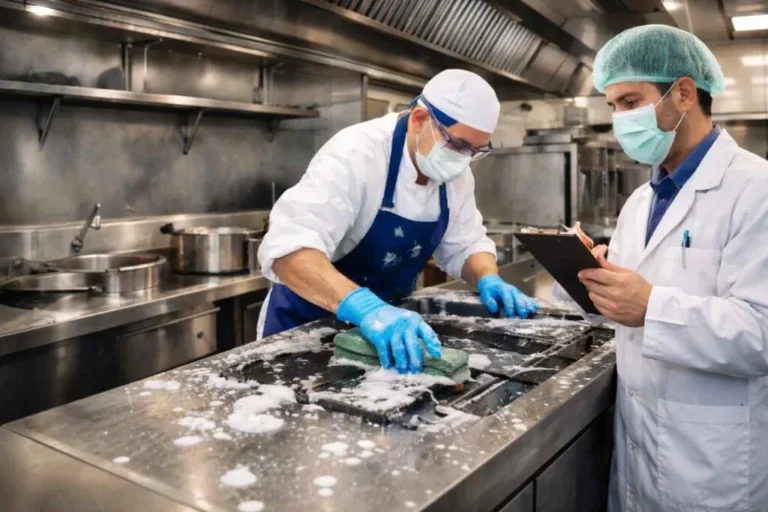
And here’s a pro tip: train your staff to clean as they go. I know it’s tempting to wait until the end of the shift to clean up, but that’s how cross-contamination happens. Encourage your team to sanitize surfaces and tools between tasks, and make sure they have the supplies they need to do it quickly and efficiently.
4. The Cooking Zone: Where Heat Meets Compliance (And Where Things Get Complicated)
The cooking zone is where the real action happens. It’s where raw ingredients are transformed into delicious dishes, and where temperature control becomes absolutely critical. But here’s the thing: most kitchens treat the cooking zone like a free-for-all. Grills, fryers, ovens, and ranges are all crammed together, and staff are expected to juggle multiple tasks at once. And that’s a recipe for disaster.
So, how do you design a smart cooking zone that keeps food safe and your staff sane? First, you need to separate raw and cooked foods. That means no using the same tongs for raw chicken and cooked chicken, and no placing cooked food on a plate that previously held raw food. And no, wiping a plate with a towel doesn’t count as sanitizing it. You need dedicated tools for each stage of the cooking process, and you need to sanitize them properly between uses.
Here’s what your cooking zone should include:
- Thermometers: Every cooking zone should have multiple thermometers for checking the internal temperature of food. And no, you can’t just guess. You need to calibrate your thermometers regularly to ensure they’re accurate.
- Hot holding equipment: If you’re holding food at a safe temperature before serving, you need hot holding equipment like chafing dishes or steam tables. And no, leaving food on the stove doesn’t count. You need to monitor the temperature regularly to ensure it stays above 135°F.
- Cooling equipment: If you’re cooling food before storing it, you need rapid cooling equipment like blast chillers or ice baths. And no, leaving food on the counter doesn’t count. You need to cool food from 135°F to 70°F within two hours, and from 70°F to 41°F within four hours.
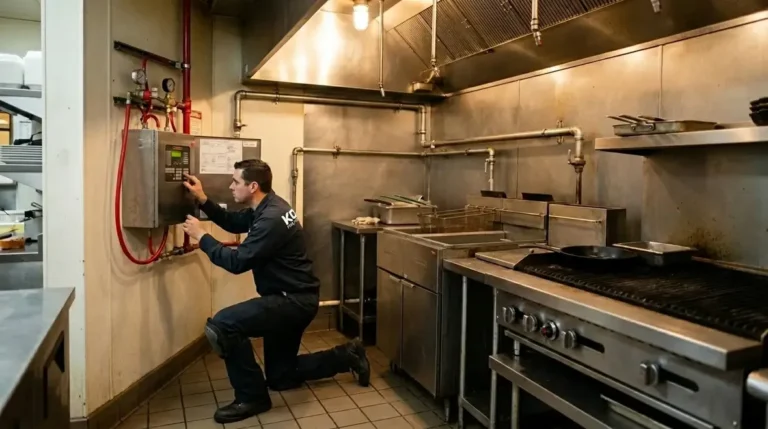
- Fire suppression systems: I know, I know, this isn’t directly related to food safety. But if your cooking zone doesn’t have a properly maintained fire suppression system, you’re playing with fire (literally). And trust me, a kitchen fire is a lot worse than a health violation.
And here’s a pro tip: train your staff to cook food to the correct temperature. I know it seems obvious, but you’d be surprised how many kitchens serve undercooked chicken or pork because they’re more concerned with speed than safety. Make sure your team knows the minimum internal temperatures for different types of food, and make sure they’re checking them regularly.
5. The Service Zone: Where Presentation Meets Compliance (And Where Diners Judge You)
The service zone is where the rubber meets the road. It’s where your culinary creations are plated, garnished, and sent out to customers. But it’s also where food safety compliance can either shine or fall apart. Because let’s be real: if your service zone is a mess, your diners are going to notice. And not in a good way.
So, how do you design a smart service zone that keeps food safe and your customers happy? First, you need to separate ready-to-eat foods from raw foods. That means no using the same utensils for plating and prep, and no placing garnishes on a plate that previously held raw food. And no, wiping a plate with a towel doesn’t count as sanitizing it. You need dedicated tools for each task, and you need to sanitize them properly between uses.
Here’s what your service zone should include:
- Handwashing stations: Yes, again. Your service zone should have multiple handwashing stations, and they should be easily accessible. Because nothing ruins a dinner service faster than a server touching their face and then grabbing a plate.
- Utensil holders: Every service zone should have dedicated utensil holders for tongs, spoons, and other tools. And no, tossing them in a drawer doesn’t count. You need to sanitize them regularly to prevent cross-contamination.
- Temperature monitoring: If you’re holding food at a safe temperature before serving, you need to monitor the temperature regularly. And no, guessing doesn’t count. You need a thermometer for each holding unit, and you need to record the temperatures in a logbook.
- Garnish stations: If you’re using garnishes like herbs, citrus wedges, or microgreens, you need a dedicated garnish station. And no, tossing them on the counter doesn’t count. You need to store them properly to prevent contamination.
And here’s a pro tip: train your staff to handle plates properly. I know it seems obvious, but you’d be surprised how many servers touch the rim of a plate (or worse, the food itself) when they’re delivering it to a table. Make sure your team knows to hold plates by the bottom or the edge, and to ever touch the food.
The Technology Factor: How Smart Kitchens Are Changing the Game (And Why You Can’t Afford to Ignore It)
Let’s talk about technology. I know, I know, kitchens are supposed to be about food, not gadgets. But here’s the thing: if you’re not using smart kitchen technology to improve food safety compliance, you’re falling behind. And in 2026, that’s not just a competitive disadvantage, it’s a liability.
So, what does a smart kitchen look like? It’s not about having a bunch of fancy gadgets (though, let’s be real, some of them are pretty cool). It’s about using technology to automate compliance, reduce human error, and make your staff’s job easier. Because at the end of the day, the best food safety measures are the ones that actually get used.
Here are a few ways technology is changing the game:
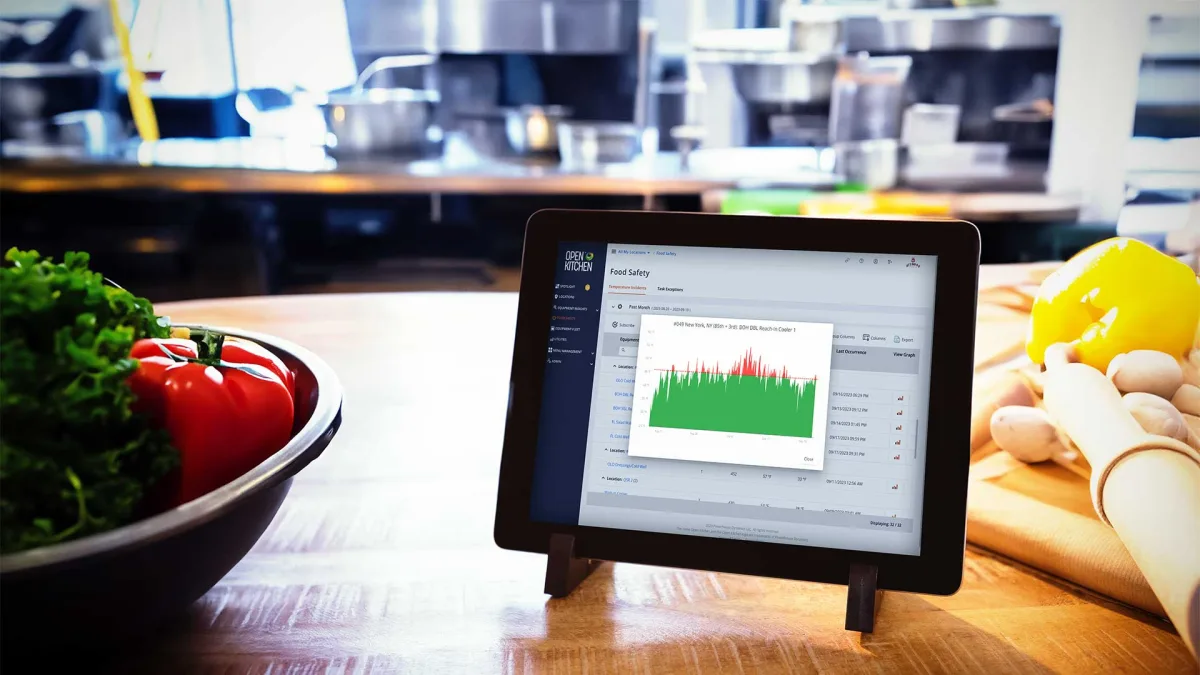
- Temperature monitoring systems: Gone are the days of manual temperature checks. With a smart temperature monitoring system, you can track the temperature of your fridge, freezer, and hot holding units in real-time. And if the temperature goes out of range, you’ll get an alert on your phone. No more guessing, no more fudging the numbers, just automated compliance.
- Digital logbooks: If you’re still using a paper logbook for temperature checks, it’s time to upgrade. A digital logbookot only makes it easier to record temperatures, but it also makes it easier to analyze trends and identify issues before they become problems.
- Handwashing monitoring: Yes, really. There are now smart handwashing stations that track how often your staff washes their hands, and for how long. And if someone skips a wash, you’ll get an alert. It might sound Big Brother-ish, but trust me, it’s a game-changer for compliance.
- Inventory management systems: A smart inventory system can help you track what’s in your fridge, what’s about to expire, and what needs to be ordered. And because it’s all digital, you can reduce waste and improve efficiency at the same time.
But here’s the thing: technology is only as good as the people using it. If your staff doesn’t know how to use a smart thermometer or a digital logbook, it’s not going to do you any good. So, make sure you’re training your team on how to use these tools, and make sure they understand why they’re important. Because at the end of the day, technology is just a tool, it’s up to you to make it work.
The Human Element: Why Training and Culture Matter More Than You Think
Alright, let’s talk about the elephant in the room: people. Because no matter how well-designed your smart kitchen zones are, and no matter how much technology you throw at the problem, if your staff doesn’t buy in, you’re still going to have issues. And let’s be real, getting buy-in from a team of overworked, underpaid line cooks is easier said than done.
So, how do you create a culture of compliance? It starts with training, but it doesn’t end there. Training is important, sure, but it’s not enough. You need to reinforce the message every single day, and you need to lead by example. Because if your staff sees you cutting corners, they’re going to cut corners too.
Here’s how to do it:
- Make training engaging: Let’s be honest, most food safety training is boring. It’s a bunch of slides with bullet points, and no one remembers anything. So, make it interactive. Use real-life scenarios, quizzes, and even games to keep your staff engaged. And for the love of all that is holy, don’t just do it once a year. Regular refresher training is key.
- Lead by example: If you’re not following the rules, why should your staff? Make sure you’re washing your hands, using separate cutting boards, and checking temperatures just like everyone else. And if you see someone cutting corners, call them out-but do it in a way that’s constructive, not punitive.
- Make compliance easy: If your food safety measures are a pain to follow, your staff is going to find a way to work around them. So, make it easy. Put handwashing stations where they’re needed, make sure sanitizing supplies are readily available, and design your kitchen for compliance (which, coincidentally, is what this whole article is about).
- Reward good behavior: Positive reinforcement works. If you see someone going above and beyond to follow food safety rules, reward them. It could be something as simple as a shout-out in a team meeting, or something more tangible like a gift card. The point is, you want to reinforce the behavior you want to see.
And here’s a pro tip: get your staff involved in the process. If you’re redesigning your kitchen, ask for their input. If you’re implementing new technology, let them test it out. Because at the end of the day, they’re the ones who are going to be using it every day. And if they feel like they have a stake in the process, they’re more likely to buy in.
The Inspection Factor: How to Pass With Flying Colors (And What to Do If You Don’t)
Let’s talk about the thing that keeps every kitchen manager up at night: health inspections. Because no matter how well you think you’re doing, there’s always that nagging fear that the inspector is going to walk in and find something you missed. And let’s be real, inspectors have a knack for finding the one thing you didn’t think about.
So, how do you pass with flying colors? It starts with preparation, but it doesn’t end there. You need to know the rules, train your staff, and stay on top of compliance every single day. Because the best way to pass an inspection is to ever fail in the first place.
Here’s how to do it:
- Know the rules: Every state (and sometimes every county) has its own food safety regulations. Make sure you know what they are, and make sure your staff knows them too. And don’t just assume you’re in compliance-check regularly.
- Keep your records up to date: Inspectors love records. Temperature logs, cleaning schedules, training records, if you don’t have them, you’re going to fail. So, make sure you’re keeping accurate records, and make sure they’re easily accessible.
- Train your staff: I know, I know, I’ve already talked about training. But it’s worth repeating. Make sure your staff knows the rules, and make sure they know why they’re important. Because if they don’t, they’re not going to follow them.
- Do your own inspections: The best way to prepare for an inspection is to do your own. Walk through your kitchen with a critical eye, and look for anything that might be a violation. And if you find something, fix it immediately.
But what if you do fail an inspection? First, don’t panic. It happens to the best of us. The key is to address the issue quickly and prevent it from happening again. Here’s what to do:
- Understand the violation: Ask the inspector to explain the violation in detail. What was the issue? Why is it a problem? What do you need to do to fix it?
- Fix the issue immediately: If it’s something simple, like a missing temperature log, fix it right away. If it’s something more complex, like a structural issue, work with the inspector to come up with a plan.
- Retrain your staff: If the violation was due to a staff member not following the rules, retrain them. And make sure they understand why the rules are important.
- Follow up: After you’ve fixed the issue, follow up with the inspector to make sure they’re satisfied. And if you’re not sure, ask for a re-inspection.
And here’s a pro tip: build a relationship with your inspector. I know, it sounds weird, like you’re trying to buddy up to the person who holds your livelihood in their hands. But the truth is, inspectors are just people. And if you treat them with respect, they’re more likely to work with you to fix issues, rather than just slapping you with a violation.
The Future of Smart Kitchen Zones: What’s Next (And How to Stay Ahead of the Curve)
Alright, let’s take a step back and look at the big picture. We’ve talked about smart kitchen zones for food safety compliance in 2026, but what about the future? What’s next? And how do you stay ahead of the curve?
First, let’s talk about automation. We’re already seeing kitchens use robots for everything from flipping burgers to chopping vegetables. And while it might seem like science fiction, it’s only a matter of time before automation becomes the norm. So, how do you prepare? Start by identifying tasks that can be automated. Things like temperature monitoring, inventory management, and even handwashing can be automated with the right technology. And the more you automate, the less you have to rely on human error.
Next, let’s talk about data. We’re already seeing kitchens use smart sensors to track everything from fridge temperatures to handwashing frequency. But in the future, that data is going to become even more valuable. Imagine being able to predict food safety issues before they happen, or optimize your workflow based on real-time data. It’s not as far-fetched as it sounds, it’s just a matter of time.
And finally, let’s talk about sustainability. In 2026, sustainability isn’t just a buzzword, it’s a ecessity. And while it might not seem directly related to food safety compliance, the two are more connected than you think. For example, reducing food waste isn’t just good for the environment, it’s also good for food safety. Because the less food you have sitting around, the less chance there is for contamination. So, start thinking about how you can make your kitchen more sustainable, and how that can also improve compliance.
So, what’s the takeaway? The future of smart kitchen zones is all about automation, data, and sustainability. And if you want to stay ahead of the curve, you need to start thinking about how to incorporate these trends into your kitchen today.
Putting It All Together: Your Action Plan for a Smarter, Safer Kitchen
Alright, let’s bring it all home. We’ve covered a lot of ground, from the psychology of kitchen zones to the future of smart kitchens. But what does it all mean for you? How do you take this information and turn it into action?
Here’s your action plan for creating smart kitchen zones for food safety compliance:
- Assess your current setup: Walk through your kitchen and identify the pain points. Where are staff cutting corners? Where are the bottlenecks? Where are the risks?
- Redesign your zones: Use the five-zone model (receiving, storage, prep, cooking, service) as a starting point, and design your kitchen for flow and compliance.
- Invest in technology: From smart thermometers to digital logbooks, technology can help you automate compliance and reduce human error.
- Train your staff: Make sure your team knows the rules, and make sure they understand why they’re important. And don’t just do it once-regular refresher training is key.
- Lead by example: If you’re not following the rules, why should your staff? Make sure you’re washing your hands, using separate cutting boards, and checking temperatures just like everyone else.
- Do your own inspections: The best way to prepare for an inspection is to do your own. Walk through your kitchen with a critical eye, and look for anything that might be a violation.
- Stay ahead of the curve: Keep an eye on trends like automation, data, and sustainability, and think about how you can incorporate them into your kitchen.
And here’s the thing: this isn’t a one-and-done process. Food safety compliance is an ongoing effort, and it requires constant vigilance. But if you take the time to design smart kitchen zones, invest in the right technology, and train your staff, you’ll be well on your way to a kitchen that’s not just compliant, but smarter.
So, what’s the first step? Start by assessing your current setup. Walk through your kitchen, identify the pain points, and start thinking about how you can improve. Because at the end of the day, the best kitchen is one that’s safe, efficient, and designed for success.
FAQ: Your Burning Questions About Smart Kitchen Zones for Food Safety Compliance
Q: What’s the biggest mistake kitchens make when designing smart zones for food safety?
A: The biggest mistake is treating the zones as isolated islands rather than parts of a flow. For example, putting the receiving zone right next to the prep zone is a recipe for cross-contamination. You need to design your kitchen so that the zones work together, not against each other. That means thinking about workflow, accessibility, and separation of raw and ready-to-eat foods.
Q: How do I convince my staff to buy into smart kitchen zones?
A: It starts with training, but it doesn’t end there. You need to make compliance easy-put handwashing stations where they’re needed, make sure sanitizing supplies are readily available, and design your kitchen for compliance. And don’t forget to lead by example. If your staff sees you cutting corners, they’re going to cut corners too. Finally, reward good behavior. Positive reinforcement works, so if you see someone going above and beyond to follow food safety rules, make sure they know you appreciate it.
Q: What’s the most important piece of technology for smart kitchen zones?
A: It’s hard to pick just one, but if I had to choose, I’d say a smart temperature monitoring system. It automates compliance, reduces human error, and gives you real-time data on your fridge, freezer, and hot holding units. And if the temperature goes out of range, you’ll get an alert on your phone. No more guessing, no more fudging the numbers, just automated compliance.
Q: How often should I do my own inspections?
A: At least once a week, but ideally more often. The best way to prepare for an inspection is to do your own. Walk through your kitchen with a critical eye, and look for anything that might be a violation. And if you find something, fix it immediately. The more often you do your own inspections, the less likely you are to be caught off guard when the health inspector shows up.
@article{smart-kitchen-zones-for-food-safety-compliance-a-practical-guide-to-modernizing-your-workflow,
    title   = {Smart Kitchen Zones for Food Safety Compliance: A Practical Guide to Modernizing Your Workflow},
    author  = {Chef's icon},
    year    = {2026},
    journal = {Chef's Icon},
    url     = {https://chefsicon.com/smart-kitchen-zones-for-food-safety-compliance/}
}