The Best Fluffy Pancakes recipe you will fall in love with. Full of tips and tricks to help you make the best pancakes.
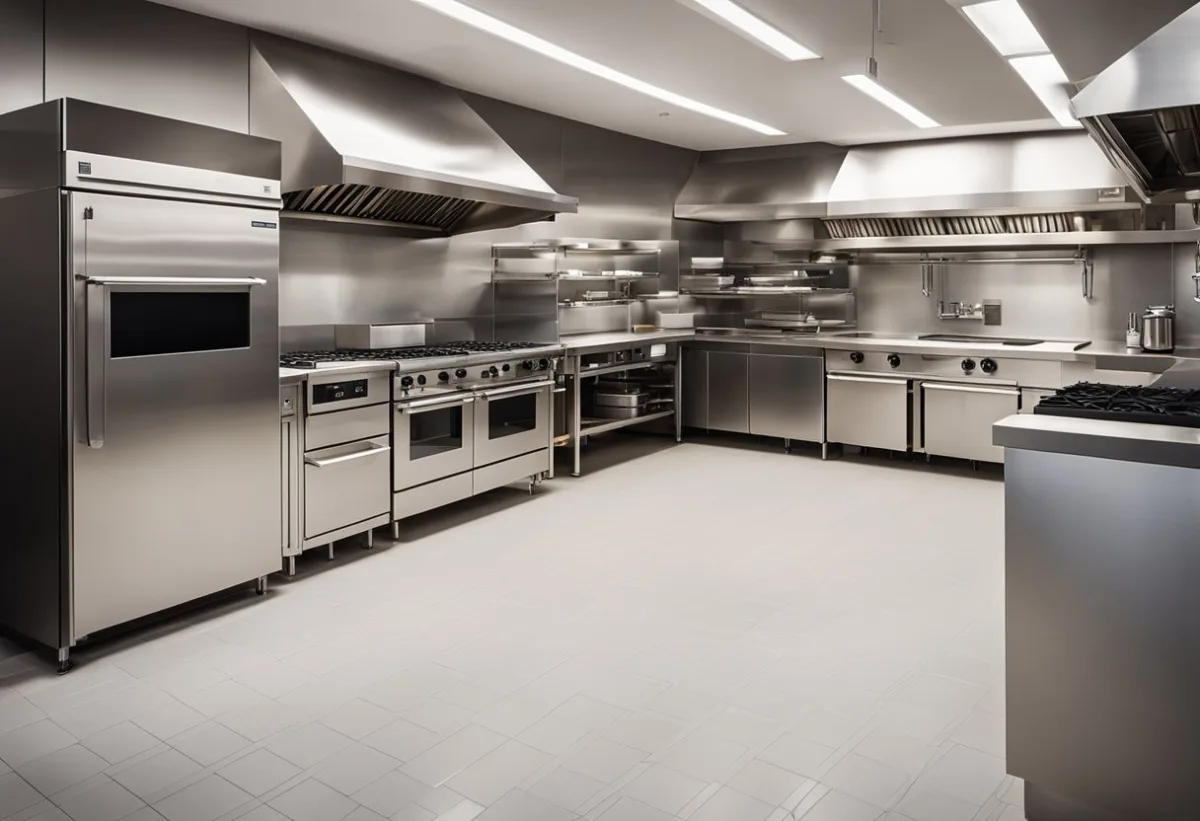
Maximizing Space in Commercial Kitchen Layouts for Small Restaurants: Why Every Inch Counts
Let me tell you about the first time I walked into a cramped commercial kitchen. It was a tiny Italian bistro in Nashville, tucked between a record store and a vintage clothing shop. The owner, Maria, had this wild energy, she’d been running the place for five years, and she knew every inch of that kitchen like the back of her hand. But when I asked her about her biggest challenge, she didn’t hesitate: “Space. Or the lack of it.” She gestured around the room, where chefs were practically doing a dance to avoid bumping into each other. “I swear, if I had just six more inches here or there, we could move twice as fast.”
That conversation stuck with me. Because here’s the thing: in a small restaurant, maximizing space in your commercial kitchen layout isn’t just about comfort, it’s about survival. Every wasted square foot is lost revenue, slower service, and frustrated staff. But here’s the good news: with the right strategies, even the tiniest kitchens can feel spacious, efficient, and downright magical. This isn’t just about cramming more equipment into a room. It’s about smart design, workflow optimization, and making every inch work harder. And that’s what we’re diving into today.
By the end of this guide, you’ll walk away with actionable insights on how to:
- Assess your current kitchen layout and identify hidden inefficiencies.
- Choose the right commercial kitchen equipment for small spaces without sacrificing functionality.
- Design a kitchen workflow that minimizes movement and maximizes productivity.
- Implement space-saving storage solutions that keep your kitchen organized and clutter-free.
- Balance compliance with creativity to meet health codes without feeling stifled.
Sound like a lot? It is. But don’t worry, we’ll take it step by step. And hey, if Maria’s tiny bistro can pull it off, so can you.
The Psychology of Space: Why Small Kitchens Feel Even Smaller
Before we dive into the nuts and bolts of maximizing space in commercial kitchen layouts, let’s talk about something that doesn’t get enough attention: the psychology of space. Because here’s the truth, small kitchens don’t just feel smaller. They are smaller, but our perception of them can make the problem worse. Or better.
I remember walking into a food truck once, you know, the kind that’s basically a kitchen on wheels. The owner, a guy named Javier, had this tiny space, but it didn’t feel claustrophobic. It felt efficient. Why? Because he’d used a few psychological tricks to make the space feel larger than it was. Light colors on the walls, mirrors to reflect light, and equipment that was scaled to fit the space without overwhelming it. It got me thinking: how much of our frustration with small kitchens is actually about the physical space, and how much is about how we perceive it?
Here’s what I’ve learned: clutter is the enemy of efficiency. And in a small kitchen, clutter isn’t just about mess, it’s about anything that disrupts the flow. A poorly placed prep table, a fridge that’s too far from the line, or even a single piece of equipment that’s rarely used but takes up valuable real estate. These things don’t just take up space; they take up mental space. They make the kitchen feel smaller, even if the square footage hasn’t changed.
So, before you start rearranging or buying new equipment, ask yourself: What’s making this space feel smaller than it is? Is it the color of the walls? The lighting? The way the equipment is arranged? Sometimes, the solution isn’t about adding more, it’s about subtracting what’s unnecessary or rethinking what’s already there.
And here’s a thought that might sound counterintuitive: small kitchens can actually be more efficient than large ones. Why? Because in a small space, everything has to be intentional. There’s no room for wasted movement, no space for equipment that’s only used once a month. Every decision has to be deliberate. That’s a good thing. It forces you to think critically about what you really need, and what you can live without.
Case Study: The 300-Square-Foot Kitchen That Felt Like 500
Let me tell you about a place called The Tiny Hearth, a farm-to-table spot in East Nashville. When the owner, Sarah, took over the space, it was a disaster. The previous tenant had left behind a hodgepodge of equipment, and the kitchen was a maze of inefficiency. The line cooks were constantly bumping into each other, and the prep area was so cramped that they had to take turns using the counter space.
Sarah’s solution? She didn’t add a single square foot. Instead, she reimagined the space. She painted the walls a light, reflective color. She installed under-counter refrigeration to free up floor space. She replaced the bulky, standalone prep table with a wall-mounted fold-down table that could be tucked away when not in use. And she rearranged the equipment so that the workflow moved in a logical, circular pattern, no backtracking, no wasted steps.
The result? The kitchen didn’t just feel bigger. It was bigger, in terms of efficiency. Orders went out faster, the staff was less stressed, and Sarah even added a few new menu items because she suddenly had the space to prep them. All without expanding the physical footprint.
So, is this the best approach for every small kitchen? Maybe not. But it’s a reminder that maximizing space isn’t just about the physical dimensions of the room. It’s about how you use what you’ve got.
Step 1: Audit Your Current Kitchen Layout (And Be Brutally Honest)
Alright, let’s get practical. The first step in maximizing space in your commercial kitchen layout is to take a hard look at what you’re working with. And I mean a hard look. This isn’t the time for rose-colored glasses. You need to channel your inner Marie Kondo and ask: Does this spark joy? Or does it just take up space?
Start by grabbing a notebook, or better yet, a floor plan of your kitchen if you have one. If you don’t, sketch one out. It doesn’t have to be fancy. Just a rough layout of where everything is. Then, walk through your kitchen and ask yourself these questions:
- What’s working? Are there areas where the flow feels natural? Where do you and your staff move efficiently?
- What’s not working? Where do you find yourself (or your staff) getting in each other’s way? Are there bottlenecks?
- What’s rarely used? Be honest. That deep fryer you bought on a whim? The extra prep table that’s always empty? The storage shelves that are just collecting dust?
- What’s missing? Is there a piece of equipment or a storage solution that would make your life easier if you had it?
Here’s where things get tricky. Because let’s be real, it’s easy to fall into the trap of thinking, “Well, we’ve always done it this way.” But just because something’s always been done a certain way doesn’t mean it’s the best way. Maybe that walk-in fridge is on the opposite side of the kitchen from the line, forcing your staff to trek across the room every time they need ingredients. Maybe your prep area is too far from the cooking stations, adding unnecessary steps to the workflow. Or maybe, just maybe, you’re holding onto equipment that you think you need but don’t actually use.
I’ll give you an example. A few years ago, I consulted for a small café that was struggling with space. The owner, Mark, was convinced he needed a bigger kitchen. But when we did an audit, we realized that 30% of his equipment was rarely used. He had two espresso machines (one was a backup that had never been used), a commercial waffle maker that was only fired up on weekends, and a deep fryer that was gathering dust. By selling or storing the rarely used equipment, we freed up enough space to add a second prep station, without expanding the kitchen at all.
So, here’s my challenge to you: Be ruthless. If a piece of equipment isn’t essential to your daily operations, consider whether it’s worth the space it’s taking up. Could you rent it for the rare occasions you need it? Could you outsource that particular task? Could you replace it with something more versatile?
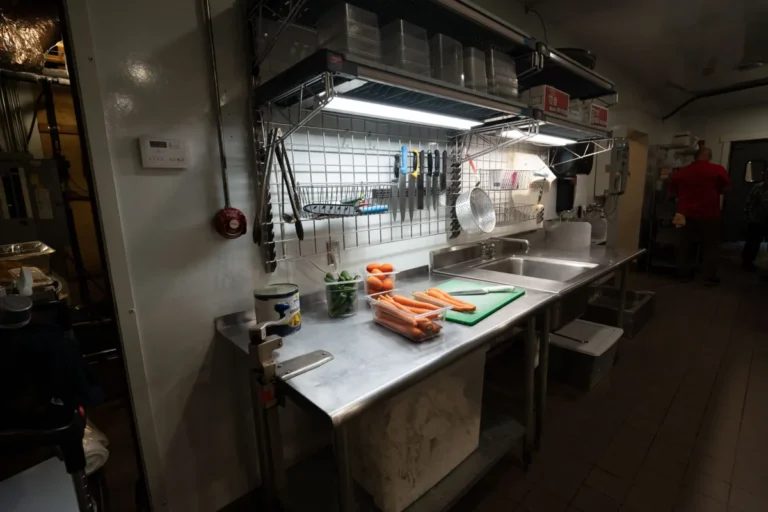
And here’s another question to consider: Are you using your vertical space? In small kitchens, the walls and ceilings are often underutilized. Could you install shelves, hooks, or racks to get things off the countertops and floors? Could you hang pots and pans from the ceiling? Could you use wall-mounted storage for utensils or small equipment?
I’m torn between two schools of thought here. On one hand, I believe in minimalism-keeping only what you need and using it well. On the other hand, I know that some kitchens need a little redundancy to handle peak times. So, how do you strike the balance? Maybe it’s about flexibility. Maybe it’s about having equipment that can serve multiple purposes. Or maybe it’s about being willing to adapt on the fly.
Let’s consider an example. Say you have a small pizzeria. You could have a dedicated dough mixer, a dough sheeter, and a proofing cabinet, all of which take up space. Or, you could invest in a multi-functional mixer that can handle dough, sauces, and even some prep work. You might lose a little bit of specialization, but you gain a ton of space and versatility. Is that trade-off worth it? It depends on your menu and your volume. But it’s a question worth asking.
Step 2: Choose the Right Equipment for Small Spaces
Alright, let’s talk about commercial kitchen equipment. Because here’s the thing: not all equipment is created equal. And in a small kitchen, the wrong choice can be disastrous. You need equipment that’s compact, versatile, and efficient. But you also need equipment that can handle the demands of a commercial kitchen. It’s a tricky balance.
First, let’s talk about size. In a small kitchen, every inch counts. That means you need to think carefully about the footprint of each piece of equipment. But here’s the catch: smaller isn’t always better. A tiny oven might save space, but if it can’t handle your volume, you’ll end up with bottlenecks and frustrated staff. So, you need to find equipment that’s compact but powerful.
Take refrigeration, for example. In a large kitchen, you might have a walk-in fridge, a reach-in fridge, and under-counter refrigeration. But in a small kitchen, you might need to consolidate. Maybe you opt for a reach-in fridge with multiple compartments, so you can store different types of ingredients without taking up extra space. Or maybe you invest in under-counter refrigeration to free up floor space. The key is to think about how you can stack functions-how one piece of equipment can serve multiple purposes.
Here’s a list of space-saving equipment that I’ve seen work well in small kitchens:
- Combination ovens: These bad boys can bake, steam, roast, and even fry, all in one compact unit. They’re a game-changer for small kitchens.
- Countertop grills: If you’re tight on space, a countertop grill can handle everything from burgers to paninis without taking up a ton of room.
- Under-counter refrigeration: This is a no-brainer. It keeps ingredients close at hand without cluttering up your floor space.
- Wall-mounted shelves and racks: Get things off the countertops and onto the walls. It’s a simple trick, but it works.
- Fold-down prep tables: These tables can be tucked away when not in use, freeing up space for other tasks.
- Multi-functional mixers: If you’re doing any baking or prep work, a mixer that can handle dough, sauces, and other tasks is a lifesaver.
But here’s the thing: equipment is only as good as the workflow it supports. You can have the most compact, versatile equipment in the world, but if it’s not arranged in a way that makes sense for your kitchen, it’s not going to help. So, before you start buying, think about how each piece of equipment fits into your overall layout. Where will it go? How will it interact with the rest of your kitchen? Will it create bottlenecks or improve flow?
And let’s not forget about maintenance. In a small kitchen, equipment that’s hard to clean or maintain can become a nightmare. You don’t want to spend half your day scrubbing a piece of equipment that’s supposed to be saving you time. So, look for equipment that’s easy to clean and maintain. Stainless steel is your friend here, it’s durable, easy to sanitize, and looks professional.
I’m torn between two approaches here. On one hand, I think it’s important to invest in high-quality, durable equipment that will last. On the other hand, I know that budgets are tight, especially for small restaurants. So, how do you balance cost and quality? Maybe it’s about prioritizing. Maybe it’s about investing in the equipment that’s most critical to your operations and finding more affordable options for the rest. Or maybe it’s about buying used equipment that’s still in good condition.
Let’s consider an example. Say you’re running a small café, and you need a coffee machine. You could buy a top-of-the-line espresso machine that costs thousands of dollars, or you could opt for a more affordable model that still gets the job done. The expensive machine might have more features, but if those features don’t actually improve your workflow or the quality of your coffee, are they worth the extra cost? Maybe not. But if you’re a coffee shop that prides itself on its espresso, maybe that investment is worth it.
Ultimately, the key is to think critically about what you really need. Don’t just buy equipment because it’s what you’re “supposed” to have. Buy equipment that makes sense for your kitchen, your menu, and your workflow.
Step 3: Design a Workflow That Minimizes Movement
Alright, let’s talk about kitchen workflow. Because here’s the truth: no matter how much space you have, if your workflow is inefficient, your kitchen is going to feel cramped. And in a small kitchen, inefficient workflows aren’t just annoying, they’re costly. Every extra step is wasted time, wasted energy, and wasted money.
So, how do you design a workflow that minimizes movement? It starts with understanding the three key zones of any commercial kitchen:
- Prep zone: This is where ingredients are prepped, chopped, mixed, and assembled.
- Cooking zone: This is where the magic happens, grilling, frying, baking, sautéing, etc.
- Plating and expediting zone: This is where dishes are finished, plated, and sent out to the dining room.
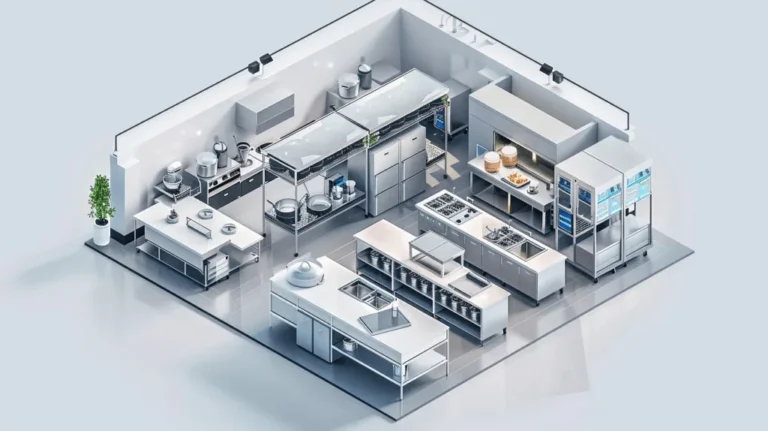
The goal is to arrange these zones in a way that minimizes backtracking and cross-traffic. Ideally, your workflow should move in a logical, circular pattern, from prep to cooking to plating, with as few detours as possible. In a small kitchen, this might mean arranging your equipment in a U-shape or L-shape, so that everything is within easy reach.
But here’s where things get tricky. Because in a small kitchen, you might not have the luxury of dedicating separate spaces to each zone. Maybe your prep area doubles as your plating area. Maybe your cooking zone is also where you store your ingredients. That’s okay, as long as you’re intentional about it. The key is to create clear pathways and minimize overlap.
Let me give you an example. I worked with a small sushi restaurant once that was struggling with workflow. The chef’s counter was in the middle of the kitchen, and the prep area was on one side, while the plating area was on the other. Every time the chef needed ingredients, he had to walk around the counter, disrupting the flow of the kitchen. The solution? We moved the chef’s counter to the side of the kitchen, so that the prep area, cooking zone, and plating area were all in a straight line. Suddenly, the chef could move from one task to the next without backtracking, and the kitchen felt twice as spacious.
So, how do you apply this to your own kitchen? Start by mapping out your current workflow. Where do your staff start? Where do they go next? Where do they end up? Are there any unnecessary steps? Any areas where they’re crossing paths or getting in each other’s way? Once you’ve identified the bottlenecks, you can start rearranging your equipment to create a smoother flow.
And here’s a pro tip: use color-coding. In a small kitchen, it’s easy for things to get chaotic. Color-coding your zones, say, green for prep, blue for cooking, red for plating, can help your staff move more efficiently and reduce mistakes. It’s a small change, but it can make a big difference.
I’m torn between two schools of thought here. On one hand, I believe in simplicity-keeping your workflow as straightforward as possible. On the other hand, I know that some kitchens need a little complexity to handle diverse menus. So, how do you strike the balance? Maybe it’s about modularity. Maybe it’s about creating a workflow that can adapt to different tasks. Or maybe it’s about training your staff to be flexible and efficient, no matter what the kitchen throws at them.
Let’s consider an example. Say you’re running a small diner that serves breakfast, lunch, and dinner. Your workflow might look different at different times of the day. In the morning, you’re focused on eggs, pancakes, and bacon. At lunch, you’re grilling burgers and frying chicken. And at dinner, you’re serving up steaks and seafood. How do you design a workflow that works for all of these tasks? Maybe it’s about having versatile equipment that can handle multiple cooking methods. Maybe it’s about creating a flexible prep area that can be reconfigured as needed. Or maybe it’s about training your staff to be adaptable and efficient, no matter what’s on the menu.
Ultimately, the key is to think critically about how your kitchen operates. Don’t just accept the status quo. Look for ways to improve, even if it means making big changes. Because in a small kitchen, every second counts.
Step 4: Master the Art of Vertical Storage
Alright, let’s talk about vertical storage. Because in a small kitchen, the floor is precious real estate. Every square foot counts, and if you’re not using your walls and ceilings, you’re wasting space. But here’s the thing: vertical storage isn’t just about slapping a few shelves on the wall and calling it a day. It’s about strategic organization-using every inch of space to its fullest potential.
First, let’s talk about shelving. In a small kitchen, shelves are your best friend. They get things off the countertops and floors, freeing up space for prep and cooking. But not all shelves are created equal. You need shelves that are durable, easy to clean, and adjustable. Stainless steel is a great choice, it’s sturdy, sanitary, and looks professional. And adjustable shelves are a must, because they allow you to customize your storage as your needs change.
But shelves aren’t the only option. Here are a few other vertical storage solutions that can help you maximize space:
- Wall-mounted racks: These are great for hanging pots, pans, utensils, and even small equipment. They keep things within easy reach and free up cabinet space.
- Ceiling-mounted racks: If you’re really tight on space, consider hanging racks from the ceiling. They’re perfect for storing large pots, pans, and even some types of equipment.
- Magnetic strips: These are a game-changer for small kitchens. You can use them to store knives, spice jars, and even small metal utensils. They keep things organized and within easy reach.
- Pegboards: Pegboards are incredibly versatile. You can use them to hang everything from utensils to small equipment to cutting boards. And because they’re customizable, you can rearrange them as your needs change.
- Overhead storage: If you have high ceilings, consider installing overhead storage racks. They’re great for storing bulk ingredients, backup equipment, or even seasonal items.
But here’s the thing: vertical storage is only as good as your organization system. If you just throw things on the shelves without a plan, you’re going to end up with a cluttered mess. So, before you start installing shelves and racks, think about how you’re going to organize them. What goes where? How will you keep things accessible? How will you prevent clutter from building up?
Here’s a tip: use clear, labeled bins. In a small kitchen, it’s easy for things to get lost in the shuffle. Clear bins allow you to see what’s inside at a glance, and labels help you and your staff find what you need quickly. It’s a small change, but it can make a big difference in your workflow.
And let’s not forget about safety. In a small kitchen, it’s easy for things to get crowded, and that can lead to accidents. So, make sure your vertical storage is secure and stable. Heavy items should be stored on lower shelves, and everything should be within easy reach. And if you’re using ceiling-mounted racks, make sure they’re properly installed and rated to hold the weight of your equipment.
I’m torn between two approaches here. On one hand, I think it’s important to maximize every inch of space. On the other hand, I know that overcrowding can lead to inefficiency and even safety hazards. So, how do you strike the balance? Maybe it’s about prioritizing accessibility. Maybe it’s about keeping frequently used items within easy reach and storing less frequently used items higher up. Or maybe it’s about creating a system that’s flexible enough to adapt as your needs change.
Let’s consider an example. Say you’re running a small bakery, and you need to store a variety of ingredients, flour, sugar, spices, etc. You could store everything on shelves, but that might not be the most efficient use of space. Instead, you could use stackable bins to store bulk ingredients, freeing up shelf space for smaller items. Or you could use wall-mounted spice racks to keep frequently used spices within easy reach. The key is to think about how you can organize your storage in a way that makes sense for your workflow.
Ultimately, the goal is to create a storage system that’s efficient, accessible, and safe. Don’t just throw things on the shelves and hope for the best. Take the time to plan, organize, and optimize. Because in a small kitchen, every inch counts.
Step 5: Embrace Multi-Functional Equipment (And Ditch the One-Trick Ponies)
Alright, let’s talk about multi-functional equipment. Because in a small kitchen, every piece of equipment needs to earn its keep. And if it’s only doing one thing, it’s probably not pulling its weight. The key is to invest in equipment that can handle multiple tasks, so you can get more done with less space.
First, let’s talk about combination ovens. These are the Swiss Army knives of the kitchen world. They can bake, steam, roast, and even fry, all in one compact unit. And because they’re so versatile, they can replace multiple pieces of equipment, freeing up valuable space in your kitchen. For example, a combination oven can replace a conventional oven, a steamer, and even a fryer. That’s a lot of space saved.
But combination ovens aren’t the only multi-functional equipment out there. Here are a few other space-saving powerhouses that can help you maximize your kitchen layout:
- Countertop grills: These can handle everything from burgers to paninis to grilled vegetables. And because they’re compact, they won’t take up a ton of space.
- Multi-functional mixers: If you’re doing any baking or prep work, a mixer that can handle dough, sauces, and other tasks is a lifesaver. Look for models with multiple attachments, so you can switch between tasks quickly.
- Induction cooktops: These are incredibly versatile. They can be used for sautéing, simmering, boiling, and even frying. And because they’re flat and compact, they can be installed almost anywhere.
- Food processors: These can handle everything from chopping vegetables to making dough to pureeing sauces. And because they’re so compact, they won’t take up a ton of counter space.
- Blender stations: If you’re making smoothies, soups, or sauces, a blender station can be a game-changer. Look for models with multiple jars, so you can switch between tasks quickly.
But here’s the thing: multi-functional equipment is only as good as your ability to use it. If you’re not taking advantage of all its features, you’re not getting the most out of your investment. So, before you buy, make sure you understand how the equipment works and how it can fit into your workflow. And don’t be afraid to train your staff on how to use it effectively.
And let’s not forget about maintenance. Multi-functional equipment can be more complex than single-purpose equipment, and that means it can be more prone to breakdowns. So, make sure you’re keeping up with regular maintenance and cleaning. The last thing you want is for your space-saving equipment to become a liability.
I’m torn between two schools of thought here. On one hand, I think it’s important to invest in high-quality, versatile equipment. On the other hand, I know that budgets are tight, and not every kitchen can afford top-of-the-line equipment. So, how do you strike the balance? Maybe it’s about prioritizing. Maybe it’s about investing in the equipment that’s most critical to your operations and finding more affordable options for the rest. Or maybe it’s about buying used equipment that’s still in good condition.
Let’s consider an example. Say you’re running a small café, and you need a coffee machine. You could buy a top-of-the-line espresso machine that costs thousands of dollars, or you could opt for a more affordable model that still gets the job done. The expensive machine might have more features, but if those features don’t actually improve your workflow or the quality of your coffee, are they worth the extra cost? Maybe not. But if you’re a coffee shop that prides itself on its espresso, maybe that investment is worth it.
Ultimately, the key is to think critically about what you really need. Don’t just buy equipment because it’s what you’re “supposed” to have. Buy equipment that makes sense for your kitchen, your menu, and your workflow. And if a piece of equipment isn’t pulling its weight, don’t be afraid to replace it with something more versatile.
Step 6: Optimize Your Refrigeration Strategy
Alright, let’s talk about refrigeration. Because in a small kitchen, your fridge and freezer can be either your best friend or your worst enemy. Get it right, and you’ll have plenty of space for ingredients and prep work. Get it wrong, and you’ll be constantly battling clutter and inefficiency.
First, let’s talk about walk-in fridges. In a large kitchen, a walk-in fridge is a no-brainer. It provides plenty of space for ingredients, and it’s easy to organize. But in a small kitchen, a walk-in fridge can be a space hog. It takes up valuable floor space, and it can be hard to keep organized. So, if you’re tight on space, you might want to consider alternatives.
One option is a reach-in fridge. These are compact, easy to organize, and can be installed almost anywhere. And because they’re so versatile, they can be used for everything from storing ingredients to holding prepped dishes. But here’s the catch: reach-in fridges can be expensive, and they might not have enough space for all your ingredients.
Another option is under-counter refrigeration. These fridges are installed under your countertops, freeing up floor space and keeping ingredients within easy reach. They’re a great choice for small kitchens, but they can be limited in terms of capacity. So, if you’re storing a lot of ingredients, you might need multiple units.
But here’s the thing: refrigeration isn’t just about space, it’s about organization. No matter what type of fridge you have, if it’s not organized, it’s going to be a mess. So, before you start rearranging your kitchen, think about how you’re going to organize your refrigeration. What goes where? How will you keep things accessible? How will you prevent clutter from building up?
Here’s a tip: use clear, labeled bins. In a small kitchen, it’s easy for things to get lost in the shuffle. Clear bins allow you to see what’s inside at a glance, and labels help you and your staff find what you need quickly. It’s a small change, but it can make a big difference in your workflow.
And let’s not forget about temperature zones. In a small fridge, it’s easy for temperatures to fluctuate, and that can lead to spoiled ingredients. So, make sure you’re storing your ingredients in the right zones. Dairy and meat should be stored in the coldest part of the fridge, while produce can be stored in a slightly warmer zone. And if you’re storing raw meat, make sure it’s on the bottom shelf, so it doesn’t drip onto other ingredients.
I’m torn between two approaches here. On one hand, I think it’s important to maximize refrigeration space. On the other hand, I know that overcrowding can lead to inefficiency and even food safety hazards. So, how do you strike the balance? Maybe it’s about prioritizing accessibility. Maybe it’s about keeping frequently used ingredients within easy reach and storing less frequently used items in the back. Or maybe it’s about creating a system that’s flexible enough to adapt as your needs change.
Let’s consider an example. Say you’re running a small sandwich shop, and you need to store a variety of ingredients, meats, cheeses, vegetables, condiments, etc. You could store everything in one big fridge, but that might not be the most efficient use of space. Instead, you could use under-counter refrigeration for frequently used ingredients and a reach-in fridge for backup supplies. Or you could use clear, labeled bins to keep everything organized and accessible. The key is to think about how you can organize your refrigeration in a way that makes sense for your workflow.
Ultimately, the goal is to create a refrigeration system that’s efficient, accessible, and safe. Don’t just throw things in the fridge and hope for the best. Take the time to plan, organize, and optimize. Because in a small kitchen, every inch counts.
Step 7: Rethink Your Prep Area (And Make It Work Harder)
Alright, let’s talk about your prep area. Because in a small kitchen, this is where the magic happens, or where the chaos begins. A well-designed prep area can make your kitchen feel spacious and efficient. A poorly designed one can make it feel cramped and disorganized. So, how do you get it right?
First, let’s talk about size. In a small kitchen, you might not have the luxury of a dedicated prep area. Maybe your prep space doubles as your plating area. Maybe it’s also where you store your ingredients. That’s okay, as long as you’re intentional about it. The key is to create a prep area that’s flexible and adaptable, so it can handle whatever tasks you throw at it.
One way to do this is to use modular equipment. For example, you could invest in a mobile prep table that can be moved around the kitchen as needed. Or you could use a fold-down prep table that can be tucked away when not in use. These types of equipment allow you to reconfigure your prep area on the fly, so it can adapt to different tasks.
But here’s the thing: prep areas aren’t just about space, they’re about workflow. No matter how much space you have, if your prep area isn’t organized, it’s going to be a mess. So, before you start rearranging your kitchen, think about how you’re going to organize your prep area. What goes where? How will you keep things accessible? How will you prevent clutter from building up?
Here’s a tip: use color-coding. In a small kitchen, it’s easy for things to get chaotic. Color-coding your prep area, say, green for vegetables, blue for meats, red for dairy, can help your staff move more efficiently and reduce mistakes. It’s a small change, but it can make a big difference in your workflow.
And let’s not forget about storage. In a small kitchen, it’s easy for prep areas to become cluttered with ingredients, utensils, and equipment. So, make sure you’re using your vertical space to its fullest potential. Install shelves, racks, and hooks to get things off the countertops and floors. And use clear, labeled bins to keep everything organized and accessible.
I’m torn between two approaches here. On one hand, I think it’s important to maximize prep space. On the other hand, I know that overcrowding can lead to inefficiency and even safety hazards. So, how do you strike the balance? Maybe it’s about prioritizing accessibility. Maybe it’s about keeping frequently used ingredients and utensils within easy reach and storing less frequently used items elsewhere. Or maybe it’s about creating a system that’s flexible enough to adapt as your needs change.
Let’s consider an example. Say you’re running a small sushi restaurant, and you need to prep a variety of ingredients, rice, fish, vegetables, etc. You could have a dedicated prep area for each ingredient, but that might not be the most efficient use of space. Instead, you could use a modular prep table that can be reconfigured as needed. Or you could use color-coded bins to keep everything organized and accessible. The key is to think about how you can design your prep area in a way that makes sense for your workflow.
Ultimately, the goal is to create a prep area that’s efficient, accessible, and safe. Don’t just throw things on the counter and hope for the best. Take the time to plan, organize, and optimize. Because in a small kitchen, every inch counts.
Step 8: Don’t Forget About Ventilation (And Why It Matters More Than You Think)
Alright, let’s talk about ventilation. Because in a small kitchen, this is one of those things that can make or break your space. Get it right, and your kitchen will feel open, airy, and comfortable. Get it wrong, and it’ll feel stuffy, smoky, and downright unpleasant. And let’s be real, no one wants to work in a kitchen that feels like a sauna.
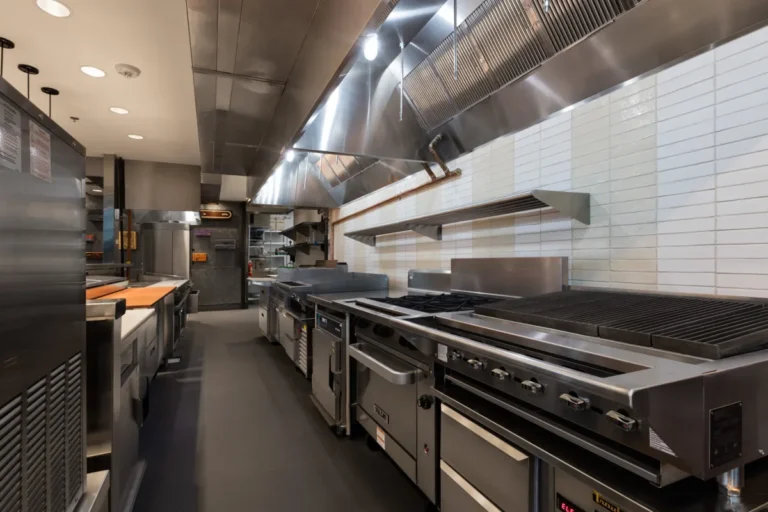
First, let’s talk about why ventilation matters. In a commercial kitchen, ventilation isn’t just about comfort, it’s about safety and compliance. A good ventilation system removes smoke, grease, and odors, keeping the air clean and reducing the risk of fires. It also helps regulate temperature, so your kitchen doesn’t turn into an oven during peak hours. And in a small kitchen, where space is already tight, proper ventilation can make the difference between a space that feels manageable and one that feels overwhelming.
But here’s the thing: ventilation systems can be bulky. They take up space, and in a small kitchen, that space is precious. So, how do you balance the need for ventilation with the need to maximize your layout? It starts with choosing the right system.
One option is a ductless ventilation system. These systems use filters to remove smoke, grease, and odors, and they don’t require ductwork. That means they can be installed almost anywhere, and they won’t take up as much space as a traditional ventilation system. But here’s the catch: ductless systems can be less effective than ducted systems, and they might not be compliant with local health codes. So, before you invest, make sure you understand the requirements in your area.
Another option is a compact ducted system. These systems use ductwork to remove smoke and grease, and they’re more effective than ductless systems. But they can be bulky, and they might not be the best choice for a small kitchen. So, if you’re tight on space, you might need to get creative. Maybe you install the ductwork in a way that doesn’t interfere with your workflow. Or maybe you opt for a ceiling-mounted system that frees up floor space.
But here’s the thing: ventilation isn’t just about the system, it’s about the layout. No matter what type of system you have, if your kitchen isn’t arranged properly, it’s not going to work as well as it could. So, before you start rearranging your kitchen, think about how your ventilation system fits into the overall layout. Where are the vents located? How does the airflow move through the kitchen? Are there any areas where smoke or grease might get trapped?
Here’s a tip: use your ventilation system to your advantage. For example, you could arrange your cooking equipment near the vents, so smoke and grease are removed quickly. Or you could use the airflow to help regulate temperature, so your kitchen stays cool and comfortable. It’s a small change, but it can make a big difference in your workflow.
And let’s not forget about maintenance. In a small kitchen, it’s easy for grease and grime to build up, and that can clog your ventilation system. So, make sure you’re keeping up with regular cleaning and maintenance. The last thing you want is for your ventilation system to become a fire hazard.
I’m torn between two approaches here. On one hand, I think it’s important to invest in a high-quality ventilation system. On the other hand, I know that budgets are tight, and not every kitchen can afford top-of-the-line equipment. So, how do you strike the balance? Maybe it’s about prioritizing. Maybe it’s about investing in the most critical components of your ventilation system and finding more affordable options for the rest. Or maybe it’s about working with a professional to design a system that’s both effective and space-efficient.
Let’s consider an example. Say you’re running a small pizzeria, and you need a ventilation system that can handle the smoke and grease from your pizza oven. You could install a traditional ducted system, but that might take up too much space. Instead, you could opt for a compact ducted system that’s designed specifically for small kitchens. Or you could use a ductless system with high-quality filters. The key is to think about how you can design your ventilation system in a way that makes sense for your kitchen.
Ultimately, the goal is to create a ventilation system that’s efficient, safe, and compliant. Don’t just install a system and hope for the best. Take the time to plan, design, and optimize. Because in a small kitchen, every detail counts.
Step 9: Keep It Clean (And Why Organization Is the Key to Efficiency)
Alright, let’s talk about cleanliness and organization. Because in a small kitchen, this isn’t just about aesthetics, it’s about efficiency and safety. A cluttered, disorganized kitchen is a slow kitchen. And in a small space, clutter can make everything feel even more cramped and chaotic.
First, let’s talk about why cleanliness matters. In a commercial kitchen, cleanliness isn’t just about keeping things looking nice, it’s about preventing foodborne illnesses, reducing the risk of fires, and maintaining a safe working environment. And in a small kitchen, where space is already tight, cleanliness is even more critical. A single spill or mess can disrupt your entire workflow, slowing down service and frustrating your staff.
But here’s the thing: cleanliness starts with organization. If your kitchen isn’t organized, it’s going to be hard to keep it clean. So, before you start scrubbing, think about how you’re going to organize your space. What goes where? How will you keep things accessible? How will you prevent clutter from building up?
Here’s a tip: use the “5S” method. This is a lean manufacturing principle that’s been adapted for commercial kitchens, and it’s a game-changer for small spaces. The 5S method stands for:
- Sort: Get rid of anything that’s not essential to your operations.
- Set in order: Arrange your equipment and ingredients in a way that makes sense for your workflow.
- Shine: Keep your kitchen clean and well-maintained.
- Standardize: Create systems and procedures to maintain your organization and cleanliness.
- Sustain: Make organization and cleanliness a habit, not a one-time event.
By following the 5S method, you can create a kitchen that’s efficient, organized, and easy to clean. And in a small kitchen, that’s a game-changer.
But here’s the thing: organization isn’t just about systems, it’s about mindset. If your staff isn’t on board with your organization efforts, it’s not going to work. So, make sure you’re training your staff on the importance of organization and cleanliness. And don’t be afraid to hold them accountable. If something is out of place, address it immediately. If a spill happens, clean it up right away. The key is to create a culture of cleanliness and organization, so it becomes second nature.
I’m torn between two approaches here. On one hand, I think it’s important to be strict about organization and cleanliness. On the other hand, I know that kitchens can be chaotic places, and it’s not always possible to keep everything perfect. So, how do you strike the balance? Maybe it’s about prioritizing. Maybe it’s about focusing on the most critical areas of your kitchen and letting the rest slide a little. Or maybe it’s about creating systems that are flexible enough to adapt to the chaos of a busy kitchen.
Let’s consider an example. Say you’re running a small food truck, and you need to keep your kitchen clean and organized. You could create a strict cleaning schedule, but that might not be realistic during peak hours. Instead, you could focus on quick, efficient cleaning. For example, you could keep a spray bottle of sanitizer and a rag within easy reach, so you can wipe down surfaces quickly. Or you could use disposable cutting boards to reduce the need for washing. The key is to think about how you can keep your kitchen clean and organized without sacrificing efficiency.
Ultimately, the goal is to create a kitchen that’s efficient, safe, and easy to clean. Don’t just accept the status quo. Look for ways to improve, even if it means making big changes. Because in a small kitchen, every detail counts.
Step 10: Think Outside the Box (And Why Creativity Is Your Best Tool)
Alright, let’s wrap this up with a little creativity. Because when it comes to maximizing space in commercial kitchen layouts, sometimes the best solutions are the ones you don’t see coming. And in a small kitchen, thinking outside the box isn’t just a nice-to-have, it’s a necessity.
First, let’s talk about why creativity matters. In a small kitchen, you don’t have the luxury of space. That means you can’t just throw more equipment at the problem. You have to rethink how you use the space you have. And that requires creativity. It requires looking at your kitchen with fresh eyes and asking: What if?
What if you moved that prep table to the other side of the kitchen? What if you replaced that bulky oven with a combination oven? What if you used the space above your fridge for storage? These are the kinds of questions that can lead to breakthroughs. And in a small kitchen, breakthroughs are what you need.
But here’s the thing: creativity isn’t just about ideas, it’s about execution. It’s not enough to come up with a great idea. You have to make it work. And that means being willing to experiment, take risks, and learn from your mistakes. It means being open to feedback from your staff and willing to make changes if something isn’t working.
So, how do you cultivate creativity in your kitchen? Start by observing. Watch how your staff moves through the space. Look for inefficiencies and bottlenecks. Ask your staff for their input, what’s working, what’s not, and what they would change if they could. Sometimes, the best ideas come from the people who are in the trenches every day.
And don’t be afraid to borrow ideas from other industries. For example, the lean manufacturing principles used in factories can be adapted for commercial kitchens. The space-saving techniques used in tiny homes can be applied to small kitchens. The organizational strategies used in retail stores can help you keep your kitchen clutter-free. The key is to keep an open mind and be willing to learn from unexpected sources.
I’m torn between two schools of thought here. On one hand, I think it’s important to be open to new ideas. On the other hand, I know that not every idea is going to work. So, how do you strike the balance? Maybe it’s about experimenting. Maybe it’s about trying new things on a small scale and seeing what works. Or maybe it’s about being willing to fail and learn from your mistakes.
Let’s consider an example. Say you’re running a small café, and you’re struggling with space. You could keep doing what you’re doing, or you could try something new. Maybe you move your coffee machine to a different location. Maybe you replace your bulky fridge with under-counter refrigeration. Maybe you install a fold-down prep table that can be tucked away when not in use. The key is to think creatively and be willing to take risks.
Ultimately, the goal is to create a kitchen that’s efficient, functional, and inspiring. Don’t just accept the status quo. Look for ways to improve, even if it means thinking outside the box. Because in a small kitchen, creativity is your best tool.
Putting It All Together: Your Action Plan for Maximizing Space
Alright, let’s bring it all home. We’ve covered a lot of ground in this guide, from the psychology of space to the nitty-gritty of commercial kitchen equipment. But now it’s time to put it all together and create an action plan for maximizing space in your commercial kitchen layout.
First, let’s recap the key takeaways:
- Audit your current kitchen layout: Be brutally honest about what’s working and what’s not. Identify inefficiencies and bottlenecks.
- Choose the right equipment: Invest in compact, versatile, and efficient equipment that can handle multiple tasks.
- Design a workflow that minimizes movement: Arrange your equipment in a way that makes sense for your operations, and create clear pathways for your staff.
- Master vertical storage: Use shelves, racks, and hooks to get things off the countertops and floors.
- Embrace multi-functional equipment: Replace single-purpose equipment with versatile alternatives that can handle multiple tasks.
- Optimize your refrigeration strategy: Choose the right type of fridge for your space, and organize it in a way that makes sense for your workflow.
- Rethink your prep area: Create a flexible, adaptable prep area that can handle whatever tasks you throw at it.
- Don’t forget about ventilation: Invest in a ventilation system that’s efficient, safe, and compliant with local health codes.
- Keep it clean and organized: Use the 5S method to create a kitchen that’s efficient, organized, and easy to clean.
- Think outside the box: Be open to new ideas and willing to take risks. Creativity is your best tool in a small kitchen.
Now, let’s create an action plan. Here’s what I recommend:
- Start with an audit: Grab a notebook and walk through your kitchen. Identify what’s working, what’s not, and what’s rarely used. Be ruthless.
- Prioritize your changes: Not all changes are created equal. Focus on the ones that will have the biggest impact on your workflow and efficiency.
- Experiment: Try new layouts, new equipment, and new storage solutions. Don’t be afraid to fail and learn from your mistakes.
- Get feedback: Ask your staff for their input. What’s working, what’s not, and what they would change if they could.
- Iterate: Keep refining your layout and workflow. The goal is to create a kitchen that’s efficient, functional, and inspiring.
And here’s a thought to leave you with: maximizing space in your commercial kitchen layout isn’t just about the physical dimensions of the room. It’s about how you use what you’ve got. It’s about workflow, organization, and creativity. And it’s about creating a space that feels spacious, efficient, and inspiring, no matter how small it is.
So, what’s your next move? Are you ready to audit your kitchen and start making changes? Or are you still feeling overwhelmed? Either way, remember this: every small change adds up. You don’t have to overhaul your kitchen overnight. Start with one thing, maybe it’s reorganizing your prep area, or maybe it’s investing in a piece of multi-functional equipment. Then, build from there. Because in a small kitchen, every inch counts.
FAQ
Q: What’s the most common mistake small restaurants make when designing their kitchen layout?
A: The biggest mistake I see is prioritizing equipment over workflow. Many small restaurants buy equipment based on what they think they need, rather than what actually makes sense for their operations. They end up with a kitchen that’s packed with equipment but lacks a logical flow. The result? Bottlenecks, inefficiency, and frustrated staff. The key is to design your layout around your workflow, not the other way around. Start with how you want your staff to move through the space, and then choose equipment that supports that flow.
Q: How can I maximize space in my kitchen without spending a fortune on new equipment?
A: You’d be surprised how much space you can free up with a little creativity and elbow grease. Start by auditing your current equipment-are there pieces you rarely use? Could you sell or store them to free up space? Next, look at your vertical space. Are you using your walls and ceilings to their fullest potential? Installing shelves, racks, or hooks can get things off the countertops and floors without costing a fortune. Finally, think about reorganizing your workflow. Sometimes, simply rearranging your equipment can make a world of difference. For example, moving your prep area closer to the line can reduce unnecessary movement and free up space.
Q: What’s the best way to organize a small kitchen for maximum efficiency?
A: The best way to organize a small kitchen is to follow the “5S” method: Sort, Set in order, Shine, Standardize, and Sustain. Start by sorting through your equipment and ingredients, get rid of anything that’s not essential. Then, set everything in order in a way that makes sense for your workflow. Keep your kitchen clean and well-maintained, and create systems to standardize your organization. Finally, make organization and cleanliness a habit, not a one-time event. The goal is to create a kitchen that’s efficient, accessible, and easy to clean.
Q: How do I balance compliance with creativity when designing my kitchen layout?
A: Balancing compliance with creativity can be tricky, but it’s not impossible. The key is to understand the rules and then work within them. Start by familiarizing yourself with local health codes and regulations. What are the requirements for ventilation, refrigeration, and food storage? Once you understand the rules, you can start getting creative. For example, if you’re tight on space, you might opt for under-counter refrigeration instead of a walk-in fridge. Or you might install a compact ducted ventilation system that meets code without taking up too much space. The goal is to meet compliance requirements while still creating a kitchen that’s efficient and functional.
@article{maximizing-space-in-commercial-kitchen-layouts-for-small-restaurants-a-practical-guide-to-efficiency-and-flow,
    title   = {Maximizing Space in Commercial Kitchen Layouts for Small Restaurants: A Practical Guide to Efficiency and Flow},
    author  = {Chef's icon},
    year    = {2026},
    journal = {Chef's Icon},
    url     = {https://chefsicon.com/maximizing-space-commercial-kitchen-layouts-small-restaurants/}
}