The Best Fluffy Pancakes recipe you will fall in love with. Full of tips and tricks to help you make the best pancakes.
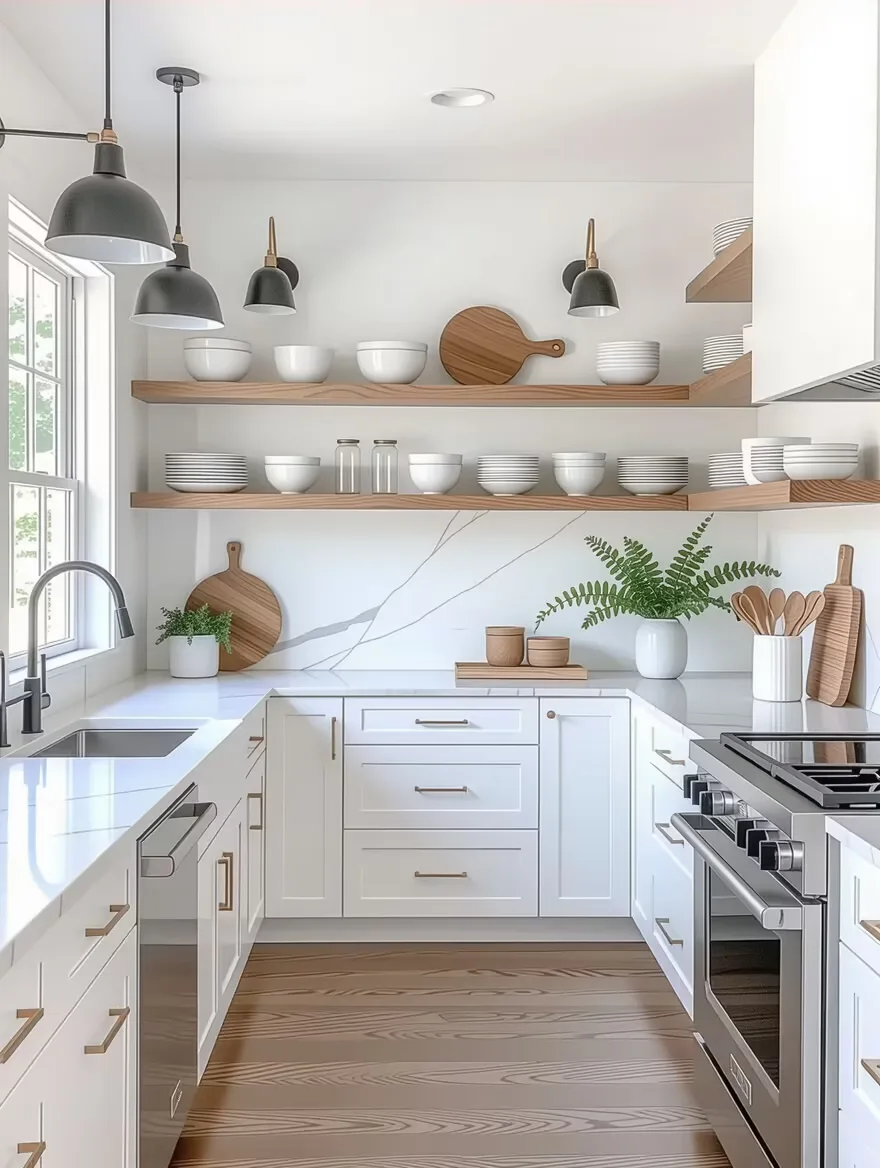
Let me tell you about the time I walked into a tiny Nashville food truck kitchen that was somehow producing Michelin-level small plates. The chef, a former line cook at a downtown hotspot, had squeezed a full prep station, two-burner induction range, and a reach-in fridge into what looked like a glorified closet. “It’s all about the vertical real estate,” he said while reaching for a spice rack mounted above the pass-through window. That moment stuck with me, how the hell do you make 80 square feet feel like 800?
Fast forward to my own consulting gigs, and I’ve seen the same story play out in diners, ghost kitchens, and even a few high-end catering operations. Small commercial kitchens are the unsung heroes of the food service world. They’re where creativity thrives under pressure, where every square inch has to earn its keep, and where bad layout decisions can turn your dream kitchen into a daily obstacle course. But here’s the thing: optimizing these spaces isn’t just about cramming in more equipment. It’s about designing a flow that matches your menu, a setup that keeps your staff sane, and a system that actually makes your food taste better.
In this guide, I’m going to walk you through the exact strategies I’ve used with clients, from the “three-foot rule” for prep zones to the “Swiss Army knife” approach to multi-functional equipment. We’ll cover the mistakes that seem smart in theory but bite you in the ass during dinner rush, the equipment swaps that save space without killing performance, and the psychological hacks that make tight spaces feel (and function) like luxury kitchens. By the end, you’ll have a blueprint to turn your cramped kitchen into a lean, mean, food-producing machine, whether you’re working with 200 square feet or just dreaming big in a broom closet.
Is this the be-all-end-all guide to small kitchens? Probably not. But it’s the one I wish I’d had when I was helping a friend redesign her café kitchen last year and we nearly put the walk-in freezer where the handwashing station should’ve been. (Spoiler: the health inspector was *not* amused.) Let’s dive in.
The Psychology of Small Kitchens: Why Your Brain Hates Tight Spaces (And How to Trick It)
Why We Panic in Small Kitchens
There’s a reason why even seasoned chefs get twitchy in cramped spaces. It’s not just about the physical constraints, it’s about how our brains process spatial anxiety. Studies in environmental psychology show that tight spaces trigger our fight-or-flight response because they limit our perceived escape routes. In a kitchen, this translates to slower reaction times, higher stress levels, and (ironically) more accidents. I remember watching a line cook at a pop-up restaurant nearly drop a tray of scallops because he had to sidestep a prep cart every time he turned around. The space wasn’t just small, it was mentally exhausting.
But here’s the kicker: our brains also respond to visual cues of spaciousness. That’s why open shelving, strategic lighting, and even the color of your walls can make a 300-square-foot kitchen feel like 600. I once convinced a client to swap out their solid metal shelves for glass ones, and suddenly, the staff reported feeling “less claustrophobic.” Was it a placebo effect? Maybe. But if it made the dinner rush smoother, I’ll take it.
Design Tricks to Make Small Spaces Feel Bigger
So how do you hack your brain (and your staff’s brains) into feeling like your kitchen has more room than it does? Here are the tricks that actually work:
- Mirror, mirror on the wall: Installing a large mirror on one wall can double the perceived depth of a room. Sounds gimmicky, but I’ve seen it work in a sushi bar where the chef needed to see the entire line without turning around. Just make sure it’s shatterproof and easy to clean, no one wants glass shards in their nigiri.
- Lighting layers: Overhead lighting flattens a space, while task lighting under shelves or inside cabinets creates depth. I recommend LED strip lights under upper cabinets, they’re cheap, easy to install, and make the kitchen feel like a high-end lab. Bonus: they reduce shadows, which means fewer knife accidents.
- The 60-30-10 color rule: Use 60% of your space in a light, neutral color (think white or light gray), 30% in a slightly darker accent (like navy or sage), and 10% in a bold pop (red or yellow). This creates visual hierarchy without overwhelming the space. Pro tip: Use the bold color on a single wall or piece of equipment to draw the eye away from the room’s size.
- Flooring direction: Laying tiles or vinyl planks diagonally can make a room feel wider. It’s a subtle trick, but it works. Just make sure the pattern isn’t so busy that it becomes a tripping hazard.
Is this interior design 101? Sure. But in a small kitchen, every little bit of mental real estate counts. The goal isn’t just to fit more stuff, it’s to make the space feel like it can handle the rush.
The Golden Rules of Small Kitchen Layout (That No One Follows)
The “Three-Foot Rule” for Prep Zones
Here’s a hard truth: most small kitchens fail because they ignore the three-foot rule. This isn’t some arbitrary measurement, it’s the minimum space needed for a cook to prep, plate, and pivot without bumping into someone or something. I’ve seen kitchens where the prep table is literally touching the fryer, and the poor soul working the station has to do a little dance every time they need to grab a pan. It’s inefficient, it’s dangerous, and it’s completely avoidable.
Let me break it down:
- 1 foot for the cook: A person needs about 12 inches of space to stand comfortably at a station. This isn’t just about elbow room, it’s about having enough space to brace yourself when you’re lifting a heavy pot or reaching for a knife.
- 1 foot for the task: Whether you’re chopping, stirring, or plating, you need at least 12 inches of clear counter space in front of you. This is non-negotiable. If your prep table is so small that your cutting board hangs off the edge, you’re doing it wrong.
- 1 foot for movement: This is the space that allows you to turn around, grab a utensil, or step back without crashing into the wall (or your coworker). In a small kitchen, this is often the first thing to get sacrificed, but it’s also the most important.
Now, I know what you’re thinking: “Sammy, my kitchen is 150 square feet. There’s no way I can give every station three feet.” Fair point. But here’s the thing: you don’t need to apply this rule to every single inch of your kitchen. Focus on the high-traffic zones-the prep station, the plating area, the expo window. These are the places where your staff will spend 80% of their time, so they deserve the most attention. The rest? Get creative with fold-down tables, wall-mounted shelves, or even rolling carts that can be moved out of the way when not in use.
The Work Triangle: Why It’s Still Relevant (And How to Bend It)
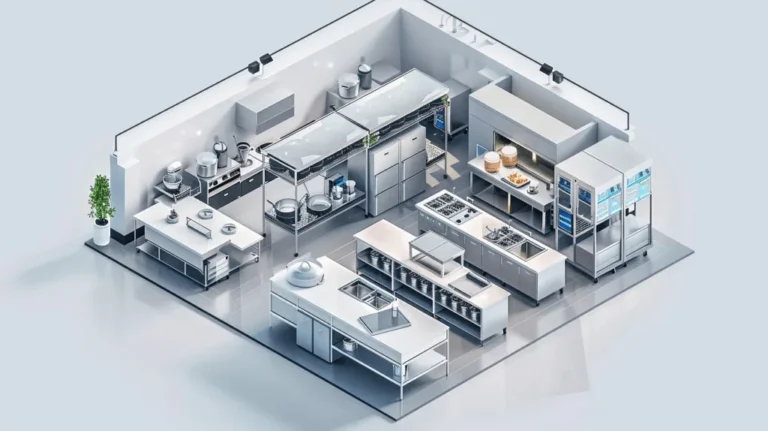
You’ve probably heard of the kitchen work triangle-the idea that the sink, stove, and refrigerator should form a triangle to maximize efficiency. It’s a classic principle, but in small kitchens, it often feels like trying to fit a square peg into a round hole. The problem? Most small kitchens don’t have the luxury of a perfect triangle. So what do you do?
First, let’s talk about why the work triangle matters. It’s all about minimizing steps. In a well-designed kitchen, a cook should be able to move between the sink, stove, and fridge with minimal effort. In a small kitchen, every extra step adds up, especially during a busy service. I once timed a line cook in a cramped diner kitchen, and he was walking nearly a mile during a single shift just to get from the grill to the fridge to the prep station. That’s a mile of wasted energy, wasted time, and (let’s be real) wasted patience.
But here’s the thing: the work triangle isn’t a law, it’s a guideline. In small kitchens, you have to adapt it to your space. Here’s how:
- Prioritize the most important leg: If your menu is heavy on sautéed dishes, the stove-to-prep-station leg is your priority. If you’re doing a lot of prep work, the sink-to-prep-station leg matters more. Figure out where your staff spends the most time and design around that.
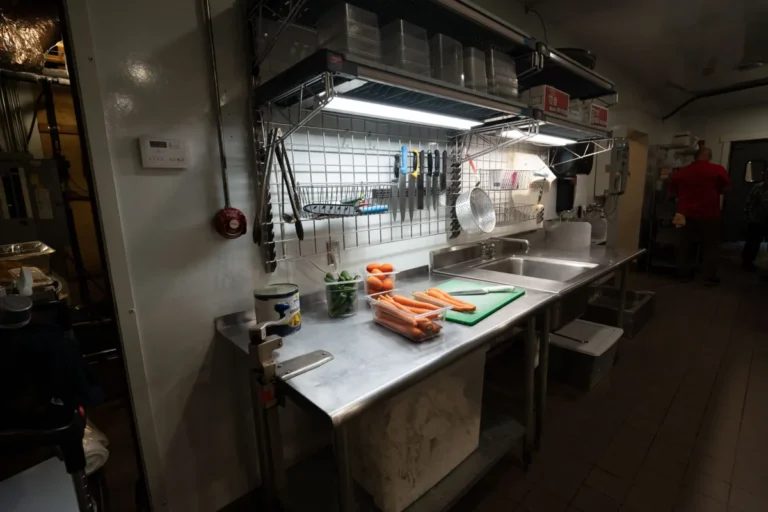
- Use vertical space: In a small kitchen, the “triangle” might need to be more of a “pyramid.” Mount your spices above the stove, hang utensils within arm’s reach, and use wall-mounted shelves to keep ingredients close without taking up counter space.
- Consider a linear layout: If your kitchen is long and narrow, a triangle might not be feasible. Instead, think in terms of a work line-sink, prep, stove, fridge, all in a straight line. This works well for food trucks or kitchens with a single wall of equipment.
- Break the rules (strategically): Sometimes, the most efficient layout means ignoring the triangle altogether. I worked with a pizza shop where the oven was on the opposite side of the kitchen from the prep station. It wasn’t ideal, but it worked because the staff had a dedicated runner to ferry pizzas back and forth. The key is to recognize when the triangle isn’t working and find a workaround.
Is this the perfect solution? No. But it’s a starting point. The goal isn’t to follow the rules, it’s to create a layout that works for your kitchen, your menu, and your staff.
Equipment Hacks: The Swiss Army Knife Approach to Small Kitchens
Why Multi-Functional Equipment is Your Best Friend
In a small kitchen, every piece of equipment has to earn its keep. That means no single-use gadgets, no “nice-to-have” appliances, and definitely no equipment that only gets used once a month. Instead, you need multi-functional workhorses-the kind of equipment that can do the job of two or three machines.
Take the humble combi oven, for example. It’s a steamer, a convection oven, and a proofing cabinet all in one. In a small kitchen, that’s a game-changer. I worked with a café that replaced their standalone steamer and convection oven with a combi oven and suddenly had enough space to add a second prep station. Was it an investment? Absolutely. But it paid for itself in space savings and energy efficiency within a year.
Here are some of my favorite multi-functional equipment swaps:
- Induction ranges: They’re faster than gas, safer than electric, and (best of all) they don’t require a hood in some jurisdictions. Plus, you can use them as a countertop when they’re not in use. I’ve seen kitchens where the induction range doubles as a prep station during off-peak hours.
- Countertop grills with clamshell lids: These bad boys can grill, press, and even steam. They’re perfect for small kitchens that need to offer a variety of cooked-to-order items without taking up a ton of space.
- Undercounter refrigerated drawers: These are a lifesaver in small kitchens. They keep ingredients cold and within arm’s reach, and they can be used to store everything from raw proteins to prepped veggies. Plus, they free up space in your reach-in fridge for larger items.
- Food processors with multiple attachments: A good food processor can chop, slice, shred, and even knead dough. In a small kitchen, that means you can ditch the mandoline, the box grater, and the dough hook attachment for your stand mixer.
Now, I know what you’re thinking: “Sammy, multi-functional equipment is expensive.” And you’re right. But here’s the thing: in a small kitchen, space is more valuable than money. If a piece of equipment can save you even a few square feet, it’s worth the investment. Plus, multi-functional equipment often pays for itself in labor savings and energy efficiency.
The Art of the Equipment Swap
Sometimes, optimizing your kitchen isn’t about adding equipment, it’s about swapping out what you have for something more efficient. Here are some of my favorite equipment swaps for small kitchens:
- Swap your reach-in fridge for an undercounter model: Reach-in fridges take up a ton of floor space, and they’re not always the most efficient option. Undercounter fridges, on the other hand, can be tucked under a counter or prep station, freeing up valuable floor space. Plus, they keep ingredients within arm’s reach, which can speed up prep time.
- Replace your standalone mixer with a hand mixer: Stand mixers are great, but they take up a ton of counter space. A hand mixer, on the other hand, can be stored in a drawer when not in use. It’s not as powerful as a stand mixer, but for small kitchens, it’s often enough.
- Ditch the deep fryer for an air fryer: Deep fryers are space hogs, and they’re not always the most efficient option. Air fryers, on the other hand, can fry, bake, and even roast, all in a fraction of the space. Plus, they’re easier to clean and more energy-efficient.
- Swap your traditional oven for a convection oven: Convection ovens cook faster and more evenly than traditional ovens, which means you can get away with a smaller model. Plus, they’re more energy-efficient, which can save you money in the long run.
Is this the right approach for every kitchen? Probably not. But if you’re working with limited space, it’s worth considering. The key is to think about what you actually need-not what you think you should have. Do you really need a deep fryer, or can you get by with an air fryer? Do you really need a stand mixer, or can a hand mixer do the job? These are the kinds of questions you need to ask when optimizing a small kitchen.
Storage Solutions: Where to Put All the Stuff
The Vertical Storage Revolution
If you’re not using your walls for storage, you’re missing out on one of the easiest ways to free up space in a small kitchen. Vertical storage is the unsung hero of small kitchens, it keeps ingredients, tools, and equipment within arm’s reach without taking up valuable counter or floor space.
Here’s the thing: most kitchens have at least one blank wall that’s just begging to be used. I once worked with a food truck that had a 4-foot-by-4-foot wall next to the prep station. We mounted a pegboard on it, hung utensils, spices, and even a small cutting board, and suddenly, the prep station had twice as much counter space. It was a game-changer.
Here are some of my favorite vertical storage solutions:
- Pegboards: These are a small kitchen’s best friend. They’re customizable, easy to install, and can hold everything from utensils to pots and pans. Plus, they’re cheap, you can pick one up at any hardware store for under $50.
- Wall-mounted shelves: These are great for storing ingredients, spices, or even small appliances. Just make sure they’re sturdy enough to hold the weight of whatever you’re storing. I recommend using heavy-duty brackets and mounting them into studs.
- Magnetic strips: These are perfect for storing knives, spice tins, or even small metal utensils. They’re easy to install, and they keep everything within arm’s reach. Just make sure the magnets are strong enough to hold whatever you’re storing.
- Overhead racks: These are great for hanging pots, pans, or even drying racks. They’re a bit more involved to install, but they’re a great way to free up cabinet space. Just make sure they’re mounted securely, no one wants a pot falling on their head during dinner rush.
Now, I know what you’re thinking: “Sammy, vertical storage is great, but what about the stuff I can’t hang on the wall?” Fair point. That’s where creative cabinet solutions come in.
Cabinet Hacks for Small Kitchens
Cabinets are the unsung heroes of small kitchens. They’re where you store all the stuff that doesn’t fit on the counter or the wall, and if you’re not careful, they can become a black hole of clutter. But with a few smart hacks, you can turn your cabinets into efficient, organized spaces that actually make your kitchen run smoother.
Here are some of my favorite cabinet hacks:
- Pull-out shelves: These are a game-changer for small kitchens. They make it easy to access everything in your cabinets, and they can double your storage space. I recommend installing them in lower cabinets, where it’s hardest to see what’s in the back.
- Door-mounted organizers: These are great for storing spices, utensils, or even cleaning supplies. They’re easy to install, and they keep everything within arm’s reach. Just make sure they’re not so deep that they block the cabinet door from closing.
- Stackable bins: These are perfect for storing small items like packets of sauce, spices, or even prepped ingredients. They keep everything organized and easy to access, and they can be moved around as needed.
- Lazy Susans: These are great for corner cabinets, where it’s hard to see what’s in the back. They make it easy to access everything in the cabinet, and they can double your storage space. Just make sure they’re sturdy enough to hold whatever you’re storing.
But here’s the thing: cabinets aren’t just for storage, they can also be used to create more workspace. I once worked with a café that installed a pull-out cutting board in one of their cabinets. It was a simple solution, but it gave them an extra 2 feet of prep space when they needed it. It’s all about thinking outside the box (or in this case, inside the cabinet).
The Hidden Costs of Bad Layouts (And How to Avoid Them)
Why Inefficient Layouts Cost You More Than Just Space
Here’s a hard truth: a bad kitchen layout doesn’t just waste space, it wastes time, money, and sanity. I’ve seen kitchens where the walk-in fridge is on the opposite side of the kitchen from the prep station, and the poor soul working the line has to walk 20 feet every time they need an ingredient. That might not sound like a lot, but during a busy service, those extra steps add up. I once calculated that a line cook in a poorly designed kitchen was walking nearly a mile during a single shift. That’s a mile of wasted energy, wasted time, and (let’s be real) wasted patience.
But it’s not just about the steps. Bad layouts also lead to bottlenecks, cross-contamination, and even safety hazards. I remember walking into a kitchen where the handwashing station was tucked behind the prep table, and the staff had to squeeze past the cutting board every time they needed to wash their hands. It was a disaster waiting to happen, and sure enough, the health inspector shut them down during a surprise visit.
So how do you avoid these hidden costs? Here are a few things to keep in mind:
- Think about flow: Your kitchen should be designed so that food moves in a logical, efficient path from storage to prep to cooking to plating. If your layout forces your staff to backtrack or zigzag, it’s going to slow them down.
- Prioritize high-traffic zones: The areas where your staff spends the most time, like the prep station, the stove, and the expo window, should be the most efficient. Don’t sacrifice these zones for the sake of squeezing in more equipment.
- Keep safety in mind: A good layout should minimize the risk of accidents, cross-contamination, and health code violations. That means keeping raw proteins away from ready-to-eat foods, ensuring that handwashing stations are easily accessible, and making sure that fire extinguishers are within reach.
- Plan for peak times: Your kitchen needs to be able to handle the busiest times of day. That means having enough prep space, enough storage, and enough equipment to keep up with demand. If your kitchen is cramped during the dinner rush, it’s going to slow you down.
Is this the perfect solution? Probably not. But it’s a starting point. The key is to think about how your kitchen actually functions-not how you think it should function.
The “One In, One Out” Rule for Equipment
Here’s a rule I wish more small kitchen owners would follow: for every new piece of equipment you bring in, you have to get rid of something. It’s called the “one in, one out” rule, and it’s a game-changer for small kitchens.
I learned this the hard way when I was helping a friend redesign his café kitchen. He was convinced that he needed a standalone mixer, a food processor, and a blender. But when we tried to fit everything into his 200-square-foot kitchen, it was a disaster. The counter was cluttered, the staff kept bumping into each other, and the mixer ended up getting used maybe once a week. It was a waste of space, a waste of money, and a waste of energy.
That’s when I realized that in a small kitchen, every piece of equipment has to earn its keep. If it’s not getting used regularly, it’s taking up valuable space that could be used for something else. The “one in, one out” rule forces you to think critically about what you actually need, and what you can live without.
Here’s how it works:
- Before you buy anything new, ask yourself: Do I really need this? Will it save me time, space, or money? If the answer is no, don’t buy it.
- If you do decide to buy something new, you have to get rid of something old. This could be a piece of equipment, a gadget, or even a piece of furniture. The key is to keep your kitchen lean and efficient.
- Be ruthless. If you haven’t used something in the past month, it’s probably not essential. Donate it, sell it, or throw it away, but get it out of your kitchen.
Is this the right approach for every kitchen? Maybe not. But if you’re working with limited space, it’s worth considering. The goal isn’t to deprive yourself, it’s to create a kitchen that’s lean, efficient, and functional.
Lighting and Ventilation: The Unsung Heroes of Small Kitchens
Why Lighting Matters More Than You Think
Let’s talk about lighting. It’s one of those things that most people don’t think about until it’s too late. But in a small kitchen, lighting isn’t just about visibility, it’s about mood, efficiency, and even safety. I’ve seen kitchens where the lighting was so bad that the staff couldn’t see what they were chopping, and it led to more than a few near-misses with the knife. I’ve also seen kitchens where the lighting was so bright that it gave everyone a headache by the end of the shift.
So how do you get it right? Here are a few things to keep in mind:
- Layer your lighting: In a small kitchen, you need a mix of ambient lighting (for overall visibility), task lighting (for specific jobs like chopping or plating), and accent lighting (to highlight certain areas or create a mood). This might sound like overkill, but it’s the best way to ensure that your kitchen is well-lit without being overwhelming.
- Use LED lights: They’re energy-efficient, long-lasting, and they don’t generate a lot of heat. Plus, they come in a variety of color temperatures, so you can choose the one that works best for your kitchen.
- Install dimmers: This is a game-changer for small kitchens. Dimmers allow you to adjust the lighting based on the time of day, the task at hand, or even the mood you’re trying to create. I recommend installing them in areas where you do a lot of prep work, it’s a small investment that can make a big difference.
- Think about color temperature: Lighting with a color temperature of 3500K to 4100K (cool white to neutral white) is ideal for kitchens. It’s bright enough to see what you’re doing, but not so harsh that it gives you a headache. Avoid lighting with a color temperature above 5000K (daylight)-it’s too harsh for most kitchen tasks.
But here’s the thing: lighting isn’t just about the fixtures, it’s also about how you use them. I once worked with a café that had great lighting, but the staff kept turning off the overhead lights because they were too bright. The problem? They were using the wrong color temperature. Once we swapped out the bulbs for something a little warmer, the staff started using the lights, and the kitchen ran smoother as a result.
Ventilation: The Silent Killer of Small Kitchens
Now, let’s talk about ventilation. It’s one of those things that most people don’t think about until it’s too late. But in a small kitchen, poor ventilation can lead to heat buildup, smoke, and even health code violations. I’ve seen kitchens where the staff was sweating through their shirts by mid-shift, and kitchens where the smoke alarm went off every time someone turned on the stove. It’s not just uncomfortable, it’s dangerous.
So how do you get it right? Here are a few things to keep in mind:
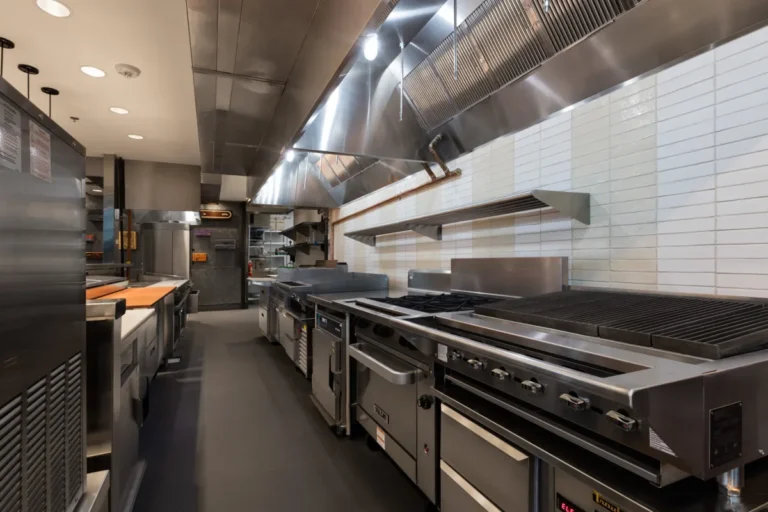
- Invest in a good hood: A commercial kitchen hood is a must-have for any small kitchen. It removes smoke, heat, and grease from the air, and it keeps your kitchen cool and comfortable. I recommend choosing a hood that’s at least as wide as your cooking equipment, and make sure it’s installed by a professional.
- Consider a make-up air system: This is a system that replaces the air that’s being sucked out by your hood. It’s especially important in small kitchens, where the air can get stale quickly. I recommend working with a professional to design a system that works for your space.
- Think about air flow: In a small kitchen, air flow is key. You want to make sure that the air is moving in a way that keeps the kitchen cool and comfortable. This might mean installing fans, opening windows, or even adjusting the layout of your equipment.
- Keep it clean: A dirty hood or filter can reduce the efficiency of your ventilation system. I recommend cleaning your hood and filters at least once a month, and more often if you do a lot of frying.
But here’s the thing: ventilation isn’t just about the equipment, it’s also about how you use it. I once worked with a food truck that had a great hood, but the staff kept turning it off because it was too loud. The problem? The hood was too powerful for the space. Once we swapped it out for something a little smaller, the staff started using it, and the kitchen stayed cool and comfortable as a result.
The Future of Small Kitchens: Smart Tech and Modular Design
How Smart Tech is Changing the Game
Let’s talk about the future. Because if you’re running a small commercial kitchen in 2026, you’re not just competing with other restaurants, you’re competing with smart homes, meal kits, and even AI-powered cooking robots. The good news? You don’t need a robot chef to stay ahead of the curve. But you doeed to think about how smart tech can make your kitchen more efficient, more sustainable, and more profitable.
Take smart thermostats, for example. These bad boys can learn your kitchen’s heating and cooling patterns and adjust the temperature automatically. That means you’re not wasting energy (or money) heating or cooling an empty kitchen. I worked with a café that installed a smart thermostat and saw their energy bill drop by 20% in the first month. That’s real money.
Or how about smart refrigeration? These systems can monitor the temperature of your fridge and freezer in real-time, alerting you if something goes wrong. That means no more spoiled food, no more health code violations, and no more surprise repairs. I’ve seen kitchens where a smart fridge paid for itself in food savings within a few months.
Here are some of my favorite smart tech upgrades for small kitchens:
- Smart ovens: These ovens can be controlled remotely, so you can preheat them on your way to work or adjust the temperature from your phone. Some even have built-in cameras, so you can check on your food without opening the door.
- Smart scales: These scales can weigh ingredients, calculate nutritional information, and even suggest recipes. They’re perfect for small kitchens where space is at a premium.
- Smart lighting: These systems can be controlled remotely, so you can turn the lights on or off from your phone. Some even have motion sensors, so they turn on automatically when someone enters the kitchen.
- Smart ventilation: These systems can monitor the air quality in your kitchen and adjust the ventilation automatically. That means no more smoke, no more heat buildup, and no more health code violations.
Is this the right approach for every kitchen? Probably not. But if you’re looking to future-proof your space, it’s worth considering. The key is to think about what problems you’re trying to solve-not just what tech is available.
Modular Design: The Future of Small Kitchens
Now, let’s talk about modular design. It’s one of those buzzwords that gets thrown around a lot, but in small kitchens, it’s a game-changer. Modular design is all about creating a kitchen that can adapt to your needs-whether that means adding a new station, reconfiguring your layout, or even moving your entire kitchen to a new location.
Take modular workstations, for example. These are workstations that can be reconfigured or moved around as needed. They’re perfect for small kitchens where space is at a premium. I worked with a food truck that used modular workstations, and they were able to reconfigure their kitchen for every event, whether they were serving burgers at a music festival or tacos at a street fair.
Or how about modular storage? These are storage systems that can be reconfigured or expanded as needed. They’re perfect for small kitchens where storage is always at a premium. I’ve seen kitchens where modular storage allowed the staff to double their storage space without adding a single square foot.
Here are some of my favorite modular design ideas for small kitchens:
- Modular workstations: These are workstations that can be reconfigured or moved around as needed. They’re perfect for small kitchens where space is at a premium.
- Modular storage: These are storage systems that can be reconfigured or expanded as needed. They’re perfect for small kitchens where storage is always at a premium.
- Modular equipment: This is equipment that can be reconfigured or expanded as needed. Think of a combi oven that can be used as a steamer, a convection oven, or a proofing cabinet, all in one.
- Modular layouts: This is a layout that can be reconfigured or expanded as needed. Think of a kitchen where the stations can be moved around to accommodate different menus or different staffing levels.
Is this the right approach for every kitchen? Maybe not. But if you’re looking to create a kitchen that can adapt to your needs, it’s worth considering. The key is to think about what you need now-and what you might need in the future.
Putting It All Together: Your Small Kitchen Optimization Plan
Alright, let’s take a step back. We’ve covered a lot of ground, from the psychology of small spaces to the future of smart tech. But how do you actually put all of this into practice? How do you take a cramped, inefficient kitchen and turn it into a lean, mean, food-producing machine?
Here’s my step-by-step plan for optimizing your small kitchen:
Step 1: Audit Your Space
Before you do anything else, you need to audit your space. That means taking a hard look at your kitchen and asking yourself some tough questions:
- What’s working? What’s not?
- Where are the bottlenecks? Where are the safety hazards?
- What equipment do you use every day? What do you only use once a month?
- What’s taking up the most space? Is it necessary?
I recommend doing this audit during a busy service. That’s when the problems will be most obvious. Take notes, take pictures, and don’t be afraid to ask your staff for their input. They’re the ones who use the kitchen every day, they’ll have insights that you might not see.
Step 2: Define Your Priorities
Once you’ve audited your space, it’s time to define your priorities. What are the most important things for your kitchen? Is it speed? Is it efficiency? Is it safety? Is it flexibility?
Here’s the thing: you can’t optimize for everything. If you try to make your kitchen faster, you might sacrifice safety. If you try to make it more flexible, you might sacrifice efficiency. The key is to figure out what’s most important to you, and then design around that.
I recommend making a list of your top three priorities. For example:
- Speed
- Efficiency
- Safety
Once you have your priorities, you can start making decisions about what to keep, what to change, and what to get rid of.
Step 3: Sketch Your Layout
Now it’s time to sketch your layout. This doesn’t have to be a professional blueprint, it can be a simple hand-drawn sketch. The goal is to visualize how your kitchen will function.
Here are a few things to keep in mind:
- The work triangle: Remember the work triangle we talked about earlier? Now’s the time to put it into practice. Sketch out where your sink, stove, and fridge will go, and make sure they form a triangle.
- The three-foot rule: Make sure every station has at least three feet of space. If it doesn’t, you’ll need to get creative with vertical storage or multi-functional equipment.
- Flow: Think about how food will move through your kitchen. It should flow in a logical, efficient path from storage to prep to cooking to plating.
Don’t be afraid to experiment with different layouts. I recommend sketching out a few different options and then asking your staff for their input. They might see problems (or opportunities) that you didn’t.
Step 4: Choose Your Equipment
Now it’s time to choose your equipment. This is where the “one in, one out” rule comes into play. For every new piece of equipment you bring in, you have to get rid of something old.
Here are a few things to keep in mind:
- Multi-functional equipment: Look for equipment that can do the job of two or three machines. A combi oven, for example, can replace a steamer, a convection oven, and a proofing cabinet.
- Space-saving equipment: Look for equipment that’s designed for small kitchens. Undercounter fridges, for example, can be tucked under a counter or prep station, freeing up valuable floor space.
- Energy-efficient equipment: Look for equipment that’s Energy Star certified. It might cost more upfront, but it’ll save you money in the long run.
Don’t be afraid to get creative. I once worked with a kitchen that replaced their standalone mixer with a hand mixer and suddenly had enough space to add a second prep station. It’s all about thinking outside the box.
Step 5: Optimize Your Storage
Now it’s time to optimize your storage. This is where vertical storage, cabinet hacks, and modular design come into play.
Here are a few things to keep in mind:
- Vertical storage: Look for ways to use your walls for storage. Pegboards, wall-mounted shelves, and magnetic strips are all great options.
- Cabinet hacks: Look for ways to make your cabinets more efficient. Pull-out shelves, door-mounted organizers, and stackable bins are all great options.
- Modular storage: Look for storage systems that can be reconfigured or expanded as needed. This is especially important if your menu changes frequently.
Don’t be afraid to get creative. I once worked with a kitchen that installed a pull-out cutting board in one of their cabinets. It was a simple solution, but it gave them an extra 2 feet of prep space when they needed it.
Step 6: Upgrade Your Lighting and Ventilation
Now it’s time to upgrade your lighting and ventilation. These are the unsung heroes of small kitchens, they can make a big difference in how your kitchen functions.
Here are a few things to keep in mind:
- Lighting: Layer your lighting, use LED lights, install dimmers, and think about color temperature. The goal is to create a well-lit, comfortable space that’s easy to work in.
- Ventilation: Invest in a good hood, consider a make-up air system, think about air flow, and keep it clean. The goal is to create a cool, comfortable space that’s free of smoke and heat.
Don’t be afraid to invest in good lighting and ventilation. They might not be as exciting as a new stove or a shiny new prep station, but they’ll make a big difference in how your kitchen functions.
Step 7: Test and Refine
Now it’s time to test and refine. This is where you put your new layout to the test and see what works (and what doesn’t).
Here are a few things to keep in mind:
- Start small: Don’t try to change everything at once. Start with one or two changes and see how they work. If they work well, you can build on them. If they don’t, you can tweak them or try something else.
- Get feedback: Ask your staff for their input. They’re the ones who use the kitchen every day, they’ll have insights that you might not see.
- Be patient: It takes time to optimize a kitchen. Don’t expect everything to work perfectly right away. Be patient, be flexible, and be willing to make changes as needed.
Don’t be afraid to make mistakes. I’ve seen kitchens where the first (or second, or third) layout didn’t work. But the key is to keep refining, keep testing, and keep improving. That’s how you create a kitchen that’s truly optimized.
Final Thoughts: The Small Kitchen Mindset
Let me leave you with this: optimizing a small kitchen isn’t just about the physical space. It’s about adopting a small kitchen mindset. It’s about being creative, being flexible, and being willing to think outside the box. It’s about seeing constraints not as limitations, but as opportunities to innovate.
I’ve seen tiny kitchens produce incredible food, and I’ve seen massive kitchens struggle to keep up. The difference? The small kitchens had something that the big ones didn’t: a sense of purpose, a focus on efficiency, and a willingness to adapt. They didn’t have the luxury of wasted space or wasted time, so they made every square foot and every second count.
So here’s my challenge to you: the next time you’re in your kitchen, take a step back and ask yourself, “What’s one thing I can do to make this space work better for me?” It might be as simple as moving a piece of equipment, or as complex as redesigning your entire layout. But whatever it is, don’t be afraid to try. Because in a small kitchen, every little bit counts.
And who knows? Maybe one day, I’ll walk into your kitchen and marvel at how you’ve turned a tiny space into a culinary powerhouse. Until then, keep cooking, keep innovating, and keep making the most of every inch.
FAQ: Small Commercial Kitchen Space Optimization
Q: What’s the biggest mistake people make when designing a small commercial kitchen?
A: The biggest mistake is prioritizing equipment over workflow. I’ve seen kitchens where the owner crammed in every gadget they could think of, only to realize during service that no one could move without bumping into something. Always design around how your staff will actually use the space, not just what you think you need. Start with the essential stations (prep, cooking, plating) and build out from there. And for the love of all things holy, leave at least three feet of clearance around high-traffic areas, your staff (and your sanity) will thank you.
Q: How do I know if my kitchen layout is actually efficient?
A: The best way to test your layout is to simulate a busy service. Grab a stopwatch and time how long it takes to complete a few key tasks, like prepping a salad, cooking a burger, or plating a dessert. If you’re spending more time walking than actually cooking, your layout needs work. Another trick? Sprinkle flour on the floor before a busy shift. The next day, look for the most worn paths, those are your high-traffic zones, and they should be the most efficient part of your kitchen. If the flour trails are zigzagging all over the place, it’s time to rethink your flow.
Q: What’s the most underrated piece of equipment for small kitchens?
A: Hands down, it’s the undercounter refrigerated drawer. Most small kitchens waste precious space with bulky reach-in fridges, but undercounter drawers can be tucked under prep stations or counters, keeping ingredients within arm’s reach without taking up floor space. I’ve seen kitchens double their storage capacity just by swapping out a reach-in for a couple of drawers. Plus, they’re easier to clean and more energy-efficient. If you’re tight on space, this is the first upgrade I’d recommend. (And no, I’m not sponsored by any drawer companies, I just really like them.)
Q: How do I keep my small kitchen organized during a busy service?
A: The key is systems, not just storage. Here’s what works:
- Color-coded bins: Assign a color to each station (red for proteins, blue for veggies, green for garnishes) and use matching bins for storage. It sounds simple, but it cuts down on confusion during the rush.
- “Home base” for tools: Every utensil, pan, and gadget should have a designated spot. Use pegboards, magnetic strips, or labeled drawers so staff can grab what they need and put it back without thinking.
- Pre-service checklists: Before every shift, run through a quick checklist: Are all stations stocked? Are tools in their home base? Is the walkway clear? It takes two minutes and prevents chaos later.
- Daily resets: At the end of every shift, do a 10-minute reset. Wipe down surfaces, restock bins, and put everything back in its place. It’s tempting to skip this when you’re exhausted, but it’s the difference between starting the next shift smoothly or playing catch-up all day.
Pro tip: If your staff keeps losing things, try the “shadow board” trick. Trace the outline of each tool on a pegboard or drawer liner. That way, it’s obvious when something’s missing, and where it goes when it’s put back.
@article{the-ultimate-small-commercial-kitchen-space-optimization-guide-maximize-every-inch-without-sacrificing-workflow,
    title   = {The Ultimate Small Commercial Kitchen Space Optimization Guide: Maximize Every Inch Without Sacrificing Workflow},
    author  = {Chef's icon},
    year    = {2026},
    journal = {Chef's Icon},
    url     = {https://chefsicon.com/small-commercial-kitchen-space-optimization-guide/}
}