The Best Fluffy Pancakes recipe you will fall in love with. Full of tips and tricks to help you make the best pancakes.
Let me tell you about the time I nearly burned down a kitchen, or at least, that’s how it felt. It was 2023, a Friday night at one of Nashville’s busiest BBQ joints, and the dinner rush was in full swing. The line cooks were moving like a well-oiled machine, the expediter was barking orders, and the smell of smoked brisket filled the air. Then, the fire alarm went off. Not a drill. An actual, blaring, heart-stopping alarm.
What happened next was a masterclass in what ot to do during an emergency. Staff froze. Someone shouted, “It’s probably just the fryer again!” A few others laughed nervously. The manager, bless his heart, tried to herd everyone toward the back exit, but half the team didn’t even know where it was. By the time the fire department arrived (false alarm, thankfully), I realized something terrifying: most high-volume kitchens are woefully unprepared for emergencies. And if you think your team is the exception, well, I’ve got some bad news for you.
This isn’t just about ticking a box for compliance. It’s about keeping your staff, your customers, and your livelihood safe. In this guide, I’ll walk you through why emergency exit drills in high-volume kitchens are different from your average office fire drill, how to design drills that actually work, and the common mistakes that could turn a minor incident into a full-blown disaster. By the end, you’ll have a step-by-step plan to make sure your team isn’t just going through the motions, because when the heat is on (literally), that’s the difference between chaos and control.
The Hidden Dangers of High-Volume Kitchens
Why Your Average Fire Drill Won’t Cut It
Most of us have been through a fire drill at some point. You hear the alarm, you file out in an orderly line, you stand around in the parking lot for a few minutes, and then you go back inside. Easy, right? In an office or a school, maybe. But in a high-volume kitchen? It’s a whole different beast.
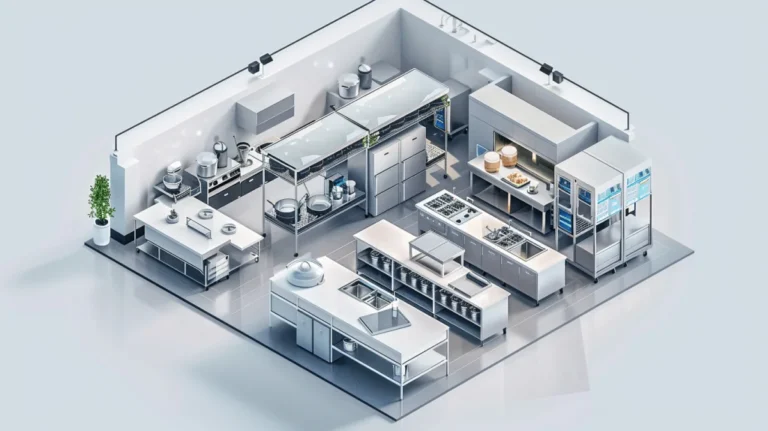
First, let’s talk about the unique hazards of a commercial kitchen. You’ve got open flames, high-temperature equipment, grease buildup, and a maze of tight spaces where staff are moving at breakneck speed. Add in the fact that many kitchens are designed for efficiency, not evacuation, and you’ve got a recipe for disaster. Narrow walkways, equipment blocking exits, and even the sheer volume of people in the space can turn a simple evacuation into a logistical nightmare.
Then there’s the psychological factor. In an office, people might grumble about the drill, but they’ll follow the plan. In a kitchen, especially during a rush, the instinct is to keep working. I’ve seen cooks ignore alarms because they’re in the middle of plating a dish, or managers wave off evacuations because they don’t want to lose momentum. That’s not just reckless, it’s a lawsuit waiting to happen.
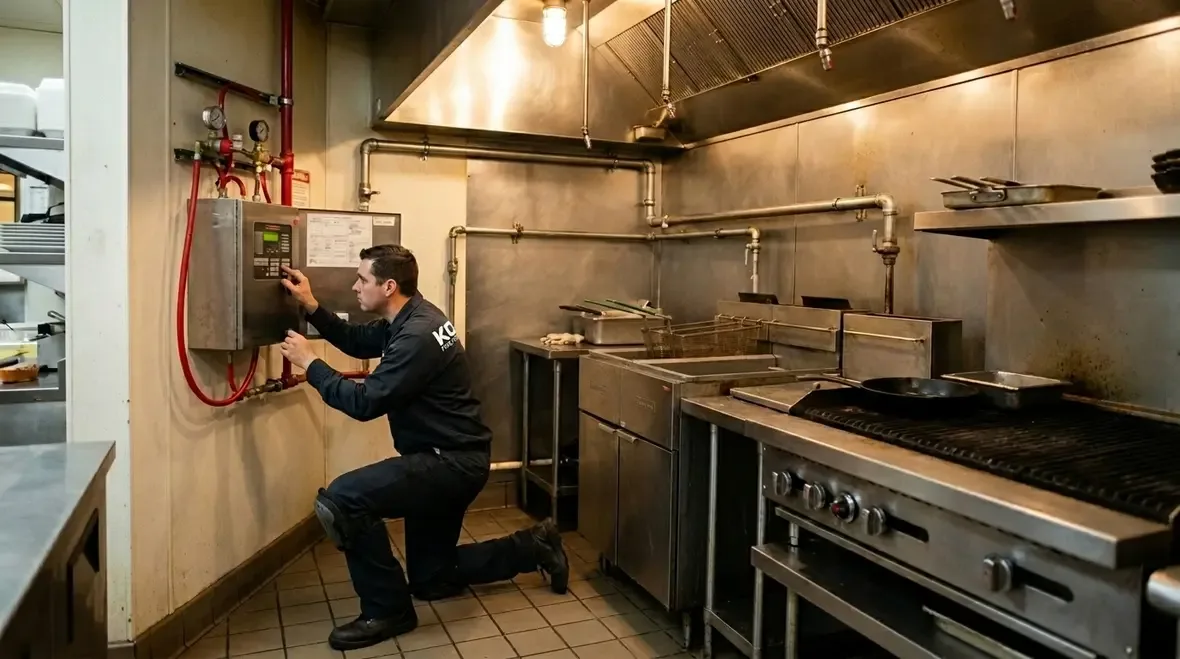
And let’s not forget the equipment. High-volume kitchens are packed with gear that can’t just be left running. Turning off a gas line, shutting down a fryer, or even just securing a walk-in cooler takes time, time you might not have in a real emergency. If your drills don’t account for this, you’re setting your team up for failure.
The Compliance Trap: Why Checking Boxes Isn’t Enough
Here’s the thing about compliance: it’s the minimum standard. Most health and safety regulations require some form of emergency drill, but they don’t always specify how to make those drills effective. And let’s be honest, how many of us have been part of a drill that felt more like a performance than a preparation?
I’ve seen kitchens where the staff knows the alarm is coming, so they treat it like a coffee break. They saunter out, chat with each other, and then go back inside without a second thought. That’s not a drill, that’s a waste of time. Real emergencies don’t come with a warning, and if your team isn’t practicing under realistic conditions, they won’t be ready when it counts.
So how do you avoid the compliance trap? Start by asking yourself: Are we actually preparing for an emergency, or are we just going through the motions? If the answer is the latter, it’s time to rethink your approach.
Designing Emergency Exit Drills That Actually Work
Step 1: Map Your Kitchen Like Your Life Depends on It (Because It Might)
Before you can run a drill, you need to know your kitchen’s evacuation routes inside and out. And I don’t mean the ones on the pretty poster by the break room. I mean the real routes, the ones that account for equipment, staff movement, and potential hazards.
Start by walking every possible exit path. Ask yourself:
- Are there any obstacles that could slow people down? (Think stacked boxes, equipment carts, or even just a busy walkway.)
- Are the exits clearly marked and well-lit? (If not, you’re asking for trouble.)
- Is there a backup route if the primary exit is blocked? (Spoiler: there should be.)
- How will staff in different areas, like the prep station, dish pit, or walk-in, get out quickly?
This is where a supplier like Chef’s Deal can be a game-changer. Their free kitchen design services aren’t just about aesthetics, they’re about functionality. A well-designed kitchen should have clear evacuation paths built into the layout, and their team can help you identify potential bottlenecks before they become a problem. If you’re in the process of outfitting a new kitchen or renovating an existing one, this is one of those details that’s easy to overlook but could save lives down the line.
Step 2: Assign Roles (Because Chaos Doesn’t Have a Plan)
In an emergency, everyone needs to know their role. That means designating evacuation leaders, equipment shutdown coordinators, and head counters to make sure everyone gets out safely. And no, this isn’t just the manager’s job. In a high-volume kitchen, the manager might be the one who’s least likely to hear the alarm or see the hazard first.
Here’s how to break it down:
- Evacuation Leaders: These are the people who will guide staff to the exits. They should be familiar with all evacuation routes and trained to stay calm under pressure. Ideally, you’ll have at least one leader per shift who’s always on duty.
- Equipment Shutdown Coordinators: Someone needs to be responsible for turning off gas lines, shutting down fryers, and securing hazardous equipment. This isn’t just about safety, it’s about preventing further damage to your kitchen. (And yes, this should be part of your drill.)
- Head Counters: This person’s job is to do a quick sweep of the kitchen to make sure everyone’s out. They should know the layout well enough to check even the hidden corners, like the walk-in or the storage room.
- First Aid Responders: If you have staff trained in first aid, they should be ready to assist anyone who’s injured during the evacuation. This is especially important in kitchens where burns or cuts are common.
Is this the best approach? Let’s consider: what happens if you don’t assign roles? You get chaos. People running in different directions, equipment left running, and no one sure if everyone’s made it out. That’s not a drill, that’s a disaster in the making.
Step 3: Make the Drill Unpredictable (Because Emergencies Don’t Schedule Themselves)
Here’s the hard truth: if your team knows when the drill is coming, they’re not really practicing for an emergency. They’re practicing for a performance. And that’s not good enough.
So how do you make drills unpredictable? A few ideas:
- Random Timing: Don’t schedule drills for the same time every month. Mix it up, do one during the lunch rush, another during prep time, and another when the kitchen is slow. The more varied the conditions, the better prepared your team will be.
- Different Scenarios: Not every emergency is a fire. Practice evacuations for gas leaks, power outages, or even medical emergencies. Each scenario will require a slightly different response, and your team should be ready for all of them.
- Obstacles: Block an exit or two during the drill to force your team to use alternate routes. This might feel cruel, but it’s better to figure out the kinks during a drill than during a real emergency.
I’m torn between making drills too predictable and making them so chaotic that staff get frustrated. Ultimately, though, I think the latter is better. If a drill feels a little unfair, that’s okay, because real emergencies are unfair. The goal is to prepare your team for the worst, not just the easy stuff.
The Equipment Factor: What to Shut Down (And What to Leave Running)
Prioritizing Safety Without Sacrificing Your Kitchen
One of the biggest challenges in a high-volume kitchen evacuation is deciding what equipment to shut down. Turn everything off, and you risk spoiling food or damaging sensitive gear. Leave things running, and you could be creating a bigger hazard. So where’s the balance?
Here’s a quick breakdown of what to prioritize:
- Gas Lines: Always shut these off first. A gas leak is one of the most dangerous scenarios in a kitchen, and it’s not something you want to mess around with.
- Fryers and Grills: These are high-risk for fires, so they should be shut down as soon as possible. If you’re using equipment from a supplier like Chef’s Deal, check the manual for specific shutdown procedures, some models have built-in safety features that make this easier.
- Walk-In Coolers: These can usually be left running, but make sure the doors are secured. You don’t want someone getting trapped inside during an evacuation.
- Ventilation Systems: If there’s a fire, turning off the ventilation can help contain the smoke. But if it’s a gas leak, you might want to leave it running to clear the air. This is why scenario-based drills are so important.
Maybe I should clarify: there’s no one-size-fits-all answer here. The right approach depends on your kitchen’s layout, the type of equipment you’re using, and the nature of the emergency. That’s why it’s so important to practice different scenarios and make sure your team knows how to adapt.
Investing in the Right Gear (Because Not All Equipment Is Created Equal)
If you’re still using outdated or poorly maintained equipment, you’re making evacuations harder than they need to be. For example, gas ranges with manual shutoff valves are a nightmare in an emergency. Modern equipment often comes with automatic shutoff features or remote control options that can make evacuations safer and more efficient.
When you’re outfitting your kitchen, think about how each piece of equipment will perform in an emergency. Can it be shut down quickly? Is it easy to access? Does it have built-in safety features? If you’re not sure, suppliers like Chef’s Deal offer expert consultation to help you choose the right gear for your needs. Their team can walk you through the pros and cons of different models and even help you design a kitchen that’s both efficient and safe.
And don’t forget about emergency lighting. In a power outage, your team needs to be able to see the exits. Investing in backup lighting isn’t just a good idea, it’s a lifesaver.
Training Your Team: More Than Just a One-Time Thing
The Problem with Annual Drills (Spoiler: They’re Not Enough)
Most kitchens do emergency drills once a year, if that. And that’s a problem. Why? Because people forget. They get complacent. They assume that because they did a drill last year, they’ll remember what to do this year. But emergencies don’t wait for your memory to kick in.
I’ve seen it happen too many times: a team does a drill, feels confident, and then six months later, they’re back to square one. So how do you keep the training fresh? A few ideas:
- Quarterly Drills: Instead of annual drills, aim for at least four per year. This keeps the training top of mind and gives you a chance to adjust based on what’s working and what’s not.
- Micro-Drills: These are quick, five-minute drills that you can do during a shift change or before a rush. For example, ask your team: “If the fire alarm goes off right now, what’s the first thing you’d do?” It’s not as thorough as a full drill, but it keeps everyone on their toes.
- Cross-Training: Make sure everyone on your team knows how to perform every role in the evacuation plan. That way, if someone’s out sick or on vacation, you’re not left scrambling.
Is this the best approach? Let’s consider: what’s the alternative? Annual drills that everyone forgets about? That’s not preparation, that’s a checkbox. If you want your team to be ready, you’ve got to make training a habit, not an afterthought.
Making Drills Engaging (Because No One Likes a Boring Safety Lecture)
Let’s be real: most people tune out during safety training. It’s dry, it’s repetitive, and it feels like a waste of time. But it doesn’t have to be that way. The key is to make drills engaging and relevant.
Here are a few ways to spice things up:
- Gamify It: Turn the drill into a competition. Time your team’s evacuation and see if they can beat their best time. Offer a small reward, like a free lunch or an extra break, for the best performance.
- Real-Life Scenarios: Instead of just shouting “Fire!” give your team a specific scenario to respond to. For example: “There’s a grease fire in the fryer. What do you do?” This forces them to think critically and adapt to different situations.
- Debrief Sessions: After each drill, sit down with your team and talk about what went well and what didn’t. Encourage them to ask questions and share their thoughts. This isn’t just about feedback, it’s about making them feel invested in the process.
I’m torn between making drills fun and making sure they’re taken seriously. Ultimately, though, I think a little humor can go a long way. If your team is laughing while they’re learning, they’re more likely to remember the lesson. Just don’t let the fun distract from the seriousness of the task at hand.
The Aftermath: What to Do When the Drill Is Over
Debriefing Like Your Business Depends on It (Because It Does)
The drill is over. Your team is standing outside, catching their breath. Now what? If you just send everyone back inside without a debrief, you’re missing a huge opportunity. The debrief is where the real learning happens.
Here’s how to make it count:
- Ask for Feedback: What worked? What didn’t? Were there any bottlenecks or confusion? Encourage your team to speak up, even if it’s something small.
- Review the Numbers: How long did the evacuation take? Were all exits used? Did everyone make it out safely? Use this data to track your progress over time.
- Adjust the Plan: If something didn’t work, fix it. Maybe you need to add another evacuation leader, or maybe the routes need to be tweaked. Don’t be afraid to make changes.
Maybe I should clarify: the debrief isn’t just about pointing out mistakes. It’s about celebrating what went well, too. If your team did something right, make sure they know it. Positive reinforcement goes a long way.
Documenting Everything (Because You Never Know When You’ll Need It)
Here’s something no one likes to think about: what if something goes wrong during a real emergency? What if someone gets hurt, or the damage is worse than expected? That’s where documentation comes in.
After every drill, write down:
- The date and time of the drill.
- Who participated.
- How long the evacuation took.
- Any issues or obstacles that came up.
- What changes you plan to make.
This isn’t just about covering your bases, it’s about improving. If you’re not tracking your progress, how will you know if you’re getting better?
And if you’re ever audited or investigated, this documentation will be your best friend. It shows that you’re taking safety seriously and that you’re committed to continuous improvement. That’s not just good for compliance, it’s good for business.
Common Mistakes (And How to Avoid Them)
Mistake #1: Assuming Your Team Knows What to Do
This is the biggest mistake I see in high-volume kitchens. Managers assume that because they’ve told their team what to do, everyone will remember it. But that’s not how it works. People forget. They get distracted. They assume someone else will handle it.
The fix? Repetition. Drills should be frequent, varied, and unpredictable. And don’t just tell your team what to do, show them. Walk them through the evacuation routes, demonstrate how to shut down equipment, and make sure they understand their roles.
Mistake #2: Ignoring the Little Things
It’s easy to focus on the big stuff, the exits, the equipment, the evacuation routes. But what about the little things? Like making sure the exit doors aren’t locked, or that the alarm system is working properly, or that the emergency lighting is bright enough?
These might seem like minor details, but they can make a huge difference in an emergency. For example, if your exit doors are locked (even if it’s just to keep people from sneaking out), you’re creating a bottleneck that could slow down the evacuation. Or if your alarm system is faulty, your team might not even hear it.
The fix? Regular inspections. Walk through your kitchen at least once a month and check for potential hazards. And don’t just rely on your memory, use a checklist to make sure you’re covering everything.
Mistake #3: Not Practicing Under Realistic Conditions
If your drills are always done during slow times, with no obstacles and no pressure, your team won’t be ready for the real thing. Emergencies don’t happen when it’s convenient, they happen during the dinner rush, when the kitchen is packed and everyone’s moving at full speed.
The fix? Make your drills as realistic as possible. Do them during busy times. Block exits. Create obstacles. The more challenging the drill, the better prepared your team will be.
Mistake #4: Forgetting About the Customers
In all the chaos of an evacuation, it’s easy to forget about the customers. But they’re part of the equation, too. If you don’t have a plan for getting them out safely, you’re putting them, and your business, at risk.
The fix? Include customer evacuation in your drills. Make sure your staff knows how to guide customers to the exits, and designate a meeting point where everyone can gather outside. And don’t forget about accessibility, make sure your evacuation plan accounts for customers with disabilities.
Putting It All Together: Your Emergency Exit Drill Checklist
Alright, let’s recap. Here’s your step-by-step checklist for running effective emergency exit drills in a high-volume kitchen:
- Map Your Kitchen: Walk every evacuation route and identify potential obstacles.
- Assign Roles: Designate evacuation leaders, equipment shutdown coordinators, head counters, and first aid responders.
- Make It Unpredictable: Vary the timing, scenarios, and obstacles to keep your team on their toes.
- Prioritize Equipment: Know what to shut down (and what to leave running) in different emergencies.
- Invest in the Right Gear: Choose equipment with safety features, and don’t forget about emergency lighting.
- Train Regularly: Do quarterly drills, micro-drills, and cross-training to keep your team sharp.
- Make It Engaging: Gamify the drills, use real-life scenarios, and hold debrief sessions.
- Debrief Thoroughly: Review what went well, what didn’t, and adjust your plan accordingly.
- Document Everything: Keep records of each drill to track progress and improve over time.
- Avoid Common Mistakes: Don’t assume your team knows what to do, ignore the little things, or forget about the customers.
Is this the best approach? Maybe. Maybe not. But it’s a start. The key is to keep learning, keep improving, and never assume that you’re done. Because when it comes to emergency preparedness, there’s always room to get better.
Final Thoughts: Why This Matters More Than You Think
I’ll be honest: when I first started writing this, I wasn’t sure how much there was to say about emergency exit drills. I mean, how complicated can it be? You hear the alarm, you get out, end of story. But the more I dug into it, the more I realized how much we’re all getting wrong.
High-volume kitchens are unique beasts. They’re fast-paced, high-pressure environments where every second counts. And when an emergency hits, those seconds can mean the difference between a minor incident and a full-blown disaster. That’s why it’s so important to take emergency drills seriously, not just as a compliance requirement, but as a lifeline for your team and your business.
So here’s my challenge to you: the next time you’re in your kitchen, take a look around. Ask yourself: Are we really prepared? If the answer isn’t a resounding yes, it’s time to make a change. Because when the alarm goes off, you don’t want to be the one standing there, wondering what to do next.
FAQ
Q: How often should we run emergency exit drills in a high-volume kitchen?
A: Ideally, you should run full drills at least four times a year, with additional micro-drills or discussions during shift changes. The key is to keep the training fresh and unpredictable. Quarterly drills strike a good balance between preparation and not overwhelming your team.
Q: What’s the biggest mistake kitchens make during emergency drills?
A: The biggest mistake is assuming that once-a-year drills are enough. Many kitchens also fail to make drills realistic, either by scheduling them during slow times or not accounting for obstacles like blocked exits or high-pressure scenarios. Another common error is not assigning clear roles, which leads to confusion during the actual drill.
Q: How can we make emergency drills more engaging for our team?
A: Turn drills into a competition by timing evacuations and rewarding the fastest (and safest) team. Use real-life scenarios to force critical thinking, for example, “There’s a grease fire in the fryer, what do you do?” Hold debrief sessions where staff can share feedback and ask questions. The more interactive and relevant the drill, the more engaged your team will be.
Q: What equipment should we prioritize shutting down during an evacuation?
A: Always prioritize gas lines first, as they pose the most immediate danger. Next, shut down high-risk equipment like fryers and grills. Walk-in coolers can usually be left running, but make sure the doors are secured. Ventilation systems should be turned off in a fire to contain smoke but left on during a gas leak to clear the air. The exact priorities may vary depending on your kitchen’s layout and equipment, so it’s important to practice different scenarios.
@article{emergency-exit-drills-for-high-volume-kitchens-why-youre-probably-doing-them-wrong-and-how-to-fix-it,
    title   = {Emergency Exit Drills for High-Volume Kitchens: Why You’re Probably Doing Them Wrong (And How to Fix It)},
    author  = {Chef's icon},
    year    = {2026},
    journal = {Chef's Icon},
    url     = {https://chefsicon.com/emergency-exit-drills-for-high-volume-kitchens/}
}