
The Best Fluffy Pancakes recipe you will fall in love with. Full of tips and tricks to help you make the best pancakes.
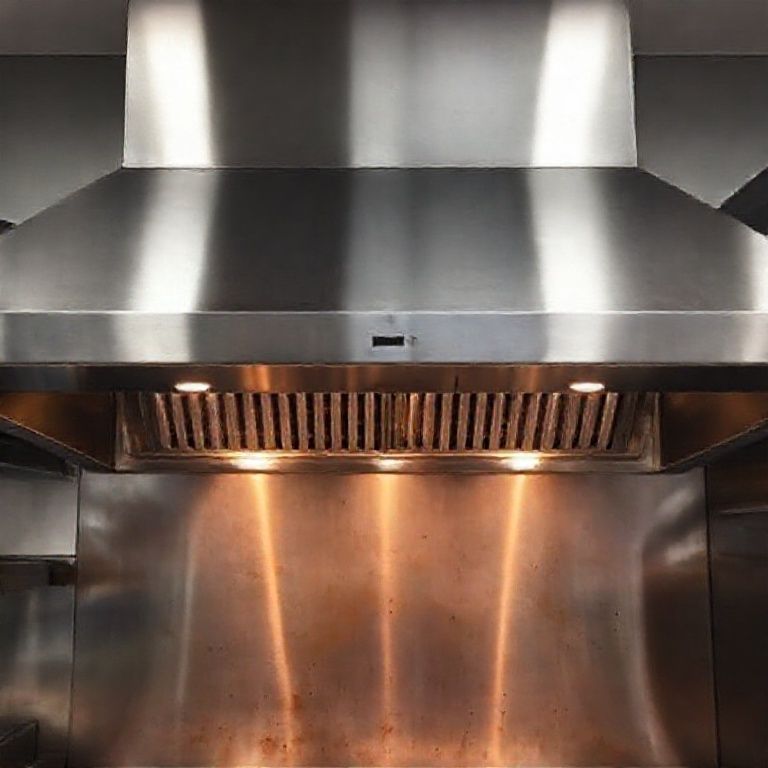
Table of Contents
- 1 Getting Down to Brass Tacks: The Hood Installation Journey
- 1.1 Why Proper Installation Isn’t Just ‘Nice to Have’
- 1.2 Decoding the Hoods: Type I vs. Type II and Styles
- 1.3 The Anatomy of a Hood System: More Than Just Metal
- 1.4 Before the First Screw: Planning and Site Checks
- 1.5 Codes, Permits, and Why You Need Pros
- 1.6 The Main Event: Installing the System (Simplified!)
- 1.7 Makeup Air (MUA): Balancing the Equation
- 1.8 Fire Suppression: Your Built-In Safety Net
- 1.9 The Finish Line: Checks, Balances, and Inspections
- 1.10 Avoiding Common Pitfalls: Don’t Make These Mistakes!
- 2 Wrapping It Up: The Long View on Ventilation
- 3 FAQ
Alright, let’s talk about something that’s maybe not the sexiest part of a commercial kitchen, but oh boy, is it crucial: the hood system. I’m Sammy, by the way, writing for Chefsicon.com. Usually, I’m diving deep into food trends or maybe the cultural significance of Nashville hot chicken (which, living here now, I have *opinions* on). But today, we’re getting technical. Why? Because a poorly installed commercial hood system isn’t just inefficient; it’s downright dangerous. I’ve seen enough kitchens, from my Bay Area days to the vibrant spots here in Nashville, to know that the big shiny range gets all the attention, but the metal box hanging above it? That’s the real workhorse keeping things safe and breathable.
Honestly, thinking about ventilation probably isn’t why most people get into the food business. You dream of crafting menus, the buzz of service, happy customers – not ductwork and airflow calculations. I get it. When I first started looking into restaurant operations from a marketing perspective, I glossed over the infrastructure stuff too. Big mistake. It’s like ignoring the foundation of a house because the paint color is more exciting. A properly installed commercial hood system is fundamental. It pulls out grease, smoke, heat, and those cooking smells that are great in moderation but overwhelming (and unhealthy) constantly. Plus, the fire marshal? Yeah, they care. A lot.
So, this isn’t going to be your typical breezy food blog post. Luna, my rescue cat, is currently judging me from her perch on the armchair as I type this, probably wondering why I’m not researching artisanal catnip. Sorry, Luna, today it’s about grease vapors and air pressure. We’re going to walk through the essentials of commercial hood systems installation. Think of this as a guide, maybe more like a detailed conversation, covering why it matters, the bits and pieces involved, the planning, the codes (ugh, codes), and why cutting corners here is a recipe for disaster. Whether you’re planning a new kitchen, renovating an old one, or just curious about what makes a professional kitchen tick safely, stick around. It might save you a massive headache, or worse, down the line.
Getting Down to Brass Tacks: The Hood Installation Journey
Why Proper Installation Isn’t Just ‘Nice to Have’
Let’s just get this out of the way: installing a commercial hood system correctly is non-negotiable. It’s easy to underestimate the sheer volume of heat, smoke, steam, and grease particles generated by commercial cooking equipment. We’re talking high-powered ranges, fryers bubbling away, charbroilers searing – it’s intense. Without effective ventilation, that stuff builds up fast. First off, fire safety. Grease-laden vapor is flammable. If it accumulates in the hood, ductwork, or on surfaces, it creates a serious fire hazard. A properly designed and installed system contains and removes this grease efficiently, often incorporating a fire suppression system directly linked to it. Secondly, air quality. Constantly breathing in smoke, particulates, and carbon monoxide (from gas appliances) is terrible for your staff’s health. Good ventilation protects your team. Thirdly, health codes and regulations. Authorities have strict rules about kitchen ventilation for a reason. Fail inspection, and you’re not opening, simple as that. Lastly, equipment performance and longevity. Excessive heat and grease buildup can damage your expensive cooking equipment and even the building structure itself. Proper kitchen ventilation helps manage the environment, making everything run better and last longer. It also impacts customer comfort – nobody wants to eat in a dining room that smells like stale fryer oil because the kitchen air is escaping.
Decoding the Hoods: Type I vs. Type II and Styles
Okay, so not all hoods are created equal. The biggest distinction is between Type I and Type II hoods. A Type I hood, also called a grease hood, is what you need over appliances that produce grease or smoke – think ranges, fryers, griddles, charbroilers, woks. These are the heavy hitters. They *must* have filters (usually stainless steel baffle filters these days, which are way better than old-school mesh) to capture grease particles, and they are required by code to be paired with a fire suppression system. The design is focused on capturing those dangerous grease-laden vapors before they escape into the kitchen or ductwork. Then you have the Type II hood, sometimes called a heat or condensate hood. These are used over appliances that primarily produce heat, steam, and odors, but *not* grease. Think ovens (like convection or deck ovens), steamers, dishwashers. They don’t require the same heavy-duty grease filtration or fire suppression (though always check local codes!). Beyond the Type I/II distinction, you’ve got different styles based on where they sit: wall canopy hoods mount against a wall, island canopy hoods hang over an equipment bank in the middle of a room (often V-shaped), and proximity or backshelf hoods are low-profile units mounted directly behind the equipment. The choice depends entirely on your kitchen layout and the specific appliances underneath. You absolutely need to match the hood type and size to the cooking battery it serves. Undersizing is a common, and costly, mistake.
The Anatomy of a Hood System: More Than Just Metal
A commercial hood system is, well, a *system*. It’s a collection of components working together, and if one part isn’t right, the whole thing suffers. The obvious part is the hood canopy itself – that big metal structure you see. Inside or attached are the filters, usually baffle filters made of stainless steel, designed to force the greasy air to change direction quickly, causing grease particles to deposit on the metal baffles, where they can drain into a collection tray. Behind the scenes, you have the exhaust fan, typically mounted on the roof or an exterior wall. This is the engine of the system, pulling the air from the kitchen, through the hood, through the ductwork, and expelling it outside. The ductwork itself is critical – it needs to be properly sized, constructed of welded steel (usually black iron or stainless steel) for grease ducts to withstand potential fires, and routed correctly to the exterior. Then there’s the often-overlooked but vital makeup air (MUA) system. As you exhaust air out, you *must* bring fresh air back in to replace it, otherwise, you create negative pressure problems. We’ll talk more about MUA later, but it’s a huge part of the equation. And for Type I hoods, the integrated fire suppression system is mandatory, with nozzles aimed at the plenum, duct collar, and cooking appliances, ready to discharge wet chemical extinguishant if a fire erupts. It’s a complex interplay of parts, all needing professional attention.
Before the First Screw: Planning and Site Checks
Okay, deep breath. Before anyone even thinks about hoisting a hood into place, there’s homework to do. Proper planning is probably 80% of the battle. First: measure everything. Twice. Maybe three times. You need the exact dimensions of the cooking equipment line-up to determine the required hood overhang (usually 6 inches on each side) and overall size. You need ceiling height – is there enough clearance? Are there beams, pipes, or other obstructions in the way? This initial site assessment is crucial. Then consider the path for the ductwork. Can it go straight up through the roof, or does it need to take a more complex route? Every bend and turn adds resistance to airflow, impacting fan selection. What about the building’s structure? Can the ceiling or walls support the weight of the hood and associated ductwork? Sometimes reinforcement is needed. You also need to locate utility connections – primarily electrical power for the exhaust fan, MUA unit, and hood lights, and potentially natural gas or electrical for a heated MUA system. Coordination is key here. The hood installer needs to work with the electrician, the roofer (if penetrating the roof), the HVAC contractor (especially regarding MUA integration), and sometimes even a structural engineer. I remember visiting a restaurant build-out once where the hood arrived, and suddenly everyone realized a massive plumbing stack was exactly where the duct needed to go. That was… an expensive delay. Don’t let that be you. Plan, plan, plan.
Codes, Permits, and Why You Need Pros
Nobody loves bureaucracy, but when it comes to fire safety and public health, cutting corners on codes and permits is just asking for trouble. The primary standard governing commercial kitchen ventilation in the US is NFPA 96 (Standard for Ventilation Control and Fire Protection of Commercial Cooking Operations). This document outlines detailed requirements for everything from hood construction and materials to ductwork specifications, exhaust rates, fire suppression, and maintenance. On top of NFPA 96, you have local building codes, mechanical codes (like the International Mechanical Code or IMC), and fire codes, which might have additional or more stringent requirements. It’s absolutely essential to understand and comply with *all* applicable regulations in your specific jurisdiction. This means obtaining the necessary permits *before* starting any installation work. Trying to get retroactive approval is often impossible or incredibly costly. And this brings me to a critical point: this is NOT a DIY job. Unless you are a licensed and experienced commercial kitchen ventilation specialist, do not attempt to install a hood system yourself. The risks are too high – fire hazards, code violations leading to shutdowns, voided insurance, poor performance. You need qualified professionals who understand the codes, know how to perform the calculations for airflow, can properly size and select equipment, and have the skills to install everything correctly and safely. They’ll handle the permits and ensure the final installation passes inspection. Seriously, hire certified pros. It’s an investment, not an expense.
The Main Event: Installing the System (Simplified!)
Alright, so permits are pulled, the site is prepped, equipment is ordered. What does the actual installation look like? It’s a multi-step process, usually starting with securely mounting the hood canopy. This might involve heavy-duty brackets, all-thread rods, or Unistrut channels, depending on the hood style and ceiling/wall structure. It needs to be level and positioned at the correct height above the cooking surfaces (typically specified by code and manufacturer instructions). Next comes the ductwork installation. This is arguably one of the most critical parts. For Type I systems, grease duct needs to be liquid-tight, meaning continuously welded seams and joints. No screws allowed (except sometimes at the fan connection, with specific caveats). The duct needs to maintain proper clearance from combustible materials or be appropriately wrapped with fire-rated insulation. Proper sealing at every joint is paramount to prevent grease leaks, which are fire hazards. Then the exhaust fan connection happens, usually on the roof. The fan curb must be properly flashed and sealed to prevent roof leaks. The fan itself needs to be wired correctly and securely mounted. Simultaneously, or perhaps sequentially depending on the plan, the MUA system components are installed – this could involve rooftop units, ducting to supply registers in the kitchen, and controls. Finally, all the electrical wiring for the hood lights, exhaust fan, MUA unit, and the interlock mechanism (which ensures the exhaust fan and MUA turn on when cooking appliances are potentially active) is completed by a licensed electrician. And don’t forget integrating the fire suppression system piping and nozzles within the hood and ductwork. It’s a carefully orchestrated sequence.
Makeup Air (MUA): Balancing the Equation
I mentioned MUA before, but it deserves its own spotlight because it’s so often misunderstood or neglected. Think about it: your exhaust fan is pulling a massive amount of air *out* of the kitchen. If you don’t replace that air, where does it come from? It tries to pull it from anywhere it can – under doors, through cracks, maybe even back-drafting other vents or flues (which can be dangerous, especially with gas appliances). This creates negative pressure in the kitchen. Symptoms include doors that are hard to open inwards, drafts, pilot lights blowing out, and poor capture performance by the hood itself because air currents are disrupted. The solution is a dedicated makeup air (MUA) system designed to introduce fresh outside air to replace the exhausted air, usually around 80-90% of the exhaust volume. This MUA can be untempered (just outside air, fine in mild climates) or, more commonly, tempered makeup air, meaning it’s heated in the winter and sometimes cooled in the summer for staff comfort and to prevent issues like condensation. Achieving the right air balance – ensuring the exhaust and MUA systems work in harmony – is critical for the hood to function efficiently and safely. This often requires professional testing and adjusting after installation. Skimping on MUA is a classic mistake that cripples even the best hood and exhaust fan.
Fire Suppression: Your Built-In Safety Net
For any Type I hood handling grease, an automatic fire suppression system isn’t optional; it’s required by code (NFPA 17A and NFPA 96). These systems are designed to quickly detect and extinguish grease fires, which can escalate incredibly fast. Typically, they use a wet chemical agent specifically formulated for cooking oil fires (Class K). The system consists of detection lines with fusible links or heat detectors located above the cooking appliances and in the hood plenum/duct entrance. If a fire occurs, the high temperature melts the fusible link or triggers the detector, activating the system. Pressurized tanks release the wet chemical agent through strategically placed nozzles onto the hazard areas (cooking surfaces, plenum, duct). Crucially, the system must also be interlocked to automatically shut off the fuel supply (gas or electric) to the cooking appliances underneath the hood upon activation. This prevents reignition. Installation involves careful placement of nozzles, routing of piping, and connection to the detection and actuation mechanisms. After installation, thorough system testing by a certified technician is mandatory, including testing the detection line, agent discharge (sometimes simulated), and the fuel shut-off interlock. Regular inspection and maintenance (usually semi-annually) are also required to ensure it remains operational.
The Finish Line: Checks, Balances, and Inspections
The physical installation might be done, but you’re not quite finished yet. Verification is key. First, leak testing of the grease ductwork is often required by inspectors, especially ensuring those welded seams are truly liquid-tight. This might involve a light test or even a pressure test. Then comes the critical step of testing and balancing the system. A certified Test and Balance (TAB) contractor will use specialized instruments (like manometers and anemometers) to measure the actual airflow rates – how much air the hood is exhausting and how much the MUA system is supplying. They adjust fan speeds and dampers as needed to meet the design specifications and code requirements, ensuring proper capture and containment at the hood and maintaining the correct pressure relationship in the kitchen. The results are documented in an air balancing report, which is usually required by the building inspector. The fire suppression system also needs its final operational tests witnessed and signed off. Only after all these checks are complete and satisfactory can you call for the final inspection by the local building department and/or fire marshal. Passing this inspection is the green light to legally operate your cooking equipment. It might feel like a hurdle, but it’s the confirmation that the job was done right.
Avoiding Common Pitfalls: Don’t Make These Mistakes!
Having seen a few kitchen projects go sideways, I’ve noticed some recurring themes when hood installations go wrong. Maybe sharing these will help you avoid them. A huge one is an undersized system – either the hood itself doesn’t provide adequate overhang for the cooking equipment, or the exhaust fan isn’t powerful enough for the calculated airflow needs (considering the duct length and bends). This leads to poor capture, smoke spilling into the kitchen, and grease buildup everywhere. Another classic is inadequate or improperly balanced makeup air, leading to all those negative pressure problems we discussed. Then there’s improper sealing of ductwork – using screws instead of welds on grease duct, or not sealing MUA ducts properly, leading to leaks and inefficiency. A big red flag is ignoring codes – maybe trying to use cheaper materials, incorrect clearances, or skipping the fire suppression system integration. This inevitably leads to failed inspections and costly rework. And as I stressed before, the biggest mistake is attempting a DIY installation or hiring unqualified installers to save a buck. The complexity, the codes, the safety implications – it demands professional expertise. Investing in a qualified, licensed, and insured ventilation contractor from the start is the smartest money you’ll spend on this part of your kitchen. Learn from the (expensive) mistakes of others!
Wrapping It Up: The Long View on Ventilation
So, yeah. Installing a commercial hood system is a lot more involved than just hanging some stainless steel above your stove, isn’t it? It’s a critical infrastructure project involving careful planning, understanding complex systems (exhaust, MUA, fire suppression), navigating stringent codes, and coordinating multiple trades. It requires precision, expertise, and a significant investment. Is this the most glamorous part of building your dream kitchen? Probably not. But is it one of the most fundamental for safety, compliance, and long-term operational success? Absolutely.
My challenge to you, if you’re embarking on this, is to treat your ventilation system with the respect it deserves. Don’t view it as an annoying expense to be minimized, but as a core component of a safe and efficient workspace. Engage qualified professionals early in your planning process. Ask questions, understand the ‘why’ behind their recommendations, especially concerning MUA and fire suppression. Ensure the installation is done by the book, verified through testing and balancing, and approved by inspectors. It might seem daunting, maybe even overwhelming, but getting the hood system right from day one will pay dividends in safety, staff well-being, and operational peace of mind for years to come. And trust me, dealing with a failed inspection or, worse, a kitchen fire, is a headache you absolutely want to avoid. Now, if you’ll excuse me, I think Luna deserves some attention after all this talk of ductwork.
FAQ
Q: How much does a commercial hood system installation typically cost?
A: Oh boy, that’s a ‘how long is a piece of string’ question! Costs vary wildly based on hood size and type, ductwork complexity, MUA needs (especially if tempered air is required), fire suppression system specifics, local labor rates, and permit fees. It can range from several thousand dollars for a very small, simple setup to tens or even hundreds of thousands for large, complex kitchens. Getting detailed quotes from qualified contractors based on your specific plans is essential.
Q: How long does the installation process usually take?
A: Again, it depends heavily on the project scope. A straightforward installation in new construction might take a few days to a week for the core components, plus time for electrical, roofing, testing, and inspections. Retrofitting into an existing space can take longer due to unforeseen challenges. Planning, ordering equipment (lead times can be long!), permits, and inspections add significant time to the overall timeline, often weeks or months from start to finish.
Q: Can I install a commercial hood system myself to save money?
A: I strongly advise against it unless you are a licensed professional specializing in this work. The technical knowledge required regarding codes (NFPA 96, local regulations), airflow calculations, proper materials (like welded grease duct), fire suppression integration, and electrical work is extensive. Mistakes can lead to serious fire hazards, failed inspections, voided insurance, and health risks. Hiring certified professionals is crucial for safety and compliance.
Q: What kind of maintenance does a commercial hood system require after installation?
A: Regular maintenance is critical. This includes frequent cleaning of the hood filters (often daily or weekly), professional cleaning of the entire system (hood, ducts, fan) by certified technicians at regular intervals (typically quarterly or semi-annually, depending on cooking volume and type, as required by NFPA 96) to remove grease buildup, and semi-annual inspection and servicing of the fire suppression system by a licensed provider. Exhaust fan maintenance (belt tension, motor lubrication) is also important.
You might also like
- Choosing the Right Commercial Kitchen Ventilation
- Understanding Makeup Air Requirements for Kitchens
- Commercial Hood Fire Suppression System Guide
@article{commercial-hood-system-installation-getting-it-right,
    title   = {Commercial Hood System Installation: Getting It Right},
    author  = {Chef's icon},
    year    = {2025},
    journal = {Chef's Icon},
    url     = {https://chefsicon.com/commercial-hood-systems-installation-guide/}
}