The Best Fluffy Pancakes recipe you will fall in love with. Full of tips and tricks to help you make the best pancakes.
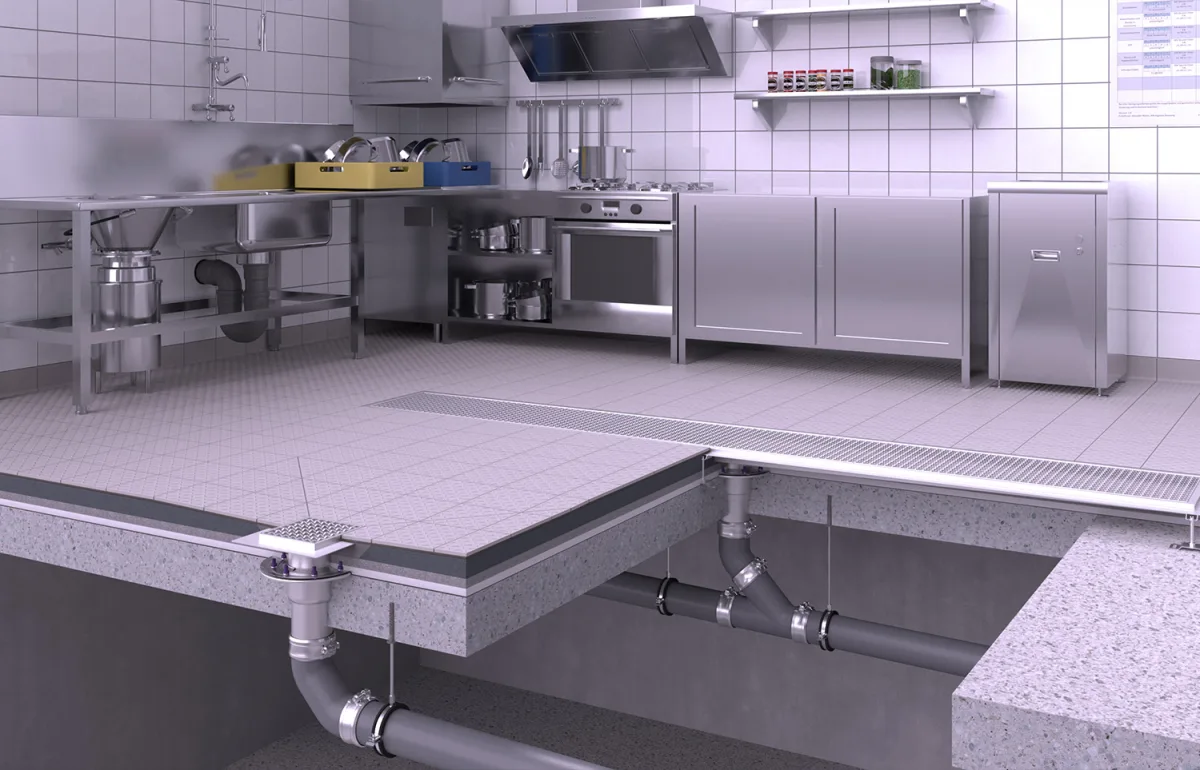
I’ll be honest, I didn’t think much about my kitchen’s energy use until the day I opened my utility bill and nearly choked on my coffee. There it was, staring back at me: a number so high it might as well have been written in neon. My first thought? *Did I accidentally leave the oven on for a month?* But no, I’d been diligent about turning things off. Or so I thought. That’s when it hit me: my kitchen was leaking money like a sieve, and I had no idea where to start plugging the holes.
Turns out, I’m not alone. Most of us assume that if our appliances are running smoothly, they’re running efficiently. But here’s the hard truth: hidden energy drains in your kitchen could be siphoning hundreds, or even thousands, of dollars from your wallet every year. And the worst part? You probably don’t even notice them. These aren’t the obvious culprits like leaving the fridge door open or running the dishwasher half-empty. No, these are the sneaky, systemic issues that lurk behind the scenes, quietly inflating your bills while you go about your daily routine.
So, what’s the solution? It’s not about drastic measures like unplugging everything or living in the dark. It’s about smart, targeted fixes that address the root causes of energy waste. In this article, I’m going to walk you through the most common (and costly) hidden energy drains in your kitchen, how to identify them, and, most importantly, how to fix them without sacrificing convenience or performance. By the end, you’ll have a clear action plan to slash your energy bills, reduce your carbon footprint, and maybe even impress your future self when you see those numbers drop.
Let’s start with the big picture. Your kitchen is a complex ecosystem of appliances, systems, and habits, all working (or not working) together. Some of these drains are technical, like outdated equipment or poor insulation. Others are behavioral, like the way you use your appliances or how you organize your space. And some are just plain overlooked, like the dust bunnies hiding in your vents or the way your fridge is positioned in the room. The good news? Once you know what to look for, these issues are surprisingly easy to fix. The bad news? If you ignore them, they’ll keep costing you, month after month, year after year.
The Silent Money Pits: Where Your Kitchen Is Bleeding Energy
1. The Refrigerator: The 24/7 Energy Hog
Your refrigerator is the workhorse of your kitchen. It’s the one appliance that never gets a break, running 24/7 to keep your food fresh. But here’s the thing: most refrigerators are energy vampires, and if yours is more than 10 years old, it’s probably guzzling power like there’s no tomorrow. I learned this the hard way when I moved into my current place and inherited an ancient fridge that looked like it belonged in a 1990s sitcom. It was clean, it worked, and it kept my beer cold, so what was the problem?
The problem, as I discovered, was that it was costing me nearly $200 a year more than a modern, energy-efficient model. And that’s just the electricity. Factor in the extra wear and tear on my HVAC system (because yes, your fridge dumps heat into your kitchen, making your AC work harder), and the numbers start to look even uglier. But even if your fridge is relatively new, it might still be wasting energy if it’s not properly maintained. For example:
- Dirty condenser coils: These are the black coils on the back or bottom of your fridge that release heat. If they’re caked with dust, your fridge has to work harder to stay cool, which means higher energy bills. I’ll admit, I’d never cleaned mine until I noticed how much warmer the back of the fridge felt compared to the front. A quick vacuum and brush session later, and I could practically hear my fridge sigh in relief.
- Faulty door seals: If your fridge door doesn’t seal properly, cold air escapes, and warm air sneaks in. This forces your fridge to run more often to maintain the right temperature. A simple way to test this? Stick a dollar bill in the door and close it. If you can pull the bill out easily, your seal needs replacing. I tried this trick and was shocked to find that my fridge door was basically a screen door for cold air.
- Overpacking or poor organization: Cramming your fridge full might seem like a good way to save space, but it actually blocks airflow and makes your fridge work harder. On the flip side, an empty fridge can also be inefficient because the cold air has nothing to cling to. The sweet spot? Fill it about 75% full, and make sure nothing is blocking the vents inside.
So, what’s the fix? If your fridge is ancient, consider upgrading to an Energy Star-certified model. The upfront cost might sting, but the long-term savings will more than make up for it. If you’re not ready to replace it, start with the basics: clean those coils, check the seals, and organize your fridge for optimal airflow. And for the love of all things holy, stop standing in front of the open fridge door while you decide what to eat. Every second counts.
2. The Phantom Load: Appliances That Never Really Turn Off
You know that little red light on your microwave that stays on even when you’re not using it? Or the clock on your oven that’s always ticking? Those might seem harmless, but they’re part of a much bigger problem: phantom loads. These are the sneaky energy drains that occur when appliances are plugged in but not in use. They’re called “phantom” because they’re invisible, you don’t see them, you don’t hear them, but they’re there, quietly sipping electricity and inflating your bill.
I first noticed this when I did a little experiment. I unplugged everything in my kitchen that wasn’t in use, coffee maker, toaster, blender, even the microwave, and checked my energy monitor the next day. The difference was shocking. My baseline energy use dropped by nearly 10%. That might not sound like much, but over a year, that’s the equivalent of leaving a 60-watt lightbulb on for three months straight. And that’s just from the appliances I *thought* were off.
Here’s the kicker: phantom loads aren’t just limited to small appliances. Your dishwasher, oven, and even your refrigerator can draw power when they’re not in use. For example:
- Microwaves: That clock and standby mode can add up to $10-$20 a year. Not a fortune, but why pay for something you’re not using?
- Coffee makers: If your coffee maker has a digital display or a warming plate, it’s drawing power 24/7. I timed mine once, it was using 5 watts just to keep the clock running. Five watts doesn’t sound like much, but multiply that by 8,760 hours in a year, and you’re looking at 43.8 kWh. At an average electricity rate of $0.13 per kWh, that’s $5.70 a year for a clock I never look at.
- TVs and entertainment systems: If your kitchen has a TV or sound system, it’s probably drawing power even when it’s “off.” Some of these devices use more power in standby mode than they do when they’re actually on.
So, how do you fight back against phantom loads? The easiest solution is to unplug appliances when you’re not using them. But let’s be real, nobody has time to plug and unplug their coffee maker every morning. That’s where smart power strips come in. These nifty devices cut power to appliances when they’re not in use, so you don’t have to think about it. You can also use timers or smart plugs to schedule when your appliances turn on and off. For example, I set my coffee maker to turn on 10 minutes before my alarm goes off, so it’s ready when I stumble into the kitchen. It’s a small change, but it adds up.
3. The Invisible Heat Thief: Poor Insulation and Air Leaks
Your kitchen is a battleground. On one side, you’ve got your fridge and freezer, working overtime to keep things cold. On the other side, you’ve got your oven, stove, and dishwasher, pumping out heat like there’s no tomorrow. And in the middle? You’ve got your walls, windows, and doors, doing their best to keep the peace. But if your kitchen isn’t properly insulated, that peace is about as stable as a house of cards in a hurricane.
Here’s the thing: air leaks and poor insulation force your HVAC system to work harder, which means higher energy bills and a less comfortable home. I learned this the hard way when I noticed that my kitchen was always either too hot or too cold, no matter what I did. Turns out, the previous owners had “sealed” the windows with caulk that had long since cracked, and the insulation in the walls was about as effective as a screen door on a submarine.
So, where do you start? First, check for air leaks. These are the sneaky gaps around windows, doors, and even electrical outlets that let hot or cold air escape. A simple way to find them is to hold a lit incense stick near potential leak spots. If the smoke wavers, you’ve found a leak. Another trick? Turn off all the lights in your kitchen at night and look for light seeping in around doors and windows. If you can see light, air is getting in (and out).
Once you’ve identified the leaks, it’s time to seal them. Here’s how:
- Weatherstripping: This is a cheap and easy way to seal gaps around doors and windows. You can find it at any hardware store, and it’s as simple as peeling off the backing and sticking it in place. I did this in my kitchen last winter, and the difference was immediate. No more cold drafts, and my heating bill dropped by about 15%.
- Caulk: Use this to seal gaps around stationary objects like window frames and baseboards. Just make sure to choose the right type of caulk for the job, some are better for indoor use, while others are designed for outdoor conditions.
- Outlet gaskets: These are little foam pads that go behind your electrical outlets and light switches to prevent air from leaking through the walls. They’re cheap, easy to install, and can make a surprising difference in your home’s energy efficiency.
But sealing leaks is only half the battle. If your walls aren’t properly insulated, you’re still losing energy. The best way to check your insulation is to hire a professional, but you can also do a quick DIY inspection. If your walls feel cold to the touch in the winter or hot in the summer, that’s a sign that your insulation isn’t doing its job. Adding insulation can be a big project, but it’s one of the most effective ways to improve your home’s energy efficiency. And if you’re not ready to tackle the walls, start with the easy stuff: add insulation to your attic, seal your ducts, and consider adding thermal curtains to your windows.
4. The Dishwasher Dilemma: Efficiency vs. Convenience
I’ll admit it: I love my dishwasher. There’s something deeply satisfying about loading it up, pressing a button, and walking away, knowing that in an hour or two, my dishes will be clean and dry. But here’s the thing: most dishwashers are energy hogs, and if you’re not using yours efficiently, you’re wasting money every time you run it.
I didn’t realize how much my dishwasher was costing me until I started paying attention to my energy bills. After a particularly expensive month, I decided to do some digging. Turns out, my dishwasher was using nearly 2 kWh per cycle, and I was running it almost every day. That’s 60 kWh a month, or about $7.80 at my local electricity rate. And that’s just the electricity, it doesn’t include the cost of heating the water or running the drying cycle.
So, how do you make your dishwasher more efficient? Here are a few tips:
- Run it full: This might seem obvious, but a lot of people run their dishwashers half-empty. Wait until it’s full to run a cycle, and you’ll use less water and energy per dish. I started keeping a bin in my sink to collect dishes throughout the day, so I could run the dishwasher only when it was full. It took a little getting used to, but now it’s second nature.
- Skip the heat dry: Most dishwashers have a heat dry setting that uses a lot of energy to dry your dishes. Instead, open the door after the wash cycle and let them air dry. It takes a little longer, but it’s free, and it works just as well. I was skeptical at first, but after a few tries, I realized that my dishes were just as dry as they were with the heat dry setting.
- Use the right detergent: Some detergents are more effective than others, and using the wrong one can force you to run extra cycles. Look for a detergent that’s designed for your dishwasher and water type. I switched to a pod-based detergent a few months ago, and I’ve noticed that my dishes come out cleaner with less residue.
- Clean the filter: Most dishwashers have a filter that catches food particles and debris. If it’s clogged, your dishwasher has to work harder to clean your dishes, which means more energy use. Check your manual to see how to clean it, and do it regularly. I clean mine every month, and it’s made a noticeable difference in how well my dishwasher performs.
If your dishwasher is more than 10 years old, it might be time to consider an upgrade. Newer models are much more energy-efficient, and some even have features like soil sensors that adjust the wash cycle based on how dirty your dishes are. If you’re in the market for a new dishwasher, look for the Energy Star label. These models use about 12% less energy and 30% less water than standard models, which can add up to big savings over time.
5. The Oven’s Dirty Little Secret: Heat Loss and Inefficiency
Your oven is one of the most energy-intensive appliances in your kitchen. It’s also one of the most inefficient. Why? Because most of the heat it produces never actually cooks your food. Instead, it escapes into your kitchen, making your AC work harder and driving up your energy bills. And if you’re using an older model, the problem is even worse.
I learned this the hard way when I decided to bake a batch of cookies on a hot summer day. By the time I was done, my kitchen felt like a sauna, and my AC was running nonstop to keep up. I checked my energy monitor, and sure enough, my oven had spiked my electricity use by nearly 30%. That’s when I realized that my oven wasn’t just cooking my cookies, it was cooking my wallet, too.
So, how do you make your oven more efficient? Here are a few tips:
- Preheat wisely: Most recipes call for preheating your oven, but a lot of people overdo it. Unless you’re baking something delicate like soufflés or pastries, you can usually get away with preheating for just 5-10 minutes. And if you’re roasting vegetables or cooking a casserole, you might not need to preheat at all. I’ve started skipping the preheat for most of my cooking, and my food turns out just as good.
- Use the right cookware: Dark, dull, or glass pans absorb heat better than shiny or light-colored pans, which means your food will cook faster and more evenly. I switched to dark nonstick pans a few months ago, and I’ve noticed that my food cooks about 10-15% faster. That might not sound like much, but over time, it adds up.
- Keep the door closed: Every time you open the oven door, you lose heat, which forces your oven to work harder to maintain the right temperature. Use the oven light and window to check on your food, and resist the urge to peek. I’ll admit, I’m guilty of this one, I love watching my food cook, but I’ve started setting a timer and only opening the door when it goes off.
- Cook multiple dishes at once: If you’re already using the oven, you might as well make the most of it. Plan your meals so that you can cook multiple dishes at the same time. For example, if you’re roasting a chicken, throw in some vegetables on the rack below. It’s a great way to save energy and time.
If you’re in the market for a new oven, consider a convection model. These ovens use a fan to circulate hot air, which means your food cooks faster and more evenly. They’re also more energy-efficient than conventional ovens, which can save you money in the long run. And if you’re really serious about saving energy, consider a toaster oven or air fryer for small meals. These appliances use a fraction of the energy of a full-sized oven, and they’re perfect for everything from reheating leftovers to cooking a quick dinner.
6. The Lighting Trap: Why Your Kitchen Lights Are Costing You More Than You Think
Lighting might not seem like a big energy drain, but in a kitchen, it can add up fast. Think about it: how many lights do you have in your kitchen? Overhead lights, under-cabinet lights, pendant lights, maybe even a chandelier. And how often are they on? If you’re like me, the answer is *a lot*. I have a habit of leaving the kitchen lights on when I’m in another room, and I’ve lost count of how many times I’ve walked into the kitchen at night and flipped on every switch in sight.
But here’s the thing: not all lights are created equal. If your kitchen is still using incandescent or halogen bulbs, you’re wasting a ton of energy. These bulbs are incredibly inefficient, they convert only about 10% of the energy they use into light, while the other 90% is wasted as heat. That’s like paying for a steak and getting a side of burnt toast.
So, what’s the solution? Switch to LED bulbs. They use up to 80% less energy than incandescent bulbs and last up to 25 times longer. I made the switch in my kitchen about a year ago, and the difference was immediate. Not only did my energy bill drop, but my kitchen also feels brighter and more inviting. And because LEDs don’t produce as much heat, my AC doesn’t have to work as hard in the summer.
But it’s not just about the type of bulbs you use. It’s also about how you use them. Here are a few tips to make your kitchen lighting more efficient:
- Use task lighting: Instead of lighting up the entire kitchen, focus on the areas where you need light the most. For example, install under-cabinet lights above your countertops to illuminate your workspace. I added a few LED strip lights under my cabinets, and now I can see what I’m doing without blinding myself with overhead lights.
- Install dimmer switches: These allow you to adjust the brightness of your lights based on your needs. For example, you can turn them up when you’re cooking and dim them when you’re eating. I installed dimmer switches in my kitchen last year, and I love being able to set the mood with just a flick of the wrist.
- Use motion sensors or timers: These are great for areas like pantries or closets, where you might forget to turn off the lights. I installed a motion sensor in my pantry, and now the lights turn on automatically when I walk in and off when I leave. It’s a small change, but it’s saved me from more than a few “oops, I left the lights on” moments.
And don’t forget about natural light. If your kitchen has windows, make the most of them. Open the curtains during the day to let in as much light as possible, and consider adding a skylight or solar tube if you need more. Not only will this reduce your energy use, but it’ll also make your kitchen feel brighter and more welcoming.
7. The Water Heater’s Hidden Role in Your Energy Bills
Your water heater is one of those appliances you don’t think about until it stops working. But here’s the thing: it’s one of the biggest energy drains in your home, and if it’s not running efficiently, it’s costing you a fortune. I learned this the hard way when my water heater decided to call it quits in the middle of winter. Not only did I have to shell out for a new one, but I also realized that my old water heater had been wasting energy for years.
So, how do you make your water heater more efficient? Here are a few tips:
- Lower the temperature: Most water heaters are set to 140°F by default, but you can usually get away with 120°F. This small change can reduce your water heating costs by up to 10%. I lowered mine last year, and I haven’t noticed a difference in my hot water supply.
- Insulate the tank: If your water heater is warm to the touch, it’s losing heat. Adding an insulation blanket can reduce heat loss by up to 45%, which means your water heater won’t have to work as hard to keep the water hot. I added one to my water heater a few months ago, and it was one of the easiest and most effective energy-saving projects I’ve done.
- Insulate the pipes: The first few feet of pipe leading from your water heater can lose a lot of heat. Insulating them can keep the water hotter as it travels to your faucets and appliances, which means you won’t have to run the water as long to get it hot. I insulated my pipes last winter, and I’ve noticed that my water heats up faster and stays hot longer.
- Drain the tank regularly: Over time, sediment can build up in your water heater, reducing its efficiency. Draining the tank once a year can help it run more efficiently and extend its lifespan. I drained mine for the first time last year, and I was shocked by how much sediment came out. It’s a messy job, but it’s worth it.
If your water heater is more than 10 years old, it might be time to consider an upgrade. Newer models are much more energy-efficient, and some even have features like heat pump technology that can reduce your water heating costs by up to 60%. If you’re in the market for a new water heater, look for the Energy Star label. These models meet strict energy efficiency guidelines, which can save you money in the long run.
And don’t forget about your dishwasher and washing machine. These appliances use a lot of hot water, so making sure they’re running efficiently can also help reduce your energy bills. For example, washing your clothes in cold water can save you up to $60 a year, and running your dishwasher only when it’s full can save you even more.
8. The Ventilation Problem: Why Your Kitchen Exhaust Fan Is a Double-Edged Sword
Your kitchen exhaust fan is a lifesaver. It whisks away smoke, steam, and cooking odors, keeping your kitchen fresh and your air clean. But here’s the catch: if it’s not running efficiently, it’s wasting energy and money. And if it’s not properly maintained, it can even make your HVAC system work harder, driving up your energy bills even more.
I learned this the hard way when I noticed that my kitchen was always humid, no matter how often I ran the exhaust fan. Turns out, the fan was clogged with grease and dust, which meant it wasn’t moving air as efficiently as it should. I cleaned it out, and the difference was immediate. Not only did my kitchen feel less humid, but my AC didn’t have to work as hard to keep the house cool.
So, how do you make sure your exhaust fan is running efficiently? Here are a few tips:
- Clean the filter regularly: Most exhaust fans have a filter that catches grease and debris. If it’s clogged, your fan has to work harder to move air, which means more energy use. Check your manual to see how to clean it, and do it regularly. I clean mine every month, and it’s made a noticeable difference in how well my fan performs.
- Check the ductwork: If your exhaust fan vents to the outside, make sure the ductwork is clean and free of obstructions. If it’s clogged, your fan won’t be able to move air efficiently, which means it’ll have to run longer to do its job. I had a professional clean my ductwork last year, and it was one of the best investments I’ve made.
- Use the fan wisely: Don’t leave your exhaust fan running longer than necessary. Turn it on when you start cooking, and turn it off when you’re done. I’ve started setting a timer for 10-15 minutes, so I don’t forget to turn it off. It’s a small change, but it’s saved me from more than a few “oops, I left the fan on all day” moments.
If your exhaust fan is more than 10 years old, it might be time to consider an upgrade. Newer models are much more energy-efficient, and some even have features like variable speed controls that allow you to adjust the fan speed based on your needs. If you’re in the market for a new exhaust fan, look for the Energy Star label. These models meet strict energy efficiency guidelines, which can save you money in the long run.
And don’t forget about your range hood. If it’s not properly sized for your stove, it won’t be able to move air efficiently, which means your exhaust fan will have to work harder. Make sure your range hood is the right size for your stove, and consider upgrading to a dual-motor model if you do a lot of high-heat cooking. These models have two motors, which means they can move air more efficiently and quietly.
9. The Small Appliances You’re Overlooking
When we think about kitchen energy drains, we usually focus on the big appliances, the fridge, the oven, the dishwasher. But what about the small appliances? The toaster, the blender, the coffee maker? These might seem insignificant, but if you’re not using them efficiently, they can add up to big energy waste over time.
Take my coffee maker, for example. I use it every morning, and I never thought twice about how much energy it was using. But then I started paying attention to my energy monitor, and I realized that my coffee maker was drawing power 24/7, even when it wasn’t in use. That’s when I decided to unplug it when I wasn’t using it, and the difference was immediate. My energy bill dropped by about $5 a month, which might not sound like much, but over a year, that’s $60 I could have spent on something else.
So, how do you make sure your small appliances aren’t wasting energy? Here are a few tips:
- Unplug them when you’re not using them: This is the easiest way to prevent phantom loads. If you’re not using an appliance, unplug it. It’s that simple. I’ve started unplugging my toaster, blender, and coffee maker when I’m not using them, and it’s made a noticeable difference in my energy bill.
- Use smart plugs or power strips: If you don’t want to unplug your appliances every time you use them, consider using smart plugs or power strips. These devices cut power to your appliances when they’re not in use, so you don’t have to think about it. I use a smart power strip for my coffee maker, and it’s been a game-changer.
- Choose energy-efficient models: If you’re in the market for a new small appliance, look for the Energy Star label. These models meet strict energy efficiency guidelines, which can save you money in the long run. I recently upgraded to an Energy Star-certified toaster, and I’ve noticed that it uses less energy than my old one.
And don’t forget about your microwave. It might seem like a small appliance, but it can use a lot of energy if you’re not using it efficiently. For example, if you’re reheating leftovers, make sure to use the right setting. Most microwaves have a reheat setting that uses less energy than the full-power setting. I’ve started using this setting for leftovers, and it’s made a noticeable difference in how much energy my microwave uses.
10. The Behavioral Fixes: How Your Habits Are Costing You
At the end of the day, the biggest energy drain in your kitchen might not be your appliances or your insulation, it might be *you*. The way you use your kitchen can have a huge impact on your energy bills, and if you’re not paying attention, you could be wasting money without even realizing it.
Take my habit of leaving the fridge door open, for example. I’ll admit, I’m guilty of this one. I’ll stand in front of the fridge, staring at the contents like they’re going to magically arrange themselves into a meal. Meanwhile, cold air is escaping, and my fridge is working overtime to keep things cool. I’ve started setting a timer for 30 seconds, and if I haven’t decided what to eat by then, I close the door and walk away. It’s a small change, but it’s made a noticeable difference in my energy bill.
So, what are some other behavioral fixes you can make? Here are a few ideas:
- Plan your meals in advance: This might seem obvious, but a lot of people don’t do it. If you plan your meals in advance, you’ll know exactly what you need from the fridge, which means you won’t have to stand in front of it with the door open while you figure it out. I’ve started meal prepping on Sundays, and it’s saved me time, money, and energy.
- Use the right burner for the job: If you’re cooking something small, like a pot of soup, use a small burner. If you’re cooking something large, like a turkey, use a large burner. Using the wrong burner can waste energy and make your food cook unevenly. I’ve started matching my pots and pans to the right burners, and it’s made a noticeable difference in how quickly my food cooks.
- Don’t preheat unless you have to: Most recipes call for preheating your oven, but a lot of the time, it’s not necessary. Unless you’re baking something delicate, like pastries or soufflés, you can usually get away with putting your food in the oven as soon as you turn it on. I’ve started skipping the preheat for most of my cooking, and my food turns out just as good.
- Use lids on your pots and pans: This might seem like a no-brainer, but a lot of people don’t do it. Using a lid on your pot or pan can reduce the amount of time it takes to cook your food, which means less energy use. I’ve started using lids on all my pots and pans, and it’s made a noticeable difference in how quickly my food cooks.
And don’t forget about your dishwasher. If you’re not using it efficiently, you could be wasting a lot of energy. For example, if you’re rinsing your dishes before you put them in the dishwasher, you’re wasting water and energy. Most modern dishwashers are designed to handle food particles, so you don’t need to rinse your dishes before you load them. I’ve stopped rinsing my dishes, and my dishwasher works just as well as it did before.
The Bottom Line: Small Changes, Big Savings
When I first started looking into my kitchen’s energy use, I’ll admit, I was overwhelmed. There were so many things to consider, appliances, insulation, habits, and more. But the more I learned, the more I realized that saving energy doesn’t have to be complicated. It’s not about making drastic changes or sacrificing convenience. It’s about making small, targeted fixes that add up to big savings over time.
So, where do you start? Here’s a quick recap of the most important steps:
- Upgrade your appliances: If your fridge, dishwasher, or oven is more than 10 years old, consider upgrading to an Energy Star-certified model. The upfront cost might sting, but the long-term savings will more than make up for it.
- Seal air leaks: Check for gaps around windows, doors, and electrical outlets, and seal them with weatherstripping, caulk, or outlet gaskets. This is one of the easiest and most effective ways to improve your home’s energy efficiency.
- Unplug phantom loads: Use smart plugs or power strips to cut power to appliances when they’re not in use. This is a simple way to prevent energy waste and save money.
- Change your habits: Small changes, like planning your meals in advance or using lids on your pots and pans, can add up to big savings over time. It’s not about perfection, it’s about progress.
At the end of the day, the goal isn’t to turn your kitchen into a model of energy efficiency overnight. It’s about making small, sustainable changes that add up to big savings over time. And who knows? Maybe one day, you’ll open your utility bill and feel that same sense of satisfaction I did when I saw my numbers drop. It’s a small victory, but it’s a victory nonetheless.
So, what’s your next move? Will you start with the fridge, the phantom loads, or something else entirely? Whatever you choose, just remember: every little bit helps. And if you ever feel overwhelmed, just take a deep breath and remind yourself that you’re not alone. We’re all in this together, one energy-saving step at a time.
FAQ
Q: How much can I really save by fixing hidden kitchen energy drains?
A: The savings can vary widely depending on your appliances, habits, and home setup, but most people see a 10-30% reduction in their energy bills after making targeted fixes. For example, upgrading to an Energy Star-certified refrigerator can save you $200 or more per year, while sealing air leaks can reduce your heating and cooling costs by up to 20%. Over time, these savings add up to thousands of dollars.
Q: What’s the easiest way to start saving energy in my kitchen?
A: Start with the low-hanging fruit. Unplug phantom loads (like your coffee maker or toaster when they’re not in use), clean your fridge’s condenser coils, and seal air leaks around windows and doors. These are simple, inexpensive fixes that can make a big difference in your energy bills. Once you’ve tackled those, you can move on to bigger projects like upgrading your appliances or improving your insulation.
Q: Are smart appliances worth the investment?
A: It depends. Smart appliances can be more energy-efficient than traditional models, but they’re also more expensive. If you’re in the market for a new appliance, it’s worth considering a smart model, especially if it has features like energy monitoring or adaptive cooking. But if your current appliances are running efficiently, you might not see enough savings to justify the cost. Do your research, compare models, and decide what’s right for your budget and needs.
Q: How often should I maintain my kitchen appliances to keep them running efficiently?
A: It depends on the appliance, but here’s a general guideline:
– Refrigerator: Clean the condenser coils every 6 months, check the door seals annually, and defrost the freezer as needed.
– Dishwasher: Clean the filter monthly, check the spray arms for clogs, and run a cleaning cycle every few months.
– Oven: Clean the interior regularly, check the door seal for gaps, and calibrate the temperature if your food isn’t cooking evenly.
– Exhaust fan: Clean the filter monthly and check the ductwork for obstructions annually.
– Water heater: Drain the tank annually, check the anode rod every few years, and insulate the tank and pipes if they’re warm to the touch.
@article{how-hidden-kitchen-energy-drains-are-costing-you-thousands-and-what-to-do-about-it,
    title   = {How Hidden Kitchen Energy Drains Are Costing You Thousands (And What to Do About It)},
    author  = {Chef's icon},
    year    = {2026},
    journal = {Chef's Icon},
    url     = {https://chefsicon.com/how-hidden-kitchen-energy-drains-are-costing-you-thousands/}
}