
The Best Fluffy Pancakes recipe you will fall in love with. Full of tips and tricks to help you make the best pancakes.
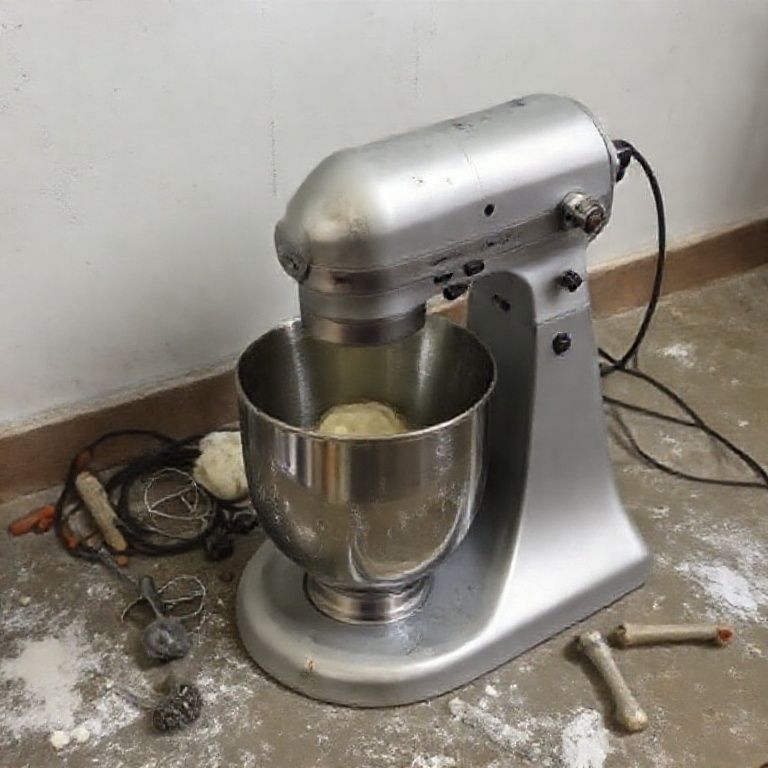
Table of Contents
- 1 Common Restaurant Equipment Setup Goofs & Fixes
- 1.1 Electrical Nightmares: Power Surges, Wrong Voltage, and Tripped Breakers
- 1.2 Plumbing Problems: Leaks, Low Water Pressure, and Drainage Issues
- 1.3 Ventilation Vexations: Poor Airflow, Grease Buildup, and Hood Headaches
- 1.4 Refrigeration Ruminations: Temperature Troubles, Icy Issues, and Door Dilemmas
- 1.5 Oven Oddities: Uneven Heating, Gas Leaks, and Pilot Problems
- 1.6 Dishwasher Disasters: Cloudy Glasses, Leaks, and Drainage Woes
- 1.7 Mixer Mishaps: Speed Issues, Attachment Agitations, and Motor Mayhem
- 1.8 Fryer Frustrations: Temperature Fluctuations, Burnt Oil, and Safety Snafus
- 1.9 Ice Machine Irritations: Slow Production, Small Cubes, and Water Leaks
- 1.10 General Setup Goofs: Ignoring the Manual, Skipping Inspection, and Forgetting Training
- 2 Conclusion: Be the Kitchen Equipment Whisperer
- 3 FAQ
So, you’re staring at a brand-new (or maybe new-to-you) piece of restaurant equipment, and it’s… not quite working as expected. Or maybe it’s been acting up, and you are not sure. It happens. I’ve been there, believe me. I remember this one time, back when I first moved to Nashville, I was helping a friend set up a small bakery. We spent hours wrestling with a commercial mixer that just wouldn’t cooperate. Turns out, we’d overlooked a tiny, crucial step in the setup. Classic, right? This article is all about avoiding those face-palm moments. We’re going to dive into the most common restaurant equipment setup errors and, more importantly, how to fix them. You’ll gain the confidence to troubleshoot like a pro and keep your kitchen running smoothly, saving time and money, a big win, specially with the cost of everything these days.
This isn’t just about following manuals (though, please, *do* read the manuals!). It’s about understanding the ‘why’ behind the ‘how.’ Because when you understand *why* something works a certain way, you’re much better equipped to fix it when it doesn’t. We’ll cover everything from electrical hiccups to plumbing puzzles, and even some of those weird, “I have no idea what’s going on” situations. My goal is that by the end, you feel empowered to tackle any equipment setup challenge that comes your way.
And hey, even if you’re not the one doing the initial setup, knowing this stuff is invaluable. Because let’s be real, equipment doesn’t always break down at convenient times. Being able to quickly diagnose and potentially fix a problem yourself can be the difference between a minor delay and a full-blown kitchen crisis. Plus, you’ll save money on service calls. Let’s face it, those can add up, especially here in Nashville where everything seems to be getting pricier by the minute!
Common Restaurant Equipment Setup Goofs & Fixes
Electrical Nightmares: Power Surges, Wrong Voltage, and Tripped Breakers
One of the biggest culprits behind equipment setup problems? Electricity. Or, more accurately, *problems* with electricity. It’s easy to assume that you just plug something in and it works, but commercial kitchen equipment often has very specific power requirements. First, always check the voltage. Using the wrong voltage can fry the equipment’s internal components, leading to costly repairs or even replacements. A 240V appliance plugged into a 120V outlet won’t work, and vice versa – a 120V appliance plugged into a 240V outlet can be a fire hazard. This is not something to mess around with.
Then there’s the issue of power surges. These sudden spikes in voltage can damage sensitive electronics. It is advisable to use surge protectors designed for commercial use, especially for expensive equipment like ovens and refrigerators. They’re a relatively small investment that can save you a lot of headaches down the line. Make sure they are rated for the amperage of your equipment. And, of course, we’ve all experienced tripped breakers. This usually happens when too many appliances are drawing power from the same circuit. Learn where your breaker box is, and how to identify which breaker corresponds to which outlet. Often, simply resetting the breaker will solve the problem. But if it keeps tripping, you might need to redistribute your equipment or consult an electrician to upgrade your electrical system.
Another common electrical blunder? Not properly grounding equipment. Grounding provides a safe path for stray electrical current, protecting you from shocks and preventing damage to the equipment. Most commercial appliances have a three-prong plug, with the third prong being the ground. Never remove this prong or use an adapter that bypasses the ground. If your outlet doesn’t have a ground, call an electrician to install one. It is vital for safety.
Finally, inspect all power cords and connections. Look for any signs of damage, such as fraying, cuts, or loose wires. A damaged cord can be a serious fire hazard. If you find any damage, replace the cord immediately. Don’t try to repair it with electrical tape – that’s a recipe for disaster. It’s always best to err on the side of caution when it comes to electricity.
Plumbing Problems: Leaks, Low Water Pressure, and Drainage Issues
Water, water everywhere… but not where it’s supposed to be! Plumbing problems are another common source of frustration in a commercial kitchen. Leaks are probably the most obvious issue. They can be caused by loose connections, damaged pipes, or faulty seals. The first step is to identify the source of the leak, which can sometimes be tricky. Tighten any loose connections and check the condition of washers and O-rings. If you find a damaged pipe, you’ll likely need to replace it. For minor leaks, you might be able to use a sealant, but this is usually a temporary fix. For anything major, it’s best to call a plumber.
Low water pressure can also be a major headache, especially for equipment like dishwashers and ice machines that rely on a consistent water supply. Low pressure can be caused by a variety of factors, including clogged pipes, a faulty pressure regulator, or even problems with the municipal water supply. Start by checking the water pressure at other fixtures in your kitchen. If the pressure is low everywhere, it’s likely a problem with the main supply. If it’s only low at one fixture, check for clogs in the pipes or the fixture itself. You might also need to adjust or replace the pressure regulator. A plumber can help with diagnosis.
Drainage issues are another common plumbing problem. Slow drains or standing water can be caused by clogs in the drainpipe, a blocked grease trap, or a problem with the venting system. Try using a plunger or a drain snake to clear minor clogs. For more serious blockages, you might need to use a chemical drain cleaner, but be careful – these can be harsh and can damage your pipes. If you have a grease trap (and you should!), make sure it’s being cleaned regularly. A full grease trap can cause major drainage problems. If you suspect a problem with the venting system, which allows air to flow through the drainpipes, call a plumber. This is a more complex issue that requires professional expertise.
When installing any equipment that requires water, make sure to use the correct fittings and connectors. Don’t mix and match different types of pipes or fittings, as this can lead to leaks. Use Teflon tape or pipe dope on threaded connections to ensure a watertight seal. And always turn off the water supply before working on any plumbing. A little bit of preparation can prevent a big mess.
Ventilation Vexations: Poor Airflow, Grease Buildup, and Hood Headaches
A properly functioning ventilation system is crucial for a safe and comfortable kitchen environment. It removes smoke, steam, grease, and odors, keeping the air clean and preventing fires. One of the most common ventilation problems is poor airflow. This can be caused by a dirty or clogged filter, a blocked exhaust duct, or a fan that’s not working properly. Start by checking the filters. They should be cleaned or replaced regularly, depending on how often you use the equipment. If the filters are clean, check the exhaust duct for any obstructions. You might need to use a brush or a vacuum to remove any buildup of grease or debris. If the fan isn’t working, check the power supply and the motor. You might need to replace the fan or the motor.
Grease buildup is a major fire hazard and a common cause of ventilation problems. Grease can accumulate in the hood, ductwork, and filters, restricting airflow and increasing the risk of fire. Regular cleaning is essential to prevent grease buildup. Use a degreaser specifically designed for commercial kitchens. Clean the hood, filters, and any accessible parts of the ductwork. For a thorough cleaning of the entire ductwork system, you’ll likely need to hire a professional hood cleaning service. They have specialized equipment and expertise to remove grease from hard-to-reach areas.
Hood headaches can also be caused by improper installation. The hood should be the correct size and type for the equipment it’s serving. It should be installed at the correct height and with the proper clearances. If the hood is too small or installed incorrectly, it won’t be able to effectively capture smoke and grease. Consult the manufacturer’s instructions for specific installation guidelines. If you’re unsure, it’s always best to hire a professional to install the hood.
Finally, make sure your ventilation system has a makeup air system. This system replaces the air that’s being exhausted by the hood, preventing negative pressure in the kitchen. Negative pressure can cause problems with draft, making it difficult to open doors and potentially drawing in carbon monoxide from gas appliances. A properly functioning makeup air system ensures a balanced airflow and a safe kitchen environment.
Refrigeration Ruminations: Temperature Troubles, Icy Issues, and Door Dilemmas
Keeping your cool is essential in a commercial kitchen, and that means your refrigeration equipment needs to be working perfectly. One of the most common refrigeration problems is temperature troubles. If your refrigerator or freezer isn’t maintaining the correct temperature, it could be due to a variety of factors, including a faulty thermostat, a dirty condenser coil, a blocked evaporator fan, or a refrigerant leak. Start by checking the thermostat. Make sure it’s set to the correct temperature and that it’s functioning properly. You can use a thermometer to check the actual temperature inside the refrigerator or freezer.
If the thermostat seems to be working, check the condenser coil. This coil is usually located on the back or bottom of the refrigerator and it releases heat. If it’s covered in dust and dirt, it won’t be able to release heat efficiently, causing the refrigerator to work harder and potentially overheat. Clean the condenser coil regularly with a brush or a vacuum. Next, check the evaporator fan. This fan circulates air inside the refrigerator or freezer. If it’s blocked or not working, the cold air won’t circulate properly, leading to uneven temperatures. Make sure the fan is clean and that it’s spinning freely.
Icy issues, such as excessive frost buildup in the freezer, can also be a problem. This can be caused by a faulty door seal, a blocked defrost drain, or a problem with the defrost system. Check the door seal for any gaps or damage. A damaged seal will allow warm, moist air to enter the freezer, leading to frost buildup. If the defrost drain is blocked, the water from the defrost cycle won’t be able to drain properly, causing it to freeze. You can try to clear the drain with a wire or a turkey baster filled with warm water. If you suspect a problem with the defrost system, which includes a timer, a heater, and a thermostat, you’ll likely need to call a technician.
Door dilemmas, such as doors that won’t close properly or doors that are constantly being left open, can also lead to temperature problems. Make sure the door hinges are properly aligned and that the door closes tightly. Train your staff to always close the refrigerator and freezer doors promptly. You might even consider installing door alarms to alert you if a door is left open for too long. A little bit of attention to detail can make a big difference in maintaining the correct temperature in your refrigeration equipment.
Oven Oddities: Uneven Heating, Gas Leaks, and Pilot Problems
Ovens are the workhorses of many kitchens, and they need to be reliable. One of the most frustrating oven problems is uneven heating. This can be caused by a faulty thermostat, a damaged heating element, or a problem with the oven’s calibration. Start by checking the thermostat. Use an oven thermometer to check the actual temperature inside the oven and compare it to the set temperature. If there’s a significant difference, you might need to recalibrate the oven or replace the thermostat. Refer to your oven’s manual for instructions on how to calibrate it.
If the thermostat seems to be working, check the heating elements. In an electric oven, the heating elements should glow red when they’re on. If one of the elements isn’t glowing, it’s likely damaged and needs to be replaced. In a gas oven, check the burner for any signs of blockage or damage. A clogged burner can cause uneven heating. Clean the burner with a brush or a wire. If you suspect a gas leak, immediately turn off the gas supply to the oven and call a qualified technician. Gas leaks are extremely dangerous and should never be ignored. Symptoms of a gas leak include a strong smell of gas, a hissing sound near the gas line, or a pilot light that won’t stay lit.
Pilot problems are common in gas ovens. If the pilot light won’t stay lit, it could be due to a dirty or clogged pilot orifice, a faulty thermocouple, or a problem with the gas supply. Try cleaning the pilot orifice with a small wire or a needle. If that doesn’t work, the thermocouple, which is a safety device that shuts off the gas supply if the pilot light goes out, might be faulty and need to be replaced. If you’re not comfortable working with gas appliances, it’s always best to call a qualified technician.
Another common oven issue is poor insulation. If the oven door doesn’t seal properly or if the insulation around the oven is damaged, heat will escape, causing the oven to work harder and potentially leading to uneven heating. Check the door seal for any gaps or damage. Replace the seal if necessary. If the insulation is damaged, you might need to replace it. Proper insulation is essential for efficient oven operation.
Dishwasher Disasters: Cloudy Glasses, Leaks, and Drainage Woes
A properly functioning dishwasher is essential for a smooth-running kitchen, ensuring clean and sanitary dishes. One of the most common dishwasher complaints is cloudy glasses. This can be caused by hard water, using too much or too little detergent, or improper loading. Hard water contains minerals that can leave a film on glassware. If you have hard water, you might need to use a water softener or a rinse aid specifically designed for hard water. Experiment with different amounts of detergent to find the right balance for your water hardness and the level of soil on your dishes. Improper loading can also contribute to cloudy glasses. Make sure dishes are not blocking the spray arms and that they are properly spaced to allow for adequate water circulation.
Leaks are another common dishwasher problem. They can be caused by a faulty door seal, a loose hose connection, or a damaged pump. Check the door seal for any gaps or damage. Replace the seal if necessary. Check all hose connections and tighten any that are loose. If you suspect a problem with the pump, you’ll likely need to call a technician. Leaks can cause water damage and create a safety hazard.
Drainage woes, such as slow draining or standing water in the dishwasher, can be caused by a clogged drain filter, a blocked drain hose, or a problem with the drain pump. Start by checking the drain filter, which is usually located at the bottom of the dishwasher. Remove the filter and clean it thoroughly. Check the drain hose for any kinks or blockages. You can try to clear a blockage with a wire or a plumbing snake. If you suspect a problem with the drain pump, you’ll likely need to call a technician.
Another important aspect is using the correct water temperature. Most commercial dishwashers require hot water (at least 140-160°F) to properly sanitize dishes. Check the water temperature at the dishwasher and adjust your water heater if necessary. Also, make sure the dishwasher is properly leveled. An unleveled dishwasher can cause leaks and drainage problems.
Mixer Mishaps: Speed Issues, Attachment Agitations, and Motor Mayhem
From whipping cream to kneading dough, mixers are essential for many kitchen tasks. One of the most common mixer problems is speed issues. If the mixer isn’t running at the correct speed, it could be due to a faulty speed control switch, a worn-out motor, or a problem with the transmission. Start by checking the speed control switch. Make sure it’s set to the desired speed and that it’s functioning properly. If the switch seems to be working, the problem might be with the motor or the transmission. These are more complex repairs that usually require a technician.
Attachment agitations, such as attachments that won’t stay on or attachments that wobble, can also be a problem. This can be caused by a worn-out attachment hub, a damaged attachment, or improper installation. Make sure the attachment is properly installed and securely locked in place. Check the attachment hub for any signs of wear or damage. Replace the hub if necessary. Inspect the attachment for any damage, such as cracks or bends. Replace the attachment if necessary.
Motor mayhem, such as a motor that’s overheating or making unusual noises, can be a sign of a serious problem. A motor that’s overheating could be due to overuse, a lack of ventilation, or a worn-out motor. Give the mixer a break if it’s been running for a long time. Make sure the mixer has adequate ventilation. If the motor continues to overheat or if it’s making unusual noises, such as grinding or squealing, it’s likely worn out and needs to be replaced. This is usually a job for a technician.
Regular maintenance is key to preventing mixer problems. Lubricate the moving parts according to the manufacturer’s instructions. Clean the mixer thoroughly after each use. Inspect the attachments and the attachment hub for any signs of wear or damage. And don’t overload the mixer. Overloading can strain the motor and lead to premature failure. A little bit of preventive maintenance can go a long way in extending the life of your mixer.
Fryer Frustrations: Temperature Fluctuations, Burnt Oil, and Safety Snafus
Crispy, golden-brown fried food is a customer favorite, but a malfunctioning fryer can quickly turn that dream into a nightmare. One of the most common fryer problems is temperature fluctuations. If the fryer isn’t maintaining the correct temperature, it could be due to a faulty thermostat, a damaged heating element, or a problem with the oil level. Start by checking the thermostat. Use a fryer thermometer to check the actual temperature of the oil and compare it to the set temperature. If there’s a significant difference, you might need to recalibrate the fryer or replace the thermostat.
If the thermostat seems to be working, check the heating elements. The heating elements should glow red when they’re on. If one of the elements isn’t glowing, it’s likely damaged and needs to be replaced. Also, check the oil level. If the oil level is too low, the fryer won’t be able to maintain the correct temperature. Add more oil if necessary, but be careful not to overfill the fryer. Burnt oil is another common problem. This can be caused by overheating the oil, using old oil, or frying food at too high a temperature. Burnt oil will give your food a bad taste and can be a fire hazard. Change the oil regularly, according to the manufacturer’s instructions. Use a fryer thermometer to monitor the oil temperature and make sure it doesn’t exceed the recommended temperature.
Safety snafus are a major concern with fryers. Fryers operate at high temperatures and involve hot oil, which can cause serious burns. Always use caution when operating a fryer. Never leave a fryer unattended. Use the correct type of oil and don’t overfill the fryer. Keep a fire extinguisher nearby and make sure it’s rated for grease fires. Train your staff on proper fryer safety procedures.
Regular cleaning and maintenance are essential for preventing fryer problems. Clean the fryer thoroughly after each use, removing any food debris and burnt oil. Filter the oil regularly to remove impurities. Inspect the heating elements and the thermostat for any signs of damage. And have the fryer professionally serviced on a regular basis. A little bit of preventive maintenance can save you a lot of trouble and expense in the long run.
Ice Machine Irritations: Slow Production, Small Cubes, and Water Leaks
Ice is essential for many beverages and food preparations, and a malfunctioning ice machine can be a major inconvenience. One of the most common ice machine problems is slow production. If the ice machine isn’t producing enough ice, it could be due to a variety of factors, including a dirty condenser coil, a low water supply, a clogged water filter, or a problem with the refrigeration system. Start by checking the condenser coil. This coil releases heat and if it’s covered in dust and dirt, it won’t be able to release heat efficiently, causing the ice machine to work harder and produce less ice. Clean the condenser coil regularly with a brush or a vacuum.
Next, check the water supply. Make sure the water line is turned on and that there’s adequate water pressure. Check the water filter. A clogged water filter can restrict water flow to the ice machine, reducing ice production. Replace the water filter regularly, according to the manufacturer’s instructions. If you suspect a problem with the refrigeration system, you’ll likely need to call a technician. This is a more complex repair that requires specialized knowledge and tools.
Small cubes or misshapen ice can also be a problem. This can be caused by low water pressure, a clogged water filter, or a problem with the water distribution system. Check the water pressure and the water filter, as described above. If those are okay, the problem might be with the water distribution system, which includes the water inlet valve, the water distributor, and the evaporator plate. You might need to clean or replace these components. Refer to your ice machine’s manual for specific instructions.
Water leaks are another common ice machine problem. They can be caused by a loose hose connection, a cracked water line, or a problem with the drain system. Check all hose connections and tighten any that are loose. Inspect the water lines for any cracks or damage. Replace any damaged lines. Check the drain line for any clogs or blockages. You can try to clear a blockage with a wire or a plumbing snake. Regular cleaning and maintenance are essential for preventing ice machine problems. Clean the ice machine thoroughly on a regular basis, removing any scale buildup or mold. Sanitize the ice machine according to the manufacturer’s instructions. Inspect the water lines, the water filter, and the drain line for any signs of damage or wear. And have the ice machine professionally serviced on a regular basis.
General Setup Goofs: Ignoring the Manual, Skipping Inspection, and Forgetting Training
Sometimes, the biggest mistakes are the simplest ones. One of the most common setup errors is ignoring the manual. Every piece of commercial kitchen equipment comes with a manual, and it’s there for a reason. The manual contains important information about installation, operation, and maintenance. Take the time to read the manual thoroughly before you even start setting up the equipment. It might seem tedious, but it can save you a lot of time and frustration in the long run.
Another common mistake is skipping inspection. Before you start using any new equipment, take a close look at it. Check for any signs of damage, such as dents, scratches, or loose parts. Make sure all the components are present and accounted for. If you find any damage, report it to the manufacturer or the supplier immediately. Don’t try to use damaged equipment, as it could be unsafe or it could malfunction.
Forgetting training is another big mistake. Just because you know how to operate a piece of equipment doesn’t mean everyone else does. Make sure all your staff members are properly trained on how to use the equipment safely and efficiently. Provide hands-on training and make sure everyone understands the operating procedures and the safety precautions. Refresher training is also a good idea, especially for equipment that’s used infrequently.
Don’t rush the setup process. Take your time and do it right the first time. A little bit of extra effort upfront can prevent a lot of problems down the line. And remember, if you’re ever unsure about something, don’t hesitate to ask for help. Consult the manual, contact the manufacturer, or call a qualified technician. It’s always better to be safe than sorry.
Conclusion: Be the Kitchen Equipment Whisperer
So, there you have it. We’ve covered a lot of ground, from electrical gremlins to plumbing puzzles. The main takeaway? Don’t panic! Most equipment setup errors are fixable, especially if you approach them with a bit of knowledge and a lot of patience. Remember that understanding the ‘why’ behind the ‘how’ is key. Read the manuals, do your inspections, and don’t be afraid to ask for help. Think of it as a challenge, a puzzle to solve. And who knows, maybe you’ll even discover a hidden talent for equipment troubleshooting! I’m half-tempted to start a side hustle fixing appliances around Nashville… but Luna might get jealous of the time away from home.
Ultimately, becoming a bit of a “kitchen equipment whisperer” is about more than just saving money on repairs (though that’s certainly a perk!). It’s about taking ownership of your kitchen, understanding how things work, and being able to keep things running smoothly. It’s about empowering yourself and your team to handle whatever challenges come your way. And that, my friends, is a recipe for success.
FAQ
Q: What’s the first thing I should do if a new piece of equipment isn’t working?
A: First, don’t panic! Take a deep breath and check the obvious things: Is it plugged in? Is the power switch on? Is the breaker tripped? If those are all okay, consult the manual. The manual often contains troubleshooting tips for common problems.
Q: I’m not comfortable working with electricity. What should I do if I suspect an electrical problem?
A: If you’re not comfortable working with electricity, don’t! Electricity can be dangerous. Call a qualified electrician to diagnose and fix the problem. It’s always better to be safe than sorry.
Q: How often should I clean my commercial kitchen equipment?
A: The frequency of cleaning depends on the type of equipment and how often it’s used. Some equipment, like fryers and griddles, should be cleaned daily. Other equipment, like ovens and refrigerators, might only need to be cleaned weekly or monthly. Consult the manufacturer’s instructions for specific cleaning recommendations.
Q: Where can I find replacement parts for my equipment?
A: You can usually find replacement parts from the equipment manufacturer or from a restaurant supply store. You can also find parts online, but be sure to buy from a reputable supplier to ensure you’re getting genuine parts.
You might also like
- Commercial Refrigeration Troubleshooting Tips
- Restaurant Oven Maintenance Guide
- Prevent Kitchen Equipment Breakdowns
@article{fix-restaurant-equipment-setup-fails-a-cooks-guide,
    title   = {Fix Restaurant Equipment Setup Fails: A Cook’s Guide},
    author  = {Chef's icon},
    year    = {2025},
    journal = {Chef's Icon},
    url     = {https://chefsicon.com/how-to-fix-common-restaurant-equipment-setup-errors/}
}