The Best Fluffy Pancakes recipe you will fall in love with. Full of tips and tricks to help you make the best pancakes.
Maximizing Storage Solutions for Small Commercial Kitchens: Where Every Inch Counts
Let me tell you about the first time I walked into a tiny commercial kitchen in East Nashville. It was a pop-up concept inside a repurposed shipping container, yes, you read that right. The chef, a friend of mine, had this wild idea to serve gourmet street food, but the space was so cramped that the prep table doubled as a storage shelf. I remember thinking, How on earth are they going to make this work? Fast forward six months, and that little kitchen was turning out some of the most creative dishes in the city. The secret? They’d cracked the code on maximizing storage solutions for small commercial kitchens.
If you’re running a small commercial kitchen, you know the struggle. Every square foot matters, and every misplaced pot or forgotten ingredient can throw off your entire workflow. It’s not just about fitting everything in; it’s about creating a system that keeps your kitchen running smoothly, safely, and efficiently. Over the years, I’ve seen kitchens of all shapes and sizes, and I’ve learned that the best ones don’t just adapt to their space, they optimize it. In this guide, I’m going to walk you through the strategies, tools, and mindset shifts you need to turn your small kitchen into a powerhouse of efficiency. Whether you’re outfitting a food truck, a café, or a tiny restaurant, this is for you.
By the end of this article, you’ll have a clear roadmap for:
- Assessing your kitchen’s unique storage needs and constraints.
- Choosing the right storage solutions that balance cost, durability, and space.
- Organizing your kitchen so that everything has a place, and stays there.
- Leveraging vertical space, multi-functional furniture, and smart tech to maximize every inch.
- Avoiding common pitfalls that can turn a well-intentioned storage plan into a cluttered mess.
Sound like a lot? It is. But here’s the thing: you don’t have to do it all at once. Even small changes can make a big difference. So let’s dive in, shall we?
The Reality of Small Commercial Kitchens: Why Storage Is Everything
Why Small Kitchens Feel Like a Puzzle
Small commercial kitchens are like those 1,000-piece jigsaw puzzles where half the pieces look identical. You know there’s a solution, but figuring out how everything fits together can feel overwhelming. Unlike home kitchens, where you might have the luxury of extra cabinets or a pantry, commercial spaces are all about functionality. There’s no room for “maybe later” or “I’ll deal with it tomorrow.” Every item, from the smallest utensil to the largest appliance, needs a designated spot. And if it doesn’t? Well, you’re looking at a recipe for chaos.
I’ve seen kitchens where the walk-in fridge is so packed that staff have to play Tetris just to find the butter. I’ve seen prep stations buried under stacks of cutting boards and mixing bowls. And I’ve seen the frustration on chefs’ faces when they can’t find what they need in the middle of a dinner rush. It’s not just annoying, it’s costly. Wasted time, wasted ingredients, and wasted energy add up quickly. That’s why storage isn’t just about space; it’s about workflow. A well-organized kitchen keeps your team moving efficiently, reduces stress, and even improves food safety.
But here’s the catch: there’s no one-size-fits-all solution. What works for a food truck won’t necessarily work for a café, and what works for a café might be overkill for a catering operation. So before you start buying shelves or rearranging your space, you need to take a step back and ask yourself: What are my biggest storage challenges? Is it lack of shelf space? Poor organization? Or maybe it’s the fact that your equipment is too bulky for the space? Let’s break it down.
Common Storage Challenges in Small Kitchens
If you’re nodding along as you read this, you’re not alone. Small commercial kitchens face a handful of recurring storage issues, and most of them boil down to three things: space, organization, and accessibility. Here’s what I hear most often:
- Limited floor space: This is the big one. When your kitchen is tiny, every square foot counts. You can’t just throw in an extra shelf or a bigger fridge without sacrificing something else. It’s a constant trade-off.
- Poor vertical utilization: I can’t tell you how many kitchens I’ve walked into where the walls are bare, and the ceiling is just… empty. Vertical space is the low-hanging fruit of small kitchen storage, but so many people overlook it.
- Cluttered prep areas: Prep stations are where the magic happens, but they’re also where clutter tends to accumulate. Cutting boards, knives, mixing bowls, and ingredients can quickly take over if you’re not careful.
- Inefficient refrigeration: Walk-in fridges and reach-in coolers are essential, but they’re also space hogs. If you’re not organizing them properly, you’re wasting valuable real estate.
- Lack of designated zones: In a small kitchen, it’s easy for everything to blend together. But when your prep area is also your storage area, things get messy fast.
- Equipment that doesn’t multitask: Some kitchens are filled with single-purpose tools that take up space but don’t earn their keep. If you’re not using something regularly, it’s probably in the way.
So, where do you start? The first step is to audit your space. Grab a notebook (or your phone) and walk through your kitchen. Take notes on what’s working and what’s not. Are there areas that always seem cluttered? Are there spots that feel underutilized? Are there tools or ingredients you use daily that are hard to reach? This isn’t about judging your kitchen, it’s about understanding it. Because once you know what you’re dealing with, you can start making smarter decisions.
Assessing Your Kitchen’s Storage Needs: Where to Begin
The Kitchen Audit: What to Look For
Alright, let’s talk about the kitchen audit. I know, I know, it sounds tedious. But trust me, this is the foundation of everything else we’re going to do. Without a clear picture of your current setup, you’re just guessing. And guessing leads to wasted money, wasted space, and wasted time. So let’s make this as painless as possible.
First, grab a measuring tape. You’re going to need it. Start by measuring the dimensions of your kitchen, including the height of your ceilings. This might seem obvious, but you’d be surprised how many people skip this step. Next, take inventory of your equipment. Not just the big stuff like ovens and refrigerators, but also the smaller items, pots, pans, utensils, storage containers, and even ingredients. Write it all down. If you’re feeling ambitious, take photos of each area. Sometimes seeing your kitchen from a different angle can reveal opportunities you’ve missed.
Now, let’s talk about workflow. How does your team move through the kitchen? Are there bottlenecks where people are constantly bumping into each other? Are there areas that get congested during peak hours? For example, if your prep station is right next to the fryer, you might be creating a traffic jam. Or if your walk-in fridge is at the back of the kitchen, your staff might be wasting time walking back and forth. These are the kinds of inefficiencies that add up over time.
Here’s a pro tip: track your kitchen’s activity for a week. Note which areas are used the most, which tools are in high demand, and which ingredients are accessed frequently. This will help you prioritize your storage solutions. For example, if you’re constantly reaching for the same spices, they should be within arm’s reach of your prep station. If you’re always grabbing the same pots and pans, they should be stored near the stove. It’s all about reducing friction.
Identifying Your Storage Priorities
Once you’ve audited your kitchen, it’s time to figure out what your storage priorities are. This is where things get a little tricky because it’s easy to get overwhelmed. You might look at your notes and think, Everything needs to change! But resist the urge to overhaul everything at once. Instead, focus on the low-hanging fruit-the changes that will have the biggest impact with the least effort.
Start by asking yourself these questions:
- What’s taking up the most space? Is it bulky equipment, excess inventory, or something else? For example, if you have a giant mixer that you only use once a week, maybe it’s time to downsize or find a better storage solution.
- What’s causing the most frustration? Is it the cluttered prep station? The overstuffed fridge? The lack of counter space? These are the pain points that will give you the biggest bang for your buck.
- What do you use daily, and what can be stored elsewhere? This is a big one. In a small kitchen, you need to be ruthless about what stays and what goes. If you’re not using something regularly, it’s probably taking up valuable real estate.
- What’s your budget? Storage solutions can range from cheap (like DIY shelving) to expensive (like custom-built storage systems). Knowing your budget upfront will help you narrow down your options.
Let’s say you’ve identified that your prep station is the biggest problem. It’s always cluttered, and your staff is constantly moving things around to find what they need. In this case, your priority might be modular storage solutions that can be customized to fit your workflow. Or maybe your walk-in fridge is the issue. If that’s the case, you might need to invest in better shelving or organization systems to maximize the space you have.
Here’s the thing: your priorities will evolve over time. What works for you now might not work in six months or a year. That’s why it’s important to revisit your storage plan regularly. Think of it like a living document, something you can tweak and adjust as your needs change.
Choosing the Right Storage Solutions: What Works and What Doesn’t
Shelving: The Backbone of Small Kitchen Storage
If there’s one storage solution that every small commercial kitchen needs, it’s shelving. But not just any shelving-smart shelving. The right shelves can transform your kitchen from a cluttered mess into a well-oiled machine. But the wrong shelves? Well, they can make things worse. So let’s talk about what to look for.
First, consider the material. Shelving comes in a variety of materials, each with its own pros and cons:
- Stainless steel: This is the gold standard for commercial kitchens. It’s durable, easy to clean, and resistant to corrosion. The downside? It’s expensive. But if you can afford it, it’s worth the investment.
- Plastic: Plastic shelving is lightweight, affordable, and easy to install. It’s also resistant to moisture, which makes it a good choice for walk-in fridges. The downside? It’s not as durable as stainless steel, and it can warp over time.
- Wire: Wire shelving is a great middle-ground option. It’s affordable, durable, and allows for airflow, which is important in refrigerated spaces. The downside? It’s not as sturdy as stainless steel, and it can be harder to clean.
- Wood: Wood shelving is rare in commercial kitchens, but it can work in certain settings (like bakeries or cafés). It’s aesthetically pleasing, but it’s not as durable or easy to clean as other materials. If you go this route, make sure it’s sealed properly to prevent moisture damage.
Next, think about the type of shelving. There are a few options to consider:
- Fixed shelving: This is the most common type of shelving. It’s sturdy and reliable, but it’s not adjustable. If your needs change, you’ll have to replace the shelves.
- Adjustable shelving: Adjustable shelves are a game-changer for small kitchens. They allow you to customize the height of each shelf to fit your needs. This is especially useful if you’re storing items of different sizes.
- Modular shelving: Modular shelving systems are like LEGO for your kitchen. They’re made up of individual components that can be rearranged to fit your space. This is a great option if you’re not sure what you need yet or if your needs are likely to change.
- Wall-mounted shelving: If you’re short on floor space, wall-mounted shelves are a great way to free up room. They’re also a good option for storing lightweight items like spices or utensils.
Finally, think about the size of your shelves. In a small kitchen, you want to maximize every inch of space, so go for deep shelves if you can. But be careful, if your shelves are too deep, you might have trouble reaching the items in the back. A good rule of thumb is to keep your shelves no deeper than 24 inches. This gives you enough space to store items without making them inaccessible.
Mobile Storage: When You Need Flexibility
Let’s talk about mobile storage. If your kitchen is tight on space, mobile storage solutions can be a lifesaver. These are essentially shelves or carts on wheels, and they can be moved around as needed. This is especially useful if you have a multi-functional space, like a prep station that doubles as a serving area or a kitchen that also serves as a storage room.
There are a few types of mobile storage to consider:
- Utility carts: These are small, wheeled carts that can be used for a variety of purposes. They’re great for storing ingredients, utensils, or even small appliances. Some utility carts come with built-in shelves or drawers, while others are just a simple flat surface.
- Mobile shelving units: These are larger than utility carts and are designed to hold heavier items. They’re a good option if you need extra storage but don’t have room for fixed shelving. Some mobile shelving units even come with locking wheels, so you can secure them in place when needed.
- Rolling racks: Rolling racks are tall, narrow shelves on wheels. They’re a great option for storing sheet pans, cutting boards, or other large, flat items. Some rolling racks even come with hooks for hanging utensils or towels.
One of the biggest advantages of mobile storage is that it’s versatile. Need extra prep space? Wheel over a utility cart. Need to store extra ingredients? Roll out a mobile shelving unit. Need to free up floor space? Move your rolling rack to the side. It’s that simple.
But mobile storage isn’t without its drawbacks. For one, it can be less stable than fixed shelving. If you’re storing heavy items, you’ll need to make sure your cart or rack is sturdy enough to handle the weight. Additionally, mobile storage can be more expensive than fixed shelving, especially if you’re buying high-quality units. And finally, mobile storage can be a tripping hazard if it’s not used properly. Make sure your team knows how to move and secure the units safely.
Vertical Space: The Secret Weapon of Small Kitchens
Why You’re Probably Not Using Your Walls (And How to Fix It)
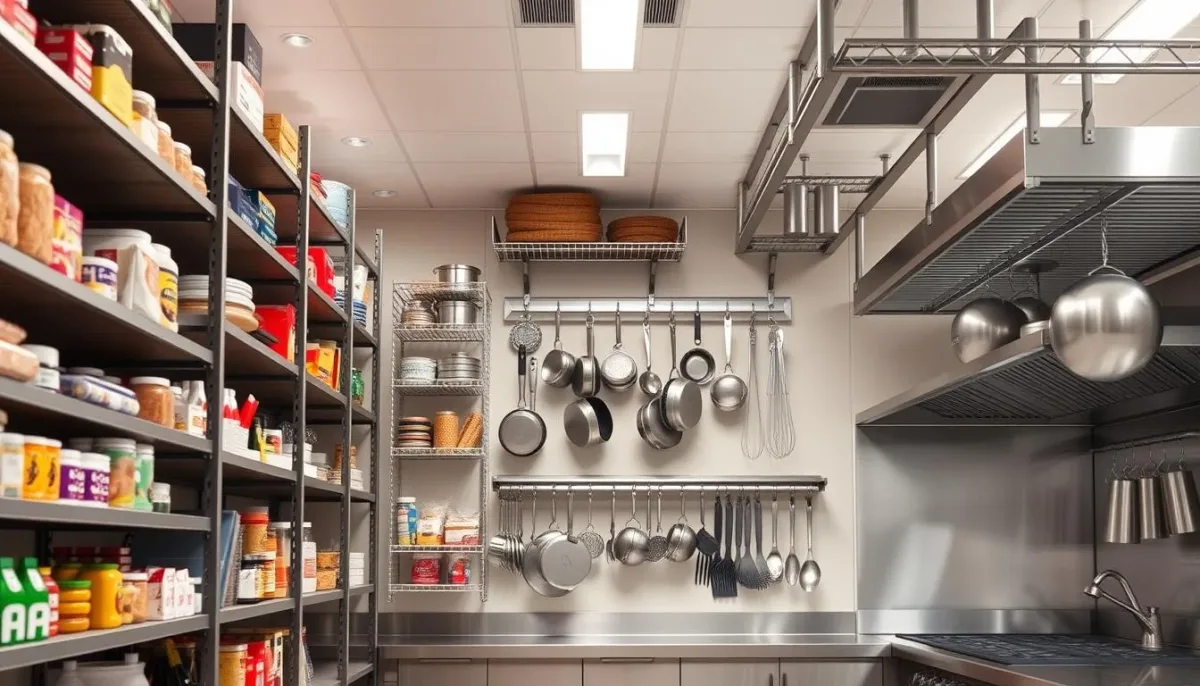
Let’s talk about vertical space. If you’re not using your walls and ceilings for storage, you’re missing out on one of the easiest ways to maximize your kitchen’s potential. Think about it: in a small kitchen, floor space is at a premium. But your walls? They’re just sitting there, waiting to be put to work. And yet, so many kitchens ignore this opportunity.
Why is that? I think part of it is psychological. We’re used to thinking of storage as something that happens on the ground, shelves, cabinets, drawers. But in a small kitchen, you have to think three-dimensionally. Every inch of space matters, and that includes the space above your head. So let’s talk about how to make the most of it.
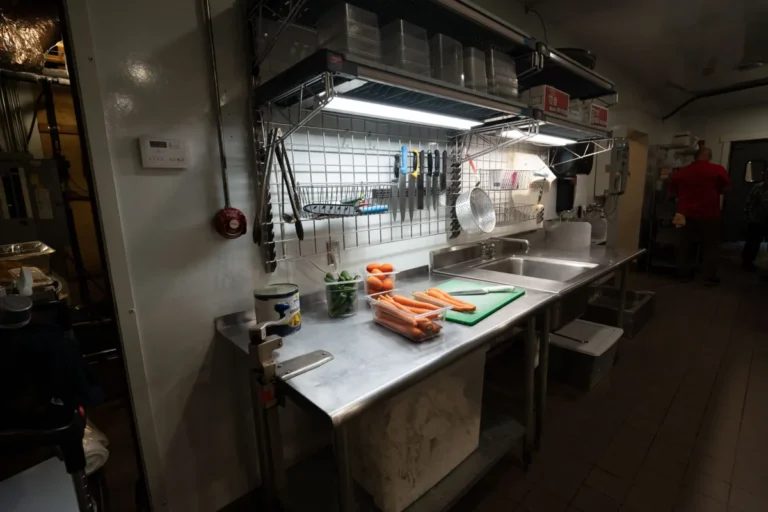
First, let’s talk about wall-mounted shelves. These are a no-brainer for small kitchens. They’re easy to install, affordable, and can be customized to fit your space. You can use them to store everything from spices to utensils to small appliances. And because they’re mounted on the wall, they don’t take up any floor space. It’s a win-win.
But not all wall-mounted shelves are created equal. Here’s what to look for:
- Weight capacity: Make sure your shelves can handle the weight of whatever you’re storing. If you’re storing heavy pots or appliances, you’ll need sturdy shelves with strong brackets.
- Spacing: Think about how much space you need between shelves. If you’re storing tall items, like bottles or jars, you’ll need more vertical space. If you’re storing smaller items, like spices, you can pack the shelves closer together.
- Material: As with fixed shelving, the material matters. Stainless steel is durable and easy to clean, but it can be expensive. Plastic is affordable and lightweight, but it’s not as sturdy. Wood is aesthetically pleasing, but it’s not ideal for wet environments.
Next, let’s talk about pegboards. Pegboards are a game-changer for small kitchens. They’re essentially perforated boards that you can mount on your wall. You can then insert hooks, shelves, or bins into the holes to create a customizable storage system. The best part? You can rearrange the hooks and shelves as your needs change. It’s like having a LEGO set for your kitchen.
Pegboards are great for storing utensils, pots, pans, and even small appliances. You can also use them to create a tool station where everything is within arm’s reach. And because they’re mounted on the wall, they don’t take up any floor space. It’s a small kitchen’s dream.
But pegboards aren’t perfect. For one, they can be less sturdy than fixed shelving. If you’re storing heavy items, you’ll need to make sure your pegboard is properly secured to the wall. Additionally, pegboards can be less aesthetically pleasing than other storage solutions. If you’re going for a sleek, modern look, pegboards might not be your best bet. But if you’re all about functionality, they’re a great option.
Ceiling-Mounted Storage: Thinking Outside the Box
Now, let’s talk about ceiling-mounted storage. This is where things get really interesting. If you’re not using your ceiling for storage, you’re missing out on a ton of potential space. Ceiling-mounted storage is perfect for items that you don’t use every day but still need to keep on hand, like extra pots, pans, or even seasonal ingredients.
There are a few types of ceiling-mounted storage to consider:
- Pot racks: Pot racks are exactly what they sound like, racks that hang from the ceiling and hold pots and pans. They’re a great way to free up cabinet space, and they can also add a rustic, homey feel to your kitchen. But be careful: pot racks can be heavy, so you’ll need to make sure your ceiling can handle the weight. Additionally, pot racks can be a safety hazard if they’re not installed properly. Make sure they’re securely mounted and out of the way of foot traffic.
- Hanging shelves: Hanging shelves are shelves that are suspended from the ceiling by chains or ropes. They’re a great option for storing lightweight items like spices, utensils, or even plants. The best part? They’re easy to install and can be customized to fit your space. Just make sure they’re not in the way of your workflow.
- Overhead racks: Overhead racks are larger than hanging shelves and are designed to hold heavier items. They’re a good option for storing sheet pans, cutting boards, or even small appliances. But like pot racks, they can be a safety hazard if they’re not installed properly. Make sure they’re securely mounted and out of the way of foot traffic.
Ceiling-mounted storage isn’t for everyone. If your kitchen has low ceilings, it might not be a practical option. Additionally, if you’re renting your space, you might not be allowed to install ceiling-mounted storage. But if you have the space and the freedom to do so, it’s a great way to maximize your storage potential.
Multi-Functional Furniture: Doing More with Less
The Rise of the Multi-Tasking Kitchen
Let’s talk about multi-functional furniture. In a small kitchen, every piece of furniture needs to earn its keep. If it’s not serving at least two purposes, it’s probably taking up too much space. That’s where multi-functional furniture comes in. These are pieces that do double (or even triple) duty, like a prep table that also stores ingredients or a shelf that doubles as a work surface.
I remember walking into a tiny café in San Francisco a few years ago. The owner had turned a small corner of the kitchen into a combo prep station and storage area. The countertop was a sturdy stainless steel surface, perfect for chopping vegetables or assembling sandwiches. But underneath, there were shelves and drawers filled with ingredients, utensils, and even a small fridge. It was a masterclass in efficiency. And the best part? It didn’t take up any more space than a regular prep table would have.
So, what kinds of multi-functional furniture should you consider for your kitchen? Here are a few ideas:
- Prep tables with storage: These are tables with built-in shelves, drawers, or cabinets underneath. They’re perfect for small kitchens because they combine prep space with storage. Some even come with built-in sinks or cutting boards.
- Islands with storage: If you have the space for an island, look for one with built-in storage. Islands can be used for prep work, serving, or even as a makeshift dining area. But if they also have shelves or cabinets underneath, they’re even more valuable.
- Fold-down tables: Fold-down tables are a great option for kitchens with limited space. They can be folded up when not in use, freeing up floor space. Some fold-down tables even come with built-in storage, like shelves or hooks.
- Shelving units with work surfaces: These are shelves that double as work surfaces. They’re perfect for small kitchens because they provide extra prep space without taking up any additional room. Some even come with built-in cutting boards or sinks.
- Mobile workstations: These are carts or tables on wheels that can be moved around as needed. They’re great for small kitchens because they can be used for prep work, storage, or even serving. Some mobile workstations even come with built-in sinks or refrigerators.
The key to multi-functional furniture is to think creatively. Don’t just look for pieces that serve one purpose, look for pieces that can do multiple things. For example, a shelf that doubles as a work surface is more valuable than a shelf that just holds ingredients. A prep table with built-in storage is more valuable than a prep table that just sits there. It’s all about maximizing functionality.
When to Invest in Custom Solutions
Now, let’s talk about custom solutions. If you’ve tried everything and you’re still struggling with storage, it might be time to consider custom-built furniture. Custom solutions are more expensive than off-the-shelf options, but they can be a game-changer for small kitchens. Why? Because they’re designed specifically for your space and your needs.
I’ve seen kitchens where custom-built shelving units transformed a cluttered mess into a well-organized workspace. I’ve seen prep tables with built-in refrigerators that saved space and improved workflow. And I’ve seen mobile workstations that could be reconfigured on the fly to meet the kitchen’s changing needs. Custom solutions aren’t cheap, but they can be worth the investment if they solve a specific problem.
So, when should you consider custom solutions? Here are a few signs that it might be time:
- You have an oddly shaped space: If your kitchen has weird nooks, crannies, or angles, off-the-shelf furniture might not fit. Custom solutions can be designed to make the most of your unique space.
- You have specific workflow needs: If your kitchen has a unique workflow, custom furniture can be designed to support it. For example, if your staff needs to move quickly between prep and cooking, a custom-built island with built-in storage could be a game-changer.
- You’re storing unusual items: If you’re storing items that don’t fit in standard storage solutions, like large sheet pans or oddly shaped utensils, custom solutions can be designed to accommodate them.
- You’re willing to invest in the long term: Custom solutions are more expensive upfront, but they can save you money in the long run by improving efficiency and reducing waste.
Of course, custom solutions aren’t for everyone. If you’re on a tight budget, you might be better off sticking with off-the-shelf options. But if you have the resources and the need, they can be a great way to maximize your kitchen’s potential.
Organizing for Efficiency: The Art of the System
Why Organization Is More Than Just Neatness
Let’s talk about organization. I know, it’s not the most exciting topic. But hear me out: organization is the difference between a kitchen that runs smoothly and one that’s constantly on the verge of chaos. It’s not just about making your kitchen look neat, it’s about creating a system that keeps everything in its place and makes it easy to find what you need when you need it.
I’ve seen kitchens where the organization was so good that even a new hire could walk in and find everything they needed. And I’ve seen kitchens where the organization was so bad that even the chef had to dig through piles of clutter to find a single ingredient. The difference? A thoughtful system.
So, what does a good organization system look like? It’s not just about labeling everything (though that helps). It’s about grouping items by function, keeping frequently used items within reach, and creating a workflow that makes sense. Let’s break it down.
The Zone Approach: Dividing Your Kitchen into Functional Areas
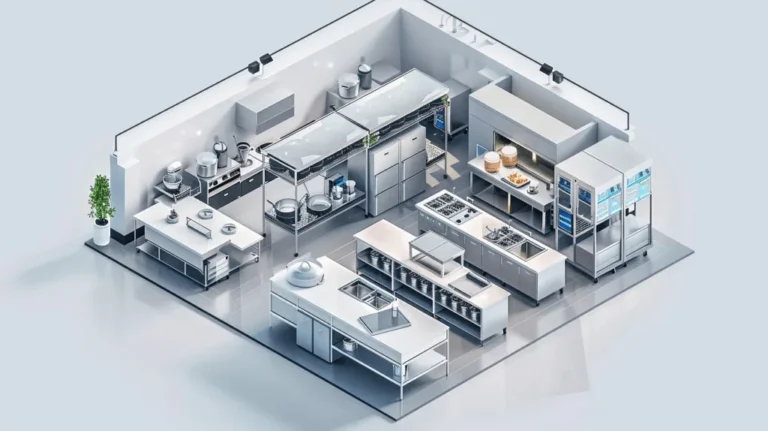
One of the best ways to organize a small kitchen is to divide it into zones. Each zone should have a specific purpose, and everything in that zone should be related to that purpose. For example, you might have a prep zone, a cooking zone, a storage zone, and a cleaning zone. By keeping related items together, you reduce the amount of time your staff spends walking around the kitchen.
Here’s how to set up a zone-based kitchen:
- Identify your zones: Start by identifying the main functions of your kitchen. Most kitchens will have at least three zones: prep, cooking, and cleaning. But you might also have a storage zone, a serving zone, or even a baking zone.
- Assign storage to each zone: Once you’ve identified your zones, assign storage solutions to each one. For example, your prep zone might have a prep table with built-in storage, while your cooking zone might have shelves for pots and pans.
- Keep related items together: Within each zone, keep related items together. For example, in your prep zone, store cutting boards, knives, and mixing bowls in the same area. In your cooking zone, keep pots, pans, and utensils within reach of the stove.
- Label everything: Labels might seem like overkill, but they’re a game-changer in a busy kitchen. Use labels to identify what goes where, so your staff doesn’t have to guess. You can use simple labels like “Spices” or “Utensils,” or you can get more specific with labels like “Dry Goods” or “Baking Supplies.”
- Revisit and adjust: Your zones shouldn’t be set in stone. As your kitchen evolves, your zones might need to change. Revisit your organization system regularly to make sure it’s still working for you.
The zone approach isn’t just about organization, it’s about efficiency. By keeping related items together, you reduce the amount of time your staff spends walking around the kitchen. And by labeling everything, you make it easy for everyone to find what they need. It’s a simple concept, but it can make a big difference.
Labeling and Color-Coding: Small Details, Big Impact
Let’s talk about labeling and color-coding. I know, it sounds like something you’d do in a corporate office, not a commercial kitchen. But trust me, these small details can have a big impact. In a busy kitchen, every second counts. If your staff has to dig through a pile of containers to find the right ingredient, you’re wasting time. But if everything is labeled and color-coded, they can find what they need in an instant.
Here’s how to make labeling and color-coding work for you:
- Use clear, legible labels: Your labels should be easy to read, even in a dimly lit kitchen. Use a bold, sans-serif font and make sure the text is large enough to read from a distance. You can use a label maker, or you can write the labels by hand if you prefer.
- Be specific: Don’t just label a container “Spices.” Instead, label it “Cumin” or “Paprika.” The more specific your labels are, the easier it will be for your staff to find what they need.
- Use color-coding: Color-coding is a great way to group related items. For example, you might use red labels for spices, blue labels for baking supplies, and green labels for produce. This makes it easy for your staff to identify what they need at a glance.
- Label everything: Don’t just label your containers, label your shelves, your drawers, and even your appliances. The more labels you have, the easier it will be for your staff to find what they need.
- Keep it consistent: Once you’ve established a labeling system, stick with it. If you use red labels for spices in one area, use red labels for spices in all areas. Consistency is key.
Labeling and color-coding might seem like small details, but they can make a big difference in a busy kitchen. By making it easy for your staff to find what they need, you reduce wasted time and improve efficiency. And in a small kitchen, every second counts.
Smart Tech for Small Kitchens: When to Go High-Tech
Inventory Management Systems: The Future of Storage
Let’s talk about smart tech. I’ll admit, I was skeptical at first. I’ve always been a “keep it simple” kind of guy, and the idea of adding tech to my kitchen felt like overkill. But after seeing how much time and stress it can save, I’m a believer. Smart tech isn’t just for big kitchens, it can be a game-changer for small spaces too.
One of the most useful smart tech tools for small kitchens is an inventory management system. These are software programs that help you track your inventory in real time. They can tell you what you have on hand, what you’re running low on, and even what you need to order. Some systems even can integrate with your suppliers, so you can reorder ingredients with the click of a button.
Here’s how an inventory management system can help you maximize storage in a small kitchen:
- Reduce waste: By tracking your inventory in real time, you can avoid overordering ingredients. This not only saves you money but also frees up valuable storage space.
- Improve organization: Inventory management systems can help you keep track of where everything is stored. Some systems even allow you to create digital maps of your kitchen, so you can see at a glance where everything is located.
- Save time: Instead of manually counting inventory, you can let the system do the work for you. This frees up your staff to focus on more important tasks, like cooking and serving customers.
- Optimize storage: By tracking what you use and what you don’t, you can make smarter decisions about what to store and where. For example, if you notice that you’re always running out of a certain ingredient, you might decide to store more of it in an easily accessible location.
Of course, inventory management systems aren’t for everyone. They can be expensive, and they require a bit of a learning curve. But if you’re struggling with inventory management, they can be a worthwhile investment. There are even some affordable options out there, like apps that you can use on your phone or tablet.
Compact Appliances: When Bigger Isn’t Better
Let’s talk about compact appliances. In a small kitchen, every inch counts. That’s why it’s important to choose appliances that are the right size for your space. But here’s the thing: bigger isn’t always better. In fact, in a small kitchen, bigger appliances can be a liability. They take up valuable space, and they can make your kitchen feel even more cramped.
So, what should you look for in a compact appliance? Here are a few things to consider:
- Size: This is the big one. Make sure your appliances are the right size for your space. If you’re tight on counter space, look for appliances that can be mounted on the wall or stored in a cabinet. If you’re tight on floor space, look for appliances that are narrow or can be stacked.
- Multi-functionality: In a small kitchen, multi-functional appliances are your best friend. Look for appliances that can do more than one thing, like a combination oven that can bake, broil, and steam. The more functions an appliance has, the less space it takes up.
- Energy efficiency: Compact appliances are often more energy-efficient than their larger counterparts. This can save you money on your utility bills and reduce your environmental footprint.
- Ease of use: Compact appliances should be easy to use and maintain. Look for appliances with intuitive controls and easy-to-clean surfaces. The last thing you want is an appliance that’s a pain to use.
Here are a few compact appliances to consider for your small kitchen:
- Countertop ovens: Countertop ovens are a great alternative to full-sized ovens. They’re small, energy-efficient, and can be used for a variety of cooking tasks. Some even come with built-in air fryers or convection fans.
- Under-counter refrigerators: Under-counter refrigerators are a great way to save space in a small kitchen. They can be installed under a counter or even in a cabinet, freeing up valuable floor space.
- Combination microwaves: Combination microwaves can microwave, bake, and even air fry. They’re a great way to save space and reduce the number of appliances you need.
- Induction cooktops: Induction cooktops are energy-efficient and can be installed on a countertop or even in a cabinet. They’re a great alternative to gas or electric stoves.
- Compact dishwashers: If you’re tight on space, a compact dishwasher can be a game-changer. They’re small enough to fit under a counter or even in a cabinet, and they can save you time and water.
Compact appliances aren’t just about saving space, they’re about maximizing efficiency. By choosing appliances that are the right size for your kitchen, you can free up valuable space and improve your workflow. And in a small kitchen, that’s everything.
Refrigeration Strategies: Keeping It Cool Without Wasting Space
Walk-In vs. Reach-In: Which Is Right for You?
Let’s talk about refrigeration. If you’re running a commercial kitchen, you know how important it is to keep your ingredients fresh. But refrigeration can also be a major space hog. Walk-in fridges and reach-in coolers take up valuable real estate, and if you’re not using them efficiently, you’re wasting space and money.
So, how do you choose between a walk-in and a reach-in fridge? It depends on a few factors:
- Space: Walk-in fridges take up a lot of space, both inside and outside your kitchen. If you’re tight on square footage, a reach-in fridge might be a better option. But if you have the space, a walk-in can be a great way to store large quantities of ingredients.
- Volume: How much refrigerated storage do you need? If you’re storing large quantities of ingredients, a walk-in fridge might be the way to go. But if you’re only storing a few items, a reach-in fridge might be sufficient.
- Workflow: How does your team move through the kitchen? If your staff is constantly walking back and forth to the fridge, a walk-in might slow them down. But if your fridge is in a convenient location, a walk-in can be a great way to keep ingredients within reach.
- Budget: Walk-in fridges are more expensive than reach-in fridges, both upfront and in the long run. They require more energy to run, and they can be more expensive to maintain. If you’re on a tight budget, a reach-in fridge might be a better option.
Here’s the thing: you don’t have to choose one or the other. Many kitchens use a combination of walk-in and reach-in fridges. For example, you might use a walk-in for bulk storage and a reach-in for frequently used ingredients. This can help you maximize your storage space while keeping your workflow efficient.
Organizing Your Fridge for Maximum Efficiency
Once you’ve chosen your fridge, it’s time to organize it. A well-organized fridge isn’t just about neatness, it’s about efficiency. By keeping your fridge organized, you can reduce waste, improve workflow, and even save money on energy costs.
Here’s how to organize your fridge for maximum efficiency:
- Group items by category: Start by grouping your ingredients by category. For example, you might have a section for dairy, a section for produce, and a section for meats. This makes it easy to find what you need and reduces the amount of time your staff spends digging through the fridge.
- Use clear containers: Clear containers make it easy to see what’s inside, so your staff doesn’t have to open every container to find what they need. They also help keep your fridge looking neat and organized.
- Label everything: Labels are a game-changer in a busy kitchen. Use labels to identify what’s in each container, so your staff doesn’t have to guess. You can also use labels to indicate when items were stored, so you can keep track of what needs to be used first.
- Store frequently used items at eye level: The items you use most often should be stored at eye level, so your staff doesn’t have to bend down or reach up to find them. This reduces the amount of time they spend searching for ingredients and improves workflow.
- Keep raw meats on the bottom shelf: Raw meats should always be stored on the bottom shelf of your fridge to prevent cross-contamination. This is especially important in a commercial kitchen, where food safety is a top priority.
- Use the FIFO method: FIFO stands for “first in, first out.” This means that the oldest items should be used first, so you don’t end up with expired ingredients. To make this easier, store new items behind old ones, so your staff is always reaching for the oldest items first.
- Keep your fridge clean: A clean fridge is an efficient fridge. Make sure your staff is regularly cleaning out expired items and wiping down shelves. This not only keeps your fridge organized but also improves food safety.
Organizing your fridge might seem like a small detail, but it can make a big difference in a busy kitchen. By keeping your fridge organized, you can reduce waste, improve workflow, and even save money on energy costs. And in a small kitchen, that’s everything.
Common Storage Mistakes (And How to Avoid Them)
The Pitfalls of Overcrowding
Let’s talk about overcrowding. I get it, when you’re running a small kitchen, it’s tempting to try to fit as much as possible into every nook and cranny. But overcrowding is one of the biggest mistakes you can make. Why? Because it makes your kitchen less efficient, less safe, and less enjoyable to work in.
Here’s what happens when you overcrowd your kitchen:
- Reduced workflow: When your kitchen is packed with stuff, your staff has to navigate around obstacles to get their work done. This slows them down and increases the risk of accidents.
- Increased risk of contamination: Overcrowding can make it harder to keep your kitchen clean. When items are packed too closely together, it’s easy for spills and messes to spread. This increases the risk of cross-contamination and foodborne illness.
- Difficulty finding items: When your kitchen is overcrowded, it’s hard to find what you need. Your staff might have to dig through piles of clutter to find a single ingredient, which wastes time and increases frustration.
- Increased stress: A cluttered kitchen is a stressful kitchen. When your staff is constantly navigating around obstacles, they’re more likely to feel overwhelmed and burnt out.
So, how do you avoid overcrowding? Here are a few tips:
- Be ruthless about what you keep: If you’re not using something regularly, get rid of it. This might mean donating unused equipment, throwing out expired ingredients, or finding a better storage solution for items you don’t use often.
- Use vertical space: Instead of packing everything onto your counters or shelves, look for ways to use your walls and ceilings for storage. This frees up valuable floor space and keeps your kitchen feeling open.
- Invest in multi-functional furniture: Multi-functional furniture, like prep tables with built-in storage, can help you maximize your space without overcrowding your kitchen.
- Keep your workflow in mind: When you’re arranging your kitchen, think about how your staff moves through the space. Make sure there’s enough room for them to work comfortably and efficiently.
- Revisit your storage plan regularly: Your storage needs will evolve over time, so it’s important to revisit your plan regularly. If you notice that your kitchen is starting to feel crowded, it might be time to make some changes.
Overcrowding is a common mistake, but it’s one that’s easy to avoid. By being mindful of your space and your workflow, you can keep your kitchen organized and efficient.
Ignoring the “Golden Zone” (And Why It Matters)
Let’s talk about the “Golden Zone.” No, it’s not a secret treasure trove in your kitchen, it’s the area between your shoulders and your knees. This is the zone where you should store the items you use most often. Why? Because it’s the most ergonomic and efficient place to store things. If you’re constantly bending down or reaching up to grab something, you’re wasting time and energy.
I’ve seen kitchens where the most frequently used items are stored on the top shelf or the bottom shelf. This might seem like a small detail, but it adds up over time. If your staff is constantly reaching up or bending down to grab something, they’re going to get tired and frustrated. And in a busy kitchen, that’s a recipe for disaster.
So, how do you make the most of your Golden Zone? Here are a few tips:
- Store frequently used items at eye level: The items you use most often should be stored at eye level, so your staff doesn’t have to bend down or reach up to find them. This reduces the amount of time they spend searching for ingredients and improves workflow.
- Use the top shelf for infrequently used items: The top shelf is a great place to store items you don’t use often, like seasonal ingredients or backup supplies. This keeps them out of the way but still accessible when you need them.
- Use the bottom shelf for heavy items: The bottom shelf is a good place to store heavy items, like pots and pans. This makes them easy to access without having to lift them up high.
- Keep your workflow in mind: When you’re arranging your storage, think about how your staff moves through the kitchen. Make sure the items they use most often are within easy reach.
- Revisit your storage plan regularly: Your storage needs will evolve over time, so it’s important to revisit your plan regularly. If you notice that your staff is constantly reaching for the same items, it might be time to move them to a more accessible location.
The Golden Zone might seem like a small detail, but it can make a big difference in a busy kitchen. By keeping your most frequently used items within easy reach, you can improve workflow, reduce stress, and even prevent injuries. And in a small kitchen, that’s everything.
Putting It All Together: A Step-by-Step Plan for Maximizing Storage
Step 1: Audit Your Space
Alright, let’s put everything we’ve talked about into action. The first step in maximizing your storage is to audit your space. This means taking a close look at your kitchen and identifying what’s working and what’s not. Here’s how to do it:
- Measure your kitchen: Start by measuring the dimensions of your kitchen, including the height of your ceilings. This will give you a clear picture of how much space you have to work with.
- Take inventory: Next, take inventory of your equipment, ingredients, and supplies. Write down everything you have, including how often you use it. This will help you identify what’s essential and what’s taking up valuable space.
- Identify pain points: Walk through your kitchen and identify the areas that are causing the most frustration. Is it the cluttered prep station? The overstuffed fridge? The lack of counter space? Write down your pain points so you can address them later.
- Track your workflow: Observe how your staff moves through the kitchen. Are there bottlenecks where people are constantly bumping into each other? Are there areas that get congested during peak hours? Note these inefficiencies so you can address them in your storage plan.
- Take photos: Finally, take photos of your kitchen from different angles. Sometimes seeing your space from a different perspective can reveal opportunities you’ve missed.
This might seem like a lot of work, but trust me, it’s worth it. By auditing your space, you’ll have a clear picture of what you’re working with and what you need to change.
Step 2: Set Your Priorities
Once you’ve audited your space, it’s time to set your priorities. This means identifying the changes that will have the biggest impact on your kitchen’s efficiency. Here’s how to do it:
- Identify your biggest storage challenges: Look at your audit notes and identify the areas that are causing the most frustration. Is it the lack of shelf space? The cluttered prep station? The overstuffed fridge?
- Determine what’s taking up the most space: Identify the items or equipment that are taking up the most room. Are there bulky appliances you don’t use often? Are there excess ingredients that could be stored elsewhere?
- Consider your budget: Storage solutions can range from cheap (like DIY shelving) to expensive (like custom-built storage systems). Determine how much you’re willing to spend so you can narrow down your options.
- Think about your workflow: Consider how your staff moves through the kitchen and what changes would make their jobs easier. For example, if your prep station is always cluttered, you might prioritize a modular storage solution that can be customized to fit your workflow.
- Set a timeline: Finally, set a timeline for your storage overhaul. Do you want to make all the changes at once, or do you prefer to tackle one area at a time? Having a timeline will help you stay on track and avoid feeling overwhelmed.
Setting your priorities is all about focus. By identifying the changes that will have the biggest impact, you can make the most of your time and budget.
Step 3: Implement Your Plan
Now it’s time to implement your plan. This is where the rubber meets the road. Here’s how to do it:
- Start with the low-hanging fruit: Begin with the changes that are easiest and most affordable. This might mean installing wall-mounted shelves, reorganizing your fridge, or decluttering your prep station. These small changes can make a big difference and give you the momentum to tackle bigger projects.
- Invest in multi-functional furniture: If you’re tight on space, look for furniture that can do double duty. This might mean a prep table with built-in storage or a shelf that doubles as a work surface. Multi-functional furniture can help you maximize your space without overcrowding your kitchen.
- Use vertical space: Don’t forget about your walls and ceilings. Wall-mounted shelves, pegboards, and ceiling-mounted storage can help you maximize your space without taking up valuable floor space.
- Organize your zones: Divide your kitchen into zones and assign storage solutions to each one. This will help you keep related items together and reduce the amount of time your staff spends walking around the kitchen.
- Label everything: Labels might seem like a small detail, but they can make a big difference in a busy kitchen. Use labels to identify what goes where, so your staff doesn’t have to guess.
Implementing your plan is all about action. Don’t get bogged down in the details, just start making changes and adjust as you go.
Step 4: Revisit and Adjust
Finally, it’s important to revisit and adjust your storage plan regularly. Your needs will evolve over time, so it’s important to make sure your storage solutions are still working for you. Here’s how to do it:
- Schedule regular check-ins: Set aside time every few months to review your storage plan. Are there areas that are still causing frustration? Are there new pain points that have emerged? Note these issues so you can address them.
- Ask for feedback: Talk to your staff and ask for their input. Are there areas that are still cluttered or inefficient? Are there changes they’d like to see? Your staff is on the front lines, so their feedback is invaluable.
- Make adjustments as needed: If you notice that something isn’t working, don’t be afraid to make changes. This might mean moving shelves around, reorganizing your fridge, or investing in new storage solutions.
- Stay flexible: Your storage needs will evolve over time, so it’s important to stay flexible. Don’t be afraid to try new things and adjust your plan as needed.
Revisiting and adjusting your plan is all about continuous improvement. By staying flexible and open to change, you can keep your kitchen running smoothly and efficiently.
Final Thoughts: The Mindset Shift That Changes Everything
Alright, let’s wrap this up. Maximizing storage in a small commercial kitchen isn’t just about finding the right shelves or the perfect fridge. It’s about rethinking how you use your space. It’s about seeing your kitchen not as a collection of limitations, but as a puzzle waiting to be solved. And most importantly, it’s about embracing the mindset that every inch counts.
I’ll be honest, this isn’t always easy. There will be days when you feel like you’ve tried everything and nothing works. There will be moments when you’re tempted to throw in the towel and just deal with the clutter. But here’s the thing: small changes add up. Every shelf you install, every label you add, every zone you create brings you one step closer to a kitchen that works for you, not against you.
So, where do you go from here? Start small. Pick one area of your kitchen that’s causing the most frustration and tackle it first. Maybe it’s the prep station, maybe it’s the fridge, maybe it’s the lack of counter space. Whatever it is, don’t wait for the “perfect” solution. Just start. Because the truth is, there’s no such thing as a perfect kitchen, only a kitchen that’s perfectly suited to your needs.
And remember: you’re not alone. Every chef, every kitchen manager, every small business owner has been where you are. The difference between those who succeed and those who don’t isn’t the size of their kitchen, it’s their willingness to adapt, to experiment, and to keep pushing forward. So take a deep breath, roll up your sleeves, and get to work. Your kitchen (and your sanity) will thank you.
FAQ
Q: What’s the most cost-effective storage solution for a small commercial kitchen?
A: The most cost-effective storage solution depends on your specific needs, but wall-mounted shelves and pegboards are great starting points. They’re affordable, easy to install, and can be customized to fit your space. If you’re looking for something more mobile, utility carts are a great option. They’re versatile, relatively inexpensive, and can be moved around as needed. For refrigeration, consider under-counter fridges or reach-in coolers, which are more affordable than walk-ins and take up less space.
Q: How do I maximize storage in a kitchen with low ceilings?
A: Low ceilings can be a challenge, but they’re not a dealbreaker. Focus on horizontal space-think deep shelves, under-counter storage, and multi-functional furniture. Wall-mounted shelves are a great option, as they don’t take up any floor space. You can also use the space under your counters for storage, like pull-out drawers or cabinets. If you have the budget, consider custom-built solutions that are designed specifically for your space. And don’t forget about your doors, over-the-door organizers can be a great way to store small items like spices or utensils.
Q: What are the best storage solutions for a food truck kitchen?
A: Food trucks have unique storage challenges, but there are plenty of solutions that can help. First, focus on multi-functional furniture. Look for prep tables with built-in storage, or shelves that double as work surfaces. Mobile storage is also key, utility carts and rolling racks can be moved around as needed, freeing up valuable floor space. For refrigeration, under-counter fridges are a great option, as they take up less space than reach-ins. And don’t forget about vertical space, wall-mounted shelves and pegboards can help you maximize your storage potential without taking up any floor space.
Q: How often should I reorganize my kitchen’s storage system?
A: There’s no one-size-fits-all answer to this question, but a good rule of thumb is to revisit your storage plan every 3-6 months. This gives you enough time to see what’s working and what’s not, and to make adjustments as needed. However, if you notice that your kitchen is starting to feel cluttered or inefficient before that, don’t wait, make changes as soon as you can. The key is to stay flexible and open to change. Your storage needs will evolve over time, so it’s important to make sure your system is still working for you.
@article{maximizing-storage-solutions-for-small-commercial-kitchens-a-practical-guide-to-efficiency-and-space,
    title   = {Maximizing Storage Solutions for Small Commercial Kitchens: A Practical Guide to Efficiency and Space},
    author  = {Chef's icon},
    year    = {2026},
    journal = {Chef's Icon},
    url     = {https://chefsicon.com/maximizing-storage-solutions-for-small-commercial-kitchens/}
}