The Best Fluffy Pancakes recipe you will fall in love with. Full of tips and tricks to help you make the best pancakes.
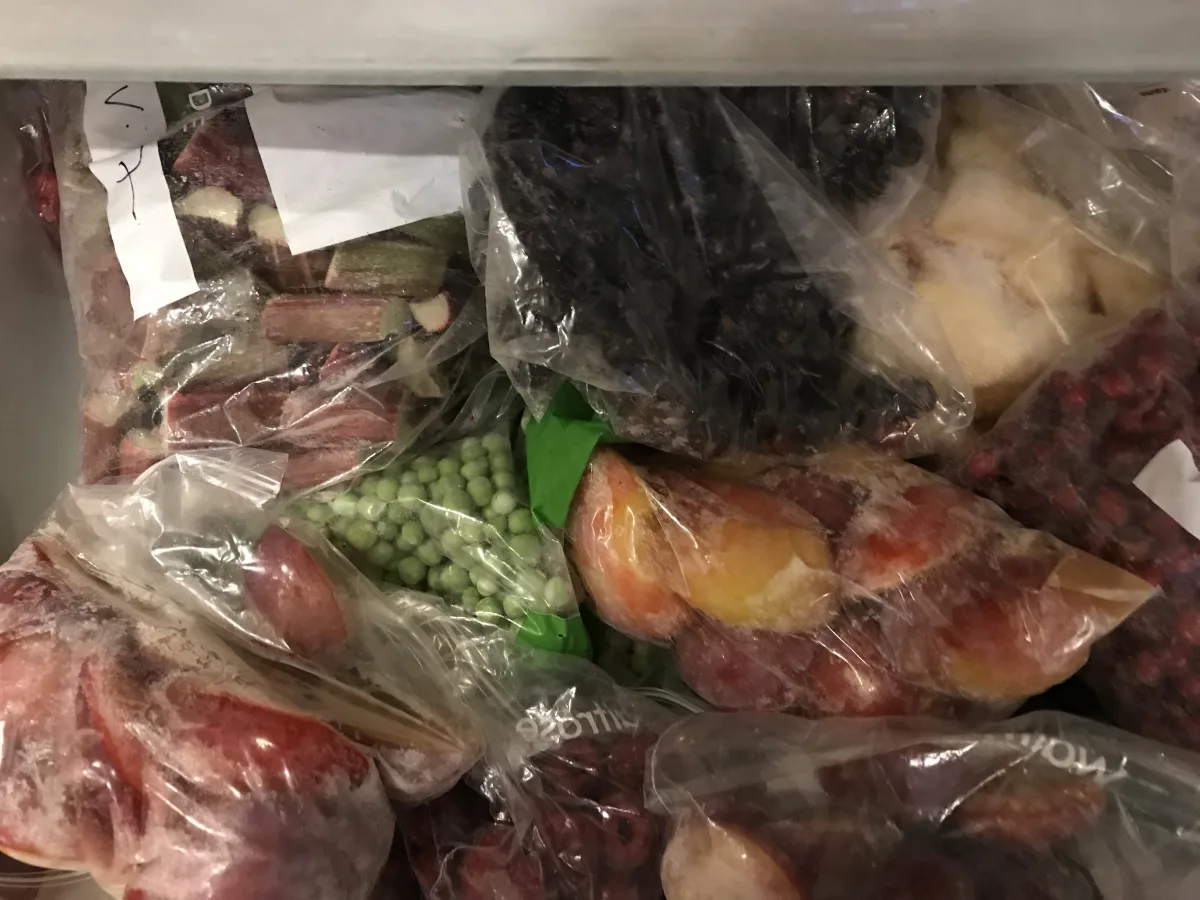
I’ll admit it, I used to think freezing food was just a matter of tossing leftovers into a plastic container and hoping for the best. Then I met shock freezing, and let’s just say my relationship with my freezer has never been the same. There’s something almost magical about pulling out a perfectly preserved batch of homemade pesto or a single portion of chili that tastes like it was made yesterday, not three months ago. But here’s the catch: shock freezing isn’t just “freezing, but faster.” It’s a whole different beast, and if you don’t understand the rules, you’re going to end up with soggy vegetables, freezer-burned meat, or worse, food that’s safe to eat but tastes like regret.
So why should you care? Because if you’re a home cook who’s ever thrown away food, wasted money on groceries, or wished you could meal prep like a pro without sacrificing quality, shock freezing might just be your new best friend. But, and this is a big but, it’s not as simple as cranking your freezer to the coldest setting and calling it a day. There’s science involved, equipment to consider, and a few hard-learned lessons I’m going to share so you don’t have to learn them the hard way. By the end of this, you’ll know exactly what shock freezing is, why it matters, and how to do it right in your own kitchen. And maybe, just maybe, you’ll never look at your freezer the same way again.
Oh, and full disclosure: I’m not a food scientist. I’m just a guy who’s spent way too much time experimenting with freezing techniques after one too many freezer-burned disasters. So take this as a conversation, not a textbook. I’ll tell you what’s worked for me, what hasn’t, and where I’m still figuring things out. Sound good? Let’s dive in.
The Shocking Truth About Shock Freezing
What Even Is Shock Freezing?
First things first: what the heck is shock freezing, and how is it different from the regular freezing you’ve been doing your whole life? At its core, shock freezing is about speed. Really, really fast speed. While your standard home freezer chugs along at around 0°F (-18°C), shock freezing drops the temperature of food so quickly that ice crystals don’t have time to form into those big, jagged monsters that turn your strawberries into mush or your steak into a sad, dry brick. Instead, the water inside the food freezes into tiny, uniform crystals that preserve the texture, flavor, and nutrients way better than traditional freezing.
Now, you might be thinking, “Okay, so it’s just freezing food faster. Big deal.” But here’s the thing: it is a big deal. Those tiny ice crystals are the difference between pulling out a bag of peas that taste fresh and crisp versus ones that have the texture of wet cardboard. It’s the reason why high-end restaurants and food manufacturers use shock freezing, because when done right, it can make frozen food taste almost as good as fresh. And for home cooks, that’s a game-changer.
But, and this is where things get tricky, shock freezing isn’t just about speed. It’s also about control. You can’t just throw a tray of lasagna into a super-cold freezer and call it a day. There’s a method to the madness, and if you skip the details, you’re going to end up with food that’s either under-frozen (hello, freezer burn) or over-frozen (goodbye, texture). So before you go all-in, let’s talk about what really happens when you shock freeze something, and why it’s not as simple as it sounds.
Why Your Freezer Isn’t Cutting It
Here’s the hard truth: your home freezer, as awesome as it is, wasn’t designed for shock freezing. Most residential freezers hover around 0°F (-18°C), which is fine for long-term storage but terrible for rapid freezing. Why? Because at that temperature, it takes hours, sometimes even a full day, for food to freeze completely. And during that time, those pesky ice crystals have plenty of time to grow, expand, and wreak havoc on your food’s texture.
Think about it: when you freeze something slowly, the water inside the food has time to migrate to the surface, where it forms those big, sharp ice crystals. These crystals puncture cell walls, break down structures, and basically turn your food into a sad, mushy version of its former self. That’s why your homemade soup might taste fine after freezing, but your berries turn to slush or your bread comes out with a weird, spongy texture. It’s not you, it’s the freezer.
Now, you might be wondering: “If my freezer isn’t good enough, do I need to buy some fancy industrial equipment?” The short answer is no, not necessarily. There are ways to hack your home freezer to get closer to shock-freezing results, and we’ll get into those later. But it’s important to manage your expectations. If you’re serious about shock freezing at home, you’re going to need to make some adjustments, and maybe even invest in a few tools. But don’t worry, we’ll start with the basics so you can dip your toes in without breaking the bank.
The Science Behind the Freeze (And Why It Matters)
Alright, let’s geek out for a second. Why does speed matter so much when it comes to freezing? It all comes down to ice crystal formation. When water freezes slowly, it forms large, hexagonal ice crystals that can damage the cellular structure of food. These crystals act like tiny knives, slicing through cell walls and releasing moisture when the food thaws. That’s why slow-frozen food often ends up watery or mushy, it’s literally been torn apart from the inside.
Shock freezing, on the other hand, freezes food so quickly that the water inside doesn’t have time to form those big crystals. Instead, it forms tiny, uniform ice crystals that don’t damage the food’s structure. The result? When you thaw it, the food retains more of its original texture, flavor, and nutrients. It’s like the difference between a gentle snowfall and a hailstorm, one leaves everything intact, while the other leaves a path of destruction.
But here’s where it gets even more interesting: shock freezing isn’t just about texture. It also helps preserve utrients. Vitamins like vitamin C and B vitamins are sensitive to oxidation, which can happen when food is exposed to air during slow freezing. Rapid freezing minimizes this exposure, so your frozen veggies might actually retain more of their nutritional value than you’d expect. And let’s be real, if you’re going to the trouble of freezing food, you probably want it to be as healthy as possible when you finally eat it.
Now, I’m not saying you need to become a food scientist to shock freeze at home. But understanding the basics of why it works can help you troubleshoot when things go wrong. And trust me, things will go wrong at some point. Maybe your freezer isn’t cold enough, or you didn’t spread the food out thinly enough, or you waited too long to freeze it after cooking. Knowing the science behind it can help you figure out where you went off track, and how to fix it next time.
Shock Freezing at Home: The Good, the Bad, and the Ugly
Can You Really Shock Freeze Without a Blast Freezer?
Okay, let’s address the elephant in the room: blast freezers. These are the industrial-strength machines that restaurants and food manufacturers use to shock freeze food in a matter of minutes. They’re amazing, they’re efficient, and they’re also way out of the budget for most home cooks. So the question is: can you get similar results at home without one?
The short answer is yes, but with some caveats. You’re not going to get the exact same results as a blast freezer, but you can come pretty close with a few hacks. The key is to maximize the surface area of your food and minimize the amount of time it takes to freeze. Here’s how:
- Spread it thin: The thicker the food, the longer it takes to freeze. If you’re freezing something like soup or sauce, pour it into a shallow tray or divide it into small portions. The thinner the layer, the faster it’ll freeze.
- Pre-chill your food: The colder your food is before it goes into the freezer, the faster it’ll freeze. Stick it in the fridge for an hour or two before freezing to give it a head start.
- Use metal trays: Metal conducts cold better than plastic or glass, so if you’re freezing something like berries or herbs, spread them out on a metal baking sheet. Just make sure they’re in a single layer, no overlapping!
- Lower your freezer temp: If your freezer has a “quick freeze” or “super freeze” setting, use it. If not, crank it to the coldest setting at least a few hours before you plan to freeze something. Just remember to turn it back down afterward, running your freezer at max cold all the time isn’t great for energy efficiency.
Now, I’ll be honest: even with these tricks, you’re not going to get the same results as a blast freezer. But you will get better results than just tossing food into a container and hoping for the best. And for most home cooks, that’s good enough. The goal isn’t perfection, it’s improvement. If you can go from freezer-burned disasters to meals that actually taste good after freezing, that’s a win in my book.
The Best Foods for Shock Freezing (And the Worst)
Not all foods are created equal when it comes to shock freezing. Some handle the process like champs, while others turn into sad, unrecognizable versions of themselves. So before you go freezing everything in sight, let’s talk about what works, and what doesn’t.
Foods that freeze well with shock freezing:
- Fruits: Berries, mangoes, peaches, and even bananas (if you’re using them for smoothies or baking) freeze beautifully. Just make sure to wash and dry them thoroughly before freezing, and spread them out in a single layer on a tray before bagging them up.
- Vegetables: Leafy greens like spinach and kale, peas, corn, and even herbs like basil and cilantro can handle shock freezing like pros. Blanch them first (more on that later) to preserve color and texture.
- Meats: Chicken, beef, pork, and fish all freeze well if you do it right. The key is to portion them out before freezing so you’re not thawing more than you need. And for the love of all things holy, remove as much air as possible from the packaging to prevent freezer burn.
- Baked goods: Cookies, muffins, and even bread can be shock frozen with great results. Just make sure they’re completely cooled before freezing, and wrap them tightly to prevent moisture loss.
- Soups and sauces: These are some of the easiest things to shock freeze because they’re already in liquid form. Just portion them out into shallow containers or freezer bags, and you’re good to go.
Foods that don’t freeze well (no matter how fast you freeze them):
- Dairy products: Milk, cream, and yogurt can separate and turn grainy when frozen. Cheese can get crumbly, and sour cream turns watery. There are ways to work around this (like freezing milk in ice cube trays for cooking), but in general, dairy and freezing don’t mix well.
- Eggs in shells: Just don’t. The shells will crack, and you’ll end up with a mess. If you want to freeze eggs, crack them first and whisk them lightly before freezing in ice cube trays.
- Lettuce and other high-water veggies: Cucumbers, celery, and lettuce turn to mush when frozen. If you’re planning to use them in cooked dishes, they might be okay, but for salads? Forget it.
- Fried foods: The crispy coating on fried chicken or onion rings turns soggy when frozen. You can reheat them in the oven to try to crisp them up again, but they’ll never be as good as fresh.
- Mayonnaise-based dishes: Potato salad, coleslaw, and other mayo-heavy dishes separate when frozen. The texture becomes unappetizing, and it’s just not worth it.
Now, I know what you’re thinking: “But what about [insert food here]?” The truth is, there’s a lot of gray area when it comes to freezing. Some foods might surprise you, like avocados, which can be frozen if you puree them with a little lemon juice first. Others might disappoint, even if they seem like they should work. The best way to find out? Experiment. Freeze a small batch, thaw it, and see how it turns out. Worst case scenario, you learn something new. Best case, you discover a new freezer-friendly favorite.
Blanching: The Secret Weapon for Freezing Veggies
If you’ve ever frozen raw vegetables only to have them turn into a sad, mushy mess when you thawed them, you’re not alone. The problem isn’t the freezing, it’s the enzymes. Vegetables contain enzymes that break down their structure over time, and these enzymes don’t stop working just because the veggies are frozen. That’s where blanching comes in.
Blanching is a simple process: you briefly boil or steam vegetables, then plunge them into ice water to stop the cooking process. This does two things: it deactivates the enzymes that cause spoilage, and it helps preserve the color, texture, and nutrients of the veggies. It might sound like an extra step, but trust me, it’s worth it. A few minutes of blanching can make the difference between frozen veggies that taste fresh and ones that taste like they’ve been sitting in your freezer for a decade.
Here’s how to blanch vegetables for freezing:
- Prep the veggies: Wash, peel, and chop your vegetables into the desired size. Smaller pieces will blanch faster, so keep that in mind.
- Boil water: Bring a large pot of water to a rolling boil. You’ll need about a gallon of water per pound of vegetables.
- Boil the veggies: Add the vegetables to the boiling water and let them cook for the recommended time (usually 1-3 minutes, depending on the vegetable). You want them to be bright in color but still crisp.
- Ice bath: Immediately transfer the vegetables to a bowl of ice water to stop the cooking process. Let them sit for the same amount of time they were in the boiling water.
- Drain and dry: Drain the vegetables and pat them dry with a clean towel. The drier they are, the better they’ll freeze.
- Freeze: Spread the vegetables out in a single layer on a metal tray and freeze until solid. Once frozen, transfer them to a freezer bag or airtight container.
Now, I’ll admit: blanching can feel like a pain, especially when you’re in a hurry. But here’s the thing: it’s a one-time investment. Once you’ve blanched and frozen your veggies, they’ll be ready to use whenever you need them. No more last-minute trips to the grocery store for fresh veggies that will just go bad in your fridge. And if you’re really pressed for time, you can even buy pre-blanched frozen vegetables from the store. They’re not quite as good as homemade, but they’re a solid backup plan.
The Tools You Actually Need (And the Ones You Don’t)
Essential Equipment for Home Shock Freezing
You don’t need a blast freezer or a commercial kitchen to shock freeze at home, but you doeed a few key tools to do it right. The good news? Most of these are things you probably already have in your kitchen. The bad news? If you don’t have them, you’ll need to invest in a few basics. Here’s what you’ll need:
- A good freezer: This might seem obvious, but not all freezers are created equal. If your freezer is packed to the gills or struggling to maintain a consistent temperature, your shock freezing efforts are going to suffer. Make sure your freezer is clean, organized, and running at peak efficiency. If it’s not, it might be time for a deep clean or even an upgrade.
- Metal baking sheets: Metal conducts cold better than plastic or glass, so it’s the best choice for freezing food quickly. Line them with parchment paper for easy cleanup, and make sure the food is in a single layer, no overlapping!
- Freezer-safe bags or containers: Not all plastic is created equal when it comes to freezing. Look for bags and containers that are labeled freezer-safe to prevent freezer burn and moisture loss. And for the love of all things good, remove as much air as possible before sealing. A vacuum sealer is great for this, but you can also use a straw to suck the air out of a bag before sealing it.
- A thermometer: If you’re serious about shock freezing, you need to know your freezer’s temperature. A simple freezer thermometer can tell you if your freezer is running too warm (or too cold, which can be just as problematic). Aim for 0°F (-18°C) or lower for long-term storage, and crank it down to the coldest setting when you’re shock freezing.
- Ice cube trays: These are great for freezing small portions of sauces, broths, or even herbs. Once frozen, you can pop the cubes out and store them in a freezer bag for easy use later.
Now, let’s talk about what you don’teed. You don’t need a blast freezer, a vacuum sealer (though it’s nice to have), or any other fancy gadgets. Sure, they can make the process easier, but they’re not essential. The most important tools are the ones you already have: your freezer, some basic kitchen supplies, and a little bit of patience.
Oh, and one more thing: labels. I can’t tell you how many times I’ve pulled something out of the freezer, stared at it, and thought, “What the heck is this?” Label everything with the name and date so you don’t end up with a mystery bag of… something. Trust me, future you will thank present you.
Vacuum Sealers: Worth the Hype or Just Another Gadget?
If you’ve spent any time researching shock freezing, you’ve probably come across vacuum sealers. These machines suck all the air out of a bag before sealing it, which is supposed to prevent freezer burn and extend the shelf life of your food. They’re a staple in commercial kitchens, and there are plenty of home models on the market. But are they really worth the investment?
The short answer is: it depends. If you’re serious about shock freezing and plan to do it regularly, a vacuum sealer can be a game-changer. It removes all the air from the bag, which means no freezer burn, no moisture loss, and no weird odors seeping into your food. It also allows you to portion out meals in advance, which is great for meal prep. But, and this is a big but, it’s not a magic bullet. A vacuum sealer won’t make up for poor freezing techniques, and it won’t turn bad food into good food.
Here’s what a vacuum sealer can do:
- Prevent freezer burn: By removing all the air from the bag, a vacuum sealer eliminates the risk of freezer burn, which is one of the biggest enemies of frozen food.
- Extend shelf life: Food stored in vacuum-sealed bags can last up to five times longer than food stored in regular freezer bags. That’s a huge difference, especially if you’re freezing large batches of food.
- Save space: Vacuum-sealed bags take up less space in your freezer than rigid containers, so you can fit more food in the same amount of space.
- Portion control: You can portion out meals in advance and freeze them in individual bags, which makes meal prep a breeze.
And here’s what it can’t do:
- Fix poor-quality food: If your food is already past its prime, a vacuum sealer won’t make it taste better. It’ll just preserve it in its current state.
- Replace proper freezing techniques: A vacuum sealer won’t make up for slow freezing or improper packaging. You still need to freeze food quickly and store it properly.
- Prevent spoilage: While a vacuum sealer can extend the shelf life of food, it won’t prevent spoilage indefinitely. Food can still go bad if it’s stored for too long or at the wrong temperature.
So, is a vacuum sealer worth it? If you’re freezing food regularly and want to maximize quality and shelf life, then yes, it’s a great investment. But if you’re just dipping your toes into shock freezing, you can get by without one. Start with the basics, see how it goes, and if you find yourself freezing food all the time, then consider upgrading. And if you do decide to buy one, look for a model with good reviews and a warranty. Trust me, you don’t want to deal with a broken vacuum sealer when you’re in the middle of meal prep.
Thawing Like a Pro (Because Freezing Is Only Half the Battle)
Why Thawing Matters Just as Much as Freezing
Here’s a hard truth: no matter how well you freeze your food, it’s all for nothing if you don’t thaw it properly. Thawing is where a lot of home cooks go wrong, and it’s often the difference between a meal that tastes fresh and one that tastes like it’s been sitting in the freezer for months. The problem? Most of us are in a hurry, and we take shortcuts. We microwave, we leave food out on the counter, or we run it under hot water. And while these methods might get the job done, they’re not doing your food any favors.
Why does thawing matter so much? Because how you thaw your food affects its texture, flavor, and even its safety. Thawing too quickly can cause moisture loss, leading to dry, tough meat or mushy vegetables. Thawing too slowly can allow bacteria to grow, especially if the food is left at room temperature for too long. And thawing unevenly can result in food that’s cooked on the outside but still frozen in the middle. None of these are ideal, and all of them can be avoided with the right techniques.
So what’s the best way to thaw food? It depends on what you’re thawing and how much time you have. But in general, the slower and more controlled the thaw, the better. Here are the best methods for thawing frozen food:
- Refrigerator thawing: This is the gold standard for thawing. It’s slow (plan for 24 hours for every 5 pounds of food), but it’s the safest and most effective method. Just transfer the food from the freezer to the fridge and let it thaw gradually. The only downside? You need to plan ahead.
- Cold water thawing: If you’re in a hurry, you can thaw food in cold water. Place the food in a leak-proof bag and submerge it in cold water, changing the water every 30 minutes. This method is faster than refrigerator thawing (about 30 minutes per pound), but it requires more attention.
- Microwave thawing: This is the fastest method, but it’s also the riskiest. Microwaves can cook food unevenly, leading to hot spots and partially cooked areas. If you’re going to use the microwave, use the defrost setting and check the food frequently.
And here’s what you shouldn’t do:
- Thaw food at room temperature: This is a big no-no. Food left out at room temperature for more than two hours can enter the “danger zone” (40°F to 140°F), where bacteria can grow rapidly. If you’re thawing meat, poultry, or seafood, this is especially risky.
- Thaw food in hot water: Hot water can start to cook the food, leading to uneven thawing and potential food safety issues. Stick to cold water for faster thawing.
- Refreeze thawed food: Once food is thawed, it should be cooked and eaten within a few days. Refreezing can lead to moisture loss and a decline in quality.
Now, I’ll admit: I’m guilty of taking shortcuts when it comes to thawing. Sometimes I’m just too hungry to wait, and I’ll throw something in the microwave or leave it out on the counter. And you know what? Most of the time, it’s fine. But every once in a while, I end up with food that’s either overcooked or undercooked, and I regret not taking the time to thaw it properly. So learn from my mistakes: thawing is just as important as freezing, and it’s worth the extra effort.
Cooking from Frozen: When It Works (And When It Doesn’t)
Here’s a little secret: you don’t always have to thaw food before cooking it. In fact, some foods are actually better when cooked from frozen. The key is knowing which foods can handle it, and which ones can’t. Cooking from frozen can save you time, but it can also lead to uneven cooking, dry meat, or mushy vegetables if you’re not careful. So let’s talk about when it works, when it doesn’t, and how to do it right.
Foods that can be cooked from frozen:
- Vegetables: Frozen vegetables are already blanched, so they’re designed to be cooked from frozen. Just toss them into a stir-fry, soup, or roasting pan, and they’ll cook up beautifully. No thawing required.
- Burgers and meatballs: These can go straight from the freezer to the grill or skillet. Just add a few extra minutes to the cooking time, and make sure they reach a safe internal temperature (160°F for ground beef).
- Fish fillets: Fish cooks quickly, so it’s often better to cook it from frozen to prevent overcooking. Just add a few extra minutes to the cooking time, and you’ll end up with moist, flaky fish.
- Bread and baked goods: You can toast frozen bread, muffins, or even pizza directly from the freezer. Just add a minute or two to the toasting time, and you’re good to go.
- Soups and sauces: These can go straight from the freezer to the pot. Just heat them slowly over medium-low heat, stirring occasionally, until they’re hot all the way through.
Foods that should be thawed first:
- Whole cuts of meat: Roasts, steaks, and whole chickens should be thawed before cooking to ensure even cooking. If you cook them from frozen, the outside will overcook before the inside is done.
- Poultry: Chicken and turkey should always be thawed before cooking to ensure they cook evenly and reach a safe internal temperature (165°F).
- Casseroles: These should be thawed before baking to ensure even cooking. If you bake them from frozen, the edges will burn before the center is hot.
- Baked goods with fillings: Pies, quiches, and other baked goods with fillings should be thawed before baking to prevent the crust from burning or the filling from being undercooked.
Now, I’ll be honest: I’ve cooked plenty of things from frozen that I probably shouldn’t have. And most of the time, it’s been fine. But every once in a while, I end up with a steak that’s burnt on the outside and raw in the middle, or a casserole that’s cold in the center. So if you’re going to cook from frozen, just be mindful of the risks. And if you’re not sure, thaw it first. It’s always better to be safe than sorry.
The Mistakes Everyone Makes (And How to Avoid Them)
Overpacking Your Freezer (And Why It’s a Problem)
Let’s talk about one of the biggest mistakes home cooks make when it comes to shock freezing: overpacking the freezer. I get it, freezer space is precious, and you want to make the most of it. But cramming your freezer full of food is one of the worst things you can do if you’re trying to shock freeze. Here’s why:
First, a packed freezer doesn’t circulate air well. Freezers work by circulating cold air around the food, and if that air can’t move freely, your food won’t freeze evenly. Some parts will freeze quickly, while others will take forever, and you’ll end up with a mix of well-frozen and poorly frozen food. Not ideal.
Second, a packed freezer has to work harder to maintain its temperature. When you open the door, all that cold air escapes, and the freezer has to work overtime to cool down again. If the freezer is already struggling to keep up, this can lead to temperature fluctuations, which can affect the quality of your frozen food. And if the freezer is really packed, it might not be able to recover at all, leaving your food at risk of spoilage.
Third, a packed freezer makes it harder to organize your food. If you can’t see what’s in there, you’re more likely to forget about it, leading to freezer burn and wasted food. And if you’re constantly digging through a mountain of frozen goods to find what you need, you’re more likely to leave the door open too long, which can cause temperature fluctuations and ice buildup.
So how do you avoid overpacking your freezer? Here are a few tips:
- Leave space for air circulation: Aim to keep your freezer about 75% full. This gives the cold air room to circulate and ensures that your food freezes evenly.
- Use stackable containers: Stackable containers and freezer bags can help you maximize space without overpacking. Just make sure they’re labeled so you can find what you need without digging through everything.
- Rotate your food: Use the “first in, first out” rule to make sure you’re using the oldest food first. This helps prevent freezer burn and ensures that nothing gets forgotten in the back of the freezer.
- Keep an inventory: Make a list of what’s in your freezer and update it regularly. This helps you keep track of what you have and prevents you from buying duplicates.
Now, I’ll admit: I’m guilty of overpacking my freezer. There’s something satisfying about seeing it full, like I’m some kind of freezer hoarder. But every time I do it, I regret it. The food doesn’t freeze as well, the freezer has to work harder, and I end up with a mess of half-frozen, half-burned food. So learn from my mistakes: keep your freezer organized, leave room for air circulation, and don’t overpack. Your food (and your freezer) will thank you.
Ignoring the “Danger Zone” (And Why It’s a Big Deal)
If you’ve ever taken a food safety course, you’ve probably heard of the “danger zone.” It’s the temperature range between 40°F and 140°F (4°C and 60°C), where bacteria can grow rapidly. And if you’re not careful, it’s easy to let your food linger in this zone for too long, putting you at risk for foodborne illness. This is especially true when you’re freezing and thawing food, because the process often involves moving food in and out of the danger zone.
Here’s the thing: bacteria don’t die when food is frozen. They just go dormant, and they wake up again when the food thaws. So if your food was contaminated before you froze it, those bacteria will still be there when you thaw it. And if you thaw it improperly, those bacteria can multiply rapidly, putting you at risk for food poisoning. That’s why it’s so important to handle food safely at every step of the freezing and thawing process.
So how do you avoid the danger zone? Here are a few tips:
- Freeze food quickly: The faster you freeze food, the less time it spends in the danger zone. Use the shock freezing techniques we’ve talked about to freeze food as quickly as possible.
- Thaw food safely: As we discussed earlier, the best way to thaw food is in the refrigerator, where it stays at a safe temperature. If you’re in a hurry, you can use cold water or the microwave, but be careful not to let the food sit at room temperature for too long.
- Cook food thoroughly: Make sure your food reaches a safe internal temperature before eating it. Use a food thermometer to check, and don’t rely on guesswork.
- Don’t refreeze thawed food: Once food is thawed, it should be cooked and eaten within a few days. Refreezing can lead to moisture loss and a decline in quality, and it can also increase the risk of foodborne illness.
Now, I’ll be honest: I’ve been guilty of ignoring the danger zone more times than I’d like to admit. I’ve left food out on the counter to thaw, I’ve refrozen thawed food, and I’ve even eaten food that’s been sitting in the danger zone for too long. And most of the time, I’ve been fine. But every once in a while, I’ve paid the price, and let me tell you, it’s not worth it. Food poisoning is miserable, and it’s not something you want to experience.
So learn from my mistakes: take the danger zone seriously. It’s not just a theoretical concept, it’s a real risk, and it’s one that you can avoid with a little bit of care and attention. Freeze food quickly, thaw it safely, cook it thoroughly, and don’t refreeze thawed food. It’s not rocket science, but it’s easy to forget in the moment. And when in doubt, remember: when it comes to food safety, it’s always better to be safe than sorry.
Putting It All Together: A Step-by-Step Guide to Shock Freezing at Home
Prepping Your Food for the Freeze
Alright, let’s get practical. You’ve got a batch of homemade tomato sauce, a bag of fresh berries, or maybe a tray of lasagna that you want to shock freeze. What do you do first? The key to successful shock freezing is preparation. If you skip this step, you’re setting yourself up for failure. So before you even think about turning on your freezer, let’s talk about how to prep your food for the freeze.
First, portion your food. Shock freezing works best when the food is in small, thin portions. The thicker the food, the longer it takes to freeze, and the more likely you are to end up with large ice crystals that ruin the texture. So if you’re freezing soup, divide it into shallow containers or freezer bags. If you’re freezing meat, portion it out into individual servings. And if you’re freezing berries, spread them out in a single layer on a tray. The goal is to maximize surface area and minimize thickness.
Second, blanch your vegetables. If you’re freezing veggies like broccoli, green beans, or spinach, blanching is a must. It deactivates the enzymes that cause spoilage and helps preserve the color, texture, and nutrients. Don’t skip this step, it’s the difference between frozen veggies that taste fresh and ones that taste like they’ve been sitting in your freezer for years.
Third, cool your food. The colder your food is before it goes into the freezer, the faster it’ll freeze. So if you’re freezing something hot, like soup or sauce, let it cool to room temperature first. You can speed up the process by placing the container in an ice bath or dividing it into smaller portions. Just don’t leave it out for too long, remember the danger zone!
Fourth, package your food properly. Use freezer-safe bags or containers, and remove as much air as possible before sealing. This prevents freezer burn and moisture loss, which can ruin the texture and flavor of your food. If you’re using bags, lay them flat in the freezer to save space and speed up the freezing process.
And finally, label everything. I can’t stress this enough. If you don’t label your food, you’ll forget what it is, how long it’s been in there, and whether it’s still safe to eat. Use a permanent marker to write the name and date on each package, and keep an inventory list if you’re freezing a lot of food. Trust me, future you will thank present you.
The Freezing Process: Step by Step
Now that your food is prepped and ready to go, it’s time to freeze it. Here’s a step-by-step guide to shock freezing at home:
- Lower your freezer temp: If your freezer has a “quick freeze” or “super freeze” setting, turn it on at least a few hours before you plan to freeze your food. If not, crank it to the coldest setting. The colder the freezer, the faster your food will freeze.
- Arrange your food: Spread your food out in a single layer on a metal baking sheet or in shallow containers. Make sure there’s space between each piece so the cold air can circulate. If you’re freezing something like soup or sauce, pour it into shallow containers or freezer bags.
- Freeze until solid: Place the tray or containers in the freezer and let the food freeze until solid. This usually takes 1-3 hours, depending on the size and thickness of the food. Don’t rush this step, patience is key.
- Package for long-term storage: Once the food is frozen solid, transfer it to freezer-safe bags or containers. Remove as much air as possible before sealing to prevent freezer burn. If you’re using bags, lay them flat in the freezer to save space.
- Return your freezer to normal temp: Once your food is frozen and packaged, turn your freezer back to its normal setting. Running it at max cold all the time isn’t great for energy efficiency, and it can cause ice buildup.
- Store properly: Keep your freezer organized and leave room for air circulation. Use the “first in, first out” rule to make sure you’re using the oldest food first, and keep an inventory list if you’re freezing a lot of food.
And that’s it! You’ve just shock frozen your food like a pro. Now, I’ll admit: this process takes a little more time and effort than just tossing food into a container and hoping for the best. But trust me, it’s worth it. The difference in quality is night and day, and you’ll be amazed at how much better your frozen food tastes when you thaw it.
Final Thoughts: Is Shock Freezing Worth the Effort?
So, after all this, you might be wondering: is shock freezing really worth the effort? I mean, it’s just freezing, right? Can’t you just toss food in the freezer and call it a day? Well, yes, you can. But if you’re reading this, I’m guessing you’re not the kind of person who settles for “good enough.” You want your frozen food to taste as good as fresh, and you’re willing to put in a little extra effort to make that happen. And that’s where shock freezing comes in.
Here’s the thing: shock freezing isn’t for everyone. If you’re the kind of person who only freezes the occasional batch of soup or a few extra portions of leftovers, you might not see the point. But if you’re someone who meal preps, buys in bulk, or just wants to reduce food waste, shock freezing can be a game-changer. It allows you to preserve food at its peak freshness, so you can enjoy it months later without sacrificing quality. And let’s be real, anything that helps you eat better, save money, and waste less food is worth a little extra effort.
But, and this is a big but, shock freezing isn’t a magic bullet. It won’t turn bad food into good food, and it won’t make up for poor freezing techniques. If you don’t prep your food properly, package it correctly, or thaw it safely, you’re still going to end up with subpar results. So if you’re going to do it, do it right. Take the time to learn the techniques, invest in the right tools, and be patient. It might take a few tries to get the hang of it, but once you do, you’ll wonder how you ever lived without it.
So, is shock freezing worth the effort? For me, the answer is a resounding yes. It’s changed the way I cook, the way I shop, and the way I think about food. It’s allowed me to meal prep like a pro, reduce food waste, and enjoy fresh-tasting food year-round. And if you’re willing to put in the time and effort, I think it can do the same for you. But don’t just take my word for it, try it for yourself. Freeze a small batch of something, thaw it, and see how it turns out. Worst case scenario, you learn something new. Best case, you discover a new freezer-friendly favorite. Either way, you win.
FAQ
Q: Can I shock freeze food in my regular home freezer, or do I need special equipment?
A: You can absolutely shock freeze food in a regular home freezer, but you’ll need to make a few adjustments. Most home freezers aren’t as cold or as efficient as commercial blast freezers, so you’ll need to spread your food out in thin layers, use metal trays for better cold conduction, and possibly lower your freezer’s temperature temporarily. It won’t be as fast as a blast freezer, but with the right techniques, you can still get great results.
Q: How long does shock-frozen food last in the freezer compared to regular frozen food?
A: Shock-frozen food can last just as long as regular frozen food, sometimes even longer, because the rapid freezing process helps preserve texture, flavor, and nutrients. However, the key to longevity is proper packaging. If you remove as much air as possible and use freezer-safe bags or containers, your shock-frozen food can last anywhere from 3 to 12 months, depending on the type of food. Just remember: the sooner you eat it, the better it’ll taste.
Q: What’s the biggest mistake people make when shock freezing at home?
A: The biggest mistake is overpacking the freezer. When your freezer is too full, the cold air can’t circulate properly, which means your food won’t freeze evenly or quickly. This leads to large ice crystals, poor texture, and a higher risk of freezer burn. To avoid this, keep your freezer about 75% full, leave space between items, and use stackable containers to maximize space without overpacking.
Q: Do I need to blanch vegetables before shock freezing them, or can I freeze them raw?
A: Blanching is highly recommended for most vegetables before shock freezing. Blanching deactivates the enzymes that cause spoilage and helps preserve the color, texture, and nutrients of the veggies. If you skip this step, your frozen vegetables might turn mushy or lose their vibrant color when you thaw them. The blanching process is simple: just boil or steam the veggies for a few minutes, then plunge them into ice water to stop the cooking process before freezing.
@article{shock-freezing-for-home-cooks-what-you-need-to-know-now-before-you-ruin-another-meal,
    title   = {Shock Freezing for Home Cooks: What You Need to Know Now (Before You Ruin Another Meal)},
    author  = {Chef's icon},
    year    = {2026},
    journal = {Chef's Icon},
    url     = {https://chefsicon.com/shock-freezing-home-cooks-need-to-know-now/}
}