The Best Fluffy Pancakes recipe you will fall in love with. Full of tips and tricks to help you make the best pancakes.
Table of Contents
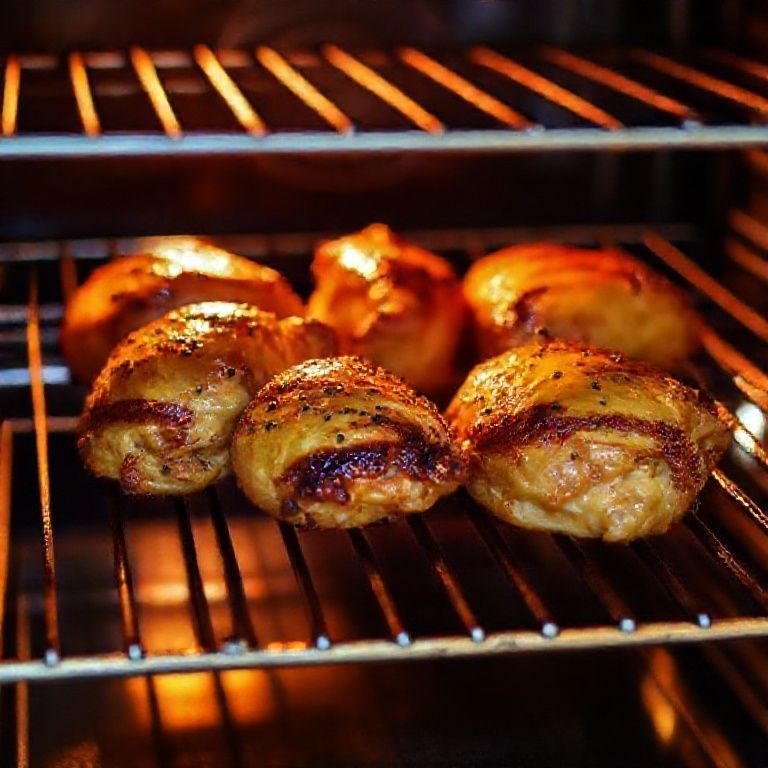
There’s nothing quite like the smell of ribs cooking in the oven. It’s a classic dish that brings people together, but it’s not without its challenges. Oven-cooking ribs can be tricky, get it wrong, and you’re left with dry, tough meat. But get it right, and you’ve got a culinary masterpiece on your hands. In this post, we’ll dive deep into the art and science of oven-cooking ribs, discussing the risks, optimal temperatures, and some tips to help you nail it every time.
Living in Nashville, I’ve had my fair share of amazing ribs. But when I first tried oven-cooking them at home, let’s just say the results were… mixed. It took a lot of trial and error, but I finally got the hang of it. And now, I want to share what I’ve learned with you.
By the end of this post, you’ll understand the common pitfalls of oven-cooking ribs, the ideal temperatures for different types of ribs, and some pro tips to elevate your rib game. Ready to dive in? Let’s go!
Understanding the Risks of Oven-Cooking Ribs
The Dreaded Dry Rib Syndrome
One of the biggest risks when oven-cooking ribs is ending up with dry, tough meat. Ribs are a fatty cut, which means they need to be cooked low and slow to break down the connective tissues and render the fat. Cook them too fast or at too high a temperature, and you’ll end up with dry, chewy ribs. Nobody wants that.
Uneven Cooking
Another common issue is uneven cooking. If your oven has hot spots or you don’t rotate the ribs, some parts might be perfectly cooked while others are still raw or overcooked. This can be frustrating, especially when you’re trying to impress guests.
The Danger of Undercooking
On the flip side, undercooking ribs can be just as bad. Not only will the meat be tough and chewy, but it can also be a health risk. Pork needs to be cooked to a safe internal temperature to kill any bacteria. We’ll talk more about safe temperatures later, but for now, just remember that undercooking is a no-go.
Is this the best approach? Let’s consider the importance of temperature control.
The Science of Temperatures
The Ideal Temperature Range
When it comes to oven-cooking ribs, temperature control is crucial. The ideal temperature range for cooking ribs is between 225°F to 250°F. This low and slow approach allows the connective tissues to break down and the fat to render, resulting in tender, juicy ribs.
But here’s where it gets a bit tricky. Different types of ribs have slightly different optimal temperatures. For example, baby back ribs tend to cook faster and can handle a slightly higher temperature, around 250°F. On the other hand, spare ribs and St. Louis-style ribs benefit from a lower temperature, around 225°F, due to their higher fat content.
The Importance of Internal Temperature
While the oven temperature is important, the internal temperature of the ribs is even more crucial. Pork is safe to eat when it reaches an internal temperature of 145°F. However, for ribs, you want to go a bit higher to ensure they’re fall-off-the-bone tender. Aim for an internal temperature of around 190°F to 203°F.
I’m torn between recommending a specific internal temperature and encouraging you to go by feel. Ultimately, the best way to tell if your ribs are done is to give them a gentle tug with a fork. If the meat pulls away from the bone easily, they’re ready.
The Role of Resting Time
Once your ribs reach the desired internal temperature, it’s important to let them rest. Resting allows the juices to redistribute throughout the meat, resulting in moister, more flavorful ribs. Aim to rest your ribs for about 10-15 minutes before serving.
Maybe I should clarify that resting time can vary depending on the size of your ribs. Larger racks might need a bit more time to rest.
Preparation Tips for Oven-Cooking Ribs
Seasoning Your Ribs
Before you even think about putting your ribs in the oven, you need to season them properly. A good dry rub is essential for adding flavor. You can use a store-bought rub or make your own with a mix of spices like paprika, garlic powder, onion powder, brown sugar, salt, and pepper.
Apply the rub generously to both sides of the ribs, making sure to coat them evenly. Let the ribs sit for at least 30 minutes to allow the flavors to meld together. If you have time, you can even let them sit overnight in the fridge.
Wrapping Your Ribs
Wrapping your ribs in foil, also known as the Texas crutch, can help speed up the cooking process and keep the ribs moist. After a few hours of cooking, wrap the ribs in foil and return them to the oven. This traps the moisture and helps break down the connective tissues faster.
However, be careful not to wrap them too early. Wrapping too early can result in a steamed, rather than smoked, flavor. Aim to wrap the ribs when they reach an internal temperature of around 160°F.
Basting Your Ribs
Basting your ribs with a liquid, like apple juice, beer, or a vinegar-based sauce, can add an extra layer of flavor and help keep the ribs moist. Baste the ribs every 30 minutes or so during the cooking process. Just be sure not to baste too often, as this can cool down the ribs and extend the cooking time.
Is this the best approach? Let’s consider the trade-offs.
Cooking Times for Different Types of Ribs
Baby Back Ribs
Baby back ribs are smaller and leaner than other types of ribs, which means they cook faster. At 250°F, baby back ribs typically take around 3-4 hours to cook. Keep an eye on them, as they can dry out quickly if overcooked.
Spare Ribs
Spare ribs are larger and fattier, which means they benefit from a longer, slower cook. At 225°F, spare ribs can take anywhere from 5-6 hours to cook. The extra time allows the fat to render and the connective tissues to break down, resulting in tender, juicy ribs.
St. Louis-Style Ribs
St. Louis-style ribs are essentially spare ribs with the tips removed, making them more uniform in shape. They also benefit from a longer, slower cook. At 225°F, St. Louis-style ribs can take around 5-6 hours to cook.
Ultimately, the key to oven-cooking ribs is patience. Rushing the process will only result in dry, tough meat. Take your time, monitor the temperature, and trust the process.
Common Mistakes to Avoid
Cooking at Too High a Temperature
One of the most common mistakes people make when oven-cooking ribs is cooking them at too high a temperature. Remember, low and slow is the name of the game. Cooking at too high a temperature can result in dry, tough ribs.
Not Using a Meat Thermometer
Another mistake is not using a meat thermometer. While you can go by feel, a meat thermometer takes the guesswork out of the equation. Invest in a good-quality meat thermometer and use it to monitor the internal temperature of your ribs.
Over-Basting
While basting can add flavor and moisture, over-basting can cool down the ribs and extend the cooking time. Baste every 30 minutes or so, but don’t go overboard.
Not Letting the Ribs Rest
Finally, not letting the ribs rest is a big no-no. Resting allows the juices to redistribute, resulting in moister, more flavorful ribs. Aim to rest your ribs for about 10-15 minutes before serving.
Let’s circle back to the importance of temperature control. It really is the key to oven-cooking ribs.
Troubleshooting Oven-Cooked Ribs
Ribs Are Too Tough
If your ribs are too tough, it’s likely because they weren’t cooked long enough or at a high enough temperature. Remember, ribs need to be cooked low and slow to break down the connective tissues. Aim for an internal temperature of around 190°F to 203°F.
Ribs Are Too Dry
If your ribs are too dry, it’s likely because they were cooked at too high a temperature or for too long. Stick to the ideal temperature range of 225°F to 250°F and keep an eye on the internal temperature.
Ribs Are Unevenly Cooked
If your ribs are unevenly cooked, it’s likely because your oven has hot spots or you didn’t rotate the ribs. Try rotating the ribs halfway through the cooking process to ensure even cooking.
I’m torn between recommending a specific internal temperature and encouraging you to go by feel. Ultimately, the best way to tell if your ribs are done is to give them a gentle tug with a fork.
Putting It All Together
So, there you have it, a comprehensive guide to oven-cooking ribs. From understanding the risks to mastering the temperatures, we’ve covered it all. Remember, the key to oven-cooking ribs is patience and temperature control.
Ready to put your newfound knowledge to the test? I challenge you to oven-cook a rack of ribs this weekend. Trust the process, monitor the temperature, and enjoy the delicious results. Happy cooking!
FAQ
Q: What’s the ideal oven temperature for cooking ribs?
A: The ideal oven temperature for cooking ribs is between 225°F to 250°F. Baby back ribs can handle a slightly higher temperature, around 250°F, while spare ribs and St. Louis-style ribs benefit from a lower temperature, around 225°F.
Q: How long should I cook my ribs in the oven?
A: Cooking times vary depending on the type of ribs. Baby back ribs typically take around 3-4 hours at 250°F, while spare ribs and St. Louis-style ribs can take anywhere from 5-6 hours at 225°F.
Q: Should I wrap my ribs in foil?
A: Wrapping your ribs in foil, also known as the Texas crutch, can help speed up the cooking process and keep the ribs moist. Aim to wrap the ribs when they reach an internal temperature of around 160°F.
Q: How can I tell if my ribs are done?
A: The best way to tell if your ribs are done is to give them a gentle tug with a fork. If the meat pulls away from the bone easily, they’re ready. You can also use a meat thermometer to monitor the internal temperature, aiming for around 190°F to 203°F.
@article{the-art-and-science-of-oven-cooking-ribs-risks-temps-and-tips,
    title   = {The Art and Science of Oven-Cooking Ribs: Risks, Temps, and Tips},
    author  = {Chef's icon},
    year    = {2025},
    journal = {Chef's Icon},
    url     = {https://chefsicon.com/oercooking-ribs-in-oven-risks-temps/}
}