The Best Fluffy Pancakes recipe you will fall in love with. Full of tips and tricks to help you make the best pancakes.
Table of Contents
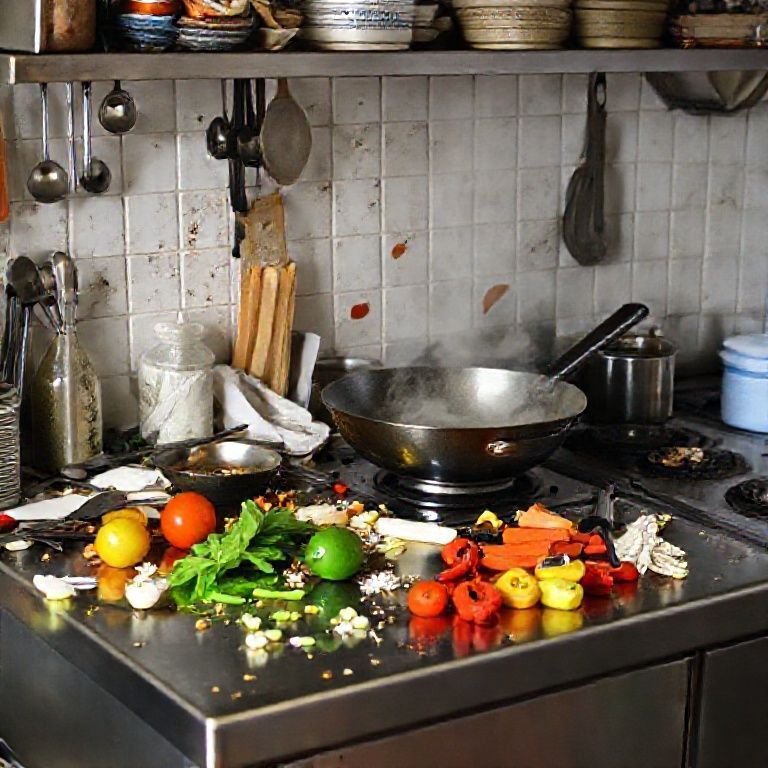
Alright, let’s talk kitchens. Not my little Nashville galley where Luna the cat judges my every culinary move (mostly attempts at tuna casserole, don’t ask), but the real deal – the engine room of any restaurant. We’re diving deep into optimizing restaurant kitchen layouts for efficiency. Because let’s be honest, we’ve all seen it, right? That barely controlled chaos during a Saturday night rush, tickets piling up, cooks bumping into each other, servers looking stressed… it’s like a poorly choreographed ballet, except nobody’s enjoying the performance, least of all the staff or the customers waiting for their food. It stresses *me* out just watching sometimes.
My background is actually in marketing, which might seem worlds away, but hear me out. In marketing, we obsess over funnels, conversion rates, and streamlining processes to get the best result with the least friction. It’s all about efficiency. And guess what? A restaurant kitchen is the ultimate conversion funnel – raw ingredients go in one end, and hopefully, happy customers and profits come out the other. The layout? That’s the funnel design. A poorly designed kitchen layout creates friction, wastes time, stresses out your team, impacts food quality, and ultimately, hits your bottom line. It’s not just about aesthetics or cramming equipment in; it’s fundamental to the entire operation.
I remember consulting for a place back in the Bay Area years ago, lovely concept, great food, but the kitchen was a nightmare. The walk-in was practically in another zip code from the main prep area, the dish pit blocked the path to the service window… it was exhausting just watching them work. We spent weeks just observing the flow, or lack thereof, before suggesting changes. Moving just one prep table and reorganizing a shelving unit made a noticeable difference. It’s those seemingly small things that add up. So, today, we’re going to break down how to think about your kitchen space, explore different layout options, and figure out how to make it work *for* you, not against you. We’ll look at workflow, key zones, equipment placement, and even stuff like safety and future-proofing. Because an efficient kitchen? That’s where the magic (and the money) happens.
Why Your Kitchen Layout is Mission Control
So, why fuss so much about where the fryer goes or how wide the walkway is? Because, as I hinted, it’s about so much more than just convenience. A well-thought-out kitchen layout is the bedrock of operational success. Think about workflow optimization – it’s the holy grail. Every single step a cook takes, every turn, every reach, it adds up. Multiply that by hundreds of plates over a busy service, and inefficiency becomes a massive drain on time and energy. A layout designed for smooth flow minimizes unnecessary movement, reduces bottlenecks, and lets your team focus on cooking, not navigating an obstacle course. This directly impacts speed of service – getting food out faster, turning tables quicker, making customers happier.
But it’s not just speed. It’s about staff morale too. Working in a cramped, illogical space is frustrating and physically taxing. Constantly bumping into colleagues, waiting for access to equipment, or trekking back and forth for ingredients breeds stress and resentment. A comfortable, efficient workspace makes for a happier, more productive team, which often translates to lower turnover – a huge issue in this industry, as we all know. And let’s not forget the impact on operational costs. Wasted steps mean wasted labor hours. Poor flow can lead to more food spoilage if ingredients aren’t easily accessible or stored correctly. Inefficient layouts might even require more staff than necessary just to overcome the physical barriers. Plus, a chaotic kitchen increases the risk of accidents and errors, impacting food cost and potentially safety.
Communication is another huge factor often overlooked in layout discussions. How easily can the expo communicate with the line? Can the grill station easily see or hear cues from the sauté station? Does the layout encourage teamwork or create isolated silos? Think about the placement of pass windows, the visibility across stations. Sometimes an open kitchen design, while having its own challenges, inherently boosts this communication. It’s all interconnected – the physical space directly shapes the human interactions and the overall efficiency. It’s a system, and the layout is the blueprint for how that system functions, or malfunctions.
Understanding the Core Kitchen Work Zones
Okay, let’s get practical. Every functional kitchen, regardless of size or style, needs distinct areas for specific tasks. Think of them as neighborhoods in your kitchen city. Identifying and organizing these work zones is step one in creating that logical flow we keep talking about. First up, you’ve got the Receiving Area. This is where deliveries come in, get checked, and start their journey. It needs to be easily accessible from the outside but also positioned logically near storage.
Next comes Storage. This isn’t just one zone, but usually three: Dry Storage (for non-perishables like flour, sugar, canned goods), Refrigerated Storage (walk-in or reach-in coolers for produce, dairy, meats), and Freezer Storage. Proximity matters here – ideally, storage should feed logically into the prep areas. You don’t want staff hauling heavy bags of onions across the entire kitchen.
Then we have the Food Prep areas. This might be one large space or several smaller, specialized stations (like garde manger for cold prep, a separate pastry area, or a butchering station). This is where raw ingredients are transformed – washed, chopped, portioned. It needs ample counter space, sinks, and easy access to relevant storage and tools. Logically, prep should flow towards the main cooking area.
The heart of the operation is the Cooking Line (or ‘the line’). This is where the heat happens – ranges, ovens, fryers, grills, sauté stations. It’s usually the busiest, hottest, and most intense zone. Layout here is critical for speed and efficiency, often arranged linearly or in specialized stations. It needs to be directly adjacent to the Service Area or Expo station, where plates are finished, garnished, and handed off to servers. This transition needs to be seamless.
Finally, often tucked away but absolutely essential, is the Dishwashing/Cleaning zone. Pots, pans, dishes, glassware – it all ends up here. It needs to be separate enough to avoid contaminating food prep areas but accessible for staff dropping off dirty items and picking up clean ones. Proper ventilation and drainage are key here. Wait, did I forget the expediting station? That’s crucial too, the bridge between the line and the front-of-house. It needs space for tickets, heat lamps, and plating adjustments. See? Lots of moving parts, and they all need their designated, logical space for a truly logical flow.
Common Kitchen Layout Styles: Pros and Cons
There’s no single ‘perfect’ kitchen layout; the best choice depends heavily on your space, menu, service style, and volume. But understanding the common configurations is crucial. One classic is the Assembly Line Layout (or Linear). Think fast food or high-volume cafeterias. Workstations are arranged in a line, usually starting with prep and moving sequentially through cooking stations to the service area. It’s great for high-volume production of standardized items, promoting specialization and efficiency for that specific workflow. However, it can be inflexible if the menu changes significantly and might not be ideal for complex dishes requiring movement between different station types.
Then there’s the Island Layout. This features a central block (the island) typically housing cooking equipment (ranges, grills, fryers), with other zones like prep, storage, and washing arranged around the perimeter. It can foster communication and allow the chef (often stationed at the island) to oversee everything. It works well in larger kitchens and can be efficient if designed correctly. The potential downside? The island itself can sometimes become a bottleneck, obstructing traffic flow around it if pathways aren’t wide enough. I always found the Island layout fascinating, kind of like a command center… but maybe it creates bottlenecks? Let’s consider the path staff need to take.
The Zone-Style Layout (or Zone Configuration) divides the kitchen into separate areas based on task or menu item type. You might have a sauté zone, a grill zone, a fry zone, a garde manger zone, each with its own dedicated equipment and potentially staff. This is common in larger restaurants with diverse menus, allowing for specialization and simultaneous production of different dishes. It requires good coordination between zones, often managed by an expo. It needs sufficient space to avoid zones feeling cramped.
A variation often seen in smaller spaces is the Galley Layout, where workstations and equipment are arranged along two parallel walls, creating a central corridor. It can be very efficient in terms of minimizing movement if workstations are placed logically opposite each other. The main challenge is ensuring the corridor is wide enough (ideally 4-5 feet) to allow staff to pass each other comfortably, especially when opening oven or refrigerator doors. Too narrow, and it becomes congested.
Finally, the Open Kitchen layout. Increasingly popular, it puts the kitchen (or parts of it) on display to the dining room. This creates theater and transparency, connecting diners to the cooking process. It demands exceptional cleanliness, organization, and often quieter equipment. Workflow still needs careful planning, but the added pressure of being ‘on stage’ can sometimes enhance focus. However, noise and heat spilling into the dining area can be concerns if not managed with proper ventilation and design. Choosing the right style – or even a hybrid approach – requires careful consideration of your specific operational needs.
Mapping Your Menu to Your Layout
This might seem incredibly obvious, but you’d be surprised how often it feels like an afterthought. Your menu *is* the driving force behind your kitchen’s design. Seriously, the type of food you serve, the complexity of the dishes, the prep involved, and the cooking methods required should dictate the layout, the equipment needed, and the space allocated to each station. Trying to force a complex, multi-stage tasting menu out of a kitchen designed for burgers and fries? Good luck with that. It’s like trying to run a marathon in flip-flops. You need the right gear, and in the kitchen, the layout is a critical part of that gear.
Think about it: a pizza place needs significant space for dough prep, large deck ovens, and maybe a dedicated cold station for toppings. A steakhouse requires high-powered grills or broilers, space for aging (potentially), and stations for sides. A fine-dining establishment with intricate plating needs more finishing and expo space. A high-volume sandwich shop prioritizes assembly line efficiency and cold storage. Performing a thorough menu analysis is step one. What are your core items? What are the high-volume sellers? What dishes require the most complex prep or specialized equipment? Understanding this helps you prioritize space and resources.
The production process for your key dishes should be mapped out. Where do the ingredients come from (storage)? Where are they prepped? What cooking equipment is needed? How long does each step take? Where is the dish plated and finished? Visualizing this flow for your most important menu items will highlight potential bottlenecks or inefficiencies in a proposed layout. Maybe you realize your grill station needs to be closer to the walk-in because your steaks are flying out the door, or that your garde manger station needs double the counter space it currently has. The equipment needs flow directly from the menu – don’t buy (or allocate space for) a giant deep fryer if 90% of your menu is salads and grilled fish.
Ultimately, the station design for each zone must support the tasks performed there, driven by the menu. Does the sauté cook have easy reach-in access to prepped ingredients? Is the plating area large enough and well-lit? Are the tools and smallwares needed for specific menu items stored conveniently at that station? It sounds basic, but designing the kitchen around the food, rather than trying to fit the food into a pre-existing design, is fundamental for efficiency. It’s about letting the menu be the architect.
Optimizing Workflow: The Art of Reducing Steps
We’ve talked about workflow, but let’s get into the nitty-gritty: minimizing movement. In kitchen design, every step counts. Or rather, every *saved* step counts. The goal is to arrange zones, equipment, and storage so that staff can perform their tasks with the fewest possible steps and the least amount of wasted motion. Think about the journey of a single plate, from raw ingredients to the pass. How many times does a cook have to walk across the kitchen? How many times do they have to bend, reach, or turn unnecessarily? Reducing this physical effort not only saves time but also reduces fatigue and the risk of errors. It’s pure ergonomics applied to a kitchen setting.
You might have heard of the classic ‘work triangle‘ concept from residential kitchen design (linking sink, stove, and refrigerator). While a useful starting point for thinking about core relationships, commercial kitchens are far more complex. You have multiple stations, multiple staff, and much higher volume. Instead of just one triangle, you might have several overlapping workflows. The key principle remains: keep related tasks and tools close together. Prep stations should be near their primary storage (cold or dry). Cooking stations need ingredients from prep nearby. The expo needs to be right next to the line. Sounds simple, but achieving it in a limited space requires careful planning.
Consider the placement of frequently used items. Hand tools, spices, oils, pans, serving dishes – these shouldn’t require a journey to retrieve. Small refrigerators under the counter at cooking stations for frequently used perishables can save countless trips to the main walk-in. Spice racks above or adjacent to the stoves. Plate warmers near the expo. It’s about anticipating needs and placing resources where they’ll be used. Also crucial is minimizing cross-traffic. Design pathways so that staff moving from receiving to storage aren’t constantly cutting through the busy cooking line, or so servers picking up orders aren’t dodging pot washers. Clear, wide-enough pathways (think 3-4 feet for single passage, 4-5 feet for two people) are essential. Sometimes, implementing pass-through windows or shelves between prep and line, or line and dishwashing, can streamline flow and reduce direct traffic. The aim is a smooth, logical, and *short* path for every common task.
Equipment Placement: Beyond Just Fitting It In
Okay, you’ve got your zones mapped out, you understand the workflow… now where does the actual *stuff* go? Placing equipment isn’t just a Tetris game of making it fit. It needs to be strategic, supporting the workflow we just discussed. The temptation might be to just line up all the cooking equipment, but think function first. Equipment grouping by task is often more efficient. Create a dedicated fry station with fryers, a landing zone, and potentially breading/prep nearby. Group the grill and plancha together. Place ovens strategically – maybe convection ovens near the main line for finishing, while baking ovens are in a dedicated pastry zone.
One major constraint, especially for cooking equipment, is ventilation. Heavy-duty equipment like ranges, grills, fryers, and combi ovens produce heat, grease, and smoke, requiring robust ventilation hoods. The location and capacity of your hood system will often dictate where this ‘hot line’ equipment *must* go. You can’t just stick a charbroiler in a corner without proper exhaust. This needs to be planned early, often involving HVAC professionals, as retrofitting ventilation is expensive and complex. Ensure the hood coverage is adequate for the equipment underneath it.
Beyond cooking, think about the flow *between* pieces of equipment. Does the blast chiller need to be near the combi oven if you’re doing a lot of cook-chill? Should the main mixer be located in the pastry area or a general prep zone, depending on its primary use? Placement should minimize the distance ingredients or semi-finished products need to travel between process steps. And please, please, think about cleaning access and maintenance space! Okay, the combi oven *fits* there, but can anyone actually clean behind it? Can a technician access the back panel for repairs without moving three other heavy pieces of equipment? Leaving adequate clearance around equipment (check manufacturer recommendations!) is crucial for sanitation and upkeep. Cramming things too tightly saves space initially but creates huge headaches down the road. Think long-term functionality, not just short-term space saving.
Storage Solutions: Maximizing Every Inch
Storage is one of those unglamorous heroes of kitchen efficiency. Get it wrong, and you’ve got chaos, waste, and frustration. Get it right, and it supports smooth operations, better inventory control, and food safety. The first rule is having *enough* storage – dry, refrigerated, and frozen – for your inventory levels. Running out of space leads to ingredients being stored improperly (hello, health code violations) or excessive deliveries, which costs time and money.
But it’s not just about quantity; it’s about organization and accessibility. This is where the FIFO system (First-In, First-Out) comes in. It’s a fundamental principle for minimizing spoilage and ensuring quality – use the oldest stock first. Your storage layout needs to facilitate this. For dry storage, this means clear shelving, good lighting, and enough space to rotate stock easily. For walk-ins, designated areas for different food types (raw meat on bottom shelves, produce above) are crucial for safety, and shelving should allow for easy visibility and rotation. Clear labeling with dates is non-negotiable.
Think vertically! Walls are often underutilized storage space. Installing sturdy, adjustable vertical storage (like wire shelving or wall-mounted racks) can dramatically increase capacity without taking up valuable floor space. Just ensure shelving is positioned so it doesn’t impede walkways or create safety hazards. Consider mobile shelving units for flexibility, allowing you to reconfigure storage areas as needed. Maybe I should try this in my own pantry… Luna seems to think the floor is prime storage for her toys anyway.
Location, location, location. Where is your storage relative to receiving and prep? Ideally, the receiving area flows directly into the main storage zones. And these storage zones should be easily accessible storage for the prep stations that use those ingredients most frequently. If your main walk-in cooler is at the opposite end of the kitchen from the garde manger station, that’s a built-in inefficiency. Maybe a smaller under-counter refrigerator at the station for daily prep quantities can bridge that gap? Effective inventory management relies heavily on organized, accessible storage. Knowing what you have, where it is, and how old it is saves time, reduces waste, and prevents frantic searching during service.
Safety and Sanitation by Design
Designing for efficiency is paramount, but it absolutely cannot come at the expense of safety and sanitation. In fact, a well-designed layout inherently promotes both. This isn’t the ‘fun’ part, maybe, but skimp here and you’re asking for trouble. Health code compliance isn’t just about passing inspections; it’s about protecting your customers and your staff. Let’s start with food safety. Your layout must minimize the risk of cross-contamination. This means designing separate workflows and ideally separate areas/cutting boards/tools for raw meats, poultry, seafood, and ready-to-eat foods like produce. Handwashing is critical – dedicated hand sinks (not prep sinks!) need to be conveniently located in prep areas, the cooking line, and the dishwashing area. Easy access encourages frequent use.
Then there’s worker safety. Kitchens are inherently hazardous environments – hot surfaces, sharp objects, wet floors. Your layout can mitigate many risks. Ensure clear, unobstructed pathways, wide enough for staff carrying hot pans or heavy loads. Avoid blind corners where collisions might occur. Use slip-resistant flooring, especially in areas prone to spills like the dish pit and around fryers. Adequate lighting is crucial throughout the kitchen, not just on the line, to prevent accidents. Proper placement of fire suppression systems (like Ansul systems over cooking equipment) and easily accessible fire extinguishers is non-negotiable. Emergency exits must be clearly marked and unobstructed.
Sanitation needs to be designed in from the start. Surfaces should be smooth, non-porous, and easy to clean (stainless steel is popular for a reason). Ensure equipment can be easily moved or accessed for cleaning underneath and behind. Plan for dedicated sanitation stations, including the main dishwashing area (with distinct zones for dirty drop-off, scraping, washing, rinsing, sanitizing, and air drying) and potentially smaller cleaning supply storage areas. Proper ventilation helps control airborne grease and moisture, contributing to a cleaner environment. Thinking about safety and sanitation during the design phase prevents costly retrofits and, more importantly, protects everyone who works in or eats from your kitchen.
Flexibility and Future-Proofing Your Kitchen
The restaurant world is constantly evolving. Menus change, dining trends shift, technology advances. Designing a kitchen layout that’s efficient *today* is great, but designing one with flexibility and adaptability for the future? That’s even better. You don’t want to invest heavily in a layout that becomes obsolete or hinders growth in just a few years. Who knows what the next big trend will be? Ghost kitchen integration? Plant-based everything requiring different prep? Point is, a little foresight goes a long way. Avoid boxing yourself in with completely fixed, immovable elements if possible.
One way to build in flexibility is through modular design and the use of mobile equipment. Can some prep tables be on castors, allowing you to reconfigure the space for different tasks or deep cleaning? Can some cooking equipment (like induction burners or countertop fryers) be mobile, allowing you to adapt the line for menu specials or catering gigs? This doesn’t work for everything (heavy ranges or built-in hoods are pretty permanent), but incorporating some mobile elements can make a big difference. Think about utility connections too – having accessible power outlets and potentially gas or water hookups in multiple locations offers more options down the line.
Consider potential menu evolution. Even if you’re focused on a specific cuisine now, might you want to add a brunch program later? Or expand your dessert offerings? Leaving a little ‘flex space’ in the layout, or designing multi-functional prep areas, can provide room to grow or pivot without a complete overhaul. Also, think about technology. Smart kitchen equipment, integrated inventory systems, kitchen display systems (KDS) – technology is playing an increasing role. While you might not implement everything now, consider the infrastructure. Is there space for KDS screens? Is your electrical capacity sufficient for future equipment upgrades? Future-proofing isn’t about predicting the future perfectly, but about making design choices that keep your options open and allow your kitchen to evolve alongside your business.
Bringing It All Together: The Design Process
So, we’ve covered zones, flow, equipment, safety, flexibility… how do you actually make it happen? Designing or redesigning a kitchen layout isn’t something to be sketched on a napkin over lunch (though maybe that’s where the initial idea sparks!). It’s a process, and ideally, a collaborative one. Who knows the current kitchen’s pain points better than the chefs, cooks, and dishwashers who work there every day? Their staff input is invaluable. Before you move a single wall or buy a new piece of equipment, talk to your team. Observe them during service. Ask them what works, what doesn’t, and what their biggest frustrations are. They’ll often have practical insights that a designer might overlook.
While staff input is crucial, working with professional designers who specialize in commercial kitchens is highly recommended, especially for new builds or major renovations. They understand building codes, health regulations, equipment specifications, ventilation requirements, and workflow principles in intimate detail. They can translate your vision and your team’s feedback into functional blueprints and technical drawings. They know the right questions to ask and can often suggest solutions you hadn’t considered. Yes, it’s an investment, but potentially saves costly mistakes and inefficiencies down the line. Look for designers with experience in your specific type of operation (e.g., fine dining vs. QSR).
The process is usually iterative. The first draft of the layout is rarely the final one. Expect to go back and forth, reviewing drawings, maybe using tape on the floor of an empty space to visualize pathways, or even employing 3D modeling software to get a better feel for the space. Question everything. Does this flow make sense? Is there enough clearance here? Where will dirty dishes pile up? Where will clean linens be stored? It’s about refinement and problem-solving before construction begins. Remember, it’s a team sport, designing a kitchen. Combining operational knowledge from your staff with the technical expertise of designers leads to the best results. Don’t rush it; a well-planned layout is worth the time and effort.
Final Thoughts on Kitchen Harmony
Whew, okay, that was a lot, right? We’ve journeyed from the chaos of a bad layout to the principles of efficient design – zones, flow, equipment, safety, flexibility. It’s clear that optimizing your restaurant kitchen layout for efficiency isn’t just a nice-to-have; it’s fundamental. It touches every part of the operation, from the stress levels of your cooks to the speed at which a plate reaches the customer, and ultimately, to your profitability. It’s the invisible architecture supporting the entire dining experience.
Maybe the biggest takeaway is that efficiency isn’t about cutting corners; it’s about removing obstacles. It’s about creating an environment where your talented team can do their best work without fighting the space itself. It requires thoughtful analysis of your menu, honest observation of your current (or potential) workflow, and a willingness to invest time, and sometimes capital, in getting it right. It’s a blend of art and science – the science of ergonomics and workflow, and the art of adapting those principles to your unique space and concept.
So, here’s a little challenge, or maybe just a thought experiment: Take a critical look at a kitchen space you know well – maybe your own restaurant’s, one you used to work in, or even just your home kitchen (Luna is currently demonstrating inefficient flow around her food bowl, requiring at least three unnecessary turns). What’s one bottleneck? One area of consistent frustration or wasted movement? What single change, big or small, could improve the flow? Sometimes just identifying the friction points is the first step towards a smoother, happier, and more efficient kitchen. Because ultimately, isn’t that what we’re all aiming for?
FAQ
Q: What’s the single most important factor in kitchen layout efficiency?
A: It’s really tough to pick just one, but workflow is arguably the most critical. Ensuring a logical, sequential flow of tasks from receiving ingredients to plating the final dish, while minimizing unnecessary steps and cross-traffic for staff, underpins almost every other aspect of an efficient layout.
Q: How much space do I really need for an efficient kitchen layout?
A: There’s no magic number, as it heavily depends on your menu complexity, projected sales volume, number of staff working simultaneously, and service style. However, a common guideline is that the kitchen should be roughly 25-35% of the restaurant’s total square footage. More importantly than raw size is using the space effectively with clear pathways (at least 3-4 feet wide) and distinct, adequately sized work zones. Avoid overcrowding at all costs.
Q: Can I realistically redesign my existing kitchen layout without a massive renovation?
A: Sometimes, yes! While moving plumbing, ventilation hoods, or major walls is expensive, significant efficiency gains can often be achieved through less drastic measures. This could involve rearranging mobile equipment (prep tables on castors), optimizing storage with better shelving, rethinking station setups, adjusting smallware placement, or improving workflow patterns through staff training and minor adjustments. An audit of your current flow can reveal achievable improvements.
Q: Is an open kitchen layout inherently less efficient or harder to manage?
A: Not necessarily less efficient, but it presents different challenges. An open kitchen *demands* exceptional organization, cleanliness, and often requires quieter equipment and more disciplined staff since they’re ‘on stage’. Workflow must still be meticulously planned. While it can enhance communication and provide a great customer experience, any disorganization or inefficiency is immediately visible. It requires a strong commitment to maintaining standards.
You might also like
- Essential Commercial Kitchen Equipment Checklist
- Small Restaurant Kitchen Design Ideas
- Understanding Kitchen Ventilation Requirements
@article{restaurant-kitchen-layout-design-for-peak-efficiency,
    title   = {Restaurant Kitchen Layout Design for Peak Efficiency},
    author  = {Chef's icon},
    year    = {2025},
    journal = {Chef's Icon},
    url     = {https://chefsicon.com/optimizing-restaurant-kitchen-layouts-for-efficiency/}
}