The Best Fluffy Pancakes recipe you will fall in love with. Full of tips and tricks to help you make the best pancakes.
Table of Contents
I remember the first time I tried the oven-then-grill method for pork ribs. It was a game-changer. I had always struggled with getting that perfect balance of tender meat and a smoky, caramelized crust. The oven-then-grill method, though, it just made sense. It’s like having the best of both worlds, precision cooking and that irresistible grill flavor. Today, I want to share why this method is worth your time and how you can master it.
You’re probably wondering, why bother with two steps? Well, the oven gives you control. It’s where the magic of slow cooking happens, breaking down the tough fibers in the ribs until they’re melt-in-your-mouth tender. Then, the grill steps in to add that smoky, charred finish that we all crave. It’s not just about convenience; it’s about creating ribs that are consistently delicious every single time.
In this article, I’ll walk you through everything you need to know, from selecting the right ribs to mastering the oven and grill process. We’ll cover seasoning, timing, and even some troubleshooting tips. By the end, you’ll be ready to impress your friends and family with ribs that are juicy, flavorful, and perfectly cooked. Let’s dive in.
Main Content: The Art of Oven-Then-Grill Pork Ribs
Choosing the Right Ribs
First things first, not all ribs are created equal. You’ve got your baby back ribs, spare ribs, and St. Louis-style ribs. Baby backs are smaller, leaner, and cook faster, while spare ribs are larger and meatier. St. Louis-style ribs are essentially spare ribs with the sternum bone, cartilage, and rib tips removed. For the oven-then-grill method, I personally love using St. Louis-style ribs. They’re meaty, flavorful, and have just the right amount of fat to keep them juicy.
When you’re at the store, look for ribs with good marbling. The fat should be evenly distributed, not clumped in one spot. Also, check the color, you want ribs that are pinkish-red, not gray or brown. And don’t be afraid to ask your butcher for advice. They can help you pick out the best rack and might even trim them for you if you ask nicely.
Is this the best approach? Let’s consider the alternatives. You could go with baby back ribs if you’re short on time, but they might not have the same depth of flavor as St. Louis-style. Spare ribs are great too, but they can be a bit tougher and require longer cooking. Ultimately, it’s about what you prefer, but I’m sticking with St. Louis-style for this method.
Preparing the Ribs
Before you even think about cooking, you need to prep your ribs. This means removing the membrane, that thin, papery layer on the bone side of the ribs. It’s tough and chewy, and nobody wants to bite into that. To remove it, slide a butter knife under the membrane at one end of the rack, lift it up, and then grab it with a paper towel (it’s slippery!) and pull it off in one swift motion. If it tears, don’t worry, just keep pulling until it’s all off.
Once the membrane is gone, it’s time to trim any excess fat. You don’t want to remove all the fat, remember, fat equals flavor, but you do want to trim off any large, uneven pieces. This helps the ribs cook more evenly and prevents flare-ups on the grill later.
Maybe I should clarify, this step isn’t just about aesthetics. Trimming the fat and removing the membrane ensures that your seasoning penetrates the meat better and that your ribs cook evenly. It’s a small step that makes a big difference.
Seasoning the Ribs
Now, the fun part, seasoning. You can go with a dry rub or a marinade, but I’m a dry rub kind of guy. It’s simple, it’s flavorful, and it forms a beautiful crust on the ribs. A basic rub might include brown sugar, paprika, garlic powder, onion powder, salt, pepper, and maybe a touch of cayenne for heat. But don’t be afraid to get creative. Add some cumin for earthiness, or a bit of coffee powder for depth. The key is to coat the ribs generously, pressing the rub into the meat so it sticks.
If you’re using a marinade, make sure it’s not too acidic. Acid can break down the meat fibers too much, making your ribs mushy. A little vinegar or citrus is fine, but balance it with oil and other flavors. And whatever you do, don’t skip the seasoning step. This is where the flavor starts building.
I’m torn between recommending a specific rub and encouraging you to experiment. Ultimately, I think you should try a few different combinations and see what you like best. That’s part of the fun of cooking, right?
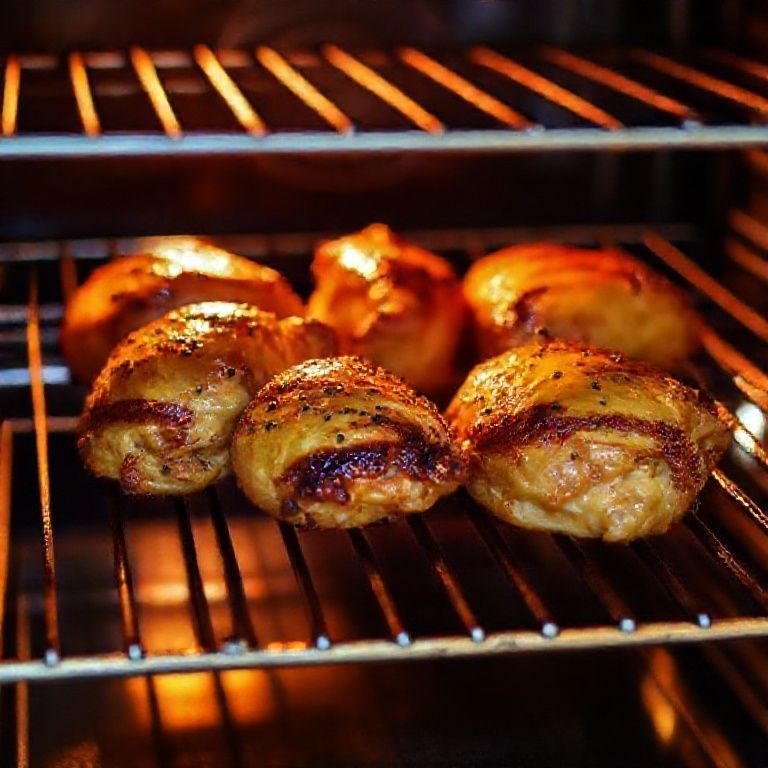
The Oven Phase: Low and Slow
Here’s where the magic happens. The oven is your best friend for getting those ribs tender. You want to cook them low and slow, around 275°F (135°C) for about 2 to 3 hours. The exact time will depend on the size of your ribs and your oven, so keep an eye on them. The goal is to get the ribs to the point where they’re almost falling off the bone but not quite.
You can cook the ribs directly on a baking sheet, but I prefer using a wire rack set inside a baking sheet. This allows the heat to circulate around the ribs, cooking them more evenly. Plus, it keeps the ribs from sitting in their own fat, which can make them greasy.
Should you cover the ribs with foil? It’s a common question. Covering them can help keep them moist, but it can also steam them, which might make the bark (that delicious crust) less crispy. I usually go uncovered for the first hour or so, then cover them loosely with foil if they’re browning too quickly. It’s all about balance.
Adding Moisture and Flavor
While the ribs are in the oven, you can add some moisture to keep them from drying out. A simple spray bottle with apple juice, cider vinegar, or even water works great. Just give the ribs a spritz every 30 minutes or so. This also helps build layers of flavor.
Another trick is to place a pan of water in the oven while the ribs cook. This adds humidity to the oven environment, which can help keep the ribs moist. It’s not strictly necessary, but it’s a good insurance policy if you’re worried about dry ribs.
Is this overcomplicating things? Maybe. But when you’re aiming for perfection, every little detail counts. And trust me, the extra effort is worth it when you bite into those juicy, flavorful ribs.
Checking for Doneness
So, how do you know when the ribs are done? The best way is to use the bend test. Pick up the rack with a pair of tongs, if the ribs bend easily and the meat starts to crack on the surface, they’re ready. If they’re still stiff, they need more time. You can also use a meat thermometer; the internal temperature should be around 195°F (90°C).
Don’t rush this step. Undercooked ribs are tough and chewy, and that’s not what we’re going for. Patience is key here. If they need more time, give them more time. It’s better to wait than to serve ribs that aren’t quite there yet.
I can’t stress this enough, doneness is everything. It’s the difference between good ribs and great ribs. So take your time and get it right.
Preparing the Grill
While the ribs are finishing up in the oven, it’s time to get the grill ready. You want a medium-high heat, around 350°F (175°C). If you’re using charcoal, let it burn down to a nice bed of coals. For gas grills, preheat on medium-high. The goal is to get a good sear on the ribs without burning them.
If you’re feeling fancy, you can add some wood chips to the grill for extra smoke flavor. Soak the chips in water for about 30 minutes first, then drain them and add them to the coals or to a smoker box if you’re using a gas grill. Hickory, apple, or cherry wood all work great with pork.
Should you oil the grates? Absolutely. This prevents the ribs from sticking and makes for easier flipping. Just use a paper towel dipped in oil and run it over the grates with a pair of tongs. Be careful, though, the grates will be hot!
The Grill Phase: Finishing Strong
Now, the moment of truth. Transfer the ribs from the oven to the grill, bone side down first. You want to get a nice char on both sides, so let them cook for about 5 minutes per side. Keep an eye on them, though, grills can be unpredictable, and you don’t want to burn your hard work.
If you’re using a sauce, now’s the time to add it. Brush a thin layer on the ribs during the last few minutes of grilling. This gives the sauce time to caramelize and stick to the ribs without burning. If you add it too early, the sugars in the sauce can burn, leaving you with a bitter taste.
I’m always a little nervous at this stage. All that time and effort, and it can all go up in smoke if you’re not careful. But trust yourself. You’ve got this.
Resting the Ribs
Once the ribs are off the grill, let them rest for about 10 minutes before cutting into them. This allows the juices to redistribute throughout the meat, making every bite as juicy as possible. If you cut into them right away, all those delicious juices will run out, leaving you with drier ribs.
Resting is one of those steps that’s easy to overlook, but it’s crucial. Think of it as the final step in the cooking process. It’s where everything comes together.
Maybe I’m making too big a deal out of this, but I’ve seen too many people skip the resting step and end up with a plate of dry ribs. Don’t be that person.
Serving and Enjoying
Finally, the best part, eating! Cut the ribs between the bones and serve them up with your favorite sides. Coleslaw, baked beans, cornbread, whatever you like. The ribs are the star of the show, so keep the sides simple.
And don’t forget the sauce. Whether you’re a fan of classic BBQ sauce, a tangy vinegar-based sauce, or something spicy, have it on the side so everyone can add as much or as little as they like.
At this point, I’m usually too excited to eat to worry about presentation, but if you’re serving these at a dinner party, a little garnish goes a long way. A sprinkle of fresh herbs or a squeeze of lemon can brighten up the plate and make your ribs look as good as they taste.
Closing Thoughts: Why This Method Works
The oven-then-grill method is all about control. The oven gives you the precision to cook the ribs slowly and evenly, ensuring they’re tender and juicy. The grill then steps in to add that smoky, charred flavor that’s hard to achieve in the oven alone. It’s a partnership that results in ribs that are consistently delicious.
I’ve tried a lot of methods over the years, smoking, braising, even sous vide, but this one is my go-to. It’s reliable, it’s relatively hands-off, and it delivers incredible results every time. Plus, it’s a great way to cook ribs if you don’t have a smoker or if the weather isn’t cooperating for outdoor cooking.
So, are you ready to give it a try? I challenge you to make a batch of these ribs for your next gathering. I guarantee they’ll be a hit. And who knows? You might just become the rib master in your circle.
FAQ
Q: Can I use this method with other types of ribs, like beef ribs?
A: Absolutely! While pork ribs are the most common, this method works well with beef ribs too. Just keep in mind that beef ribs are larger and may require a longer cooking time in the oven. Adjust the seasoning to complement the richer flavor of beef.
Q: What if I don’t have a grill? Can I still make these ribs?
A: Yes, you can! If you don’t have a grill, you can finish the ribs under the broiler in your oven. Keep a close eye on them, as broilers can be intense and may char the ribs quickly. Alternatively, you can use a grill pan on your stovetop for a similar effect.
Q: How do I store leftovers?
A: Leftover ribs can be stored in an airtight container in the refrigerator for up to 3 days. To reheat, wrap them in foil and warm them in the oven at 275°F (135°C) until heated through. This helps retain moisture and prevents them from drying out.
Q: Can I freeze cooked ribs?
A: Yes, you can freeze cooked ribs for up to 3 months. Wrap them tightly in plastic wrap and then in foil or place them in a freezer bag to prevent freezer burn. To reheat, thaw them in the refrigerator overnight and then warm them in the oven as described above.
@article{oven-then-grill-pork-ribs-a-game-changer-for-your-bbq,
    title   = {Oven-Then-Grill Pork Ribs: A Game-Changer for Your BBQ},
    author  = {Chef's icon},
    year    = {2025},
    journal = {Chef's Icon},
    url     = {https://chefsicon.com/oven-then-grill-pork-ribs/}
}