
Table of Contents
- 1 Choosing Your Ideal Chili Companion: Size, Material, and More
- 1.1 The Great Size Debate: How Much Chili Do You *Really* Need?
- 1.2 Material Matters: From Stainless Steel to Cast Iron
- 1.3 Beyond the Basics: Features to Consider
- 1.4 Budget-Friendly vs. Investment Pieces: Finding Your Price Point
- 1.5 Cleaning and Maintenance: Keeping Your Chili Pot in Tip-Top Shape
- 1.6 The Induction Question: Does Your Pot Work with Your Stovetop?
- 1.7 The Aesthetics of Chili: Does the Pot *Look* Good?
- 1.8 Beyond the Pot: Essential Chili-Making Accessories
- 1.9 The Chili-Making Ritual: It’s More Than Just a Recipe
- 2 The Final Simmer: Choosing *Your* Perfect Chili Pot
- 3 FAQ
- 4 You Might Also Like
Chili. Just the word conjures up images of crisp autumn evenings, roaring fireplaces (or at least, the *idea* of one), and that deep, satisfying warmth that only a good bowl of chili can provide. I’ve been making chili for years, ever since I moved to Nashville from the Bay Area – talk about a culinary culture shock! And let me tell you, the pot you use *matters*. It’s not just about getting something big enough; it’s about heat distribution, material, and even, dare I say, the *vibe* of the pot. This isn’t just about cooking; it’s about crafting an experience. It’s about nurturing something delicious. So, we’re going to dive deep into the world of chili pots. Because, honestly, who wants mediocre chili?
Over the years, I’ve gone through my fair share of pots. Flimsy ones that scorched my chili on the bottom, ridiculously heavy ones that made me question my upper body strength, and even one that… well, let’s just say it involved a very unfortunate lid incident. (Luna, my rescue cat, still gives me the side-eye when I mention it.) Through all that trial and error, I’ve learned a thing or two. And it all boils down to choosing the right tool for the job. This isn’t about fancy gadgets or the most expensive option. It’s about understanding what makes a *great* chili pot and finding the one that fits *your* cooking style and needs.
This article is going to walk you through everything you need to know to choose the best pot for making chili. We’ll talk about different materials, sizes, shapes, and features. We’ll even discuss some of the… less obvious considerations. By the end, you’ll be armed with the knowledge to confidently select the perfect chili pot – the one that will become your trusty companion for years of chili-making adventures. Ready to get started? Let’s simmer down, and get into it! (Sorry, I couldn’t resist.)
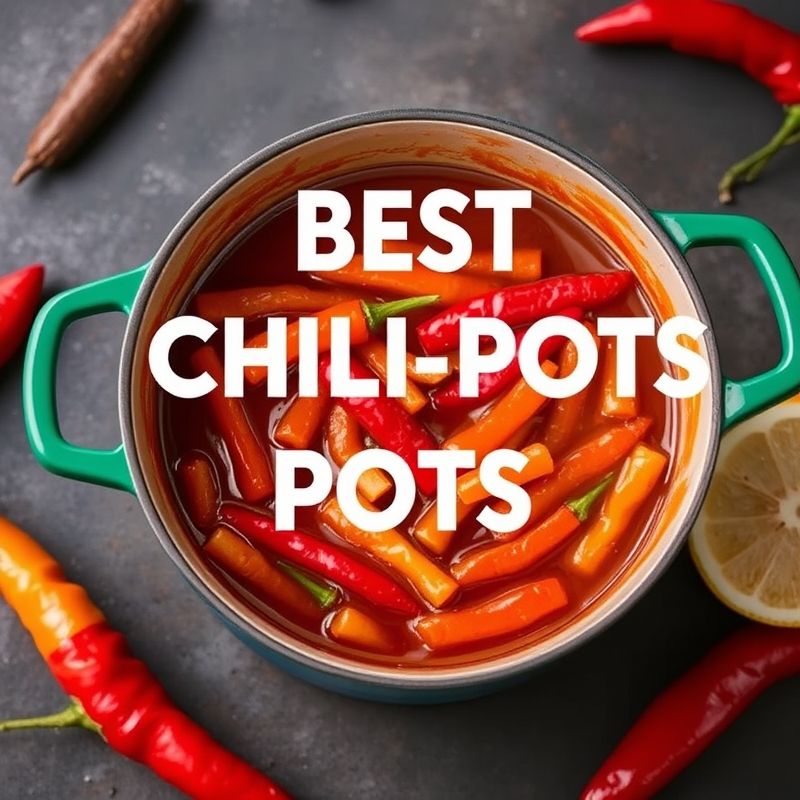
Choosing Your Ideal Chili Companion: Size, Material, and More
The Great Size Debate: How Much Chili Do You *Really* Need?
Okay, first things first: size. This seems obvious, but it’s easy to underestimate (or overestimate!). Think about how much chili you typically make. Are you feeding a small army, or is it usually just for you and a couple of friends? A 6-quart pot is a good starting point for a standard batch, feeding maybe 4-6 people. If you regularly host chili cook-offs or have a large family, you might want to bump up to an 8-quart or even a 12-quart. I have an 8-quart that I use most of the time, and it’s perfect for leftovers (which, let’s be honest, are the best part of chili). But, if you’re tight on storage space, a smaller pot might be a more practical choice. Also, remember bigger isn’t always better for flavor. If you have too much empty space, your chili might not simmer as evenly.
Another thing to consider is the *shape* of the pot. A wider pot with a larger surface area will allow for better evaporation, leading to a thicker, richer chili. A taller, narrower pot might be better if you’re worried about splattering, but it could also take longer for your chili to reduce. It’s a trade-off. I personally prefer a wider pot, even if it means a little extra cleanup. The depth of flavor is worth it, in my opinion. And don’t forget the lid! A tight-fitting lid is crucial for trapping moisture and heat, especially during the long simmering process.
Material Matters: From Stainless Steel to Cast Iron
Now, let’s talk materials. This is where things get interesting. Each material has its own unique properties that affect how it heats up and cooks your chili. Here are the main contenders:
- Stainless Steel: A popular choice for its durability and ease of cleaning. Look for tri-ply or multi-clad stainless steel, which means it has layers of different metals (usually aluminum or copper sandwiched between stainless steel) for better heat distribution. Stainless steel is non-reactive, so it won’t interact with acidic ingredients like tomatoes.
- Enameled Cast Iron: My personal favorite. Cast iron is a heavy-duty workhorse that heats up slowly and evenly, retaining heat beautifully. The enamel coating makes it easier to clean than traditional cast iron and prevents it from reacting with acidic foods. It’s also incredibly versatile – you can use it on the stovetop, in the oven, and even on a campfire!
- Cast Iron: The classic, bare-bones option. Cast iron provides excellent heat retention and can develop a natural non-stick surface over time (called seasoning). However, it requires more care than enameled cast iron and can react with acidic ingredients, potentially giving your chili a metallic taste.
- Nonstick: While convenient for cleanup, nonstick coatings can sometimes be less durable and may not be suitable for high-heat cooking. If you go this route, look for a high-quality nonstick pot that’s specifically designed for stovetop use.
- Copper:Known for its exceptional heat conductivity, copper heats up quickly and evenly. However, it’s also expensive and requires special care. It’s often lined with another metal, like stainless steel, to prevent it from reacting with food.
I’m a big fan of enameled cast iron. It’s like the Goldilocks of chili pots – not too fussy, not too delicate, just right. It gives my chili that beautiful, slow-simmered flavor, and it’s a breeze to clean. Plus, it just *feels* right, you know? Like I’m connecting with some ancient culinary tradition. But ultimately, the best material for you depends on your personal preferences and cooking style.
Beyond the Basics: Features to Consider
Beyond size and material, there are a few other features that can make a big difference in your chili-making experience. Think about things like:
- Handles: Are they comfortable to grip? Are they oven-safe? Sturdy handles are essential, especially when you’re dealing with a large, heavy pot of chili.
- Lid: Does it fit snugly? Is it made of the same material as the pot, or is it glass? A glass lid can be nice for monitoring your chili without lifting the lid, but it might not retain heat as well.
- Shape: As we discussed earlier, a wider pot is generally better for chili, but a taller pot might be better for preventing splatters.
- Induction Compatibility: If you have an induction cooktop, make sure the pot you choose is compatible. Look for pots with a magnetic base.
These might seem like small details, but they can really impact your overall cooking experience. For example, I once had a pot with flimsy handles that made me nervous every time I had to move it. It totally took the joy out of the process. It is important to think of safety first, but it’s also good to consider the feel of the pot. Little things can make a big difference in the long run.
Budget-Friendly vs. Investment Pieces: Finding Your Price Point
Let’s talk money. Chili pots can range in price from surprisingly affordable to… well, let’s just say you could buy a small car for the price of some high-end cookware. It’s all about finding the right balance between quality and your budget. You can definitely find a decent stainless steel pot for a reasonable price. If you’re on a tighter budget, that’s a great option. Enameled cast iron tends to be a bit more expensive, but it’s a worthwhile investment if you plan on making chili regularly. It’s the kind of pot that will last you a lifetime (with proper care, of course). I view the price of a pot as a long-term investment.
Think about how often you’ll use the pot and how long you expect it to last. If you’re a serious chili enthusiast, it might be worth splurging on a higher-end pot. But if you only make chili a few times a year, a more affordable option might be perfectly fine. Just be sure to read reviews and compare prices before making a decision. I am always looking for a good deal.
Cleaning and Maintenance: Keeping Your Chili Pot in Tip-Top Shape
No one wants to spend hours scrubbing a pot after enjoying a delicious bowl of chili. So, let’s talk about cleaning and maintenance. Stainless steel is generally the easiest to clean – just use hot, soapy water and a non-abrasive sponge. Enameled cast iron is also relatively easy to clean, but you’ll want to avoid using harsh abrasives or metal scouring pads, which can damage the enamel. For stubborn stains, you can make a paste of baking soda and water and let it sit for a while before scrubbing. This works wonders, I am speaking from experience.
Traditional cast iron requires a bit more TLC. You’ll need to season it regularly to maintain its non-stick surface and prevent rust. After cleaning, dry it thoroughly and rub it with a thin layer of oil. Avoid using soap, as it can strip away the seasoning. And whatever you do, *don’t* put it in the dishwasher! (Trust me, I learned that the hard way.) The bottom line: Choose a pot that you’re comfortable cleaning and maintaining. If you’re not willing to put in the effort to care for cast iron, then enameled cast iron or stainless steel might be a better choice.
The Induction Question: Does Your Pot Work with Your Stovetop?
This is a quick but important point. If you have an induction cooktop, you *must* use a pot that’s compatible. Induction cooking works by creating a magnetic field that heats the pot directly. So, the pot needs to have a magnetic base. You can test this by holding a magnet to the bottom of the pot – if it sticks, you’re good to go. Most stainless steel pots with a multi-ply base are induction-compatible, as is cast iron (both enameled and traditional). But some aluminum and copper pots might not be. Always check the manufacturer’s specifications to be sure.
I switched to an induction cooktop a few years ago, and I love it. It’s so fast and efficient. But it did mean I had to replace some of my old pots. It was a bit of a bummer, but it was also an excuse to upgrade to some new enameled cast iron pieces, so I can’t complain too much! Always check your tools to see if they are compatible with your kithen.
The Aesthetics of Chili: Does the Pot *Look* Good?
Okay, this might seem superficial, but hear me out. The pot you use can actually enhance your overall chili-making experience. Think about it: You’re going to be spending hours simmering your chili, stirring it, and admiring its beautiful, bubbling goodness. Don’t you want a pot that’s pleasing to look at? I’m not saying you need to buy the most stylish, designer pot on the market. But choosing a pot that you find aesthetically pleasing can add to the enjoyment of the process. I love the classic, rustic look of enameled cast iron. It just feels… right. Like it belongs in a cozy kitchen, filled with the aroma of simmering spices. But maybe you prefer the sleek, modern look of stainless steel. Or the vibrant colors of some enameled pots. It’s all about personal preference.
Think about the colors and styles that you’re drawn to. Do you prefer bright, bold colors, or more muted, earthy tones? Do you like a classic, traditional look, or something more modern and minimalist? Choose a pot that reflects your personal style and makes you happy to use it. I have been thinking on expanding my color collection.
Beyond the Pot: Essential Chili-Making Accessories
While the pot is the star of the show, there are a few other accessories that can make your chili-making life easier. These aren’t strictly necessary, but they can definitely enhance the process:
- A good ladle: For serving your chili with ease. Look for one that’s sturdy and has a comfortable handle.
- A wooden spoon or spatula: For stirring your chili without scratching the pot.
- A slow cooker liner: If you’re using a slow cooker, these make cleanup a breeze.
- An immersion blender: If you like a smoother, creamier chili, an immersion blender can be a great tool.
- Quality Ingredients: This goes without saying, but using fresh, high-quality ingredients will make a huge difference in the flavor of your chili.
These are just a few suggestions, of course. You might have other tools or gadgets that you find helpful. The key is to create a chili-making setup that works for you and makes the process enjoyable. I am always looking for new little tools for my kitchen.
The Chili-Making Ritual: It’s More Than Just a Recipe
For me, making chili is more than just following a recipe. It’s a ritual. It’s a way to slow down, connect with my food, and create something nourishing and delicious. It’s about the anticipation of that first bite, the warmth spreading through my body, and the satisfaction of sharing a meal with loved ones. It is an art for sure.
And the pot I use is a part of that ritual. It’s a tangible connection to the process, a reminder of all the delicious batches of chili I’ve made in the past, and all the ones I’ll make in the future. So, when you’re choosing a chili pot, don’t just think about the technical specifications. Think about the *feeling* you want to create. Think about the memories you want to make. Think about the ritual you want to establish. I think everyone should have a ritual.
The Final Simmer: Choosing *Your* Perfect Chili Pot
So, there you have it. Everything you need to know (and probably more than you ever *wanted* to know) about choosing the best pot for making chili. It’s a lot to consider, I know. But ultimately, it comes down to finding the pot that’s right for *you*. There’s no one-size-fits-all answer. It’s about your cooking style, your budget, your personal preferences, and even your… chili-making philosophy. (Yes, I went there.)
Don’t be afraid to experiment. Try different pots, different materials, different sizes. See what works best for you. And most importantly, have fun! Making chili should be a joyful experience, not a stressful one. So, embrace the process, find your perfect pot, and get simmering! I’m challenging you to make a batch of chili this week. Experiment with different ingredients, different spices, and, of course, different pots. See what you discover. And don’t forget to share your creations with me! (I’m always looking for new chili inspiration.)
FAQ
Q: Can I use a Dutch oven for chili?
A: Absolutely! A Dutch oven, especially an enameled cast iron one, is an excellent choice for making chili. Its heavy construction and excellent heat retention are perfect for long, slow simmering.
Q: What’s the best way to prevent my chili from sticking to the bottom of the pot?
A: Use a heavy-bottomed pot, stir your chili regularly, and keep the heat at a low simmer. If you’re still having trouble, you can try adding a little extra oil or broth to the pot.
Q: Can I make chili in a slow cooker?
A: Yes, a slow cooker is a great option for making chili, especially if you want to set it and forget it. Just be sure to brown your meat and sauté your vegetables before adding them to the slow cooker for the best flavor.
Q: How do I season a cast iron pot?
A: To season a cast iron pot, clean it thoroughly, dry it completely, and then rub it with a thin layer of oil (vegetable oil, canola oil, or flaxseed oil are good choices). Bake it in a preheated oven at 350°F (175°C) for about an hour. Let it cool completely before using.
You Might Also Like
@article{best-chili-pots-finding-your-perfect-simmering-sidekick,
    title   = {Best Chili Pots: Finding Your Perfect Simmering Sidekick},
    author  = {Chef's icon},
    year    = {2025},
    journal = {Chef's Icon},
    url     = {https://chefsicon.com/best-pots-for-chili-making/}
} 
