
Table of Contents
- 1 Choosing the Right Stainless Steel Prep Table
- 1.1 Understanding Stainless Steel Grades: 304 vs. 430
- 1.2 Gauge Matters: Thickness and Durability
- 1.3 Size and Configuration: Finding the Perfect Fit
- 1.4 Undershelves and Storage: Maximizing Space
- 1.5 Backsplashes and Edge Types: Containing the Mess
- 1.6 Casters and Mobility: Moving with Ease
- 1.7 Assembly and Installation: Getting it Right
- 1.8 Maintenance and Cleaning: Keeping it Sparkling
- 1.9 Budget and Value: Finding the Sweet Spot
- 1.10 Beyond the Basics: Additional Features and Considerations
- 2 The Finishing Touches: Making the Right Choice
- 3 FAQ
Okay, so you’re diving into the world of stainless steel prep tables. Maybe you’re finally opening that food truck you’ve been dreaming about, expanding your catering business, or just *really* upgrading your home kitchen (no judgment here – I once considered putting an industrial dishwasher in my Nashville condo, but Luna, my rescue cat, wasn’t thrilled with the idea). Whatever your reason, choosing the right prep table is a bigger deal than it seems. It’s not just a slab of metal; it’s the heart of your workspace, honestly. It’s where the magic – or the mess, depending on the day – happens.
I’ve been there. Trying to navigate the sheer number of options, gauges, and features can feel overwhelming. Back when I was helping a friend set up her bakery, we spent *hours* agonizing over prep tables. It felt like choosing between different types of rocket fuel. This article is what I wish I had back then – a no-nonsense, slightly rambling, but hopefully helpful guide to finding the *best* stainless steel prep table for *your* specific needs.
We’re going to cover everything from the basics of stainless steel grades (it’s more interesting than it sounds, I promise!) to the nitty-gritty of undershelves, backsplashes, and all those other details that can make or break your workflow. Think of this as a conversation – me sharing what I’ve learned (sometimes the hard way) and you nodding along, occasionally raising an eyebrow and thinking, “Hmm, that’s actually a good point.” Let’s get into it, shall we?
Choosing the Right Stainless Steel Prep Table
Understanding Stainless Steel Grades: 304 vs. 430
Alright, let’s talk about stainless steel grades. This is where things can get a bit technical, but it’s *crucially* important. The two main grades you’ll encounter are 304 and 430. Think of them as the good and the… well, *less* good, but still potentially okay, depending on your needs. 304 stainless steel is the gold standard. It contains more chromium and nickel, making it incredibly resistant to corrosion, rust, and staining. This is what you want if you’re dealing with acidic foods (tomatoes, citrus), lots of moisture, or if you just want a table that will last practically forever.
430 stainless steel, on the other hand, has less chromium and no nickel. It’s still stainless, but it’s more susceptible to corrosion, especially in harsh environments. It’s also magnetic, which can be a plus or minus depending on your preferences (some people like being able to stick magnetic timers or tools to their table). 430 is generally cheaper, so it might be a viable option for lower-impact use, like dry storage or light prep work. If you’re on a tight budget and *know* you’ll be meticulous about cleaning and drying, 430 *might* work. But, honestly, if you can swing it, 304 is almost always the better investment.
The difference in longevity and resistance to wear and tear is significant. I’ve seen 430 tables start to show signs of rust within a year in a busy kitchen, while a 304 table can look almost new after years of heavy use. It’s like the difference between a cheap pair of shoes and a well-made, investment pair – the latter might cost more upfront, but they’ll save you money (and headaches) in the long run.
Another less common grade is 201 stainless steel, it’s more budget-friendly and less durable and resistance to corrosion than 304 and 430.
Gauge Matters: Thickness and Durability
Next up: gauge. This refers to the thickness of the steel. The lower the gauge number, the thicker the steel. So, a 14-gauge table is thicker and stronger than an 18-gauge table. Seems counterintuitive, I know, but that’s how it works. For commercial kitchens, you’ll typically see tables ranging from 14-gauge to 18-gauge. 14-gauge is the most robust and can handle heavy-duty use – think butcher shops, high-volume restaurants, or anyone who’s going to be throwing around heavy pots and pans.
16-gauge is a good middle ground, offering a balance of durability and cost-effectiveness. It’s suitable for most commercial applications and can withstand regular use without bending or denting easily. 18-gauge is the thinnest and is generally recommended for lighter-duty use, like prep work with lighter ingredients or as a general-purpose work surface. It’s more prone to denting, so if you’re planning on doing any serious chopping or pounding, you’ll want to go with a thicker gauge.
Think about the kind of abuse your table will endure. Are you going to be kneading dough on it? Breaking down large cuts of meat? Or just slicing vegetables and assembling sandwiches? Your anticipated workload should directly inform your gauge choice. And remember, a thicker gauge also means a heavier table, which can be a factor if you need to move it around frequently. It’s a balancing act, really – finding the sweet spot between durability, weight, and budget.
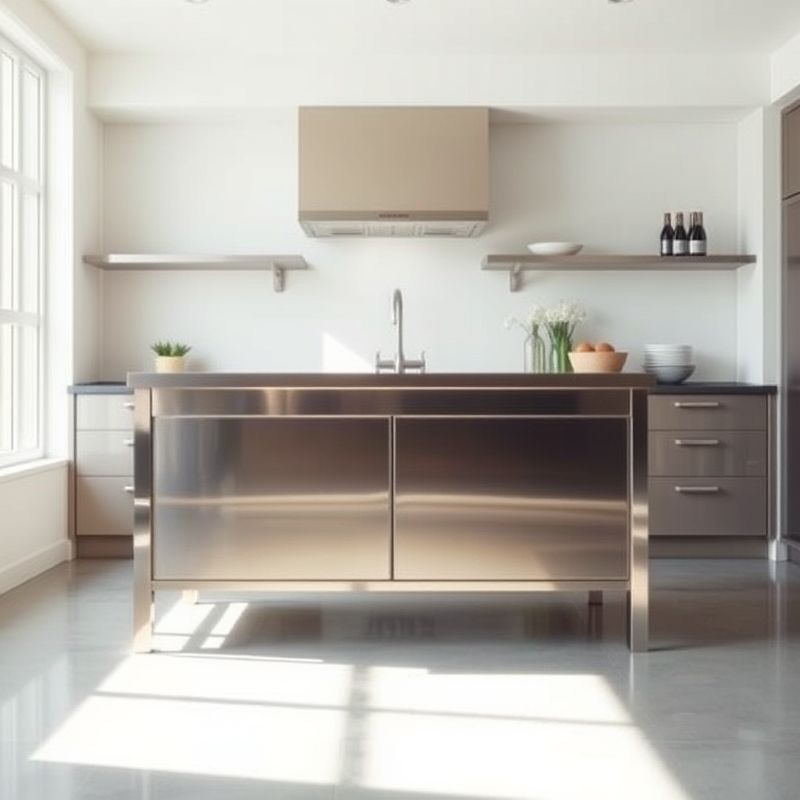
Size and Configuration: Finding the Perfect Fit
This might seem obvious, but it’s worth emphasizing: *measure your space*. Seriously. I’ve seen too many people get excited about a great deal on a massive prep table only to realize it doesn’t actually fit in their kitchen. Consider not just the length and width of the table, but also the surrounding space. You need enough room to move around comfortably, open drawers and doors, and access other equipment. Think about workflow. Where will the table be positioned in relation to your other appliances? Will it be a central island or against a wall?
Consider the height, too. Most standard prep tables are around 34-36 inches high, which is a comfortable working height for most people. But if you’re particularly tall or short, you might want to consider an adjustable-height table. Also, think about what you’ll be prepping. If you’re doing a lot of fine detail work, you might prefer a slightly lower table. If you’re working with large, heavy items, a higher table might be easier on your back.
Then there’s the configuration. Do you need an undershelf? (Almost certainly, yes.) Do you want a backsplash? (Highly recommended, especially if the table is against a wall.) Do you need drawers? (Super convenient for storing utensils and small tools.) Do you want casters (wheels) for mobility? (Essential if you need to move the table frequently.) These features can significantly impact the functionality and convenience of your prep table, so think carefully about your needs before making a decision.
Undershelves and Storage: Maximizing Space
Let’s talk about undershelves. In my opinion, they’re practically essential. A good undershelf provides valuable storage space for ingredients, equipment, and supplies, keeping your workspace clear and organized. You’ll find undershelves made of stainless steel (matching the tabletop) or galvanized steel. Stainless steel undershelves are more durable and resistant to corrosion, but they’re also more expensive. Galvanized steel is a more budget-friendly option, but it’s not as resistant to rust, especially in humid environments.
Consider the weight capacity of the undershelf, too. Make sure it can handle the weight of whatever you plan to store on it. Some undershelves have adjustable heights, which can be a great feature if you need to accommodate different-sized items. Think about what you’ll be storing on the undershelf – large mixing bowls, stacks of sheet pans, bulk ingredients? This will help you determine the size, material, and weight capacity you need.
Some tables even come with multiple undershelves, offering even more storage options. This can be a real space-saver in a small kitchen. But be mindful of the overall height of the table – too many undershelves can make the workspace feel cramped. It’s all about finding the right balance between storage and usability.
Backsplashes and Edge Types: Containing the Mess
Backsplashes are your friends. Seriously. They prevent food and liquids from splattering onto your walls, making cleanup much easier. They also add a professional touch to your kitchen. Most backsplashes are around 4-10 inches high and are made of the same material as the tabletop. A higher backsplash is generally better, especially if you’re working with messy ingredients or doing a lot of high-volume cooking.
Then there are the edge types. You’ll typically find three main options: bullnose, turned-down, and square. Bullnose edges have a rounded, curved profile, making them comfortable to lean against and easy to clean. Turned-down edges have a straight, 90-degree drop-off, which can help contain spills. Square edges are, well, square. They’re the most basic and economical option.
The choice of edge type is largely a matter of personal preference, but I tend to favor bullnose edges for their comfort and cleanability. Turned-down edges can be a good choice if you’re working with a lot of liquids, but they can also be a bit harder to clean around the edges. Square edges are fine, but they’re not as comfortable to lean against, and they don’t do as good a job of containing spills. It’s a small detail, but it can make a difference in your day-to-day workflow.
Casters and Mobility: Moving with Ease
Casters (wheels) can be a lifesaver if you need to move your prep table around frequently. This is especially true for food trucks, catering businesses, or any kitchen where flexibility is key. Look for locking casters, which allow you to secure the table in place when you’re working. This prevents it from rolling around unexpectedly, which can be a safety hazard.
Consider the size and material of the casters, too. Larger casters are generally better for rolling over uneven surfaces, while smaller casters are more maneuverable in tight spaces. Polyurethane casters are a good choice for most applications, as they’re durable, non-marking, and resistant to chemicals and grease. Rubber casters are another option, but they can be more prone to marking floors.
Make sure the casters are rated for the weight of the table and its contents. Overloading the casters can damage them and make the table difficult to move. And if you’re planning on rolling the table over delicate flooring, like hardwood or tile, be sure to choose non-marking casters to avoid scratches and scuffs.
Assembly and Installation: Getting it Right
Most stainless steel prep tables require some assembly. It’s usually a fairly straightforward process, but it’s important to follow the instructions carefully. Make sure you have all the necessary tools and hardware before you begin. And if you’re not comfortable assembling the table yourself, don’t hesitate to hire a professional.
If the table has casters, make sure they’re securely attached before you start using it. And if it has an undershelf, double-check that it’s properly installed and can support the weight you intend to place on it. It’s always better to be safe than sorry, especially when dealing with heavy equipment.
Once the table is assembled, give it a thorough cleaning before you start using it. This will remove any dust, debris, or manufacturing residue. Use a mild detergent and warm water, and be sure to dry the table thoroughly to prevent water spots. And if you’re using any cleaning chemicals, be sure to follow the manufacturer’s instructions and safety precautions. I always prefer using food-grade cleaning supplies.
Maintenance and Cleaning: Keeping it Sparkling
Stainless steel is relatively low-maintenance, but it still requires regular cleaning to keep it looking its best and prevent corrosion. Clean the table after each use with a mild detergent and warm water. Avoid using abrasive cleaners or scouring pads, as they can scratch the surface. For stubborn stains or grease buildup, you can use a specialized stainless steel cleaner.
Dry the table thoroughly after cleaning to prevent water spots and streaks. This is especially important if you have hard water. You can use a soft cloth or a microfiber towel. And if you’re dealing with any rust spots (which can happen, even with 304 stainless steel), you can try using a paste of baking soda and water. Apply the paste to the rust spot, let it sit for a few minutes, and then scrub gently with a soft cloth.
Regular cleaning and maintenance will not only keep your prep table looking great, but it will also extend its lifespan. It’s a small investment of time that can pay off big in the long run. And let’s be honest, a clean and well-maintained kitchen is just a more pleasant place to work.
Budget and Value: Finding the Sweet Spot
Stainless steel prep tables can range in price from a few hundred dollars to several thousand, depending on the size, features, and quality. It’s important to set a budget before you start shopping, but it’s also important to consider the long-term value. A cheaper table might seem like a good deal upfront, but it might not last as long or perform as well as a higher-quality table.
Think about your needs and your budget, and try to find the sweet spot. It’s often worth spending a little more to get a table that will meet your needs and last for years to come. But don’t feel like you have to break the bank to get a good quality table. There are plenty of reputable brands that offer excellent value for the money.
Do your research, read reviews, and compare prices before making a decision. And don’t be afraid to ask questions. A good supplier should be able to answer your questions and help you find the right table for your specific needs. Ultimately, the best prep table is the one that fits your budget, your workflow, and your long-term goals.
Beyond the Basics: Additional Features and Considerations
Once you’ve covered the basics, there are a few additional features and considerations that might be relevant to your specific needs. For example, some tables come with built-in sinks, which can be a great convenience for food prep. Others have overhead shelves or pot racks, providing even more storage options. There are even tables with heated or refrigerated compartments, perfect for keeping food at the right temperature.
Consider your specific workflow and any specialized needs you might have. Do you need a table with a built-in cutting board? Or a table with a specific type of edge for rolling out dough? Do you need a table that can be easily disassembled and transported? Thinking about these details can help you narrow down your options and find the perfect prep table for your unique situation.
And don’t forget about aesthetics. While functionality is paramount, the look of your prep table can also contribute to the overall ambiance of your kitchen. Stainless steel has a clean, modern look that complements most kitchen styles. But you can also find tables with different finishes or accents to match your personal taste. It’s your workspace, after all – make it a place you enjoy spending time in. I’m thinking of adding some colorful, magnetic spice racks to my own table, just to add a little personality.
The Finishing Touches: Making the Right Choice
Choosing the right stainless steel prep table is a process. It requires careful consideration of your needs, your budget, and your workflow. Don’t rush into a decision. Take your time, do your research, and ask questions. And remember, the best prep table is the one that *works* for *you*. It’s the one that makes your job easier, your kitchen more efficient, and your food preparation more enjoyable.
So, go forth and find your perfect prep table! Embrace the stainless steel. Embrace the possibilities. And most importantly, have fun with it. This is your chance to create a workspace that truly reflects your passion and your style. It’s an investment in your craft, in your business, and in yourself. And honestly, who doesn’t love a good, solid, shiny surface to work on?
I am pretty sure I covered pretty much everything, now that I think of it, maybe I should have started with a checklist… oh well. I hope this helps! I’m off to make some coffee and ponder the mysteries of undershelf organization. Luna is giving me the stink eye, which probably means it’s time for a treat. Happy prepping!
FAQ
Q: What’s the absolute best gauge for a commercial kitchen prep table?
A: If you’re looking for maximum durability and can handle the weight, 14-gauge is generally considered the best. However, 16-gauge is a solid choice for most commercial applications, offering a good balance of strength and cost.
Q: Is 304 stainless steel *really* that much better than 430?
A: For most kitchen environments, yes. The higher chromium and nickel content in 304 provides significantly better corrosion resistance, especially when exposed to acidic foods or frequent moisture. If budget is a major constraint, 430 *can* work, but be prepared for more diligent cleaning and potential rust issues over time.
Q: Are casters essential for a prep table?
A: They’re not *essential*, but they’re incredibly helpful if you need to move the table regularly. If your table will stay in one place, you can skip the casters. But if you anticipate needing to rearrange your kitchen layout or move the table for cleaning, locking casters are a worthwhile investment.
Q: How do I deal with scratches on my stainless steel table?
A: Minor scratches are inevitable, but you can often minimize their appearance. Try using a non-abrasive stainless steel cleaner and a soft cloth. For deeper scratches, there are specialized stainless steel scratch removal kits available, but proceed with caution and follow the instructions carefully.
You might also like
- Choosing the Right Commercial Refrigerator
- Commercial Kitchen Ventilation Guide
- Guide to Commercial Food Processors
@article{best-stainless-steel-prep-tables-finding-your-perfect-fit,
    title   = {Best Stainless Steel Prep Tables: Finding Your Perfect Fit},
    author  = {Chef's icon},
    year    = {2025},
    journal = {Chef's Icon},
    url     = {https://chefsicon.com/best-stainless-steel-prep-tables/}
} 

