
Table of Contents
- 1 Decoding the Grill: Your First Big Decision
- 2 Gearing Up: Essential Grilling Tools You Actually Need
- 3 Lighting the Fire: The Right Way to Start
- 4 Mastering the Heat: Direct vs. Indirect Zones
- 5 Prepping for Perfection: Marinades, Rubs, and Temp Matters
- 6 The Main Event: Grilling Techniques and Timing
- 7 Flare-Up Frustrations: Keeping the Flames in Check
- 8 Expanding Horizons: Grilling Veggies and Fruits
- 9 The Patience Principle: Why Resting Meat Matters
- 10 After the Sizzle: Grill Cleaning and Maintenance
- 11 Wrapping It Up: Your Grilling Journey Begins
- 12 FAQ
Okay, let’s talk grilling. That primal call of fire and food, the smell wafting through the neighborhood… it seems so straightforward, doesn’t it? A piece of meat, some heat, boom. Dinner. But if you’re just starting out, staring down a Weber Kettle or a gleaming new gas grill can feel less like a fun summer activity and more like… well, intimidating. I remember my first real attempt at grilling years ago, back before the move from the Bay Area. Let’s just say the chicken ended up looking like a charcoal briquette on the outside and felt suspiciously cool on the inside. Not my finest culinary moment. It’s one of those things that looks easy until you actually try it and realize there’s a bit more nuance involved.
Moving to Nashville really kicked my grilling interest into higher gear. It’s practically a way of life down here, and frankly, after being confined to a tiny electric grill on my old apartment balcony (the horror!), having a backyard felt like unlocking a new level of cooking freedom. My rescue cat, Luna, usually supervises from a safe distance on the porch, probably judging my technique. But those early fumbles taught me a lot, mostly through trial and, yes, quite a bit of error. It turns out, a few key pieces of knowledge can make a world of difference, transforming potential frustration into some seriously tasty food. It’s not about complex Cordon Bleu techniques, just solid fundamentals.
So, this isn’t going to be some exhaustive encyclopedia of grilling. Think of it more like notes passed from a friend (that’s me, Sammy!) who’s navigated the smoke and flames and wants to help you skip some of the… let’s call them ‘learning experiences’ I went through. We’ll cover the basics – choosing your grill, the essential tools you *actually* need, understanding heat (this is a big one!), prepping your food, the grilling process itself, and even the dreaded cleanup. My goal here on Chefsicon.com is to give you practical, real-world grilling tips for beginners that cut through the noise and help you fire up that grill with confidence. Ready to make some delicious food and maybe impress your friends (or just Luna)? Let’s get into it.
Decoding the Grill: Your First Big Decision
Gas Grills: The Convenience Champions
Alright, first hurdle: what kind of grill? For many beginners, gas grills feel like the most approachable option, and honestly, there’s a lot to love. The biggest draw? Ease of use. You turn a knob, push a button, and boom – fire. Usually within 10-15 minutes, you’re preheated and ready to cook. This is fantastic for weeknight dinners when you don’t have an hour to mess around with charcoal. Temperature control is another huge plus. Need medium heat? Set the dial to medium. Want to sear high then finish low? Just adjust the knobs. It offers a level of precision that can be reassuring when you’re starting out. Cleanup is generally simpler too; usually just brushing the grates and emptying a grease trap. I relied heavily on gas when I first started grilling more seriously because it felt less… volatile? Less room for catastrophic error, maybe. The downside? Purists will tell you (and they’re not entirely wrong) that you don’t get the same depth of smoky flavor as charcoal. And good gas grills can be a significant investment upfront. But for sheer convenience and control, they’re hard to beat. They often come with side burners too, which can be handy for sauces or side dishes. Just make sure you check your propane tank level before you plan a big cookout!
Charcoal Grills: For the Flavor Seekers
Then there’s charcoal. Ah, charcoal. This is where things get a bit more… elemental. Charcoal grills are generally less expensive upfront than their gas counterparts. Think the classic Weber Kettle. Their main selling point is undeniable: smoky flavor. There’s just something about food cooked over glowing embers that gas can’t perfectly replicate. Charcoal can also achieve incredibly high heat searing temperatures, which is fantastic for getting that perfect crust on a steak. However, there’s a steeper learning curve. Lighting the charcoal takes time and practice (more on that later). Achieving and maintaining a specific temperature requires mastering the vents to control airflow – open them up for more heat, close them down to cool things off. It’s more art than science sometimes, or maybe a blend of both? Cleanup is definitely messier; you’re dealing with ash. Is the extra effort worth it? For me, on a lazy Sunday afternoon, absolutely. The ritual, the smell, the flavor – it feels more like *grilling*. But it requires more patience and attention. You have to decide if that trade-off works for you. There’s also the choice between lump charcoal vs briquettes – lump burns hotter and more naturally, briquettes are more uniform and consistent. I tend to prefer lump, but briquettes are reliable.
Electric & Pellet Grills: Niche Players
We should also briefly mention electric and pellet grills. Electric grills are often the only option for apartment dwellers with strict rules. They’re super easy to use, heat up quickly, and have no open flame. But let’s be real, the flavor is the most compromised here. It’s more like outdoor pan-searing than true grilling. Still, better than nothing! Pellet grills are a fascinating category that has exploded in popularity. They burn small wood pellets, using a digital controller to maintain precise temperatures. They excel at smoking (‘low and slow’) but can also grill at higher temps. Think set-it-and-forget-it convenience combined with real wood smoke flavor. They’re techy, often WiFi-enabled, and usually quite expensive. They sort of bridge the gap between smoker and grill. I haven’t personally owned one yet, but the convenience factor combined with wood flavor is tempting. They seem great for people who want consistency and are willing to invest. Each type has its place, it really depends on your lifestyle, budget, and what you prioritize – convenience, flavor, or maybe tech features.
Gearing Up: Essential Grilling Tools You Actually Need
Walk into any store with a grilling section, and you’ll be bombarded with gadgets. Pineapple corer-grillers? Motorized cleaning brushes? You can go nuts. But honestly, you only *need* a few key things to get started effectively and safely. Let’s cut through the clutter. First up, long-handled tongs. Emphasis on *long-handled*. Your knuckles will thank you when reaching over hot coals. Crucially, use tongs, not a fork, to turn most meats. Piercing the meat lets precious juices escape. Get a sturdy pair; flimsy tongs are frustrating and potentially dangerous if they drop your food. Alongside tongs, a good long-handled spatula is essential, especially for burgers or fish. Again, length equals safety.
Next, and this is non-negotiable in my book: an instant-read thermometer. Seriously, stop guessing if your chicken is cooked through. Stop cutting into steaks to check doneness (again, lost juices!). Cooking to temperature, not time, is the single biggest step you can take towards perfectly cooked, safe food. They’re not expensive – you can get a reliable digital one for $15-$25. It takes the guesswork out completely. Get one. Use it. Trust it. Another vital tool is a grill brush. Clean grates are crucial for preventing sticking and ensuring good flavor. A sturdy brush with stiff bristles (wire or heavy-duty nylon) is best. Use it while the grill is hot (either after cooking or during preheating next time) as it’s much easier to remove gunk then. Safety note: always check your brush for loose bristles, especially wire ones, before and after use. You don’t want those ending up in your food.
If you’re going the charcoal route, I highly, highly recommend a chimney starter. It’s basically a metal cylinder with a grate at the bottom. You stuff newspaper underneath, fill the top with charcoal, and light the paper. The chimney effect gets the coals roaring hot quickly and evenly, usually in about 15-20 minutes, without any need for lighter fluid (which can impart a nasty chemical taste to your food). Trust me, this is way better and more reliable than trying to build a charcoal pyramid and dousing it in fluid. Optional but nice-to-haves include heat-resistant grill gloves for handling hot chimneys or adjusting coals/grates, and maybe some metal skewers for kebabs. But tongs, spatula, thermometer, brush, and (for charcoal) a chimney starter? Those are the core essentials. Invest in decent quality here; they’ll last longer and make your grilling experience much smoother.
Lighting the Fire: The Right Way to Start
Getting your grill properly lit and heated is step one for successful cooking. It sounds simple, but there are definitely better and worse ways to do it. Let’s talk charcoal first, because it requires a bit more technique. As I mentioned, the chimney starter is your best friend. Forget lighter fluid. Seriously. Stuff a couple of sheets of newspaper loosely under the chimney’s bottom grate (don’t pack it too tight, air needs to flow). Fill the top with your charcoal – either lump charcoal or briquettes. Light the newspaper in a few spots. The fire will creep up through the coals. Now, patience. Place the chimney on the grill’s charcoal grate (not the cooking grate!) and let it do its thing. You’ll know the coals are ready when the top layer is mostly covered in gray ash. This usually takes 15-25 minutes depending on the charcoal and conditions. Carefully (using gloves!) pour the hot coals onto the charcoal grate, arranging them for your desired heat zone (we’ll cover that next). That’s it! No chemical fumes, just pure, hot embers ready for cooking. Avoiding lighter fluid not only tastes better but feels… cleaner?
For gas grills, the process is much simpler but equally important. The key here is preheating. Don’t just turn it on and throw your food on immediately. You need to let the grill get fully up to temperature. Turn all your burners to high, close the lid, and let it heat for a good 10-15 minutes. Why? Several reasons. First, it ensures even cooking. A properly preheated grill cooks food more predictably. Second, it gets the grates screaming hot, which is essential for searing and getting those beautiful grill marks (more on the Maillard reaction later!). Third, it helps sterilize the cooking surface. And finally, it’s the perfect time to clean your grates. Use your grill brush on the hot grates right before you put the food on – any leftover debris from last time will come off much more easily. So, even though it’s quick to light, don’t skip the preheat step on your gas grill. It makes a real difference to the final result. It’s one of those small things that separates okay grilling from great grilling.
Mastering the Heat: Direct vs. Indirect Zones
Okay, this might be the single most important concept for leveling up your beginner grilling game: understanding and using direct heat and indirect heat. It’s the secret to perfectly cooked food that’s beautifully seared on the outside and cooked through on the inside, without burning. Think of it like having different zones on your stovetop. Direct heat means cooking food directly over the heat source (the hot coals or the lit gas burners). This is high heat, great for searing steaks, burgers, chops, and thinner items quickly. It gives you those desirable grill marks and that delicious crust.
Indirect heat means cooking food *away* from the direct heat source, usually with the lid closed, allowing the heat to circulate around the food more like an oven. This is lower, gentler heat, perfect for cooking larger or thicker items that need more time without burning the outside – think whole chickens, roasts, ribs, chicken pieces (especially bone-in), or even delicate fish. You often use both zones for the same piece of food: sear over direct heat first, then move it to indirect heat to finish cooking through gently. This two-zone setup is incredibly versatile and gives you massive control over your cooking. I struggled with burnt-outside-raw-inside chicken until I truly embraced the two-zone method. Game changer, truly.
Setting up these zones is straightforward. On a charcoal grill, after your coals are ready, simply pile them all on one side of the charcoal grate. The area directly above the coals is your direct zone; the empty side is your indirect zone. Easy. On a typical two-burner gas grill, light one burner for direct heat and leave the other one off for indirect heat. On a three or four-burner grill, you have more options: light one or two burners on one side (direct) and leave the others off (indirect), or light the outer burners and leave the middle one(s) off for a central indirect zone. Experiment to see what works best for your grill. Having this setup also gives you a ‘safe zone’ to move food to if you experience flare-ups. Understanding heat management through zones is fundamental. Don’t try to grill everything over screaming direct heat – that’s a recipe for disappointment. Embrace the zones!
Prepping for Perfection: Marinades, Rubs, and Temp Matters
What you do *before* the food hits the grill is just as important as the grilling itself. Let’s talk flavor builders: marinades and dry rubs. Marinades are liquid mixtures, often containing an acid (like vinegar or citrus juice), oil, and seasonings. The acid helps tenderize the meat slightly (don’t over-marinate, especially with delicate items like fish or shrimp, as the acid can ‘cook’ it or make it mushy), while the oil helps transfer flavors and prevent sticking. They’re great for adding moisture and deep flavor to cuts like chicken breasts, pork chops, or flank steak. Dry rubs, on the other hand, are blends of dried herbs, spices, salt, and sometimes sugar. They don’t tenderize much but create a fantastic flavorful crust on the surface of the meat. Think ribs, brisket, pork shoulder, or even just a simple steak. Pat the meat dry before applying a rub so it adheres better. You can use one or the other, or sometimes even both (apply rub after marinating and patting dry).
Another prep step that often gets overlooked is bringing your meat to room temperature before grilling. Pull steaks, chops, or chicken out of the fridge about 20-30 minutes before they hit the heat. Why? A freezing cold piece of meat hitting a hot grill will cook unevenly. The outside might burn before the inside even gets close to the target temperature. Allowing it to warm up slightly promotes much more even cooking from edge to center. Is this absolutely critical for thin items like burgers? Maybe less so. But for a thick steak or bone-in chicken? I find it makes a noticeable difference. Just be mindful of food safety – don’t leave meat out for hours, especially on a hot day. 30 minutes is usually plenty.
One last crucial prep tip: pat your food dry, especially meat, right before it goes on the grill. Use paper towels. Excess surface moisture hinders browning and searing. You want that satisfying sizzle when the food hits the grates. Removing surface water allows the heat to immediately start the Maillard reaction – that magical chemical process responsible for the complex, savory flavors and brown crust we associate with grilled food. A dry surface promotes better contact with the hot grates, leading to better grill marks and a much tastier result. So, marinade or rub, bring to temp (for thicker cuts), and pat dry – these simple steps set the stage for grilling success.
The Main Event: Grilling Techniques and Timing
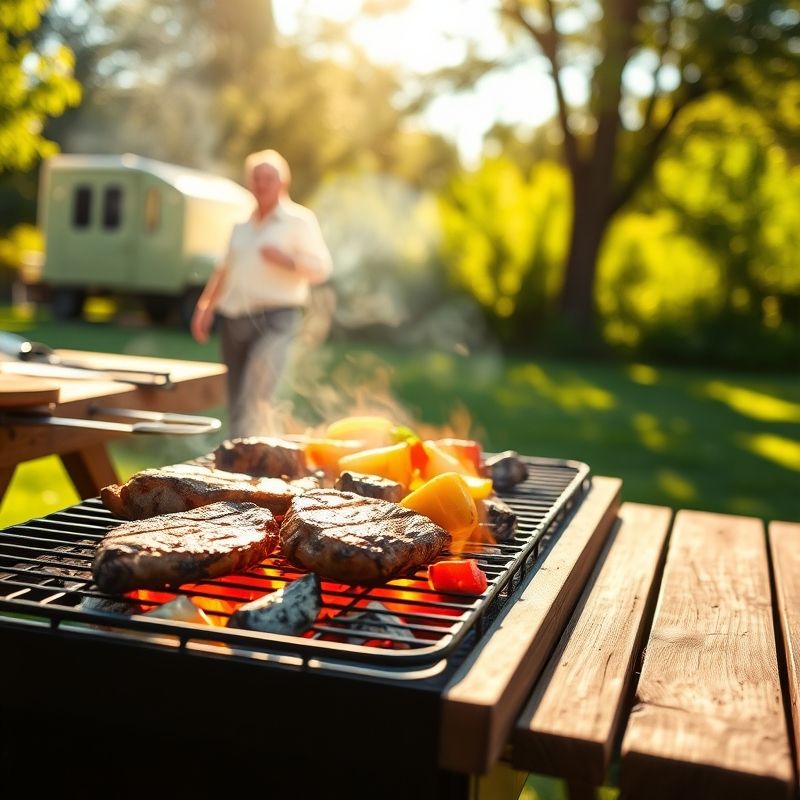
Alright, the grill is hot, the food is prepped, it’s time for the action. First rule: don’t overcrowd the grill. It’s tempting to squeeze everything on at once, but food needs space. Air needs to circulate for even cooking, and you need room to maneuver things, especially if you need to move items between direct and indirect heat or manage flare-ups. Leave at least 25% of your grill surface empty. If you’re cooking in batches, keep the first batch warm in a low oven (around 200°F) while the next batch cooks.
Now, let’s talk doneness. As I hammered home earlier, the absolute best way to know when your food is perfectly cooked is by using an instant-read thermometer. Forget poking, prodding, or guessing based on time alone. Grilling times are always estimates – wind, ambient temperature, grill hot spots, and food thickness all play a role. Temperature is objective. For food safety and quality, learn the target internal temperatures for what you’re cooking. Chicken and turkey need to reach 165°F. Pork chops and roasts are safe at 145°F (with a rest). Ground meats (burgers) should hit 160°F. Steaks have various doneness levels: 125-130°F for rare, 130-135°F for medium-rare, 135-140°F for medium, and so on. Insert the thermometer into the thickest part of the meat, avoiding bone. Trust the reading!
What about flipping? Resist the urge to constantly fuss with your food. For things like steaks, burgers, and chops where you want good grill marks and searing, the general advice is to flip only once halfway through the direct heat cooking time. Let it develop a good crust. For items like chicken pieces cooking over indirect heat, you might need to turn them more often for even cooking. Listen to the sizzle, watch for flare-ups, and use your thermometer. Develop some patience. Let the grill do its work. One specific flipping technique for great crosshatch marks on steaks: after searing one side, rotate the steak 45-60 degrees on the same side before flipping to the second side, then repeat the rotation. It’s mostly aesthetic, but hey, it looks professional! Mostly though, focus on temperature and avoiding burning.
Flare-Up Frustrations: Keeping the Flames in Check
Ah, flare-ups. Those sudden bursts of flame that shoot up when fat drips onto the hot coals or gas grill burner covers. They can quickly turn delicious food into charred cinders if you’re not prepared. What causes them? Simply put, rendering fat meeting intense heat. While a little bit of flame kissing the food can add flavor, sustained flare-ups are bad news. They deposit soot and can lead to that acrid, burnt taste. Preventing and managing them is a key beginner skill.
Prevention starts before the food even hits the grill. Fat trimming is your first line of defense. Trim any excessive, thick layers of fat from steaks, chops, or chicken skin. You want *some* fat for flavor and moisture, but get rid of the big chunks that are just going to melt and cause trouble. Also, avoid oily marinades dripping excessively onto the flames; let excess marinade drip off before placing food on the grill. Having a two-zone setup (direct and indirect heat) is crucial for managing flare-ups. If a piece of food starts flaring up badly over direct heat, simply use your tongs to move it over to the cooler, indirect ‘safe zone’ until the flames die down. Don’t panic and start swatting at the flames.
What about dousing with water? Some people keep a squirt bottle handy. Use it sparingly, if at all. A quick spritz can temporarily knock down flames, but too much water can kick up ash on charcoal grills (coating your food, yuck) or create steam that hinders browning. A better immediate tactic is often just moving the food away from the flame source. Another trick, especially on kettle grills, is briefly closing the lid. This restricts oxygen flow and usually dampens the flames. Just keep an eye on things, as prolonged lid closure over high heat can sometimes lead to a different kind of fire issue when you reopen it (backdraft). Proper lid management is part of the skill. Mostly, stay vigilant, manage your heat zones, and don’t let dripping fat get out of control.
Expanding Horizons: Grilling Veggies and Fruits
Grilling isn’t just about meat! Some of my absolute favorite things to come off the grill are vegetables and even fruits. The high heat caramelizes their natural sugars and adds a smoky dimension that’s just incredible. If you’re only grilling burgers and dogs, you’re missing out. Grilled vegetables are ridiculously easy and versatile. Think corn on the cob (husk on or off), asparagus spears, thick slices of zucchini and summer squash, bell pepper strips, onion wedges, even whole mushrooms. Just toss them lightly with olive oil, salt, and pepper (maybe some garlic powder or herbs) and grill over direct or indirect heat, depending on the vegetable and desired tenderness. Asparagus cooks quickly over direct heat. Corn might take longer over indirect. Watch them closely as they can char quickly.
For smaller or more delicate vegetables like cherry tomatoes, sliced mushrooms, or chopped peppers, a grill basket or grill topper is invaluable. These perforated metal pans sit on your grates and prevent small items from falling through while still allowing heat and smoke to circulate. They make stir-frying on the grill possible! You can also thread veggies onto skewers for kebabs – just be sure to soak wooden skewers in water for about 30 minutes beforehand to prevent them from burning completely.
And don’t forget dessert! Grilled fruits undergo a magical transformation. The heat intensifies their sweetness and creates amazing caramelization. Thick slices of pineapple are classic – they get beautifully marked and juicy. Peach or nectarine halves (pit removed) grilled cut-side down until slightly softened and caramelized are divine, especially served with a scoop of vanilla ice cream. Even watermelon slices take on a surprisingly smoky, savory-sweet flavor when grilled briefly. Use medium heat, brush lightly with oil or melted butter, and don’t overcook them; you want them tender but not mushy. Exploring veggies and fruits on the grill opens up a whole new world of flavors and textures. Plus, it makes for fantastic, healthy side dishes or light meals. The farmers markets here in Nashville offer amazing seasonal produce perfect for grilling experiments.
The Patience Principle: Why Resting Meat Matters
You did it! You navigated the flames, hit the perfect internal temperature, and pulled that beautiful steak/chicken/pork chop off the grill. The temptation to slice right into it is immense. Resist! Implementing a resting period is one of the simplest yet most impactful things you can do to ensure juicy, tender meat. It might feel like unnecessary waiting, but trust me, it’s science.
Here’s what happens: When meat cooks, the muscle fibers contract and push the moisture towards the center. If you cut into it immediately, all those accumulated juices will spill out onto your cutting board, leaving the meat itself drier and less flavorful. Resting meat allows those muscle fibers to relax and the internal pressure to equalize. This gives the juices time to redistribute throughout the meat, resulting in a significantly more moist and tender bite. Think of it like letting a sponge reabsorb water evenly after being squeezed.
How long should you rest it? A general rule of thumb is 5-10 minutes for smaller cuts like steaks, chops, and chicken breasts. For larger items like roasts or whole birds, you’ll want a longer rest, maybe 15-20 minutes or even more. Tent the meat loosely with foil while it rests. Don’t wrap it tightly, as that can trap steam and make the crust soggy. Just a loose tent to keep it warm. It’s also important to factor in carryover cooking. The internal temperature of the meat will continue to rise by 5-10 degrees *after* you take it off the grill due to residual heat. So, if you’re aiming for a medium-rare steak (130-135°F), you might want to pull it off the heat when your thermometer reads 125-130°F, knowing it will climb during the rest. This takes a little practice, but using your thermometer consistently helps you learn how much carryover to expect. Patience here pays huge dividends in tenderness and flavor. Don’t skip the rest!
After the Sizzle: Grill Cleaning and Maintenance
The cooking is done, the eating was glorious, now comes the part nobody loves: cleanup. But proper grill maintenance isn’t just about tidiness; it’s crucial for safety, performance, and the longevity of your grill. Plus, a clean grill just cooks better – no weird leftover flavors interfering with your next meal. The most important routine task is cleaning the cooking grates. The best time to do this is while the grill is still hot, either right after you finish cooking or during the preheat cycle next time. Use a stiff grill brush to scrape off any food debris and carbon buildup. Hot grates release gunk much more easily than cold, greasy ones.
Beyond the grates, there are other tasks. If you have a charcoal grill, you need to deal with the ash. Wait until the coals are completely cool (this can take 24 hours or even longer – be patient and safe!), then perform your ash removal. Scoop or sweep the cold ash into a metal container, never plastic or paper. Dispose of it safely once you’re certain there are no lingering embers. For gas grills, periodically check and clean the burner tubes (make sure the gas is off!) to ensure the ports aren’t clogged, which can cause uneven heating. Also, empty and clean the grease trap regularly to prevent overflow and potential grease fires. A nasty grease fire is not something you want to experience, believe me.
Occasionally, maybe a few times per season depending on how often you grill, give your grill a deeper clean. This might involve removing the grates and burner covers (on a gas grill) or charcoal grate and scrubbing the inside of the cook box to remove built-up grease and carbon. Wipe down the exterior to keep it looking good. Finally, invest in a good grill cover. Protecting your grill from the elements (rain, sun, pollen, bird droppings…) when it’s not in use will significantly extend its life and keep it cleaner between uses. It seems like a chore, but spending 5-10 minutes on cleanup after each session makes the job much easier than facing a disgusting mess weeks later. Luna seems to appreciate a clean grilling station too, or maybe she just likes napping under the cover.
Wrapping It Up: Your Grilling Journey Begins
So there you have it – a rundown of some core grilling tips for beginners, straight from my own experiences and, let’s be honest, mistakes. We’ve covered choosing your grill (gas for convenience, charcoal for flavor, maybe others depending on your needs), getting the essential tools (thermometer!), understanding the power of two-zone heating, prepping your food right, the actual grilling process, managing those pesky flare-ups, expanding into veggies and fruits, the crucial rest period, and keeping your equipment clean. It might seem like a lot, but focus on mastering one or two things at a time.
Maybe next time, really nail that two-zone setup. Or invest in that instant-read thermometer and start trusting temperatures. Grilling, like any cooking, is a journey. You’ll have triumphs, you’ll have occasional setbacks (hopefully fewer burnt-outside-raw-inside chickens than I had!), but the key is to keep practicing, keep learning, and most importantly, have fun with it. It’s supposed to be enjoyable! The smells, the sounds, the satisfaction of pulling perfectly cooked food off the grates – it’s a fantastic way to cook and connect with food.
Here’s my challenge to you: next time you fire up the grill, try one thing differently based on what we talked about. Maybe it’s setting up heat zones properly for the first time. Maybe it’s finally letting that steak rest before slicing. Maybe it’s throwing some unexpected veggies on alongside your main course. Whatever it is, embrace the process. Don’t aim for perfection right away; aim for deliciousness and learning something new. Happy grilling from Nashville – may your flames be controlled and your food flavorful!
FAQ
Q: What’s the real difference between lump charcoal and briquettes?
A: Lump charcoal is made from chunks of hardwood burned down with limited oxygen. It lights faster, burns hotter, produces less ash, and imparts a more natural wood smoke flavor. Its irregular shapes can sometimes lead to less consistent heat. Briquettes are manufactured from compressed sawdust, wood scraps, and binders, often formed into uniform pillow shapes. They provide a more consistent, longer burn and are easier to arrange for even heat, but they produce more ash and some argue the binders can affect flavor (especially if using lighter fluid). Many grillers prefer lump for flavor and heat, while others like the predictability of briquettes. It often comes down to personal preference and what you’re cooking.
Q: How do I know when my steak is done without cutting into it?
A: The only foolproof way is to use an instant-read thermometer. Visual cues and the ‘poke test’ are notoriously unreliable, especially for beginners. Insert the thermometer probe into the thickest part of the steak, avoiding bone. Target temperatures (remembering to pull it 5-10 degrees *before* reaching these, allowing for carryover cooking during the rest) are generally: 125-130°F for Rare, 130-135°F for Medium-Rare, 135-140°F for Medium, 140-145°F for Medium-Well, and 160°F+ for Well-Done. Investing in and using a thermometer consistently is key to perfect steaks every time.
Q: Can I get smoky flavor using my gas grill?
A: Yes, you can definitely add smoky flavor to food on a gas grill, although it might not be as intense as with charcoal or a dedicated smoker. The most common method is using wood chips or chunks. Soak wood chips (like hickory, mesquite, apple, or cherry) in water for about 30 minutes, then drain them. Place the damp chips in a smoker box designed for gas grills, or create a pouch out of heavy-duty aluminum foil (poke holes in the top). Place the box or pouch directly over one of the lit burners, usually under the cooking grates. As the chips heat up, they’ll smolder and release smoke, flavoring your food. It takes some experimentation to get the amount of smoke right.
Q: How often should I really deep clean my grill?
A: While you should clean the cooking grates after every use (or during preheating for the next use), a ‘deep clean’ isn’t needed quite as often. It really depends on how frequently you grill. A good guideline is to perform a deep cleaning at least twice per grilling season – maybe once at the beginning and once at the end. If you grill multiple times a week, you might want to do it more often, perhaps every month or two. This involves scrubbing the grates thoroughly, cleaning out the inside of the cook box (removing ash/grease buildup), checking and cleaning burner tubes (gas) or vents (charcoal), cleaning flavorizer bars/heat shields (gas), and wiping down the exterior. Regular light cleaning makes the deep cleans much less daunting.
You might also like
- Best Charcoal Chimney Starters Reviewed
- Gas vs Charcoal Grill: The Never-Ending Flavor Debate
- Essential Grilling Accessories You Actually Need
@article{real-grilling-tips-for-beginners-getting-started,
    title   = {Real Grilling Tips For Beginners Getting Started},
    author  = {Chef's icon},
    year    = {2025},
    journal = {Chef's Icon},
    url     = {https://chefsicon.com/grilling-tips-for-beginners/}
} 

