
Table of Contents
- 1 Duck Breast: To Sear, Bake, or Braise? A Culinary Exploration
- 1.1 Main Content: The Art of Cooking Duck Breast
- 1.1.1 Understanding Duck Breast
- 1.1.2 The Searing Method: Crispy Skin and Juicy Meat
- 1.1.3 The Baking Method: A Hands-Off Approach
- 1.1.4 The Braising Method: Tender and Flavorful
- 1.1.5 Scoring the Skin: The Key to Perfect Duck Breast
- 1.1.6 Seasoning: Keeping It Simple
- 1.1.7 Resting: The Final Step
- 1.1.8 Pairing Duck Breast with Sides and Sauces
- 1.1.9 Troubleshooting Common Issues
- 1.1.10 Experimenting with Flavors and Techniques
- 1.2 Closing Content: The Journey Continues
- 1.3 FAQ
- 1.1 Main Content: The Art of Cooking Duck Breast
Duck Breast: To Sear, Bake, or Braise? A Culinary Exploration
I remember the first time I tried cooking duck breast. It was a disaster. The skin was flabby, the meat was dry, and I was left wondering why anyone would bother with this finicky protein when chicken was so much easier. But, as with many things in life, the challenge was part of the appeal. Duck breast, with its rich, gamey flavor and that irresistible layer of fat, is a culinary puzzle worth solving. Today, we’re going to tackle this puzzle together, exploring whether to sear, bake, or braise duck breast to achieve that perfect balance of crispy skin and succulent meat.
You see, duck breast is a bit like that friend who’s high maintenance but absolutely worth it. It demands attention, precision, and a bit of finesse. But when you get it right, oh boy, it’s a showstopper. Whether you’re a home cook looking to impress at your next dinner party or a professional chef aiming to refine your technique, understanding the nuances of cooking duck breast is a game-changer.
In this article, we’ll dive deep into the world of duck breast preparation. We’ll explore the searing method, which promises a crispy skin and juicy meat; the baking approach, which offers a more hands-off technique; and the braising method, which transforms the duck into a tender, fall-off-the-bone delight. We’ll discuss the pros and cons of each method, share some personal anecdotes, and hopefully, by the end, you’ll feel confident enough to give duck breast another shot—even if your first attempt was as disastrous as mine.
So, grab your apron, sharpen your knives, and let’s get started on this culinary adventure. By the end of this article, you’ll not only know how to cook duck breast but also understand why each method works the way it does. And who knows? Maybe you’ll even develop a newfound appreciation for this often-overlooked protein.
Main Content: The Art of Cooking Duck Breast
Understanding Duck Breast
Before we dive into the cooking methods, it’s essential to understand what makes duck breast unique. Unlike chicken or turkey, duck breast has a thick layer of fat under the skin, which renders down during cooking, basting the meat in its own juices. This fat is both a blessing and a curse. It’s what gives duck its rich, luxurious flavor, but it also makes it tricky to cook perfectly.
Duck breast is also darker and more flavorful than chicken, with a texture that’s somewhere between steak and chicken breast. It’s leaner than you might expect, especially once you’ve rendered out the fat. This leanness means it can dry out quickly if overcooked, which is why precision is key.
When buying duck breast, look for ones with a good layer of fat—this is your insurance policy against dry meat. The skin should be intact and unblemished, and the meat should have a deep, reddish color. If you can, opt for fresh duck breast over frozen, as it tends to have better texture and flavor.
The Searing Method: Crispy Skin and Juicy Meat
Searing is perhaps the most popular method for cooking duck breast, and for good reason. When done correctly, it yields a beautifully crispy skin and tender, juicy meat. The key here is to render the fat slowly while ensuring the meat doesn’t overcook.
To start, score the skin in a crosshatch pattern, being careful not to cut into the meat. This helps the fat render out more evenly. Season the duck breast generously with salt and pepper, and place it skin-side down in a cold pan. Yes, you read that right—a cold pan. Starting in a cold pan allows the fat to render slowly, giving you that crispy skin without burning it.
Cook the duck breast over medium-low heat, allowing the fat to melt away. This can take anywhere from 8 to 12 minutes, depending on the thickness of the skin. Once the skin is golden and crispy, flip the breast and sear the other side for just a couple of minutes. Remember, duck breast is best served medium-rare, so you’re aiming for an internal temperature of about 130°F (55°C).
Let the duck rest for a few minutes before slicing. This allows the juices to redistribute, ensuring each bite is as succulent as the last. Serve with a simple pan sauce made from the rendered fat, some shallots, and a splash of red wine or balsamic vinegar.
The Baking Method: A Hands-Off Approach
If searing feels a bit too hands-on for you, baking is a great alternative. This method is particularly useful if you’re cooking for a crowd and need to free up some stovetop space. The key to baking duck breast is to start with high heat to render the fat and crisp the skin, then finish at a lower temperature to cook the meat gently.
Preheat your oven to 400°F (200°C). Score the skin as you would for searing, season the duck, and place it skin-side up on a wire rack set over a baking sheet. This setup allows the fat to drip away from the meat, ensuring the skin stays crisp. Bake for about 20 minutes, then flip the duck and bake for another 10 minutes or until the internal temperature reaches 130°F (55°C).
One of the advantages of baking is that it’s more forgiving than searing. You don’t have to stand over the stove, constantly monitoring the heat and adjusting as needed. However, you do sacrifice a bit of control over the final product. The skin might not be as crispy as it would be with searing, and the meat might not be as evenly cooked.
Still, baking is a solid method, especially for those who are new to cooking duck breast. It’s a good way to get comfortable with the protein before moving on to more advanced techniques.
The Braising Method: Tender and Flavorful
Braising is a bit of a wildcard when it comes to duck breast. It’s not the most traditional method, but it can yield some incredible results. Braising involves cooking the duck breast low and slow in a flavorful liquid, which infuses the meat with rich, complex flavors and ensures it stays tender.
To braise duck breast, start by searing it skin-side down in a hot pan to render some of the fat and develop a bit of color. Then, flip the duck and add your braising liquid—a mix of stock, wine, and aromatics like garlic, thyme, and bay leaves works well. Cover the pan and transfer it to a preheated 325°F (165°C) oven. Let the duck braise for about an hour, or until it’s fork-tender.
The advantage of braising is that it’s nearly foolproof. The low, moist heat ensures the duck stays juicy and tender, and the braising liquid infuses the meat with flavor. The downside is that you won’t get that crispy skin that’s so prized in duck breast. However, you can always remove the duck from the braising liquid at the end and give it a quick sear to crisp up the skin.
Braising is an excellent method for those who prefer their duck breast well-done or for those who want to experiment with different flavor profiles. It’s also a great way to use up any leftover duck breast, as the braising liquid can be reduced into a rich, flavorful sauce.
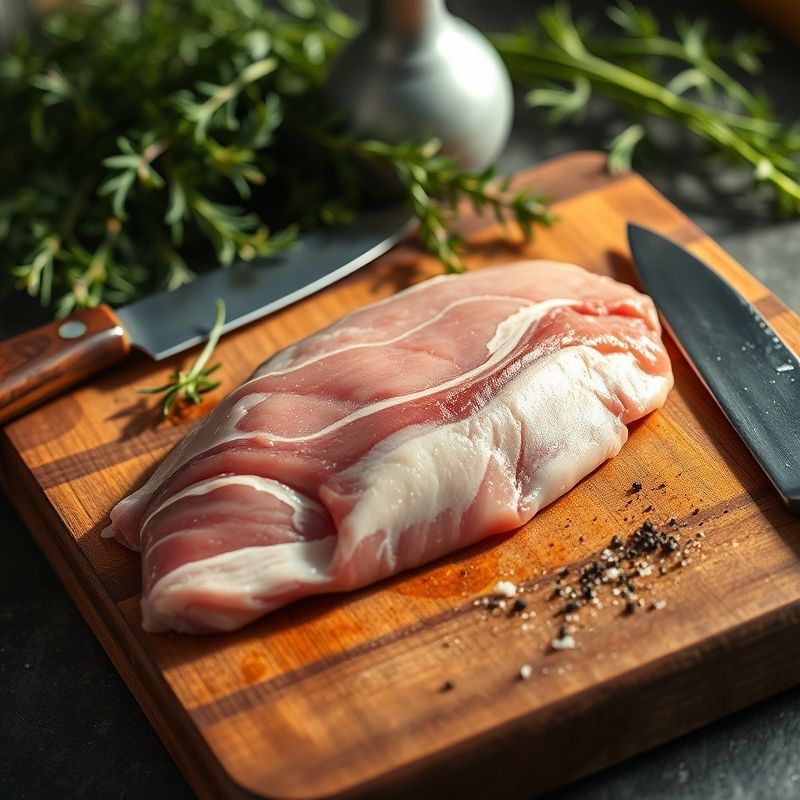
Scoring the Skin: The Key to Perfect Duck Breast
No matter which method you choose, scoring the skin is a crucial step. Scoring allows the fat to render out more evenly, ensuring crispy skin and preventing the duck from curling up as it cooks. To score the skin, use a sharp knife to make shallow cuts in a crosshatch pattern, being careful not to cut into the meat.
I like to think of scoring as creating little pathways for the fat to escape. Without these pathways, the fat would be trapped under the skin, leading to a flabby, unappetizing texture. Plus, scoring gives the seasoning more surface area to cling to, ensuring a well-seasoned piece of meat.
When scoring, be sure to use a sharp knife and make clean, decisive cuts. A dull knife will tear the skin, leading to an uneven render and a less-than-perfect final product. And don’t be afraid to get a little aggressive with your scoring—duck skin is tougher than you might think.
Seasoning: Keeping It Simple
When it comes to seasoning duck breast, less is often more. Duck has a rich, gamey flavor that can be easily overwhelmed by heavy-handed seasoning. A simple sprinkle of salt and pepper is often all you need to let the natural flavor of the duck shine.
That said, there’s plenty of room for experimentation. A light dusting of smoked paprika can add a subtle depth of flavor, while a sprinkle of Chinese five-spice powder can give the duck an exotic twist. Fresh herbs like thyme or rosemary can also complement the duck’s natural richness.
Whatever seasoning you choose, be sure to apply it generously to both sides of the duck. And don’t forget to season the skin after you’ve scored it—this ensures that every bite is packed with flavor.
Resting: The Final Step
Resting is a crucial but often overlooked step in cooking duck breast. After you’ve cooked the duck to your desired doneness, it’s essential to let it rest for a few minutes before slicing. This allows the juices to redistribute throughout the meat, ensuring each bite is as succulent as the last.
I like to rest my duck breast for about 5 to 10 minutes, depending on the size. During this time, you can prepare any sides or sauces, or simply take a moment to appreciate the culinary masterpiece you’ve just created.
When resting, place the duck on a cutting board or plate, skin-side up. This allows any residual fat to drip away from the meat, keeping the skin crispy. And whatever you do, don’t tent the duck with foil—this will trap steam and turn your crispy skin into a soggy mess.
Pairing Duck Breast with Sides and Sauces
Duck breast is a versatile protein that pairs well with a variety of sides and sauces. For a classic French-inspired meal, serve the duck with a simple green salad, some roasted potatoes, and a red wine reduction. For an Asian twist, pair the duck with steamed bok choy, jasmine rice, and a hoisin glaze.
When it comes to sauces, the possibilities are endless. A simple pan sauce made from the rendered duck fat, some shallots, and a splash of red wine is always a winner. For something a bit more exotic, try a cherry or orange sauce—both complement the duck’s rich flavor beautifully.
Don’t be afraid to get creative with your pairings. Duck breast is a blank canvas, just waiting for your culinary inspiration. And remember, the best pairings are the ones that make your taste buds sing.
Troubleshooting Common Issues
Even with the best techniques, things can sometimes go wrong. If your duck skin isn’t crispy, it might be because the heat was too high, causing the fat to render too quickly and burn the skin. Try lowering the heat and giving the fat more time to render out slowly.
If your duck meat is dry, it’s likely because it was overcooked. Remember, duck breast is best served medium-rare, so keep an eye on that internal temperature. And if your duck is tough, it might be because it wasn’t rested properly. Always let your duck rest for a few minutes before slicing—this ensures the juices redistribute and the meat stays tender.
Cooking duck breast is a learning process, and even the best chefs have off days. Don’t be discouraged if your first few attempts aren’t perfect. Keep experimenting, keep learning, and most importantly, keep cooking.
Experimenting with Flavors and Techniques
Once you’ve mastered the basics of cooking duck breast, it’s time to start experimenting. Try different seasonings, like a coffee rub or a blend of Middle Eastern spices. Experiment with different cooking methods, like sous vide or smoking. The world of duck breast is your oyster, and there’s always something new to discover.
One of my favorite experiments is to cure the duck breast overnight in a mix of salt, sugar, and spices, then smoke it low and slow until it’s tender and infused with smoky flavor. It’s a bit of a project, but the results are well worth the effort.
Don’t be afraid to think outside the box when it comes to duck breast. Some of the best culinary innovations come from a willingness to take risks and try new things. So go ahead, get creative, and see where your culinary imagination takes you.
Closing Content: The Journey Continues
As we wrap up this culinary exploration, I hope you’re feeling inspired to give duck breast another shot. Whether you choose to sear, bake, or braise, remember that each method has its own unique advantages and challenges. The key is to find the method that works best for you and your cooking style.
Cooking is a journey, and duck breast is just one stop along the way. It’s a protein that demands respect and attention, but the rewards are well worth the effort. So the next time you’re in the mood for a culinary adventure, pick up some duck breast and get cooking. Who knows? You might just discover a new favorite dish.
And remember, the best meals are the ones cooked with love, patience, and a healthy dose of curiosity. So don’t be afraid to make mistakes, to experiment, and to learn. After all, every great chef started somewhere, and every great dish was once a work in progress.
FAQ
Q: Can I cook duck breast from frozen?
A: It’s best to thaw duck breast before cooking to ensure even cooking and optimal texture. However, if you’re in a pinch, you can cook it from frozen, but be prepared for a longer cooking time and potentially less crispy skin.
Q: What’s the best way to reheat leftover duck breast?
A: To reheat duck breast, place it skin-side up in a cold pan and heat over low heat until warmed through. This helps to crisp up the skin and prevent the meat from drying out.
Q: Can I substitute duck breast with chicken in recipes?
A: While you can substitute chicken for duck breast, keep in mind that the flavors and textures will be quite different. Duck breast has a richer, gamey flavor and a texture more akin to steak, so the substitution might not work in all recipes.
Q: How do I know when duck breast is done?
A: Duck breast is best served medium-rare, with an internal temperature of about 130°F (55°C). Use a meat thermometer to check the temperature, and remember that the duck will continue to cook as it rests.
@article{duck-breast-to-sear-bake-or-braise-a-culinary-exploration,
    title   = {Duck Breast: To Sear, Bake, or Braise? A Culinary Exploration},
    author  = {Chef's icon},
    year    = {2025},
    journal = {Chef's Icon},
    url     = {https://chefsicon.com/duck-breast-sear-bake-or-braise/}
} 

