The Best Fluffy Pancakes recipe you will fall in love with. Full of tips and tricks to help you make the best pancakes.
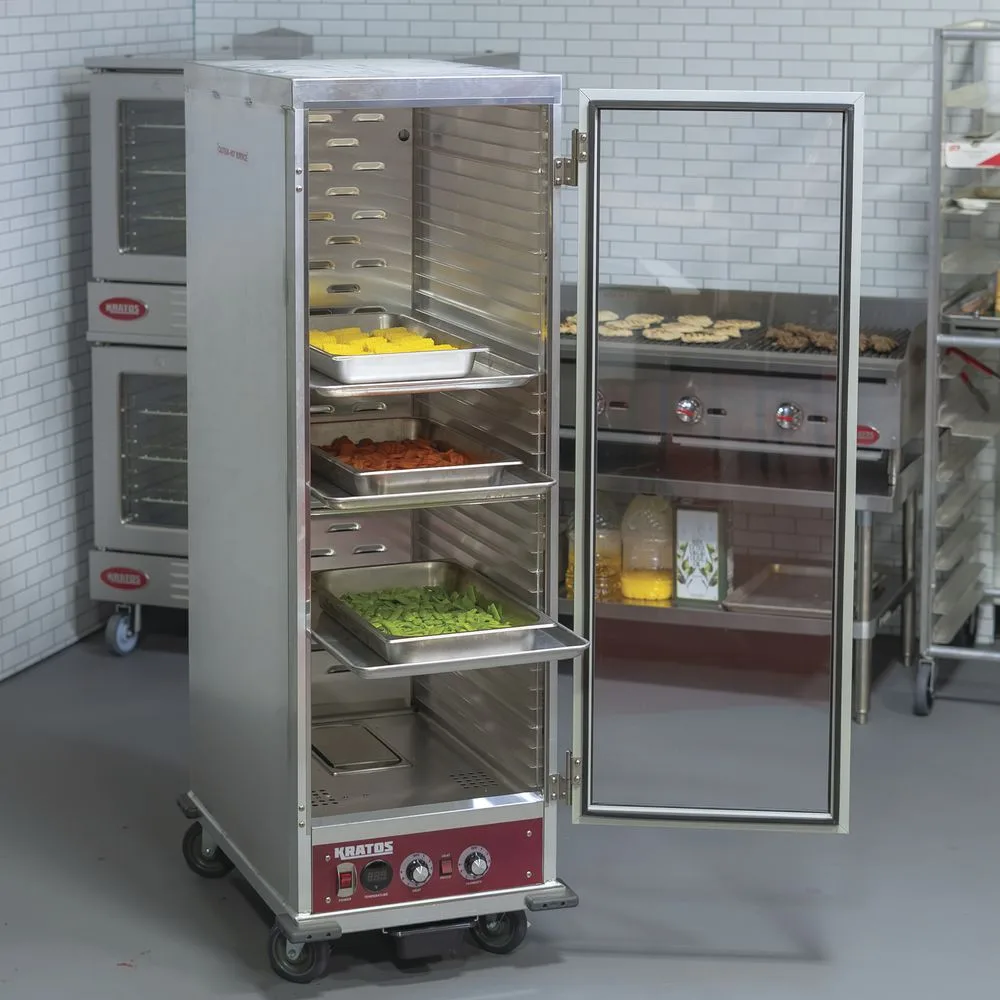
How to Calibrate Insulated Holding Cabinets for Food Safety: Because Guesswork Isn’t on the Menu
Let me set the scene for you. It’s a Tuesday evening, peak dinner service at the restaurant where I was consulting last year. The kitchen’s humming, tickets are flying, and then, out of nowhere, the health inspector walks in. My stomach dropped. Not because we weren’t prepared, but because I’d just realized I’d never double-checked the calibration on our insulated holding cabinets since they were installed six months prior. Sure, the food *looked* fine, but was it *actually* safe? That’s the thing about food safety, it’s not always visible until it’s too late.
I’m not ashamed to admit I panicked a little. I mean, we’re talking about temperature control, the backbone of food safety. If those cabinets were even a few degrees off, we could’ve been serving up a side of bacteria with every plate. That night, I made a promise to myself: I’d never leave something this critical to chance again. And that’s why I’m writing this guide. Because if you’re reading this, you’re probably like me, someone who cares about doing things right, even when no one’s watching. So, let’s talk about how to calibrate insulated holding cabinets for food safety, why it matters, and how to make sure your kitchen isn’t playing Russian roulette with your customers’ health.
By the end of this, you’ll know:
- Why calibration isn’t just a buzzword, it’s your first line of defense.
- The step-by-step process to calibrate your cabinets like a pro (even if you’re not a tech whiz).
- How to spot the red flags that scream, “Hey, this thing is broken!”
- What to do when your cabinet is giving you the cold shoulder (or the hot one).
- How to keep records that’ll make your health inspector nod in approval.
Sound good? Let’s dive in. And hey, if you’re already sweating just thinking about this, don’t worry. I’ve been there. We’ll get through it together.
Why Calibrating Insulated Holding Cabinets Is Non-Negotiable
The Science (and Stakes) Behind the Numbers
First, let’s talk about why we’re even having this conversation. Insulated holding cabinets aren’t just fancy boxes to keep food warm or cold, they’re critical control points in your kitchen’s HACCP (Hazard Analysis Critical Control Point) plan. If you’re not familiar with HACCP, think of it as the rulebook for keeping food safe. And one of its golden rules? Temperature control.
Here’s the deal: bacteria like Salmonella, E. coli, and Listeria aren’t just unpleasant, they’re opportunists. They thrive in what’s called the “danger zone”, which is between 41°F (5°C) and 135°F (57°C). If your holding cabinet is even a few degrees off, you’re basically rolling out the welcome mat for these pathogens. And trust me, they’ll RSVP.
But it’s not just about avoiding foodborne illnesses (though that should be reason enough). There’s also the matter of food quality. Ever had a soggy, overcooked burger or a lukewarm soup that tasted like it forgot its purpose in life? That’s what happens when your holding cabinet isn’t calibrated. Food that’s held at the wrong temperature doesn’t just risk safety, it risks flavor, texture, and your customers’ trust. And in this industry, trust is everything.
So, why calibrate? Because:
- It ensures your cabinet is accurately maintaining the temperature you set.
- It helps you comply with health codes (which, let’s be real, are getting stricter by the day).
- It extends the shelf life of your food by keeping it out of the danger zone.
- It saves you money by reducing food waste (no one wants to toss perfectly good product because it got too warm).
- It gives you peace of mind-and that’s priceless.
I’ll be honest: when I first started in this industry, I thought calibration was something you did once and then forgot about. Boy, was I wrong. These cabinets are like cars, they need regular tune-ups to run smoothly. And just like you wouldn’t skip an oil change, you shouldn’t skip calibration.
What Happens When You Don’t Calibrate?
Let’s play a little game of “What If?” What if you *don’t* calibrate your insulated holding cabinets? Well, here’s what could happen:
Scenario 1: The Health Inspector’s Nightmare
You’re in the middle of a busy shift when the health inspector walks in. They ask to see your temperature logs, and you hand them over with a confident smile. Then they pull out their infrared thermometer and start scanning your holding cabinets. Suddenly, your smile fades. The inspector’s thermometer reads 130°F, but your cabinet’s display says 140°F. That’s a 10-degree discrepancy, and it’s enough to fail your inspection. Now you’re looking at fines, potential closures, and a hit to your reputation. Not fun.
Scenario 2: The Customer Complaint
A customer takes a bite of their chicken and immediately flags down the server. “This tastes off,” they say. You check the holding cabinet, and sure enough, the temperature’s been creeping into the danger zone. Now you’ve got a customer who’s not only unhappy but might also be sick. Worse, they post about it online. Suddenly, your Yelp rating is tanking, and you’re fielding calls from concerned customers. All because of a few degrees.
Scenario 3: The Food Waste Fiasco
You prep a big batch of soup for the lunch rush, but by the time it’s ready to serve, the holding cabinet’s temperature has dropped below 135°F. Now, instead of serving it, you have to toss it. That’s hundreds of dollars in ingredients and labor down the drain. And if this keeps happening? You’re looking at a serious dent in your bottom line.
I’ve seen all of these scenarios play out in real kitchens. And let me tell you, none of them are pretty. The good news? They’re all preventable with proper calibration.
The Tools You’ll Need (And Why They Matter)
Essential Equipment for Calibration
Before you start calibrating, you need the right tools. Think of this like a chef’s knife, you wouldn’t use a butter knife to chop onions, right? The same goes for calibration. Here’s what you’ll need:
- Calibrated Thermometer: This is your gold standard. You’ll use it to verify the accuracy of your holding cabinet’s built-in thermometer. Look for a digital thermometer with a probe that can measure both hot and cold temperatures. Brands like Taylor, Cooper-Atkins, and ThermoWorks are reliable choices. Make sure it’s NSF-certified-this means it’s been tested and approved for food safety.
- Infrared Thermometer: This is optional but incredibly useful. It lets you quickly scan the surface temperature of your food without touching it. It’s great for spot-checking, but it’s not a replacement for a probe thermometer. Think of it as a supplement, not a substitute.
- Ice Water Bath: You’ll use this to test your thermometer’s accuracy. Fill a glass with ice and water, let it sit for a few minutes, and then check the temperature. It should read 32°F (0°C). If it doesn’t, your thermometer needs recalibration (or replacement).
- Boiling Water: Another way to test your thermometer. Boiling water should read 212°F (100°C) at sea level. If you’re at a higher elevation, you’ll need to adjust for the lower boiling point. (Pro tip: Google the boiling point for your elevation if you’re not sure.)
- Notebook or Digital Log: You’ll need this to record your calibration results. More on this later, but trust me-documentation is key. If you don’t write it down, it didn’t happen.
- Screwdriver or Adjustment Tool: Some holding cabinets have a calibration screw or adjustment dial that you’ll need to tweak. Check your cabinet’s manual to see if yours has one. If it does, you’ll need the right tool to make adjustments.
- Manufacturer’s Manual: This is your bible. Every cabinet is a little different, so don’t assume you know how yours works. The manual will tell you where to find the calibration settings, how to adjust them, and what to do if something goes wrong.
Now, I know what you’re thinking: “Do I really need all this stuff?” The short answer is yes. The long answer is yes, because food safety isn’t something you want to cut corners on. If you’re on a tight budget, start with the essentials, a good thermometer and a notebook, and build from there. But don’t skip the thermometer. It’s the most important tool in your kit.
How to Test Your Thermometer’s Accuracy
Before you calibrate your holding cabinet, you need to make sure your thermometer is accurate. After all, if your thermometer is off, your calibration will be off too. Here’s how to test it:
- Ice Water Test:
- Fill a glass with ice and add cold water until it’s full.
- Let it sit for a few minutes to stabilize.
- Stick the probe of your thermometer into the water, making sure it doesn’t touch the sides or bottom of the glass.
- Wait for the reading to stabilize. It should read 32°F (0°C). If it doesn’t, your thermometer needs adjustment or replacement.
- Boiling Water Test:
- Bring a pot of water to a rolling boil.
- Stick the probe of your thermometer into the water, again avoiding the sides and bottom.
- Wait for the reading to stabilize. At sea level, it should read 212°F (100°C). If you’re at a higher elevation, adjust for the lower boiling point.
If your thermometer doesn’t pass these tests, it’s time to recalibrate or replace it. Most digital thermometers have a calibration function-check the manual to see how to adjust yours. If it’s not adjustable, it’s time for a new one. Don’t risk it.
I’ll admit, I used to skip this step. I figured, “If the thermometer looks fine, it’s probably fine.” But after a few close calls, I realized that assuming is the enemy of accuracy. Now, I test my thermometer before every calibration. It’s a small step that makes a big difference.
Step-by-Step Guide to Calibrating Your Insulated Holding Cabinet
Step 1: Prep Your Cabinet
Before you start calibrating, you need to prepare your cabinet. Here’s how:
- Empty the Cabinet: Remove all food, trays, and racks. You want a clear workspace so you can access the temperature sensor and any calibration controls.
- Clean the Interior: Wipe down the inside of the cabinet with a food-safe sanitizer. This isn’t just about hygiene, it’s about ensuring nothing interferes with the temperature readings. Grease, food debris, or even dust can affect how the cabinet holds heat.
- Let It Stabilize: Turn on the cabinet and let it run for at least 30 minutes to reach its set temperature. This gives you a baseline to work from.
- Check the Door Seal: A faulty door seal can let heat escape, which will throw off your calibration. Run your hand along the seal to feel for drafts. If you feel air leaking, you’ll need to replace the seal before calibrating.
I’ll be honest: I used to skip the cleaning step. I figured, “It’s just a quick calibration, what’s the worst that could happen?” Turns out, a lot. One time, I calibrated a cabinet without cleaning it first, and the temperature readings were all over the place. It took me an hour to realize the issue was a buildup of grease near the sensor. Lesson learned: always clean first.
Step 2: Locate the Temperature Sensor and Calibration Controls
This is where things get a little tricky because every cabinet is different. Here’s how to find what you’re looking for:
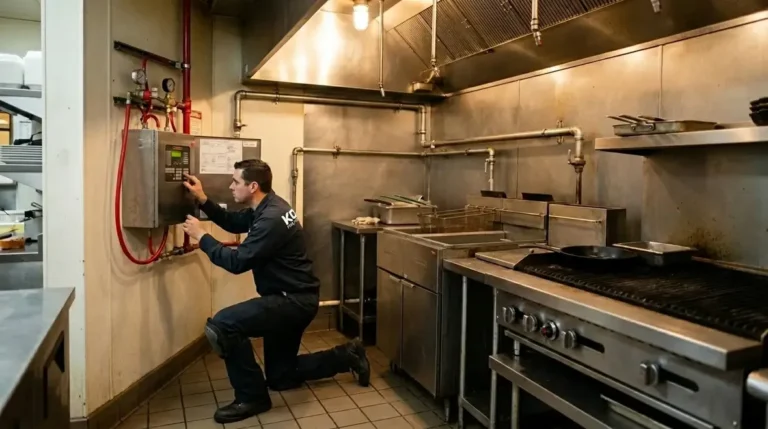
- Temperature Sensor: This is the component that measures the temperature inside the cabinet. It’s usually a small probe or wire located near the back or side of the cabinet. In some models, it’s hidden behind a panel, check your manual to find out where yours is.
- Calibration Controls: These are the settings you’ll adjust to fine-tune the cabinet’s temperature. They might be a physical dial, a digital menu, or a calibration screw. Again, your manual is your best friend here. If you can’t find the controls, don’t guess, call the manufacturer or a professional.
If you’re working with an older cabinet, the calibration controls might be a little more primitive. I once worked with a cabinet that had a tiny screw hidden behind a panel. It took me 20 minutes to find it, and another 10 to figure out how to adjust it. But once I did, it was smooth sailing. The point is, don’t give up if it’s not obvious. Dig into that manual and keep looking.
Step 3: Take the Initial Temperature Reading
Now it’s time to see where your cabinet stands. Here’s how to do it:
- Set your cabinet to the temperature you want to test. For hot holding, this is usually 140°F (60°C) or higher. For cold holding, it’s 41°F (5°C) or lower.
- Let the cabinet stabilize for at least 30 minutes. This gives the temperature time to even out.
- Use your calibrated thermometer to take a reading. Place the probe in the center of the cabinet, away from the walls and any heating or cooling elements. Wait for the reading to stabilize, this can take a few minutes.
- Record the temperature in your log. Note the date, time, cabinet model, and the reading from both the cabinet’s display and your thermometer.
Here’s where things can get confusing. What if the cabinet’s display and your thermometer don’t match? That’s what calibration is for. But first, you need to figure out how far off the cabinet is. For example, if the cabinet says 140°F but your thermometer reads 135°F, you’re 5 degrees off. That’s a problem, but it’s fixable.
I’ll never forget the first time I did this. I was so nervous I triple-checked everything. Was the thermometer in the right spot? Did I wait long enough? Was the cabinet even working? Turns out, it was fine, but the process made me realize how easy it is to second-guess yourself. If you’re feeling unsure, that’s normal. Just take your time and follow the steps.
Step 4: Adjust the Calibration Settings
This is the part where you actually calibrate the cabinet. How you do this depends on your cabinet’s make and model, but here’s a general guide:
- Digital Controls: If your cabinet has a digital display, you’ll likely find the calibration settings in the menu. Look for options like “Calibration,” “Offset,” or “Adjust.” Follow the manual’s instructions to enter the correct temperature. For example, if your thermometer reads 135°F but the cabinet says 140°F, you’ll need to adjust the calibration by -5°F.
- Physical Dial or Screw: If your cabinet has a physical adjustment, you’ll need to turn the dial or screw to fine-tune the temperature. This is where a screwdriver comes in handy. Turn the adjustment slowly, small changes can make a big difference. For example, if your thermometer reads 135°F but the cabinet says 140°F, you’ll need to turn the adjustment to lower the displayed temperature by 5 degrees.
Here’s the thing: calibration isn’t always a one-and-done deal. Sometimes, you’ll need to make an adjustment, wait for the cabinet to stabilize, and then check the temperature again. It’s a process of trial and error, and that’s okay. The key is to be patient and methodical.
I remember calibrating a cabinet that just wouldn’t cooperate. No matter what I did, the temperature was always off by a few degrees. I was ready to throw in the towel when I realized I’d been adjusting the wrong setting. Turns out, the cabinet had separate calibration controls for hot and cold holding. Once I figured that out, everything clicked. The moral of the story? Don’t assume, always double-check.
Step 5: Verify the Adjustment
After you’ve made your adjustment, it’s time to verify that it worked. Here’s how:
- Let the cabinet stabilize for another 30 minutes. This gives the temperature time to adjust to your new settings.
- Take another reading with your calibrated thermometer. Place the probe in the same spot as before to ensure consistency.
- Compare the reading to the cabinet’s display. If they match (or are within ±2°F), you’re good to go. If not, you’ll need to make another adjustment.
- Record the new reading in your log. Note any adjustments you made and the final temperature.
This step is crucial because it tells you whether your calibration worked. If the temperatures still don’t match, you might need to troubleshoot. Maybe the sensor is faulty, or maybe the cabinet needs professional servicing. Either way, don’t ignore the discrepancy, it’s a sign that something’s not right.
I’ll admit, I used to skip this step too. I’d make an adjustment, see that the temperatures were close enough, and call it a day. But then I realized that “close enough” isn’t good enough when it comes to food safety. Now, I always verify my adjustments, even if it takes a little extra time. It’s worth it for the peace of mind.
Step 6: Test Multiple Zones
Here’s something a lot of people don’t realize: temperature can vary inside a holding cabinet. The area near the heating or cooling element might be warmer or cooler than the center, and the top shelf might be different from the bottom. That’s why it’s important to test multiple zones. Here’s how:
- Divide the cabinet into three zones: top, middle, and bottom. If your cabinet is large, you might need to test more zones.
- Place your thermometer in each zone and take a reading. Wait for the temperature to stabilize before moving to the next zone.
- Record the readings in your log. Note any discrepancies between the zones.
If you find that one zone is significantly warmer or cooler than the others, you might need to adjust the cabinet’s airflow or placement. Some cabinets have adjustable vents that let you control the temperature distribution. If yours doesn’t, you might need to rearrange the food to ensure even heating or cooling. For example, place denser items (like soups or stews) near the heating element, and lighter items (like salads or sandwiches) in the center.
I learned this the hard way when I noticed that the top shelf of our holding cabinet was always warmer than the bottom. At first, I thought it was a calibration issue, but after testing multiple zones, I realized it was an airflow problem. Once I adjusted the vents, the temperature evened out. It’s a small detail, but it makes a big difference.
Step 7: Document Everything
I can’t stress this enough: documentation is everything. If you don’t write it down, it didn’t happen. Here’s what you need to record:
- Date and Time: When did you calibrate the cabinet?
- Cabinet Model and Serial Number: This helps you keep track of which cabinets you’ve calibrated and when.
- Initial Temperature Readings: What did the cabinet’s display and your thermometer read before calibration?
- Adjustments Made: What changes did you make to the calibration settings?
- Final Temperature Readings: What did the cabinet’s display and your thermometer read after calibration?
- Zones Tested: If you tested multiple zones, what were the readings for each?
- Your Name: Who performed the calibration? This is important for accountability.
You can keep these records in a notebook, spreadsheet, or digital log. Some kitchens use apps like ComplianceMate or FoodLogiQ to track their calibrations. Whatever method you choose, make sure it’s easy to access and update.
Why is documentation so important? Because it’s your proof that you’re following food safety protocols. If a health inspector asks to see your records, you’ll want to hand them over with confidence. Plus, it helps you track trends over time. For example, if you notice that a cabinet’s temperature is consistently drifting, it might be a sign that it needs servicing.
I’ll be honest: I used to hate documentation. It felt like busywork, and I always thought I’d remember the details. But then I had to recall the last time I calibrated a specific cabinet, and I drew a blank. Now, I document everything. It’s saved me more times than I can count.
Troubleshooting Common Issues
What to Do When Your Cabinet Won’t Calibrate
Let’s say you’ve followed all the steps, but your cabinet still won’t calibrate. What now? Here are some common issues and how to fix them:
- Faulty Temperature Sensor: If the sensor is damaged or dirty, it won’t give accurate readings. Try cleaning it with a food-safe sanitizer. If that doesn’t work, you might need to replace it. Check your manual for instructions or call a professional.
- Broken Heating or Cooling Element: If the element isn’t working, the cabinet won’t hold temperature. Listen for unusual noises or check for error codes on the display. If you suspect an issue, call a technician.
- Poor Airflow: If the vents are blocked or the door seal is damaged, the cabinet won’t maintain temperature. Check for obstructions and replace the seal if needed.
- Electrical Issues: If the cabinet isn’t getting power, it won’t work. Check the plug, circuit breaker, and power cord. If you’re not comfortable with electrical work, call an electrician.
- Software Glitch: If your cabinet has digital controls, a software glitch could be causing the issue. Try resetting the cabinet to its factory settings. If that doesn’t work, contact the manufacturer.
I’ve dealt with all of these issues at one point or another, and I’ll tell you, it’s frustrating. But the key is to stay calm and methodical. Don’t assume the worst. Start with the simplest fixes (like cleaning the sensor or checking the door seal) and work your way up to more complex solutions (like calling a technician).
When to Call a Professional
There’s no shame in calling a professional. In fact, it’s often the smartest move. Here are some signs that it’s time to call in the experts:
- You’ve tried calibrating the cabinet multiple times, but the temperature is still off.
- The cabinet is making unusual noises (like grinding, buzzing, or clicking).
- There’s an error code on the display that you don’t understand.
- The cabinet isn’t turning on or is shutting off unexpectedly.
- You suspect an electrical or mechanical issue (like a broken heating element or faulty wiring).
When in doubt, call the manufacturer or a certified technician. They have the tools and expertise to diagnose and fix the problem. And remember, it’s better to be safe than sorry. A small repair now could save you from a big headache later.
I’ll never forget the time I tried to fix a cabinet on my own. I thought I could handle it, but I ended up making the problem worse. It cost me twice as much to fix it in the end. Now, I know my limits. If I’m not sure, I call a professional. It’s worth the peace of mind.
How Often Should You Calibrate?
Creating a Calibration Schedule
So, how often should you calibrate your insulated holding cabinets? The short answer is regularly. But what does that mean? Here’s a general guideline:
- Monthly: Perform a quick check with your calibrated thermometer to ensure the cabinet is holding temperature. This doesn’t have to be a full calibration, just a spot-check to catch any major issues.
- Quarterly: Perform a full calibration following the steps in this guide. This is a deeper dive to ensure everything is working as it should.
- After Any Major Event: If the cabinet is moved, serviced, or experiences a power outage, recalibrate it. These events can throw off the temperature settings.
- Before Health Inspections: If you know an inspection is coming up, calibrate your cabinets beforehand. It’s a small step that can make a big difference.
Of course, these are just guidelines. Your schedule might need to be more or less frequent depending on how often you use the cabinet, its age, and its condition. For example, if you use your cabinet every day, you might want to calibrate it more often. If it’s older or showing signs of wear, you might need to check it more frequently.
I used to think that calibrating once a year was enough. But after a few close calls, I realized that temperature drift can happen gradually. By the time I noticed a problem, it was often too late. Now, I stick to a quarterly schedule, with monthly spot-checks. It’s a small time investment that pays off in spades.
Signs Your Cabinet Needs Immediate Calibration
Sometimes, your cabinet will give you signs that it needs calibration *now*. Here’s what to watch for:
- Inconsistent Temperatures: If the temperature is fluctuating wildly, it’s a sign that something’s off. This could be due to a faulty sensor, poor airflow, or a broken heating/cooling element.
- Food Spoilage: If food is spoiling faster than it should, it might be because the cabinet isn’t holding temperature. Check the temperature and calibrate if needed.
- Customer Complaints: If customers are complaining about cold food or lukewarm drinks, it’s a red flag. Don’t ignore it, check the cabinet’s temperature immediately.
- Error Codes: If the cabinet’s display is showing an error code, it’s trying to tell you something. Check the manual to see what it means and take action.
- Unusual Noises: If the cabinet is making grinding, buzzing, or clicking noises, it might be struggling to maintain temperature. This could be a sign of a mechanical issue that needs attention.
I’ll never forget the time I ignored a customer complaint about cold fries. I assumed it was a one-off, but then I started getting more complaints. When I finally checked the cabinet, the temperature was way off. It took me hours to recalibrate it and replace the faulty sensor. All because I didn’t act sooner. Now, I take complaints seriously. They’re often the first sign of a problem.
Maintaining Your Insulated Holding Cabinets for Long-Term Accuracy
Daily and Weekly Maintenance Tips
Calibration is just one part of keeping your insulated holding cabinets in top shape. Here’s how to maintain them for long-term accuracy:
- Clean the Interior Daily: Wipe down the inside of the cabinet with a food-safe sanitizer at the end of each day. This prevents grease, food debris, and bacteria from building up and affecting the temperature.
- Check the Door Seal Weekly: Run your hand along the seal to feel for drafts. If you feel air leaking, replace the seal. A faulty seal can let heat escape, which will throw off your calibration.
- Inspect the Vents Weekly: Make sure the vents aren’t blocked by food or debris. Blocked vents can disrupt airflow and cause temperature inconsistencies.
- Monitor the Temperature Daily: Use your calibrated thermometer to spot-check the temperature at the start of each shift. This helps you catch any issues early.
- Keep the Exterior Clean: Dust and grease can build up on the outside of the cabinet, which can affect its performance. Wipe it down weekly with a damp cloth.
I’ll admit, I used to skip some of these steps. I figured, “It’s just a holding cabinet, how dirty can it get?” Turns out, pretty dirty. Grease and food debris can build up quickly, especially in a busy kitchen. Now, I make maintenance a priority. It’s a small effort that makes a big difference.
Long-Term Care and Servicing
In addition to daily and weekly maintenance, your cabinets need long-term care. Here’s what to do:
- Schedule Professional Servicing Annually: Even if your cabinet seems fine, it’s a good idea to have it serviced by a professional once a year. They can check for issues you might miss, like worn-out heating elements or faulty wiring.
- Replace Worn-Out Parts: Over time, parts like the door seal, temperature sensor, and heating/cooling elements can wear out. Replace them as needed to keep your cabinet running smoothly.
- Update the Software: If your cabinet has digital controls, check for software updates. These updates can improve performance and fix bugs.
- Keep the Manual Handy: Store the manual in a safe place where you can access it easily. It’s your go-to resource for troubleshooting and maintenance.
- Train Your Staff: Make sure your staff knows how to use and maintain the cabinet. Teach them how to spot signs of trouble and who to call if something goes wrong.
I learned the importance of long-term care the hard way. A few years ago, I ignored a small issue with a cabinet’s door seal. It didn’t seem like a big deal at the time, but over the next few months, the temperature started drifting. By the time I fixed it, the cabinet was beyond repair. Now, I take a proactive approach to maintenance. It’s saved me time, money, and stress.
Wrapping Up: Your Calibration Checklist
Alright, let’s recap. Calibrating your insulated holding cabinets isn’t just a box to check, it’s a critical part of food safety. And while it might seem daunting at first, it’s really just a series of small, manageable steps. Here’s your calibration checklist to keep handy:
- Gather Your Tools: Make sure you have a calibrated thermometer, infrared thermometer (optional), ice water bath, boiling water, notebook, screwdriver, and the manufacturer’s manual.
- Test Your Thermometer: Use the ice water and boiling water tests to ensure your thermometer is accurate.
- Prep the Cabinet: Empty it, clean it, and let it stabilize for 30 minutes.
- Locate the Sensor and Controls: Check the manual to find the temperature sensor and calibration controls.
- Take the Initial Reading: Use your thermometer to check the temperature and record the results.
- Adjust the Calibration: Follow the manual’s instructions to fine-tune the temperature.
- Verify the Adjustment: Let the cabinet stabilize, take another reading, and record the results.
- Test Multiple Zones: Check the temperature in different areas of the cabinet to ensure even heating or cooling.
- Document Everything: Record the date, time, cabinet model, initial and final readings, adjustments made, and your name.
- Maintain the Cabinet: Clean it daily, check the door seal weekly, and schedule professional servicing annually.
And remember, calibration isn’t a one-time event. It’s an ongoing process that requires regular attention. But the good news is, once you get into the habit, it becomes second nature. And the peace of mind it brings? That’s priceless.
I’ll leave you with this: the next time you’re in the kitchen, take a look at your holding cabinets. Are they calibrated? Are they maintaining the right temperature? If you’re not sure, now’s the time to find out. Because when it comes to food safety, there’s no room for guesswork.
So, what’s your next step? Maybe it’s ordering a calibrated thermometer, digging out the manual, or scheduling a calibration session. Whatever it is, don’t put it off. Your customers, and your peace of mind, will thank you.
FAQ: Your Calibration Questions Answered
Q: How do I know if my insulated holding cabinet is out of calibration?
A: The easiest way to tell is by using a calibrated thermometer to check the temperature. If the reading doesn’t match the cabinet’s display, it’s out of calibration. You might also notice inconsistent temperatures, food spoilage, or customer complaints about cold or lukewarm food. If you’re seeing any of these signs, it’s time to calibrate.
Q: Can I calibrate my holding cabinet myself, or do I need a professional?
A: You can calibrate most holding cabinets yourself, as long as you have the right tools and follow the manufacturer’s instructions. However, if you’re not comfortable with the process or if the cabinet has digital controls or complex adjustments, you might want to call a professional. It’s always better to be safe than sorry.
Q: What’s the difference between calibration and maintenance?
A: Calibration is the process of adjusting the cabinet’s temperature settings to ensure accuracy. Maintenance is the ongoing care that keeps the cabinet running smoothly, like cleaning, checking the door seal, and inspecting the vents. Both are important for food safety and long-term performance.
Q: How often should I replace the temperature sensor in my holding cabinet?
A: There’s no set timeline for replacing the temperature sensor, but it’s a good idea to inspect it regularly for signs of wear or damage. If you notice that the cabinet’s temperature is consistently off, even after calibration, it might be time to replace the sensor. Check your manual for specific guidelines or call a professional for advice.
@article{how-to-calibrate-insulated-holding-cabinets-for-food-safety-a-step-by-step-guide-for-commercial-kitchens,
    title   = {How to Calibrate Insulated Holding Cabinets for Food Safety: A Step-by-Step Guide for Commercial Kitchens},
    author  = {Chef's icon},
    year    = {2026},
    journal = {Chef's Icon},
    url     = {https://chefsicon.com/how-to-calibrate-insulated-holding-cabinets-for-food-safety/}
}