
The Best Fluffy Pancakes recipe you will fall in love with. Full of tips and tricks to help you make the best pancakes.
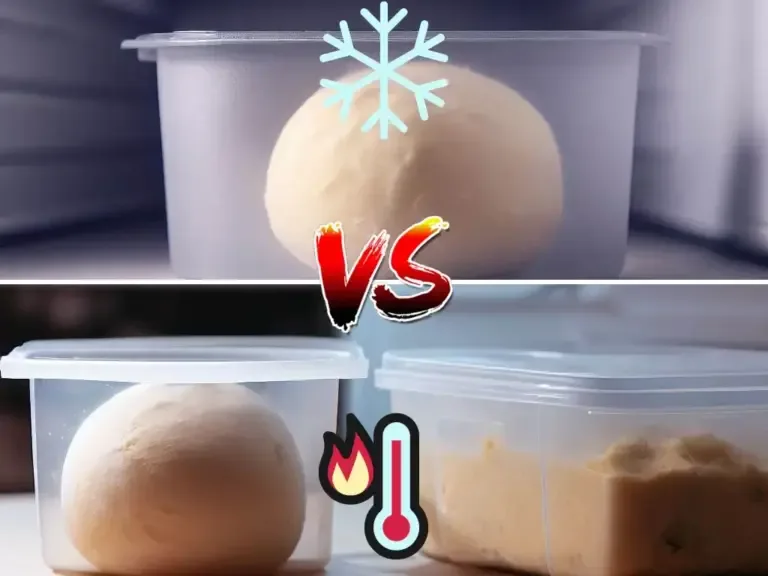
What to Do When Your Fridge Malfunctions: Using Pizza Dough After It’s Been at Room Temperature
So there I was, standing in my Nashville kitchen at 11 PM, staring at the sad, flickering light of my fridge like it was some kind of betrayal. Luna, my rescue cat, was perched on the counter, judging me, as usual, while I held a bowl of pizza dough that had been sitting out for who knows how long. The power had blinked out earlier, and I’d only just noticed. My mind raced: Is this dough still safe to use? Should I toss it? Can I salvage it? And why, oh why, did I think making dough at midnight was a good idea?
If you’ve ever found yourself in this exact situation, fridge on the fritz, dough left out, panic setting in, you’re not alone. It’s one of those moments where you question every decision that led you here, from the late-night baking urge to the fact that you still haven’t invested in a backup generator. But here’s the thing: all is not lost. With a little know-how and some quick thinking, you can often rescue that dough and turn it into something delicious. In this guide, I’ll walk you through what to do when your fridge malfunctions and your pizza dough has been left at room temperature. We’ll cover safety, troubleshooting, and even how to turn this setback into an opportunity for culinary creativity.
By the end of this, you’ll know:
- How to assess whether your dough is still safe to use
- The science behind dough fermentation and why temperature matters
- Step-by-step methods to revive or repurpose dough that’s been left out
- How to prevent this from happening again (because let’s be real, it probably will)
- Creative ways to use dough that’s overproofed or questionable
Let’s dive in, before the dough (or my sanity) ferments any further.
The Fridge Failed. Now What?
First things first: take a deep breath. Panicking won’t help the dough, and it certainly won’t fix your fridge. The key here is to act quickly but thoughtfully. Time and temperature are the two biggest factors in determining whether your dough is still usable. Most food safety guidelines suggest that perishable items, including dough with yeast, eggs, or dairy, shouldn’t be left at room temperature for more than 2 hours. But here’s the catch: that’s a general rule, and dough is a little more forgiving than, say, raw chicken. Yeast is a living organism, and its activity can actually help preserve the dough in some cases by creating an acidic environment that inhibits harmful bacteria.
That said, I’m not here to give you a free pass to ignore food safety. If your dough has been sitting out for more than 4 hours, especially in a warm kitchen, the risk of bacterial growth (like Bacillus cereus or E. coli) increases significantly. But if it’s been less than that, you’ve got options. Start by giving the dough a sniff test. Does it smell sour, funky, or off in any way? If it’s just a little yeasty or tangy, that’s normal. If it smells like something died in there, well… maybe don’t risk it. Next, look at the texture. Is it overly sticky, bubbly, or collapsing? That could mean it’s overproofed, but not necessarily unsafe. We’ll get into how to handle that later.
I’ll admit, I’ve been in this situation more times than I’d like to confess. Once, I left dough out overnight by accident (thanks, wine) and still used it the next day. Did I get sick? No. Was it the best pizza I’ve ever made? Also no. But it was edible, and sometimes that’s a win. That said, I’m not recommending you take the same risks, just sharing that dough is more resilient than you might think. Still, if you’re unsure, err on the side of caution. Food poisoning is not a badge of honor.
When in Doubt, Throw It Out… But Not Always
Here’s where I’m torn. On one hand, I’m all for reducing food waste. On the other, I’ve seen what happens when people push their luck with questionable ingredients. So let’s lay out some ground rules. If your dough meets any of the following criteria, it’s time to toss it:
- It’s been left out for more than 6 hours in a warm environment (above 75°F/24°C).
- It has visible mold or an offensive odor (not just yeasty or sour, but truly foul).
- It’s slimy, discolored, or has an unusual texture (e.g., stringy or overly wet).
- It contains perishable add-ins like eggs, milk, or cheese that have also been left out.
But if your dough is just overproofed, slightly sour, or a little sticky, you can often salvage it. The key is to reset the fermentation process. More on that in a bit. For now, let’s talk about why this happens in the first place.
The Science of Dough: Why Temperature Matters
Dough is alive. Okay, not literally, but it’s full of living organisms, yeast, that feed on sugars and produce carbon dioxide and alcohol. This process, called fermentation, is what makes dough rise and gives bread its flavor. But yeast is sensitive to temperature. Too cold, and it goes dormant. Too hot, and it goes into overdrive. At room temperature (around 70°F/21°C), yeast is in its happy place, multiplying and releasing gas at a steady pace. That’s why dough left out will continue to rise, sometimes to the point of collapse.
Here’s where things get interesting. Yeast doesn’t just make dough rise, it also creates an acidic environment that can inhibit the growth of harmful bacteria. That’s why sourdough, which relies on wild yeast and bacteria, is often more stable than commercial yeast dough. The lactic acid bacteria in sourdough produce acids that lower the pH, making it harder for bad bacteria to thrive. If your dough has been left out for a few hours, the yeast may have already started this protective process. That’s not to say you should push your luck, but it’s a reason why dough is more forgiving than other perishable foods.
But what if your dough is overproofed? Overproofing happens when the yeast has consumed too much sugar and produced too much gas, causing the gluten structure to weaken. The dough becomes sticky, slack, and prone to collapsing. It’s not unsafe (unless it’s been out for an extended period), but it won’t make great pizza. The good news? You can often knock back the dough (deflate it) and let it rise again. This resets the fermentation process and can save your dough from the trash. I’ll walk you through how to do that later.
Now, let’s talk about the elephant in the room: your fridge. If it’s malfunctioning, you’ve got bigger problems than just dough. A fridge that’s not keeping food cold enough is a food safety hazard, and it’s not something you can ignore. If you suspect your fridge is on the fritz, check the temperature with a thermometer. It should be below 40°F (4°C). If it’s not, it’s time to troubleshoot or call a repair person. In the meantime, transfer perishable items to a cooler with ice packs. And maybe invest in a backup plan, like a generator or a second fridge, because this is the kind of thing that always seems to happen at the worst possible time.
Assessing Your Dough: Is It Salvageable?
Alright, let’s say your dough has been out for 3-4 hours. It’s not moldy, it doesn’t smell terrible, but it’s definitely not in peak condition. How do you decide whether to use it or toss it? Here’s a step-by-step guide to assessing your dough:
Step 1: The Sniff Test
This is the first line of defense. Yeasty dough should smell slightly tangy or sour, but not foul. If it smells like alcohol (a sign of overfermentation) or has a sharp, unpleasant odor, it’s probably best to toss it. Trust your nose, it’s rarely wrong.
Step 2: The Look Test
Inspect the dough for any visible signs of spoilage. Mold is an obvious red flag, if you see any fuzzy spots, throw it out. Discoloration (like gray or green patches) is another sign that the dough has gone bad. If the dough looks normal but is overly bubbly or collapsing, it’s likely overproofed but not necessarily unsafe.
Step 3: The Touch Test
Gently press your finger into the dough. If it springs back quickly, it’s probably fine. If it leaves an indentation or feels overly sticky, it’s overproofed. Overproofed dough can still be used, but it may require some extra work to revive it. If the dough feels slimy or unusually wet, that’s a sign of bacterial growth, and it’s time to toss it.
Step 4: The Taste Test (Optional)
If you’re still unsure, you can take a tiny bite of the raw dough. I know, I know, this sounds like a terrible idea. But if the dough tastes sour, bitter, or off in any way, it’s not safe to use. If it just tastes like flour and yeast, it’s probably fine. That said, I don’t recommend this unless you’re absolutely desperate. There’s no need to risk food poisoning over a batch of dough.
If your dough passes these tests, congratulations! You’ve got a salvageable batch on your hands. Now let’s talk about what to do with it.
Reviving Overproofed Dough: A Step-by-Step Guide
So your dough is overproofed. It’s sticky, slack, and looks like it’s given up on life. Don’t worry, this is fixable. The key is to knock back the dough (deflate it) and let it rise again. This resets the fermentation process and gives the yeast a chance to start fresh. Here’s how to do it:
Step 1: Deflate the Dough
Gently press down on the dough to release the gas. You can do this with your hands or by folding the dough over itself a few times. The goal is to remove as much air as possible without overworking the gluten. If the dough is extremely sticky, wet your hands with a little water or oil to prevent it from sticking.
Step 2: Reshape the Dough
Once the dough is deflated, reshape it into a ball. If it’s too sticky to handle, you can add a little flour, but be careful not to overdo it. Too much flour can make the dough dense and dry. The goal is to create a smooth, cohesive ball that holds its shape.
Step 3: Let It Rise Again
Place the dough in a lightly oiled bowl, cover it with a damp towel or plastic wrap, and let it rise again. This time, keep an eye on it. Depending on the temperature of your kitchen, it could take anywhere from 30 minutes to 2 hours to rise. You’ll know it’s ready when it’s doubled in size and springs back slowly when pressed.
Step 4: Test the Dough
To check if the dough is ready, press your finger gently into the surface. If the indentation fills in slowly, it’s ready to use. If it fills in quickly, it needs more time. If it doesn’t fill in at all, it’s overproofed again, and you may need to repeat the process.
This method works for most types of dough, including pizza dough, bread dough, and even some enriched doughs like brioche. But what if your dough is beyond saving? Don’t worry, there are still ways to use it.
Creative Ways to Use Questionable Dough
Let’s say your dough is overproofed, slightly sour, or just not ideal for pizza. That doesn’t mean it’s destined for the trash. There are plenty of creative ways to use dough that’s past its prime. Here are a few ideas:
1. Flatbread or Crackers
Overproofed dough makes excellent flatbread or crackers. The lack of structure means it won’t rise much, but it will still bake into something delicious. Roll the dough out thinly, brush it with olive oil, and sprinkle it with salt, herbs, or spices. Bake at 400°F (200°C) for 10-15 minutes, or until golden and crispy. You can also cut the dough into small squares for crackers.
2. Focaccia
Focaccia is forgiving, and overproofed dough works beautifully for it. Press the dough into a greased baking sheet, dimple it with your fingers, and drizzle it with olive oil. Top it with rosemary, sea salt, or your favorite toppings, and bake at 425°F (220°C) for 20-25 minutes. The result is a flavorful, rustic bread that’s perfect for dipping or serving with meals.
3. Breadsticks
Roll the dough into thin ropes, brush them with garlic butter, and bake at 375°F (190°C) for 12-15 minutes. You can also twist the dough for a more decorative look. Breadsticks are a great way to use up dough that’s not ideal for pizza.
4. Pizza Bianca
Pizza bianca is a Roman-style pizza that’s topped with olive oil, salt, and sometimes rosemary. It’s simple, delicious, and perfect for dough that’s a little past its prime. Roll the dough out thinly, brush it with olive oil, sprinkle it with salt, and bake at 500°F (260°C) for 8-10 minutes. The result is a crispy, flavorful flatbread that’s great on its own or served with dips.
5. Sweet Treats
If your dough is enriched (contains eggs, milk, or butter), you can use it to make sweet treats like cinnamon rolls, monkey bread, or even doughnuts. Overproofed dough won’t rise as much, but it will still bake into something delicious. For example, roll the dough out, sprinkle it with cinnamon sugar, roll it up, and bake it into cinnamon rolls. The result may not be as fluffy as usual, but it will still be tasty.
These ideas are great for when your dough isn’t ideal for pizza but is still safe to eat. But what if your dough is truly questionable? Let’s talk about when to call it quits.
When to Toss the Dough (And How to Prevent This Next Time)
I’ll be honest: there are times when you just have to accept defeat. If your dough has been left out for too long, smells off, or shows signs of spoilage, it’s not worth the risk. Food poisoning is miserable, and it’s not something you want to experience over a batch of dough. So when should you toss it? Here’s a quick recap:
- If it’s been left out for more than 6 hours in a warm environment.
- If it has visible mold or an offensive odor.
- If it’s slimy, discolored, or has an unusual texture.
- If it contains perishable add-ins that have also been left out.
If any of these apply, it’s time to say goodbye. But don’t beat yourself up, it happens to the best of us. The important thing is to learn from the experience and take steps to prevent it from happening again. Here’s how:
1. Invest in a Backup Plan
If your fridge is unreliable, it’s time to invest in a backup plan. A small generator, a backup fridge, or even a cooler with ice packs can save you from future dough disasters. I learned this the hard way after losing a batch of sourdough starter (RIP). Now, I keep a backup power source on hand, just in case.
2. Set a Timer
If you’re proofing dough at room temperature, set a timer. Most doughs need 1-2 hours to rise, depending on the temperature of your kitchen. A timer will remind you to check on the dough before it overproofs. I like to use my phone’s timer, but a kitchen timer works just as well.
3. Use the Fridge for Long Proofs
If you’re not in a hurry, you can proof dough in the fridge. Cold fermentation slows down the yeast, giving you more control over the process. Dough can stay in the fridge for up to 3 days, which is great for developing flavor. Just make sure your fridge is working properly, this brings us to our next point.
4. Maintain Your Fridge
A well-maintained fridge is less likely to malfunction. Clean the coils regularly, check the seals, and monitor the temperature. If your fridge is acting up, don’t ignore it. Call a repair person or replace it if necessary. A fridge is an investment, and it’s worth taking care of.
5. Keep a Dough Journal
This might sound excessive, but keeping a dough journal can help you track your fermentation times and temperatures. Note how long your dough takes to rise, what temperature your kitchen is, and how the dough behaves. Over time, you’ll develop a better sense of how your dough should look and feel at each stage. I started doing this after a particularly disastrous batch of cinnamon rolls, and it’s made a huge difference in my baking.
Prevention is key, but even with the best-laid plans, things can go wrong. That’s why it’s important to know how to handle a fridge malfunction when it happens.
Troubleshooting Your Fridge: Quick Fixes and When to Call a Pro
So your fridge is on the fritz. Now what? Before you panic, there are a few quick fixes you can try. Here’s a step-by-step guide to troubleshooting your fridge:
Step 1: Check the Power
This might seem obvious, but it’s easy to overlook. Make sure the fridge is plugged in and that the outlet is working. If the fridge is plugged in but not turning on, try resetting the circuit breaker. If that doesn’t work, the issue might be with the fridge itself.
Step 2: Clean the Coils
Dirty coils can cause your fridge to work harder than it needs to, leading to malfunctions. Unplug the fridge, pull it away from the wall, and vacuum the coils. This is a simple fix that can often resolve cooling issues.
Step 3: Check the Seals
If the seals on your fridge door are dirty or damaged, cold air can escape, causing the fridge to work harder. Clean the seals with warm, soapy water, and check for any cracks or gaps. If the seals are damaged, you may need to replace them.
Step 4: Monitor the Temperature
Use a thermometer to check the temperature inside the fridge. It should be below 40°F (4°C). If it’s not, adjust the temperature settings and check again after a few hours. If the temperature doesn’t drop, there may be a more serious issue.
Step 5: Call a Pro
If none of these fixes work, it’s time to call a professional. A fridge is a complex appliance, and some issues require expert attention. Don’t try to fix it yourself unless you know what you’re doing, you could end up making the problem worse.
While you’re waiting for the repair person, transfer perishable items to a cooler with ice packs. This will buy you some time and prevent food waste. And if your fridge is beyond repair, start researching replacements. A good fridge is an investment, and it’s worth spending a little extra for one that’s reliable and energy-efficient.
Turning a Fridge Failure into a Culinary Opportunity
Let’s be real: a fridge malfunction is never fun. But it can also be an opportunity to get creative in the kitchen. Instead of seeing this as a setback, think of it as a chance to experiment with new recipes or techniques. Here are a few ways to turn this situation into something positive:
1. Embrace Cold Fermentation
If your fridge is working but you’re worried about future malfunctions, try cold fermentation. This involves proofing dough in the fridge for an extended period, which slows down the yeast and develops more flavor. Cold-fermented dough is often more complex and delicious than dough proofed at room temperature. Plus, it’s more forgiving, if you forget about it for a day or two, it’s less likely to overproof.
2. Experiment with Sourdough
Sourdough is more stable than commercial yeast dough because of its acidic environment. If you’ve been thinking about starting a sourdough starter, now’s the time. A sourdough starter can be kept in the fridge for weeks, making it a great backup plan for when your fridge acts up. Plus, sourdough is incredibly versatile, you can use it for bread, pizza, pancakes, and more.
3. Try No-Knead Bread
No-knead bread is a great option for when you’re dealing with a fridge malfunction. The dough is mixed and left to rise for 12-18 hours at room temperature, making it a low-maintenance option. Plus, the long fermentation time develops a lot of flavor, so you don’t need a fridge to get great results.
4. Make Flatbreads or Crackers
As I mentioned earlier, overproofed dough makes excellent flatbreads or crackers. These are quick to make and don’t require a lot of effort. Plus, they’re a great way to use up dough that’s not ideal for pizza. Experiment with different toppings and seasonings to create something unique.
5. Get Creative with Toppings
If your dough is questionable but still safe to eat, focus on the toppings. A great sauce, cheese, or garnish can elevate even the most mediocre dough. Try making a white pizza with garlic oil, ricotta, and fresh herbs, or a Margherita pizza with fresh basil and mozzarella. The toppings can make all the difference.
At the end of the day, a fridge malfunction is just a temporary setback. With a little creativity and know-how, you can turn it into an opportunity to learn and grow as a cook. And who knows? You might even discover a new favorite recipe along the way.
Final Thoughts: When Life Gives You Overproofed Dough…
So here’s the thing: life happens. Fridges malfunction, power goes out, and dough gets left out. But that doesn’t mean your culinary dreams are over. With the right knowledge and a little creativity, you can salvage that dough and turn it into something delicious. Whether you revive it, repurpose it, or use it as an excuse to try something new, there’s always a way to make the best of the situation.
I’ll leave you with this: next time your fridge acts up, take a deep breath and remember that dough is more resilient than you think. Assess the situation, trust your instincts, and don’t be afraid to get creative. And if all else fails, there’s always takeout. (No judgment here.)
Now, if you’ll excuse me, I need to go check on my own fridge. Luna’s giving me that look again, and I think she’s hungry. Or maybe she’s just judging my life choices. Either way, I’m off to make some pizza, overproofed dough and all.
FAQ
Q: How long can pizza dough safely sit at room temperature?
A: Pizza dough can safely sit at room temperature for up to 2 hours, according to general food safety guidelines. However, dough is more forgiving than other perishable foods because yeast creates an acidic environment that can inhibit harmful bacteria. If the dough has been out for 2-4 hours, it may still be safe to use, but you should assess it for signs of spoilage (off odors, mold, sliminess). If it’s been out for more than 4 hours, especially in a warm kitchen, the risk of bacterial growth increases significantly, and it’s best to discard it.
Q: Can I still use pizza dough that’s overproofed?
A: Yes, overproofed dough can often be salvaged. Overproofing happens when the yeast has consumed too much sugar and produced too much gas, weakening the gluten structure. To revive it, gently deflate the dough by pressing or folding it to release the gas, reshape it into a ball, and let it rise again. This resets the fermentation process. Keep in mind that overproofed dough may not rise as much as usual, but it can still be used for flatbreads, focaccia, or other recipes where a lighter texture isn’t critical.
Q: What are the signs that pizza dough has gone bad?
A: There are several signs that pizza dough has gone bad and should be discarded:
- Off odors: If the dough smells foul, sour, or like alcohol, it’s likely spoiled.
- Mold: Visible mold (fuzzy spots or discoloration) is a clear sign that the dough is unsafe to eat.
- Sliminess or unusual texture: If the dough feels slimy, overly wet, or has a stringy texture, it may have bacterial growth.
- Discoloration: Gray or green patches indicate spoilage.
- Perishable add-ins: If the dough contains eggs, milk, or cheese and has been left out for an extended period, it’s best to discard it.
If you notice any of these signs, it’s not worth the risk, toss the dough and start fresh.
Q: What can I do to prevent my fridge from malfunctioning in the future?
A: Preventing fridge malfunctions starts with regular maintenance and a few proactive steps:
- Clean the coils: Dust and debris on the coils can cause the fridge to work harder than necessary. Clean them every 6 months with a vacuum or brush.
- Check the seals: Dirty or damaged seals can let cold air escape, causing the fridge to overwork. Clean the seals regularly and replace them if they’re cracked or worn.
- Monitor the temperature: Use a thermometer to ensure the fridge stays below 40°F (4°C). If the temperature fluctuates, adjust the settings or call a repair person.
- Don’t overfill the fridge: A crowded fridge can block airflow, making it harder to maintain a consistent temperature. Keep it organized and avoid overpacking.
- Invest in a backup plan: If your fridge is unreliable, consider a small generator, backup fridge, or cooler with ice packs for emergencies.
Regular maintenance and a little vigilance can go a long way in keeping your fridge running smoothly.
@article{what-to-do-when-your-fridge-malfunctions-salvaging-pizza-dough-left-at-room-temperature,
    title   = {What to Do When Your Fridge Malfunctions: Salvaging Pizza Dough Left at Room Temperature},
    author  = {Chef's icon},
    year    = {2026},
    journal = {Chef's Icon},
    url     = {https://chefsicon.com/what-to-do-when-your-fridge-malfunctions-using-pizza-dough-after-its-been-at-room-temperature/}
}