The Best Fluffy Pancakes recipe you will fall in love with. Full of tips and tricks to help you make the best pancakes.
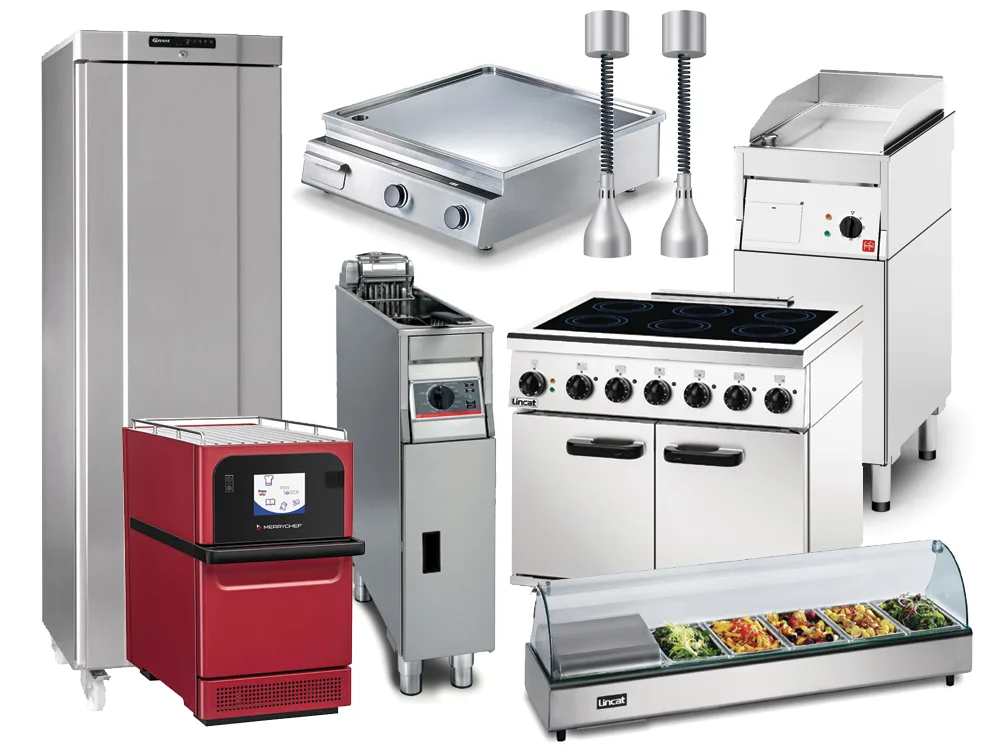
How to Choose Catering Equipment for Small-Scale Events Without Losing Your Mind (or Your Budget)
Let me set the scene: It’s 2024, and you’ve just volunteered, okay, fine, been voluntold, to handle catering for your cousin’s engagement party. Thirty guests. A backyard. Zero commercial kitchen experience. You’ve spent the last three nights scrolling through Pinterest boards labeled “elegant backyard soirées,” but none of them mention the one thing that’s actually going to make or break this event: the catering equipment. Not the floral arches. Not the custom cocktail napkins. The stuff that keeps the food hot, the drinks cold, and the guests from staring at you like you’ve just committed a culinary war crime.
I’ve been there. Not with an engagement party, but with a corporate lunch for twenty-five people that was supposed to be “casual but polished.” I rented a chafing dish that arrived with a dent the size of a grapefruit, and the sternos I bought at the last minute burned out halfway through service. The quinoa salad? Room temperature. The salmon? Lukewarm. The client’s smile? Frozen. That was the day I learned that choosing the right catering equipment for small-scale events isn’t just about logistics, it’s about dignity. Yours, mostly.
So, if you’re staring at a guest list of 20–50 people and wondering how to turn a patch of grass or a borrowed kitchen into a functional food service operation, you’re in the right place. This isn’t a corporate white paper. It’s not a glossy brochure from a rental company. It’s a real, slightly messy, occasionally self-doubting guide to picking the right tools for the job, written by someone who’s made the mistakes so you don’t have to. By the end, you’ll know:
- How to assess your event’s real needs (hint: it’s not just about headcount)
- Which essential catering equipment you actually need, and which you can skip
- How to balance renting vs. buying without breaking the bank
- The sneaky little details that no one tells you about (like why your chafing dish might explode if you use the wrong fuel)
- How to troubleshoot on the fly when things go sideways (and they will)
Let’s start with the most important question: What kind of event are you really hosting?
1. Start with the Event Blueprint: What Are You Actually Serving?
Before you even think about equipment, you need to answer three questions:
- What’s the menu?
- What’s the service style?
- What’s the venue like?
I can’t tell you how many times I’ve seen people order a buffet-style chafer set for a plated dinner, or rent a coffee urn for a brunch that’s actually serving cold brew. It’s like buying a snowboard for a beach vacation, sure, it’s equipment, but it’s not the right kind.
Let’s break it down:
Menu: What’s on the Plate?
Your menu dictates everything. Are you serving:
- Hot, plated meals (e.g., chicken piccata with sides)? You’ll need hot holding equipment like chafing dishes or warming trays, plus serving utensils and plates that can handle heat.
- Buffet-style dishes (e.g., taco bar, pasta station)? You’ll need chafer sets, serving spoons, and possibly a food warmer for backup.
- Cold dishes (e.g., charcuterie, salads, sushi)? You’ll need chilled serving trays, ice baths, or even a portable refrigeration unit if you’re outdoors.
- Desserts (e.g., cupcakes, pies, a DIY sundae bar)? You’ll need display stands, portioning tools, and possibly a dessert warmer for things like molten lava cakes.
I once catered a baby shower where the host insisted on serving a warm spinach-artichoke dip alongside cold finger sandwiches. Sounds simple, right? Wrong. The dip required a slow cooker to keep it warm, but the venue had no outlets near the serving table. We ended up using a portable butane burner (which I’d brought as a backup) and praying no one noticed the faint smell of fuel. Lesson learned: always map out where your equipment will go and how it’ll be powered.
Service Style: How Are You Serving It?
This is where things get tricky. The service style affects not just the equipment you need, but how much of it. For example:
- Plated service: You’ll need serving platters, tongs, and possibly plate warmers if you’re going for that restaurant-level presentation. You’ll also need enough hands to serve, don’t assume you can do it alone for 30 people.
- Buffet: You’ll need chafer sets, serving utensils, and labels (trust me, people will ask what’s in the quinoa salad). You’ll also need to think about flow, can guests easily access all dishes, or will they bottleneck at the mac and cheese?
- Family-style: You’ll need large serving bowls, serving spoons, and extra plates for passing. This style is great for intimate events, but it requires more coordination (and more dishwashing).
- Food stations (e.g., taco bar, pasta station): You’ll need individual setups for each station, including small chafers, portioning tools, and condiment holders. This is fun but labor-intensive, make sure you have enough staff or helpers.
I’m torn between recommending buffet or plated for small events. Buffets feel more relaxed and interactive, but they can be chaotic if you’re not organized. Plated feels more polished, but it’s a lot of work for one person. Maybe I should clarify: if you’re flying solo, family-style or stations might be your best bet. They spread the workload and let guests serve themselves without the buffet scrum.
Venue: Where Is This Happening?
The venue is the wild card. You can plan the perfect menu and service style, but if the venue doesn’t have outlets, water access, or enough space, you’re in trouble. Ask yourself:
- Is it indoors or outdoors? Outdoor events often require portable equipment like propane burners, coolers, or tent rentals for shade.
- Are there outlets? If not, you’ll need battery-powered or fuel-based equipment (e.g., butane burners, portable induction cooktops).
- Is there a kitchen? Even a small one can be a game-changer. If not, you’ll need to prep everything off-site and transport it, which means insulated carriers and coolers.
- How much space do you have? A cramped venue might mean you need stackable or collapsible equipment to save room.
Here’s a pro tip: always visit the venue in person. I once assumed a client’s backyard had enough space for a buffet table, only to realize on the day of the event that the only flat surface was a tiny patio. We ended up using a foldable banquet table and a portable island, which worked but was far from ideal. Measure twice, cater once.
2. The Essential Catering Equipment Checklist: What You Actually Need
Now that you’ve got your event blueprint, let’s talk equipment. I’m going to break this down into categories, because throwing a list of 50 items at you isn’t helpful. Instead, I’ll focus on the on-negotiables for small-scale events, plus a few ice-to-haves if your budget allows.
Hot Holding and Serving Equipment
If you’re serving hot food, this is where you can’t cut corners. Cold food can sit out for a bit, but hot food needs to stay hot, both for safety and for taste. Here’s what you’ll need:
- Chafing dishes: The workhorse of catering. These come in full-size (for buffets) and half-size (for stations). You’ll need one per hot dish, plus fuel holders and sternos (the little cans of gel fuel). Pro tip: buy extra sternos. They burn out faster than you think, especially in cold or windy conditions.
- Warming trays: Electric trays that keep food at a consistent temperature. These are great for plated service or if you’re serving from a kitchen. Just make sure you have enough outlets.
- Slow cookers: Perfect for dips, soups, or sauces. They’re portable, easy to use, and can double as serving vessels. I always bring at least two, one for backup.
- Portable induction burners: If you need to keep something warm but don’t have a chafing dish, these are a lifesaver. They’re also great for cooking on-site (e.g., making pancakes at a brunch). Just make sure you have the right cookware.
- Insulated food carriers: If you’re transporting hot food, these are a must. They keep food warm for hours and are way more reliable than wrapping dishes in towels (yes, I’ve tried that).
Is this the best approach? Let’s consider: Chafing dishes are the gold standard, but they’re bulky and require fuel. Warming trays are easier but need power. Slow cookers are versatile but limited to certain dishes. Maybe the answer is to mix and match. For example, use a chafing dish for the main dish and a slow cooker for the dip. That way, you’re covered without overcomplicating things.
Cold Holding and Serving Equipment
Cold food might seem easier, but it’s just as tricky. You need to keep things chilled without freezing them, and you need to do it in a way that’s visually appealing. Here’s what you’ll need:
- Chilled serving trays: These are like chafing dishes but for cold food. They sit on a bed of ice and keep things like shrimp cocktail or fruit salad cold. You can also DIY this with ice baths (a large bowl filled with ice and a smaller bowl on top).
- Coolers: Not just for drinks! A good insulated cooler can keep food cold for hours. Look for ones with wheels if you’re transporting a lot of stuff.
- Portable refrigeration units: If you’re outdoors and need to keep things cold for a long time, these are worth the investment. They’re like mini fridges and run on electricity or battery.
- Ice buckets and tongs: For drinks, of course, but also for keeping bottles of wine or champagne chilled. Don’t forget the ice scoop-no one wants to fish ice out with their hands.
- Salad bars and condiment holders: If you’re serving a lot of cold dishes, these keep things organized and accessible. Look for ones with sneeze guards if you’re in a public space.
I’m a little obsessed with chilled serving trays. They’re so simple, but they make cold food look elegant. The downside? They take up a lot of space. Maybe I should clarify: if you’re tight on room, ice baths are a great alternative. They’re not as pretty, but they get the job done.
Food Prep and Cooking Equipment
Unless you’re serving pre-made food (no judgment), you’ll need some on-site prep tools. Even if you’re doing most of the prep ahead of time, you’ll likely need to do some last-minute chopping, mixing, or cooking. Here’s what to consider:
- Cutting boards and knives: You’d be surprised how often these get overlooked. Bring a chef’s knife, a paring knife, and a serrated knife, plus a large cutting board (or two). Pro tip: color-coded cutting boards help prevent cross-contamination (e.g., green for veggies, red for meat).
- Mixing bowls: You’ll need these for everything from tossing salads to marinating meat. Bring a variety of sizes, and make sure they’re stackable to save space.
- Measuring cups and spoons: Even if you’re eyeballing it, these are handy for sauces, dressings, and drinks. I like the magnetic ones that stick together, no more digging through drawers for the 1/4 teaspoon.
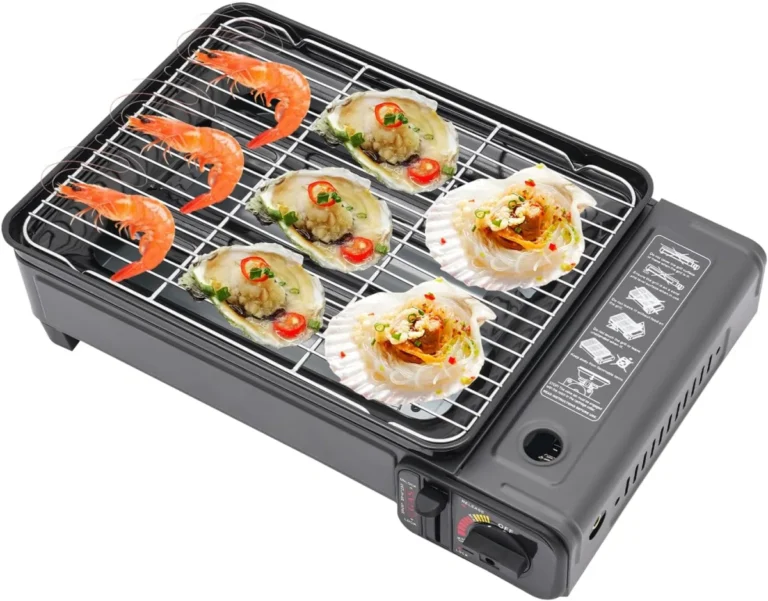
- Portable grills or burners: If you’re cooking on-site, you’ll need a way to do it. Propane grills are great for burgers and hot dogs, while butane burners are better for stir-fries or sauces. Just make sure you have enough fuel.
- Food processors or blenders: If you’re making dips, sauces, or smoothies, these are a game-changer. Look for compact, portable models if you’re tight on space.
- Thermometers: A food thermometer is non-negotiable. You need to make sure meat is cooked to a safe temperature, and a candy thermometer is handy for sauces or caramel.
I’ll admit, I used to skip the food thermometer. I thought I could tell when chicken was done by looking at it. Spoiler: I couldn’t. Now I bring two, one for meat and one for sugar work. It’s a small thing, but it’s saved me from more than one kitchen disaster.
Serving Utensils and Tableware
This is where a lot of people go overboard. You don’t need a different utensil for every dish, but you do need the right tools for the job. Here’s what to consider:
- Serving spoons and tongs: For buffets and stations, you’ll need long-handled spoons for deep dishes and tongs for things like pasta or salad. I like the ones with on-slip grips-they’re easier to hold when you’re serving for hours.
- Ladles: For soups, stews, or sauces. Look for ones with pouring lips to avoid drips.
- Serving forks and knives: For carved meats or large dishes. You’ll also need carving boards if you’re doing a roast or turkey.
- Plates, bowls, and cups: This seems obvious, but don’t forget to match the size and style to your menu. For example, shallow bowls are better for pasta, while deep bowls are better for soup. And please, don’t use plastic cups for wine. It’s a crime against humanity.
- Napkins and linens: Cloth napkins elevate any event, but they’re a pain to wash. Disposable linen-look napkins are a great compromise. You’ll also need tablecloths (or at least table runners) to cover up ugly tables.
- Condiment holders: For sauces, dressings, or toppings. Look for ones with multiple compartments to save space.
I’m torn between recommending disposable or reusable tableware. Disposable is easier, but it’s wasteful. Reusable is eco-friendly, but it’s a lot of work. Maybe the answer is to mix and match. For example, use compostable plates for the main meal and real glassware for drinks. That way, you’re not washing 50 wine glasses, but you’re still keeping things classy.
Transport and Storage
This is the part no one thinks about until they’re standing in a parking lot with 20 pounds of ice and no way to carry it. Here’s what you’ll need:
- Insulated carriers: For transporting hot or cold food. Look for ones with wheels if you’re carrying a lot of stuff.
- Coolers: For drinks, ice, or cold food. Rolling coolers are a lifesaver if you’re moving heavy items.
- Storage bins: For non-perishable items like napkins, utensils, or decor. Look for stackable bins to save space.
- Dollies or hand trucks: If you’re moving a lot of equipment, these are worth the investment. Trust me, your back will thank you.
- Plastic wrap and aluminum foil: For covering dishes during transport. Stretch wrap is also great for securing items to dollies or tables.
- Labels and markers: For labeling dishes, coolers, or bins. This might seem overkill, but it’s a game-changer when you’re trying to find the vegan dip in a sea of containers.
I’ll be honest: I used to skip the dolly. I thought I could carry everything myself. Then I tried to move a chafing dish set up a flight of stairs and nearly dropped it. Now I rent a dolly for every event. It’s $20 well spent.
3. Renting vs. Buying: The Eternal Struggle
This is the question that keeps me up at night: Should you rent or buy your catering equipment? The answer, of course, is it depends. Let’s break it down.
When to Rent
Renting is a great option if:
- You’re hosting a one-time event and don’t want to store equipment afterward.
- You need high-end or specialized equipment (e.g., a portable refrigeration unit or a commercial-grade grill).
- You’re on a tight budget and don’t want to invest in equipment you won’t use often.
- You don’t have storage space for large items like chafing dishes or banquet tables.
Pros of renting:
- No long-term commitment.
- Access to high-quality equipment without the upfront cost.
- No maintenance or storage hassles.
Cons of renting:
- Rental costs add up if you host events frequently.
- You’re limited to the inventory of the rental company. If they’re out of chafing dishes, you’re out of luck.
- You might not get the exact items you want (e.g., a specific brand or color).
I’ve rented equipment for most of my events, and it’s worked out fine. But I’ve also had rental companies deliver dirty chafing dishes or missing parts. Always inspect your rental equipment when it arrives, and don’t be afraid to send something back if it’s not up to par.
When to Buy
Buying is a better option if:
- You host multiple events per year and want to build a collection of equipment.
- You need basic, versatile items that you’ll use often (e.g., slow cookers, cutting boards, serving utensils).
- You want to customize your setup (e.g., branded napkins, custom tablecloths).
- You have storage space for equipment.
Pros of buying:
- You own the equipment and can use it whenever you want.
- No rental fees or delivery charges.
- You can choose the exact items you want (e.g., a specific brand or color).
Cons of buying:
- Upfront cost can be high, especially for large items.
- You’re responsible for maintenance and storage.
- Equipment can become outdated or wear out over time.
I’ve started buying small, versatile items like slow cookers and cutting boards, but I still rent large or specialized equipment like chafing dishes and banquet tables. It’s a good compromise, but I’m still not sure if it’s the best approach. Maybe I should clarify: if you’re just starting out, rent first. See what you use most often, then invest in those items.
Where to Rent
If you decide to rent, here are some places to look:
- Party rental companies: These are the most common and usually have a wide selection of equipment. Look for ones that specialize in catering or event rentals.
- Restaurant supply stores: Some of these offer rental services, especially for large items like banquet tables or chafing dishes.
- Online marketplaces: Websites like PeerRenters or RentMyEquipment let you rent from individuals or small businesses. This can be a great option for iche items or if you’re on a tight budget.
- Local caterers: Some caterers rent out their equipment when they’re not using it. This can be a good option if you need high-end or specialized items.
Pro tip: compare prices and reviews before committing to a rental company. Some charge exorbitant delivery fees or have hidden costs. And always read the fine print-some companies charge extra for late returns or damaged items.
Where to Buy
If you decide to buy, here are some places to look:
- Restaurant supply stores: These are great for commercial-grade equipment like chafing dishes, warming trays, or serving utensils. They often have better prices than retail stores.
- Online retailers: Websites like Amazon, WebstaurantStore, or Cabela’s have a wide selection of catering equipment. Just make sure to read reviews and check the return policy.
- Thrift stores or secondhand shops: You can find great deals on used equipment, especially for items like slow cookers or cutting boards. Just make sure to inspect items carefully for damage or wear.
- Local classifieds: Websites like Craigslist or Facebook Marketplace often have listings for catering equipment. This can be a good option if you’re on a tight budget, but be sure to meet in a safe location and inspect items before buying.
I’ve bought a lot of my equipment from WebstaurantStore, and I’ve been happy with the quality. But I’ve also found some great deals on Facebook Marketplace. For example, I once bought a barely used chafing dish set for half the retail price. It’s all about being patient and doing your research.
4. The Sneaky Details No One Tells You About
This is the part where I share the hard-earned lessons that no one bothered to mention in the glossy catering guides. These are the things that will save you from panic on the day of the event.
Fuel Matters: The Sterno Debacle
If you’re using chafing dishes, you’ll need fuel. Most people use sterno cans, which are little cans of gel fuel. Here’s what no one tells you:
- Not all sterno is created equal. Some brands burn hotter and longer than others. I’ve had sterno cans that lasted 2 hours and others that lasted 6. Always test your fuel beforehand.
- Wind and cold kill sterno. If you’re outdoors, even a light breeze can make sterno burn out faster. And if it’s cold, the fuel won’t burn as hot. Bring extra cans and consider using a wind guard if you’re in a breezy area.
- Sterno can explode. I know, it sounds dramatic, but it’s true. If you leave a sterno can lit for too long, the pressure can build up and cause it to burst. Always extinguish sterno cans when not in use, and never leave them unattended.
- There are alternatives to sterno. Butane burners are more powerful and don’t have the same explosion risk, but they’re bulkier and require more setup. Electric chafing dishes are the safest option, but they need an outlet.
I learned about the sterno explosion risk the hard way. I left a can lit under a chafing dish while I ran inside to grab something. When I came back, the can had burst, and the gel fuel was everywhere. Luckily, no one was hurt, but it was a mess. Now I ever leave sterno unattended.
Power Struggles: Outlets Are Your Friend
If you’re using electric equipment like warming trays, slow cookers, or coffee urns, you’ll need power. Here’s what to keep in mind:
- Not all venues have enough outlets. I’ve been to backyards with one outlet and corporate event spaces with none. Always ask about outlets when you book the venue.
- Extension cords are a necessity. Bring at least two heavy-duty extension cords (12-gauge or thicker) and a power strip with a surge protector. Pro tip: tape down cords to avoid tripping hazards.
- Generators are an option. If you’re outdoors and need a lot of power, a portable generator can be a lifesaver. Just make sure it’s quiet (no one wants to hear a generator during a toast) and safe (keep it away from food and guests).
- Battery-powered equipment exists. If you’re in a pinch, look for battery-powered warming trays or portable induction burners. They’re not as powerful as electric models, but they’re better than nothing.
I once catered an outdoor wedding where the only outlet was on the other side of the yard. We ended up running three extension cords across the grass, which was a tripping hazard and an eyesore. Now I always scout the venue for outlets and bring extra cords.
Space Planning: The Tetris Effect
You might have all the right equipment, but if you don’t have a plan for where it’s going, you’re in trouble. Here’s how to avoid the Tetris effect (where nothing fits and everything is a mess):
- Draw a layout. Sketch out where the buffet table, drink station, and food prep area will go. Make sure there’s enough room for guests to move around.
- Think about flow. Guests should be able to move through the buffet line without bottlenecking. Place plates at the beginning and utensils at the end.
- Leave room for prep. If you’re cooking or assembling dishes on-site, make sure you have a separate prep area away from the serving table.
- Consider height. Use risers or stands to create levels on your buffet table. This makes it easier for guests to see and access dishes.
- Label everything. Use tent cards or chalkboard signs to label dishes. This is especially important for dietary restrictions (e.g., “Vegan,” “Gluten-Free”).
I’ll admit, I used to wing the layout. I’d show up on the day of the event and try to figure it out on the fly. It never worked. Now I draw a diagram and measure everything beforehand. It takes 20 minutes, but it saves hours of stress.
Dietary Restrictions: The Vegan Dilemma
You might think dietary restrictions are a menu problem, but they’re also an equipment problem. Here’s what to keep in mind:
- Cross-contamination is a real risk. If you’re serving vegan, gluten-free, or allergen-free dishes, you’ll need separate utensils and serving dishes. Color-coded cutting boards and tongs are a great way to keep things organized.
- Labeling is non-negotiable. Use clear, visible labels for all dishes, especially those with dietary restrictions. I like to use chalkboard signs or tent cards.
- Separate prep areas help. If possible, prep dietary-restricted dishes in a separate area from the rest of the food. This reduces the risk of cross-contamination.
- Bring backup options. If you’re serving a buffet, have a separate dish for guests with dietary restrictions. For example, a vegan pasta salad or a gluten-free dessert.
I once catered an event where the host forgot to mention that one of the guests was deathly allergic to nuts. We had to scramble to re-prep all the dishes and wash all the utensils. Now I always ask about dietary restrictions and plan accordingly.
5. Troubleshooting: When Things Go Sideways (And They Will)
No matter how well you plan, something will go wrong. It’s not a question of if, but when. Here’s how to handle the most common catering disasters.
The Food Is Cold (or Hot) When It Shouldn’t Be
This is the most common issue, and it’s usually due to fuel or power problems. Here’s what to do:
- For cold food: If your chilled serving tray isn’t cold enough, add more ice. If you’re using an ice bath, make sure the water level is high enough to cover the bottom of the bowl. If all else fails, move the dish to a cooler and serve it in smaller batches.
- For hot food: If your chafing dish isn’t hot enough, check the fuel. If the sterno can is empty, replace it. If you’re using an electric warming tray, check the outlet and extension cord. If the food is already cold, reheat it in a microwave or oven (if available) or serve it as a “chilled” dish (e.g., “chilled pasta salad”).
I’ve had to reheat food in a microwave more times than I’d like to admit. It’s not ideal, but it’s better than serving cold lasagna. Always have a backup plan for reheating, even if it’s just a portable butane burner.
The Equipment Breaks
This is every caterer’s nightmare. Here’s how to handle it:
- Chafing dish falls apart: If the frame collapses or the water pan leaks, transfer the food to a slow cooker or warming tray. If you don’t have a backup, serve the food in bowls and keep it warm with sterno cans.
- Warming tray stops working: Check the outlet and extension cord. If it’s still not working, transfer the food to a chafing dish or slow cooker.
- Cooler fails: If the ice melts and the food starts to warm up, add more ice or move the food to a refrigerator (if available). If you’re outdoors, cover the cooler with a blanket to insulate it.
- Utensils go missing: Always bring extra serving spoons, tongs, and ladles. If something goes missing, improvise with what you have (e.g., a large spoon for serving pasta).
I once had a chafing dish frame collapse mid-event. The water pan tipped over, and the food was everywhere. I ended up transferring the food to slow cookers and serving it from there. It wasn’t pretty, but it worked. Now I always inspect my equipment before the event and bring backups.
The Venue Isn’t What You Expected
You might show up to the venue and realize it’s smaller, hotter, or less equipped than you thought. Here’s how to adapt:
- Not enough space: If the venue is smaller than expected, downsize your setup. Use smaller tables or collapsible equipment. If you’re serving a buffet, create a single-line flow instead of a double-sided table.
- No outlets: If the venue doesn’t have enough outlets, switch to fuel-based equipment like butane burners or sterno cans. If you’re using electric equipment, limit it to essentials (e.g., one warming tray instead of three).
- No kitchen: If the venue doesn’t have a kitchen, prep as much as possible off-site. Use insulated carriers to transport hot or cold food, and bring pre-cut ingredients to save time.
- Too hot or cold: If the venue is too hot, use fans or open windows to cool it down. If it’s too cold, use space heaters or blankets to warm it up. For outdoor events, rent a tent to provide shade or shelter.
I once showed up to a venue that was half the size I expected. The buffet table I’d rented was too big, and there was no room for guests to move around. I ended up switching to a single-line setup and using smaller serving dishes. It wasn’t ideal, but it worked. Now I always confirm the venue size before the event and bring flexible equipment.
The Food Runs Out
This is the ultimate catering sin: running out of food. Here’s how to avoid it (and what to do if it happens):
- Overestimate: Always prepare 10–20% more food than you think you’ll need. People eat more than you expect, especially at buffets.
- Have a backup dish: Prepare a simple, easy-to-make dish (e.g., pasta salad, sandwiches) that you can serve if you run out of something. Keep it in a cooler or insulated carrier until you need it.
- Monitor consumption: Keep an eye on how much food is being eaten. If a dish is running low, refill it from your backup or switch to a new dish.
- If all else fails, apologize and improvise: If you do run out of food, apologize sincerely and offer to order takeout or make more food (if possible). Most guests will understand, especially if you handle it gracefully.
I’ve run out of food exactly once, and it was mortifying. I’d underestimated how much people would eat, and the main dish was gone halfway through the event. I ended up ordering pizza and serving it as a “surprise late-night snack.” The guests were happy, but I was humiliated. Now I always overestimate and bring backups.
6. The Final Checklist: Don’t Forget the Little Things
You’ve got the big stuff covered: chafing dishes, serving utensils, coolers. But what about the little things that can make or break your event? Here’s a checklist of the often-forgotten items:
- Aluminum foil and plastic wrap: For covering dishes during transport or storing leftovers.
- Ziploc bags: For storing small items like utensils, condiments, or garnishes.
- Rubber bands: For securing foil or plastic wrap, or bundling utensils together.
- Permanent markers: For labeling dishes, coolers, or bins.
- Scissors: For opening packages, cutting foil, or trimming garnishes.
- Duct tape or gaffer tape: For securing cords, fixing broken equipment, or marking off areas.
- Trash bags: For collecting trash and recyclables. Bring extras, you’ll need them.
- Wet wipes or paper towels: For spills, sticky hands, or last-minute cleaning.
- First aid kit: For cuts, burns, or other minor injuries. You’d be surprised how often this comes in handy.
- Extension cords and power strips: For powering electric equipment. Bring extras, you never know when you’ll need them.
- Batteries: For thermometers, timers, or other battery-powered equipment.
- Matches or a lighter: For lighting sterno cans or candles.
- Notepad and pen: For jotting down notes, tracking inventory, or leaving messages for helpers.
- Cash and coins: For tipping delivery drivers, paying for parking, or making last-minute purchases.
- Phone charger: For your phone, because you will run out of battery.
I can’t tell you how many times I’ve forgotten trash bags or matches. It’s the little things that trip you up. Now I keep a “catering emergency kit” in my car with all these items. It’s saved me more times than I can count.
7. The Day-Of Game Plan: How to Stay Sane (and Look Like You Know What You’re Doing)
You’ve planned, you’ve prepped, you’ve packed. Now it’s the day of the event, and you’re one step away from a nervous breakdown. Here’s how to stay organized, calm, and in control:
Arrive Early (Like, Really Early)
I can’t stress this enough: arrive at least 2 hours before the event starts. This gives you time to:
- Set up your equipment and tables.
- Do a final prep of any last-minute dishes.
- Troubleshoot any issues (e.g., missing outlets, broken equipment).
- Do a walkthrough with the venue staff or event coordinator.
- Take a deep breath and mentally prepare.
I once arrived 30 minutes before an event because I thought I could “wing it.” Spoiler: I couldn’t. The venue staff was late, the equipment was missing parts, and I spent the first hour of the event frantically trying to fix everything. Now I always arrive early, even if it means sitting in my car for an hour.
Delegate Tasks (You Can’t Do It All)
If you’re flying solo, you’re going to burn out. Delegate tasks to friends, family, or hired helpers. Here’s how to do it:
- Assign roles: Give each person a specific job (e.g., “You’re in charge of refilling the chafing dishes,” “You’re in charge of bussing tables”).
- Brief your team: Go over the menu, the service style, and any dietary restrictions. Make sure everyone knows where the equipment is and how to use it.
- Set up a communication system: Use walkie-talkies, a group chat, or hand signals to communicate during the event. This is especially important for large venues.
- Check in regularly: Touch base with your team every 30 minutes to make sure everything is running smoothly.
I used to think I could handle everything myself. Then I tried to serve 30 people, refill dishes, and clean up all at once. It was a disaster. Now I always bring at least one helper, even if it’s just a friend who’s willing to refill drinks.
Do a Final Walkthrough
Before guests arrive, do a final walkthrough of your setup. Check for:
- Safety hazards: Are cords taped down? Are sterno cans secure? Are sharp objects out of reach?
- Presentation: Is the food arranged nicely? Are the labels visible? Are the napkins folded?
- Functionality: Can guests access all dishes easily? Is there enough room for people to move around?
- Temperature: Is the hot food hot and the cold food cold? Use a thermometer to check.
I once skipped the final walkthrough because I was running late. When guests arrived, I realized the chafing dish wasn’t lit, the salad was wilted, and the apkins were upside down. It was a mess. Now I always do a final walkthrough, even if it means making guests wait a few minutes.
Stay Flexible (Because Things Will Go Wrong)
No matter how well you plan, something will go wrong. The key is to stay flexible and adapt. Here’s how:
- Have a backup plan: For every potential issue (e.g., broken equipment, missing food), have a Plan B. This could be as simple as having extra sterno cans or a backup dish.
- Prioritize: If something goes wrong, focus on the most important things first (e.g., keeping food at the right temperature, making sure guests are fed). Everything else can wait.
- Stay calm: Panicking won’t help. Take a deep breath, assess the situation, and take action. Guests will take their cues from you, if you’re calm, they’ll be calm.
- Ask for help: If you’re overwhelmed, don’t be afraid to ask for help. Whether it’s a friend, a family member, or a hired helper, extra hands can make all the difference.
I’ve had events where the power went out, the food delivery was late, and the guest of honor got sick. The key is to roll with the punches. Most guests won’t even notice if you handle it gracefully.
Clean as You Go
Nothing is worse than trying to clean up after an event when you’re exhausted. Clean as you go to make the process easier:
- Assign a cleanup person: If you have helpers, assign one person to collect trash, wash dishes, or pack up equipment during the event.
- Use disposable items: If you’re using disposable plates, cups, or utensils, set up a trash station where guests can dispose of them. This keeps the area clean and makes cleanup easier.
- Pack up as you go: As dishes are emptied, pack them up in storage bins or coolers. This saves time at the end of the event.
- Wipe down surfaces: Use wet wipes or paper towels to wipe down tables, counters, or equipment as you go. This prevents buildup and makes final cleanup easier.
I used to leave all the cleanup until the end of the event. By the time I was done, I was exhausted and cranky. Now I clean as I go, and it’s made a huge difference. I even enjoy the cleanup process now, it’s a chance to wind down and reflect on the event.
8. Post-Event: What to Do After the Guests Leave
The event is over, the guests have gone home, and you’re left with a mountain of dirty dishes, half-empty chafing dishes, and a sense of relief. Here’s what to do next:
Return Rental Equipment
If you rented equipment, return it as soon as possible. Most rental companies charge extra for late returns, and some may even charge for damaged or missing items. Here’s how to make the process smooth:
- Clean everything: Wipe down chafing dishes, warming trays, and other equipment. Remove any food residue or stains.
- Check for damage: Inspect the equipment for any damage. If something is broken, report it to the rental company immediately. Some companies may waive the fee if you report it right away.
- Pack it up: Return the equipment in the same packaging it came in. If you don’t have the original packaging, use storage bins or boxes to protect it during transport.
- Return on time: Make sure to return the equipment by the agreed-upon time. If you’re running late, call the rental company to let them know.
I once returned a dirty chafing dish because I was too tired to clean it. The rental company charged me a cleaning fee, which was totally avoidable. Now I always clean rental equipment before returning it.
Store Your Own Equipment
If you bought equipment, store it properly to keep it in good condition:
- Clean everything: Wash dishes, wipe down equipment, and remove any food residue. This prevents mold, bacteria, and pests.
- Dry everything: Make sure all equipment is completely dry before storing it. This prevents rust and mold.
- Organize it: Store equipment in labeled bins or boxes so you can find it easily next time. I like to use clear plastic bins so I can see what’s inside.
- Store it in a cool, dry place: Avoid storing equipment in damp or humid areas, as this can cause rust or mold.
I used to throw my equipment in a closet and forget about it until the next event. Then I’d spend hours digging through boxes to find what I needed. Now I organize my equipment as soon as I get home, and it’s made my life so much easier.
Reflect on What Worked (and What Didn’t)
Every event is a learning experience. Take some time to reflect on what worked and what didn’t:
- What went well? Did the chafing dishes work as expected? Did the guests enjoy the food? Did your helpers do a good job?
- What didn’t go well? Did you run out of food? Did the equipment break? Did you forget something important?
- What would you do differently next time? Would you rent different equipment? Would you change the menu? Would you delegate more tasks?
I like to write down my reflections in a notebook or on my phone. It helps me remember what worked and what didn’t, and it gives me a starting point for the next event.
Send Thank-You Notes
If you had helpers, send them a thank-you note. It doesn’t have to be fancy, a quick text or email is enough. If the event was for a client, send them a thank-you note as well. It’s a nice gesture and can lead to more business.
I used to skip the thank-you notes because I thought they were unnecessary. Then I realized how much it meant to my helpers when I took the time to thank them. Now I always send a note, even if it’s just a quick text.
9. The Bottom Line: You’ve Got This
Choosing the right catering equipment for small-scale events isn’t rocket science, but it does require planning, flexibility, and a willingness to adapt. The key is to:
- Start with the event blueprint: Know your menu, service style, and venue inside and out.
- Invest in the essentials: Chafing dishes, serving utensils, coolers, these are the backbone of your setup.
- Rent or buy wisely: Weigh the pros and cons of renting vs. buying, and choose what works best for your budget and needs.
- Pay attention to the details: Fuel, power, space, dietary restrictions, these are the things that can make or break your event.
- Stay flexible: Things will go wrong. The key is to adapt and improvise.
- Learn from every event: Reflect on what worked and what didn’t, and use that knowledge to improve next time.
I’ve catered dozens of events, and I still get nervous before each one. But I’ve learned that the more you plan, the more confident you’ll feel. And remember: guests care more about the food and the experience than they do about the equipment. If the food is delicious and the service is smooth, no one will notice if your chafing dish is a little dented or your napkins aren’t perfectly folded.
So take a deep breath, trust your instincts, and remember: you’re not just serving food, you’re creating an experience. And that’s something to be proud of.
10. FAQ: Your Burning Questions, Answered
Q: How much catering equipment do I need for a small event?
A: It depends on the menu and service style, but for a buffet-style event with 20–30 guests, you’ll typically need:
- 2–3 chafing dishes (for hot dishes)
- 1–2 chilled serving trays (for cold dishes)
- 1 slow cooker (for dips or sauces)
- 1 cooler (for drinks or backup food)
- Serving utensils (spoons, tongs, ladles)
- Plates, bowls, and cups (enough for all guests, plus extras)
- Napkins and tablecloths
If you’re doing plated service, you’ll need fewer serving dishes but more plates and utensils.
Q: Can I use household appliances for catering?
A: You can, but be cautious. Household appliances (e.g., slow cookers, blenders) aren’t designed for heavy use, so they may not hold up as well as commercial-grade equipment. If you’re using household appliances, bring backups in case they fail. Also, make sure they’re clean and in good condition-no one wants to eat food from a slow cooker that smells like last week’s chili.
Q: How do I keep food at the right temperature during transport?
A: For hot food, use insulated food carriers or wrapped in towels and placed in a cooler. For cold food, use coolers with ice packs or chilled serving trays. If you’re transporting food for more than an hour, consider using a portable refrigeration unit or warming bag.
Q: What’s the best way to label dishes for dietary restrictions?
A: Use clear, visible labels that are easy to read. I like to use chalkboard signs or tent cards with large, bold lettering. You can also use color-coded labels (e.g., green for vegan, red for gluten-free) to make it even clearer. Just make sure the labels are placed directly in front of the dish so guests can see them easily.
Final Thoughts: The Art of Small-Scale Catering
At the end of the day, catering a small-scale event is about more than just the equipment. It’s about creating an experience-one where guests feel welcome, the food is delicious, and everything runs smoothly. The equipment is just the tool that helps you get there.
So don’t stress too much about having the perfect setup. Focus on the essentials, stay flexible, and remember that o one knows your event better than you do. Trust your instincts, learn from your mistakes, and most importantly, have fun. Because at the end of the day, the best events are the ones where the host is relaxed, the food is great, and the guests leave happy.
Now go forth and cater like a pro. And if all else fails, order pizza. It’s a classic for a reason.
@article{how-to-choose-catering-equipment-for-small-scale-events-a-practical-guide-for-hosts-who-care-about-details,
    title   = {How to Choose Catering Equipment for Small-Scale Events: A Practical Guide for Hosts Who Care About Details},
    author  = {Chef's icon},
    year    = {2026},
    journal = {Chef's Icon},
    url     = {https://chefsicon.com/how-to-choose-catering-equipment-for-small-scale-events/}
}