
Table of Contents
- 1 Mastering Your Walk-In Cooler: Essential Practices
- 1.1 1. The Art of Strategic Shelving and Organization
- 1.2 2. Temperature Monitoring: Your Cooler’s Vital Signs
- 1.3 3. Door Management: Keeping the Cold In and the Warm Out
- 1.4 4. Proper Air Circulation: The Unsung Hero of Cooling
- 1.5 5. Cleaning and Sanitation: A Non-Negotiable Routine
- 1.6 6. Inventory Management: Knowing What You Have and Where It Is
- 1.7 7. Lighting: Illuminating Your Inventory and Safety
- 1.8 8. Staff Training: Empowering Your Team for Cooler Success
- 1.9 9. Preventative Maintenance: The Key to Long-Term Performance
- 1.10 10. Emergency Preparedness: Planning for the Unexpected
- 2 Keeping Your Cool: Final Thoughts on Walk-in Cooler Best Practices
- 3 FAQ
- 4 You Might Also Like
Okay, so picture this: you’re running a busy restaurant, things are flying, orders are pouring in, and then…bam! Your walk-in cooler decides to take a vacation. Not a good scenario, right? I mean, a malfunctioning walk-in is basically a chef’s worst nightmare – spoiled ingredients, potential health code violations, and a whole lot of stress. I’ve been there, trust me, back in my early days in the Bay Area, juggling multiple projects. One time, a cooler breakdown cost us a whole weekend’s worth of prep. It wasn’t pretty. That’s why I’m here, in my Nashville home office, with my rescue cat Luna purring nearby, to share some hard-earned wisdom about keeping your walk-in cooler in tip-top shape. It’s more than just keeping things cold; it’s about protecting your business, your reputation, and your sanity! This article will dive deep into restaurant walk-in cooler best practices, covering everything from organization to maintenance, so you can avoid the cooler chaos I experienced.
This isn’t just about preventing disasters, although that’s a big part of it. It’s also about efficiency. A well-maintained and organized walk-in cooler makes your entire kitchen operation smoother. Think about it: less time searching for ingredients, less food waste, and a happier, more productive staff. We’re talking about optimizing your workflow, reducing costs, and ultimately, serving better food. Who wouldn’t want that? We’ll cover the nitty-gritty details, from proper shelving to temperature monitoring, and even some of the less obvious, but equally important, aspects of walk-in cooler management. The value proposition is clear, I will show you how to improve the performance of your refrigeration system and reduce costs.
I’ve learned a lot over the years, transitioning from the fast-paced tech world of the Bay Area to the vibrant culinary scene here in Nashville. And one thing that’s remained constant is the importance of systems. Whether it’s software or a walk-in cooler, a well-designed and meticulously maintained system is the key to success. So, let’s get into it and turn your walk-in cooler from a potential problem area into a well-oiled machine. We’ll explore the *why* behind the *what*, because understanding the principles is just as important as following the rules. After all, a walk-in cooler is not just big fridge, is the heart of your kitchen.
Mastering Your Walk-In Cooler: Essential Practices
1. The Art of Strategic Shelving and Organization
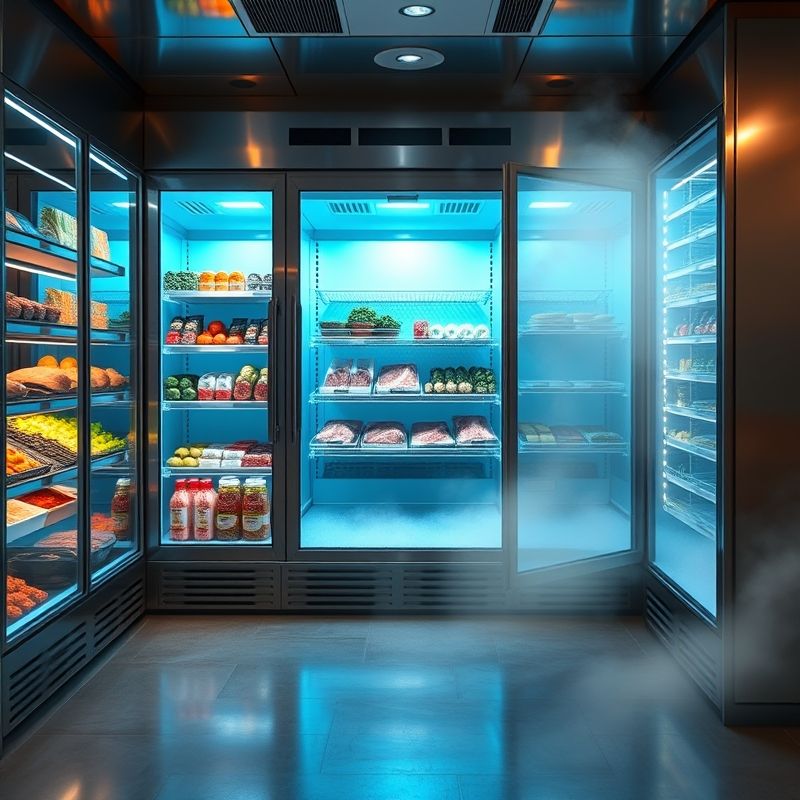
Think of your walk-in cooler as a tiny, temperature-controlled warehouse. Just like any warehouse, organization is key. This isn’t just about making things look neat; it’s about food safety, efficiency, and minimizing waste. First, invest in heavy-duty, NSF-approved shelving. This is non-negotiable. You need shelving that can withstand the weight of your inventory and is easy to clean. Avoid wood shelving at all costs – it’s a breeding ground for bacteria. Wire shelving is generally preferred because it allows for better air circulation. Make sure that shelving is at the correct height, 6 inches from the floor and 2 inches from the wall is a good rule to follow.
Now, let’s talk about placement. The First In, First Out (FIFO) method is your best friend. This means that older products should be placed in front of newer products, ensuring that you use the oldest items first. This minimizes spoilage and saves you money. Label everything clearly, and I mean *everything*. Use date labels, product names, and even prep dates. This might seem tedious, but it will save your staff countless hours searching for ingredients and prevent accidental use of expired products. Consider color-coding labels for different food categories – it’s a simple visual cue that can make a big difference. Think about creating designated zones for different types of food: raw meats, poultry, seafood, dairy, produce, and prepared foods. This prevents cross-contamination and makes it easier to find what you need.
Another crucial aspect is avoiding overcrowding. Overpacking your walk-in restricts airflow, leading to uneven temperatures and potential spoilage. It also makes it harder to find things, increasing the risk of items getting lost and forgotten in the back. Aim for a system where you can easily see and access everything. It might seem counterintuitive, but leaving some empty space actually improves efficiency and food safety. Believe it or not, there’s a real psychology to organization. A cluttered space leads to a cluttered mind, and in a busy kitchen, that’s the last thing you need. A well-organized walk-in, on the other hand, promotes a sense of calm and control, which translates to a more efficient and productive team. It’s like a visual representation of your kitchen’s workflow.
2. Temperature Monitoring: Your Cooler’s Vital Signs
This is absolutely critical. Your walk-in cooler’s temperature is its lifeline. You need to monitor it constantly, and I don’t mean just glancing at the built-in thermometer occasionally. Invest in a reliable, independent thermometer, preferably one with an alarm that will alert you if the temperature goes outside the safe zone (generally between 34°F and 38°F for coolers, and below 0°F for freezers). Place the thermometer in a central location, away from the door and the cooling unit, to get an accurate reading of the overall temperature.
But don’t stop there. Regular temperature logging is essential. This means recording the temperature at least twice a day, ideally more often, especially during peak hours. This creates a record that you can use to identify trends and potential problems. Are you seeing temperature fluctuations? Is the cooler consistently running warmer than it should? This data can help you diagnose issues early on, before they turn into major problems. There are even digital thermometers that automatically log temperatures and send alerts to your phone – a worthwhile investment for peace of mind. I, for one, am a big fan of anything that automates a tedious task and provides real-time data.
And it’s not just about the air temperature. You should also periodically check the temperature of the food itself, especially perishable items like meat and dairy. Use a food thermometer to ensure that they are being held at safe temperatures. This is particularly important for items that are stored near the door, as they may be exposed to warmer air when the door is opened. Remember, the goal is to maintain a consistent, safe temperature throughout the entire cooler. Any significant fluctuations can compromise food safety and quality. It’s like keeping a patient’s vital signs stable – you need constant monitoring and quick intervention if something goes wrong.
3. Door Management: Keeping the Cold In and the Warm Out
The walk-in cooler door is a surprisingly important factor in maintaining temperature and efficiency. It’s the barrier between the cold, controlled environment inside and the warmer, often chaotic, environment of the kitchen. Every time that door opens, you’re losing cold air and letting warm air in, forcing the cooler to work harder to maintain its temperature. So, minimize door openings as much as possible. Train your staff to be mindful of this. Instead of going in and out multiple times, encourage them to gather everything they need in one trip. This might seem like a small detail, but it adds up over time, saving energy and reducing wear and tear on the cooling unit.
Also, make sure the door seals are in good condition. Check them regularly for cracks, tears, or any signs of wear. A damaged seal allows cold air to escape and warm air to enter, compromising the cooler’s efficiency. Replacing worn seals is a simple and inexpensive fix that can make a big difference. Consider installing strip curtains, especially if your cooler is in a high-traffic area. These plastic strips help to create an additional barrier, reducing air exchange when the door is opened. They’re particularly useful during busy periods when the door is constantly being opened and closed.
And finally, don’t prop the door open! I know it’s tempting, especially when you’re loading or unloading large deliveries, but it’s a major no-no. It completely defeats the purpose of the cooler and can lead to significant temperature fluctuations. If you need to keep the door open for an extended period, use a doorstop that allows the door to close automatically. It’s all about being mindful of the door and minimizing the amount of time it’s open. Think of it as a precious resource – you want to conserve the cold air as much as possible.
4. Proper Air Circulation: The Unsung Hero of Cooling
Air circulation is often overlooked, but it’s absolutely crucial for maintaining a consistent temperature throughout your walk-in cooler. Without proper airflow, you’ll get hot spots and cold spots, leading to uneven cooling and potential spoilage. As we discussed earlier, wire shelving is ideal because it allows air to circulate freely. Avoid solid shelving, which restricts airflow. Also, don’t overcrowd the shelves. Leave space between items to allow air to move around. This is particularly important near the cooling unit’s fan – make sure nothing is blocking it.
Another important factor is the placement of your products. Don’t stack boxes directly on the floor or against the walls. This restricts airflow and can create warm pockets. Use pallets or dunnage racks to elevate items off the floor and allow air to circulate underneath. Similarly, leave a few inches of space between the walls and your products. This allows air to flow around the perimeter of the cooler, ensuring even cooling. It’s like creating a miniature wind tunnel – you want the air to move freely throughout the entire space.
Think about the location of your cooling unit’s fan. It’s usually located at the top of the cooler, and its job is to circulate the cold air. Make sure nothing is blocking the airflow from the fan. This is a common mistake – people often stack boxes too high, inadvertently blocking the fan and disrupting the entire cooling system. Regular cleaning of the fan and the surrounding area is also important. Dust and debris can accumulate, reducing the fan’s efficiency and potentially contaminating the air. It’s a bit like maintaining the lungs of your cooler – you want them to be clean and unobstructed.
5. Cleaning and Sanitation: A Non-Negotiable Routine
This should go without saying, but a clean walk-in cooler is a safe walk-in cooler. Regular cleaning and sanitation are absolutely essential for preventing bacterial growth, mold, and other unpleasantness. Establish a cleaning schedule and stick to it religiously. This should include daily, weekly, and monthly tasks. Daily tasks might include wiping up spills, sweeping the floor, and checking for any obvious signs of contamination. Weekly tasks could involve cleaning the shelves, walls, and door seals. Monthly tasks might include a more thorough cleaning of the entire cooler, including the cooling unit and fan.
Use approved cleaning solutions. Don’t use harsh chemicals that could damage the cooler’s surfaces or contaminate the food. There are plenty of food-safe sanitizers available that are specifically designed for use in walk-in coolers. Follow the manufacturer’s instructions carefully. And always rinse thoroughly after cleaning to remove any residue. Pay particular attention to areas where moisture tends to accumulate, such as around the door seals and the drain. These are prime breeding grounds for mold and bacteria.
Don’t forget about the floor. It’s easy to overlook, but it’s one of the dirtiest areas in the cooler. Sweep and mop it regularly, and use a floor cleaner that’s designed for use in food service environments. Consider using a floor mat to help trap dirt and debris before it enters the cooler. And if you have a drain, make sure it’s clean and free-flowing. A clogged drain can lead to standing water, which is a major sanitation hazard. It’s a bit like maintaining a clean operating room – you want to eliminate any potential sources of contamination.
6. Inventory Management: Knowing What You Have and Where It Is
Effective inventory management is crucial for minimizing waste, controlling costs, and ensuring that you always have the ingredients you need on hand. This goes hand-in-hand with the FIFO method we discussed earlier. A well-organized walk-in cooler makes inventory management much easier. You can quickly see what you have, what you’re running low on, and what needs to be used first. There are various inventory management systems available, ranging from simple spreadsheets to sophisticated software. Choose a system that works for your needs and your budget.
Regular inventory checks are essential. This means physically counting your inventory on a regular basis, ideally weekly or even daily for high-turnover items. This helps you identify discrepancies, track usage patterns, and prevent theft. It also allows you to adjust your ordering accordingly, avoiding overstocking or running out of critical ingredients. This is particularly important for perishable items, which have a limited shelf life. Knowing exactly what you have on hand helps you minimize waste and ensure that you’re using your ingredients before they expire.
Consider using a par stock system. This means setting a minimum quantity for each item that you always want to have on hand. When the quantity falls below the par level, you know it’s time to reorder. This helps you maintain a consistent inventory level and avoid running out of essential ingredients. It also simplifies the ordering process, as you know exactly how much to order each time. It’s like having a built-in reminder system – it takes the guesswork out of ordering and ensures that you’re always prepared.
7. Lighting: Illuminating Your Inventory and Safety
Proper lighting in your walk-in cooler is often overlooked, but it’s important for both safety and efficiency. You need to be able to see clearly to find what you need, avoid spills, and identify any potential problems. LED lighting is the best option for walk-in coolers. It’s energy-efficient, produces minimal heat, and has a long lifespan. Avoid incandescent bulbs, which generate too much heat and can affect the cooler’s temperature. Fluorescent bulbs are also less desirable than LEDs, as they can flicker and may contain mercury.
Make sure the lighting is bright enough and evenly distributed throughout the cooler. You shouldn’t have any dark corners or shadows. This is particularly important near the shelves and the floor, where you need to be able to see clearly to avoid accidents. Consider installing motion-sensor lighting. This is a great way to save energy, as the lights will only turn on when someone enters the cooler. It also eliminates the risk of accidentally leaving the lights on, which can waste energy and generate unnecessary heat.
And don’t forget about emergency lighting. In the event of a power outage, you need to have a backup lighting system in place. This is essential for safety, as it allows your staff to exit the cooler safely and avoid any potential hazards. Consider installing battery-powered emergency lights that will automatically turn on when the power goes out. It’s a small investment that can make a big difference in an emergency situation. It’s like having a safety net – you hope you never need it, but it’s there just in case.
8. Staff Training: Empowering Your Team for Cooler Success
Your staff is your first line of defense when it comes to maintaining a well-functioning walk-in cooler. They are the ones who are interacting with it on a daily basis, so they need to be properly trained on all of the best practices we’ve discussed. Regular training sessions are essential. This should cover everything from proper storage and organization to temperature monitoring, cleaning, and inventory management. Make sure your staff understands the *why* behind each practice, not just the *what*. Explain how their actions directly impact food safety, efficiency, and the overall success of the restaurant.
Create a written standard operating procedure (SOP) for walk-in cooler management. This should outline all of the key procedures and responsibilities in detail. Make it easily accessible to all staff members, and review it regularly to ensure that everyone is on the same page. Consider using visual aids, such as posters or diagrams, to reinforce key concepts. And don’t be afraid to make it fun! A little bit of humor and engagement can go a long way in making training more effective.
Encourage your staff to report any potential problems they observe, such as temperature fluctuations, equipment malfunctions, or sanitation issues. Create a culture of open communication and make it clear that they won’t be penalized for reporting problems. Early detection is key to preventing major issues, and your staff is in the best position to identify them. It’s like creating a team of cooler detectives – everyone is responsible for monitoring and maintaining the health of the system. I’m thinking of creating a checklist, maybe I should do it after I finish writing this.
9. Preventative Maintenance: The Key to Long-Term Performance
Just like any piece of equipment, your walk-in cooler needs regular preventative maintenance to keep it running smoothly and efficiently. This is not something you should skimp on. It’s far more cost-effective to invest in preventative maintenance than to deal with costly repairs or replacements down the road. Schedule regular inspections and maintenance by a qualified refrigeration technician. They can identify and address potential problems before they turn into major issues.
The technician should check the compressor, condenser coils, evaporator coils, fan motors, door seals, and refrigerant levels. They should also clean the coils, lubricate moving parts, and calibrate the thermostat. This is like giving your cooler a regular checkup – it ensures that all of the components are functioning properly and that there are no hidden problems. The frequency of these inspections will depend on the age and condition of your cooler, as well as your usage patterns. But generally, at least twice a year is recommended.
Keep a maintenance log to track all inspections, repairs, and any other maintenance activities. This creates a record that you can use to identify trends and potential problems. It also helps you budget for future maintenance and repairs. And if you ever need to file a warranty claim, having a detailed maintenance log can be invaluable. It’s like keeping a medical history for your cooler – it provides a comprehensive record of its health and any interventions that have been performed.
10. Emergency Preparedness: Planning for the Unexpected
Even with the best preventative maintenance, things can still go wrong. Equipment can fail, power outages can occur, and unexpected events can happen. That’s why it’s crucial to have an emergency plan in place. This plan should outline the steps to take in the event of a cooler malfunction, a power outage, or any other emergency situation. It should include contact information for your refrigeration technician, your utility company, and any other relevant personnel.
Consider investing in a backup generator, especially if you operate in an area prone to power outages. A generator can keep your cooler running during a power outage, preventing food spoilage and minimizing losses. The size of the generator you need will depend on the size of your cooler and your other essential equipment. But it’s a worthwhile investment that can provide peace of mind and protect your business. If a backup generator is not an option, consider having a plan in place for alternative cold storage. This could involve using dry ice, refrigerated trucks, or arrangements with other businesses to store your perishable items temporarily.
Train your staff on the emergency plan and conduct regular drills to ensure that everyone knows what to do in the event of an emergency. This is particularly important for new staff members. Make sure everyone knows where the emergency supplies are located, such as flashlights, batteries, and first-aid kits. And review the plan regularly to ensure that it’s up-to-date and that everyone is familiar with the procedures. It’s like having a fire drill – you hope you never need it, but it’s essential to be prepared.
Keeping Your Cool: Final Thoughts on Walk-in Cooler Best Practices
So, there you have it – a deep dive into the world of restaurant walk-in cooler best practices. It’s a lot of information, I know, but it’s all crucial for keeping your kitchen running smoothly, your food safe, and your business thriving. Remember, your walk-in cooler is more than just a big box that keeps things cold. It’s a vital part of your operation, and it deserves your attention and care. By implementing these best practices, you’re not just preventing problems; you’re investing in the long-term success of your restaurant. I challenge you to take a look at your own walk-in cooler with fresh eyes. Are you doing everything you can to optimize its performance and protect your valuable inventory?
Ultimately, managing a walk-in cooler effectively boils down to a few key principles: organization, vigilance, and proactive maintenance. It’s about creating a system that works, sticking to it religiously, and always being prepared for the unexpected. It’s not always glamorous, but it’s absolutely essential. And who knows, maybe by mastering these seemingly mundane details, you’ll unlock a new level of efficiency and creativity in your kitchen. What will the future of refrigeration look like? I’m not entirely sure, but I bet it will involve even more sophisticated monitoring systems, energy-efficient technologies, and perhaps even AI-powered inventory management. It’s an evolving field, and we all need to stay informed and adapt to the latest advancements.
FAQ
Q: What’s the ideal temperature range for a walk-in cooler?
A: The ideal temperature range for a walk-in cooler is generally between 34°F and 38°F (1°C and 3°C). For walk-in freezers, the temperature should be below 0°F (-18°C).
Q: How often should I clean my walk-in cooler?
A: You should establish a cleaning schedule that includes daily, weekly, and monthly tasks. Daily tasks might include wiping up spills and sweeping the floor. Weekly tasks could involve cleaning the shelves and walls. Monthly tasks might include a more thorough cleaning of the entire cooler.
Q: What’s the best way to organize my walk-in cooler?
A: Use the First In, First Out (FIFO) method, label everything clearly, and create designated zones for different types of food. Invest in heavy-duty, NSF-approved wire shelving and avoid overcrowding.
Q: What should I do if my walk-in cooler malfunctions?
A: Have an emergency plan in place. Contact your refrigeration technician immediately. If you have a backup generator, activate it. If not, consider alternative cold storage options.
You Might Also Like
- Commercial Refrigeration Maintenance Tips: Extend Equipment Life
- Restaurant Kitchen Layout Design: Maximize Efficiency and Flow
- Food Safety Best Practices for Commercial Kitchens
@article{restaurant-walk-in-cooler-best-practices-keep-it-cold-keep-it-safe,
    title   = {Restaurant Walk-In Cooler Best Practices: Keep It Cold, Keep It Safe},
    author  = {Chef's icon},
    year    = {2025},
    journal = {Chef's Icon},
    url     = {https://chefsicon.com/restaurant-walk-in-cooler-best-practices/}
} 
