The Best Fluffy Pancakes recipe you will fall in love with. Full of tips and tricks to help you make the best pancakes.
Table of Contents
- 1 Getting Your Kitchen Flow Right
- 1.1 Assessing Your Current Chaos
- 1.2 The Magic of Zoning
- 1.3 Layout Logic – Work Triangle and Beyond
- 1.4 Equipment Placement Power
- 1.5 Storage Smarts – Verticality and Accessibility
- 1.6 Prep Area Perfection
- 1.7 The Dish Pit Dilemma
- 1.8 Technology Integration – Friend or Foe?
- 1.9 Safety and Compliance by Design
- 1.10 Flexibility for the Future
- 2 Can You *Really* Do This? Wrapping It Up
- 3 FAQ
Alright, let’s talk kitchens. Not my little Nashville setup where Luna the cat judges my every culinary move from the countertop (don’t worry, she gets shooed off… eventually), but the big leagues – the commercial kitchen. The heart of any restaurant, hotel, cafeteria, you name it. And let’s be honest, sometimes that heart is racing, arrhythmic, and frankly, a bit chaotic. I’ve walked into enough back-of-house operations, both during my marketing days visiting clients and now as someone deeply obsessed with food culture, to see the difference between a kitchen that flows and one that… well, flounders. The frantic dance, the near-collisions, the precious seconds wasted searching for *that one pan* – it all adds up. So, the big question pops up: can I do this streamline your commercial kitchen setup? Can you actually untangle the spaghetti junction of workflows and equipment?
I remember this one spot I consulted for briefly back in the Bay Area, a promising cafe that was constantly hitting a wall during peak hours. Great food, passionate team, but the kitchen layout was, to put it mildly, counterintuitive. The dish pit was practically in the prep area, the walk-in was a trek across the main cooking line, and storage was just… wherever things fit. It was stressful to even watch. It got me thinking deeply about how much the physical space dictates the operational reality. It’s not just about having the fanciest gear; it’s about orchestrating the space so the gear and the people can work *together*, efficiently and safely. Forget sleek finishes if your cooks are playing bumper cars just to get an order out.
So, yes, you absolutely *can* streamline your commercial kitchen setup. It’s not some dark art reserved for high-budget designers (though they can certainly help). It’s about applying logic, observation, and a willingness to rethink how things are done. It takes effort, no doubt. Maybe some investment. But the payoff? Oh, it’s huge. We’re talking faster ticket times, less waste, reduced stress for your team (which is massive for retention, let me tell you), better safety, and ultimately, a healthier bottom line. This isn’t just about tidying up; it’s about fundamentally improving your operation from the inside out. We’re going to break down how you can approach this, looking at workflow, layout, equipment, storage, and all those crucial details that make a kitchen hum.
Getting Your Kitchen Flow Right
Assessing Your Current Chaos
Okay, first things first. Before you start moving giant ovens around (please don’t, not yet), you need to understand what you’re working with. You have to diagnose the illness before prescribing the cure, right? Spend some real time *observing* your kitchen during different service periods – the frantic lunch rush, the slower mid-afternoon prep, the dinner peak. Where do people physically bump into each other? Where do orders seem to stall? What tasks take way longer than they seemingly should? This is about gathering data, even informally. Talk to your staff; they are on the front lines and probably have a laundry list of frustrations and ideas. Maybe even try sketching out the current flow – how ingredients come in, get prepped, cooked, plated, and how dirty dishes return. This initial workflow analysis is crucial. It’s easy to assume you know the problems, but objective observation often reveals surprising bottleneck identification points you hadn’t considered. Don’t underestimate the power of just watching and listening. Sometimes, I find just mapping it out visually on paper, even crudely, highlights the absurdity of certain paths staff have to take repeatedly. It’s like seeing the invisible traffic jams happening right under your nose. This step isn’t glamorous, but skipping it means you’re just guessing, and that’s a recipe for wasted effort.
The Magic of Zoning
Think of your kitchen like a city. You wouldn’t put a noisy factory right next to a quiet library, would you? Same principle applies here. Zoning means creating distinct areas for specific tasks: receiving, storage (dry, cold, frozen), prep (vegetables, proteins – maybe separate!), hot line (cooking), cold line (salads, desserts), plating/expo, and warewashing (dish pit). The goal is to group related tasks together and arrange the zones logically to minimize unnecessary movement and potential hazards like cross-contamination. For instance, your prep stations should ideally be near your cold storage, and your cooking line needs easy access to both prep output and the plating area. It sounds simple, but the impact of well-defined dedicated zones is profound. It creates a natural flow, reduces cooks wandering into each other’s space, and makes it easier to maintain cleanliness and organization within each area. Think about ergonomics too – are the heights right? Are tools within easy reach *within* that zone? This isn’t just about drawing lines on a floor plan; it’s about creating functional ecosystems within the larger kitchen environment. It also helps new staff get up to speed faster, as their responsibilities are tied to a physical location. It really does bring a sense of order to the potential chaos.
Why does zoning work so well? It taps into how we naturally organize tasks. When everything has its place and purpose, mental energy isn’t wasted figuring out where to go or what to do next. It becomes instinctual. A cook on the sauté station knows exactly where their pans, oils, and prepped ingredients are. The person on garde manger isn’t dodging hot pans to get to the lettuce. This minimization of reducing cross-traffic isn’t just about efficiency; it’s a major safety booster. Fewer collisions, fewer spills, fewer opportunities for raw ingredients to mingle with cooked ones inappropriately. I saw a kitchen once where the raw meat prep was happening right beside the salad station because of space constraints – talk about a cross-contamination nightmare waiting to happen! Proper zoning, even in a tiny space, could have mitigated that risk significantly by creating clearer separation, perhaps using vertical barriers or designated time slots if space was truly the limiting factor. It requires thinking critically about every single step in your production process.
Layout Logic – Work Triangle and Beyond
Ah, the classic work triangle – linking the stove, sink, and refrigerator. It’s been a cornerstone of kitchen design for decades, primarily in residential settings. But does it hold up in a bustling commercial kitchen with multiple cooks, specialized stations, and vastly different workflows? Yes and no. The *principle* behind it – minimizing steps between key related points – is absolutely still valid. However, a single triangle rarely cuts it in a commercial context. Instead, you might have multiple, smaller, specialized triangles or work zones. Your fry cook needs fryer, landing station, and maybe nearby freezer access. Your sauté cook needs range, prep ingredients, and plating area nearby. It’s more about optimizing workflow patterns for specific roles and stations rather than one overarching shape. Consider linear, galley, island, or zone-style layouts. A linear or assembly-line flow works well for high-volume, standardized items (think QSRs). Island layouts can centralize cooking or prep. Zone layouts create distinct pods for different functions. The key is analyzing *your* menu, *your* volume, and *your* staffing to determine the most efficient station placement strategy. Don’t just copy a layout you saw somewhere else; tailor it to your unique operational needs. Is the traditional triangle completely dead? Maybe not for a very small operation, but for most, it’s evolved into a more complex, multi-zone concept. I sometimes wonder if we cling to the triangle idea too much when we should be focusing purely on minimizing travel distance for the *most frequent* tasks within each specific station. That seems more practical.
The scale difference is really the game-changer here. A home kitchen might have one person preparing a meal. A commercial kitchen could have ten or more people working simultaneously during a peak rush. This density necessitates a different approach. Imagine ten people trying to efficiently use a single work triangle – it’s impossible. That’s why thinking in terms of dedicated stations and optimizing the flow *between* those stations becomes paramount. The path from the walk-in cooler to the main prep area needs to be clear. The route from the cooking line to the expo window must be unobstructed. The journey dirty dishes take to the wash station shouldn’t intersect with clean plates coming out. Minimizing steps isn’t just about saving time; it reduces fatigue, lowers the risk of accidents, and keeps the energy focused on production. Every extra step taken unnecessarily hundreds of times a day adds up to significant lost productivity and increased physical strain on your team. Mapping these critical paths and ensuring they are as short and direct as possible is a core tenet of streamlining the setup.
Equipment Placement Power
This seems obvious, but you’d be surprised how often it goes wrong. Placing your equipment isn’t just about finding a spot where it fits; it’s strategic. Heavy-use items – your ranges, ovens, fryers – need prime real estate on the main line. Less frequently used items can be placed further away. Consider the equipment footprint not just in terms of square footage, but also the space needed *around* it for operation and cleaning. Think about workflow: does it make sense to have the fryer right next to the griddle if they are often used in sequence for certain dishes? Absolutely. Does it make sense to put the ice machine miles away from the beverage station? Absolutely not. And critically, you MUST consider utility connections – gas lines, electrical requirements (voltage, phase), water supply, drainage – *before* deciding on placement. Moving these after installation is costly and disruptive. And don’t forget ventilation needs! Hood systems are essential for ranges, fryers, griddles, and ovens, and their placement dictates where that equipment can realistically go. Proper ventilation isn’t just a comfort issue; it’s a major safety and compliance requirement. Ignoring it can lead to dangerous grease buildup and poor air quality.
I can’t stress the utility planning enough. Honestly, it’s one of the biggest headaches if you get it wrong. Imagine buying a beautiful, expensive combi oven, finding the ‘perfect’ spot for workflow, only to realize the electrical capacity isn’t there, or the necessary water line and drain are on the opposite wall. It’s a costly mistake. Always, always, always map out your utilities and ensure your desired equipment placement aligns with the available infrastructure *before* finalizing layouts or purchasing equipment. Equally important is accessibility for cleaning and maintenance. Can staff easily get behind and underneath equipment to clean properly? Can technicians access panels for repairs without having to dismantle half the kitchen? Building in even a few extra inches of clearance can save immense time and frustration down the road. It also encourages more thorough cleaning, which is vital for food safety. Think long-term operational ease, not just the initial fit.
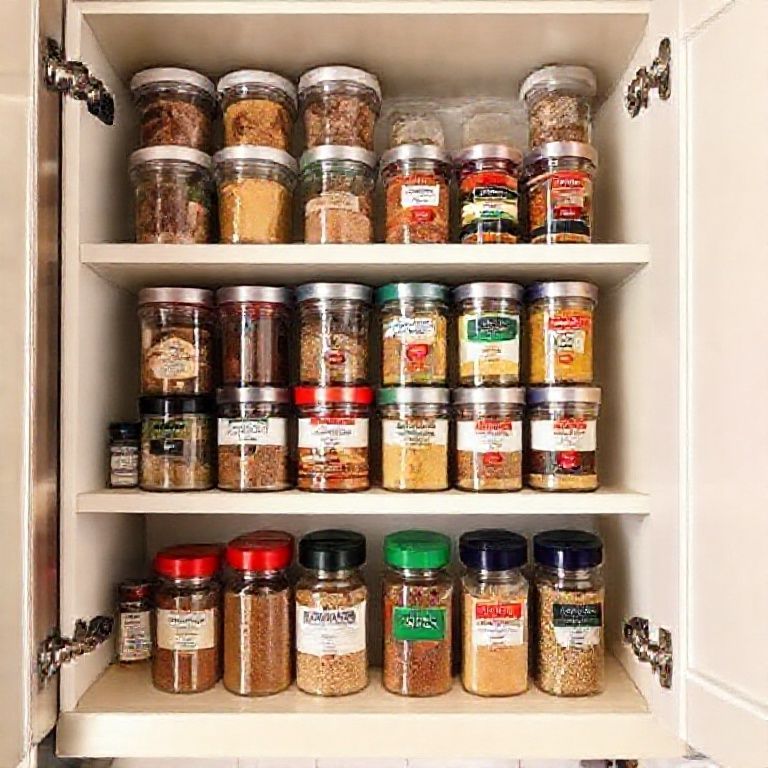
Storage Smarts – Verticality and Accessibility
Storage is the unsung hero of an efficient kitchen. When it’s bad, everything suffers. When it’s good, everything flows better. One of the biggest mistakes I see is underutilizing vertical space. Walls are prime real estate! Installing sturdy, accessible shelving can dramatically increase your storage capacity without expanding your footprint. Think upwards! Consider open shelving for frequently used items (easy visibility and access) versus closed cabinets for things needing more protection. Implement a strict First-In, First-Out (FIFO) system for inventory rotation, especially for perishable goods. This requires disciplined organized storage and clear labeling. Speaking of which, label everything! Shelves, containers, bins – knowing exactly what’s where without having to search saves incredible amounts of time. Your storage areas (dry goods, walk-in cooler, freezer) need to be organized logically, perhaps grouping items by type or by station that uses them most. The goal is easy access – staff should be able to quickly find what they need and see inventory levels at a glance. This directly impacts prep time and ordering efficiency. My cat Luna treats our pantry shelves like a climbing gym, which is… not ideal. Thankfully, commercial shelving is built tougher, but the principle of accessibility (for humans, not cats) remains key.
Poor storage isn’t just inconvenient; it costs money. Time wasted searching for ingredients is time not spent cooking or prepping. Disorganized coolers often lead to forgotten items expiring in the back (violating FIFO) resulting in food waste. It can also lead to over-ordering because you can’t accurately assess stock levels quickly. Implementing simple tools like clear storage bins allows for quick visual checks. Consistent labeling systems, including date labels for prepped items, are non-negotiable for safety and efficiency. Think of your storage areas as an extension of your mise en place – everything organized, accessible, and ready for use. Proper inventory management, supported by a well-organized physical storage system, prevents stockouts of critical items and reduces the financial hit from spoilage. It requires discipline from the whole team to maintain, but the benefits are continuous. It’s a system that needs constant tending, not a set-it-and-forget-it solution.
Prep Area Perfection
The prep station is where the magic often begins, transforming raw ingredients into ready-to-cook components. An inefficient prep area creates downstream delays for the entire kitchen. What makes a great prep area? Firstly, sufficient, dedicated counter space. Trying to chop vegetables on a tiny sliver of counter wedged between a sink and a mixer is frustrating and slow. Ensure there’s enough room to work comfortably and safely. Secondly, easy access to necessary tools – knives, cutting boards, peelers, bowls, etc. Consider wall-mounted magnetic knife strips or designated tool drawers. Proximity is also key: prep stations should be located conveniently near relevant storage (like the walk-in for produce prep) and the warewashing area for cleaning equipment. Think about ergonomic height for countertops to reduce strain. Incorporating integrated waste disposal – like cutouts in the counter with bins underneath – can significantly speed up workflow and keep the area cleaner. Using color-coded cutting board systems is crucial for preventing cross-contamination between different food types (e.g., red for raw meat, green for vegetables). Every second saved here multiplies across every dish prepared.
This is genuinely an area where small improvements yield big results. Because so much foundational work happens here, optimizing the prep workflow smooths out the entire production process. Consider dedicated prep stations if space allows – one for vegetables, one for proteins, perhaps. This further enhances efficiency and food safety. Ensure adequate lighting over prep areas; mistakes happen in dim conditions. Access to handwashing sinks and sanitizing solutions within the prep zone is also critical. It’s about creating a self-contained, highly efficient workspace where the prep cooks have everything they need within arm’s reach, minimizing unnecessary movement and maximizing focused work time. It might seem like common sense, but actively designing for this level of efficiency, rather than just letting prep happen wherever there’s space, makes a tangible difference in speed and quality.
The Dish Pit Dilemma
Ah, the dish pit. Often relegated to the back corner, sometimes an afterthought in design, yet absolutely critical to keeping the entire operation running. If dishes aren’t getting washed and returned promptly, the kitchen grinds to a halt. A streamlined dish area needs a clear, logical flow. Typically, this involves a landing area for dirty dishes, a scraping/pre-rinsing station (often with a garbage disposal), the washing equipment itself (whether a three-compartment sink setup for manual washing or a high-temperature commercial dishwasher), a drying/sanitizing area, and finally, organized storage for clean dishes, ideally located near the points of use (like the plating station). Maintaining strict separation between dirty and clean items is paramount for sanitation standards. The workflow should prevent clean dishes from crossing paths with dirty ones. Ensure there’s adequate space for racks, carts, and staff movement. An efficient dish return system, maybe using bus carts or a dedicated conveyor, prevents dirty dishes piling up in service areas. Don’t skimp on the power of your dishwasher either; a machine that can keep up with your peak volume is essential.
A bottleneck in the dish pit has immediate and severe consequences. If cooks run out of pans, plating runs out of plates, or servers run out of glasses, service stops. It’s that simple. Investing in a well-designed dish area with adequate space and appropriate equipment is not a luxury; it’s a necessity. This includes ensuring proper ventilation to handle the heat and steam, non-slip flooring for safety, and easy access for cleaning the area itself. Staff training on proper procedures for scraping, loading, unloading, and handling chemicals is also vital. Sometimes, simply rearranging the flow within the existing space, or adding targeted shelving for clean items, can make a surprising difference without major renovations. It’s about looking at it as a crucial part of the production line, not just a cleanup zone.
Technology Integration – Friend or Foe?
Technology is creeping into every corner of our lives, and the commercial kitchen is no exception. We’re talking Kitchen Display Systems (KDS) replacing paper tickets, inventory management software linked to POS systems, programmable combi ovens, maybe even smart fridges that monitor temperatures. The promise is huge: increased efficiency, better accuracy, reduced waste, valuable data. KDS screens can streamline communication between front-of-house and back-of-house, improve order accuracy, and track ticket times. Inventory software can automate ordering and provide real-time food cost insights. Smart equipment can ensure cooking consistency and potentially optimize energy use. This potential for process automation and data tracking is incredibly tempting. But… is it always the right move? Technology comes with costs – initial investment, training time, potential maintenance issues, and the risk of system failures during peak service. Sometimes, the complexity outweighs the benefit, especially for smaller operations or teams resistant to change. I’m torn on this sometimes; the marketer in me loves the data and efficiency, but the pragmatist sees the potential headaches. Is this the best approach? Let’s consider the specific needs and capabilities of the kitchen.
The key is to be strategic about tech adoption. Don’t just chase shiny objects. Evaluate specific pain points in your operation and see if there’s a technology solution that directly addresses them and offers a clear return on investment. Will a KDS genuinely speed up your line communication or just add another screen to look at? Will inventory software save you more in reduced waste and better ordering than it costs to implement and maintain? It requires a careful cost-benefit analysis. Staff buy-in and thorough training are also critical; technology is useless if the team doesn’t know how, or doesn’t want, to use it effectively. Start small, perhaps? Pilot a system in one area before rolling it out kitchen-wide. And always, always have a backup plan for when the tech inevitably glitches. Maybe I should clarify: technology can be a powerful streamlining tool, but it needs careful consideration and shouldn’t be seen as a magic bullet for underlying process or layout issues.
Safety and Compliance by Design
Streamlining isn’t just about speed; it’s fundamentally about creating a better, safer working environment. Safety and compliance shouldn’t be afterthoughts; they need to be baked into the design from the start. This means ensuring clear, unobstructed egress paths in case of emergency. Installing appropriate fire suppression systems (like Ansul systems over cooking lines) and making fire extinguishers easily accessible. Choosing non-slip flooring to prevent falls in potentially wet or greasy areas. Designing workflows and station placements to minimize the risk of burns, cuts, and collisions. Crucially, the layout must facilitate adherence to health codes. This includes adequate handwashing stations, separation between raw and ready-to-eat food prep areas to preventing cross-contamination, easy-to-clean surfaces, and proper temperature control in storage and cooking. Thinking about HACCP (Hazard Analysis Critical Control Point) principles during the design phase can help identify and mitigate potential food safety risks proactively. Designing for safety means designing for smooth, predictable workflows and easy maintenance of hygiene standards. It’s about making the safe way the easy way.
This aspect is completely non-negotiable. Failing health inspections or having workplace accidents due to poor design can have devastating consequences for a business. Think about details like proper lighting – good visibility prevents mistakes and injuries. Ensure adequate spacing between equipment not just for workflow but also for safe operation and cleaning. Plan for chemical storage away from food areas. Consider ventilation not just for comfort but to remove potentially hazardous grease-laden vapors. Emergency preparedness goes beyond just fire exits; it’s also about how quickly and safely staff can react to spills, equipment malfunctions, or injuries, which a well-organized layout supports. Ultimately, a kitchen designed with health code adherence and worker safety in mind is inherently more efficient because it reduces disruptions, fosters good habits, and keeps the operation running smoothly and legally.
Flexibility for the Future
The food world changes fast. Menus evolve, customer tastes shift, delivery becomes more important, volume might increase (hopefully!). A kitchen designed rigidly for today’s needs might become inefficient tomorrow. So, how do you build in flexibility? One way is through modularity. Using mobile equipment tables or stations that can be reconfigured relatively easily allows you to adapt the layout as needed. Choosing multi-functional equipment – like a combi oven that can steam, bake, and roast – provides more menu flexibility than single-purpose units. When planning the layout, try to anticipate potential future needs. Could that storage area be converted to additional prep space if volume grows? Is the electrical and plumbing infrastructure robust enough to handle additional equipment down the line? Thinking about adaptable layouts from the outset can save major headaches and renovation costs later. It’s about creating a space that can grow and change with your business. This kind of future-proofing is a smart investment. Maybe consider leaving some ‘flex space’ in the design if possible, an area not immediately designated but available for future equipment or stations. It’s hard to predict the future, but designing for some level of scalability is always wise.
This forward-thinking approach is something I really advocate for, though I know it’s tough when you’re focused on getting operational *now*. But consider the lifecycle of your kitchen. Major renovations are disruptive and expensive. Building in adaptability means you might be able to accommodate a menu revamp, a shift towards catering, or a sudden surge in takeout orders with relatively minor adjustments rather than a complete overhaul. Maybe it’s ensuring utility hookups are placed strategically to allow for future equipment additions. Perhaps it’s choosing shelving systems that can be easily reconfigured. Even just thinking about traffic flow patterns with potential future stations in mind can help. It’s a bit like strategic planning for your physical space. You don’t know exactly what’s coming, but you can build a foundation that’s resilient and ready to pivot when necessary. That inherent flexibility is a key component of long-term operational efficiency.
Can You *Really* Do This? Wrapping It Up
So, we’ve walked through the zones, the flows, the gear placement, the storage sagas, and even the tech debates. Streamlining your commercial kitchen setup feels like a mountain to climb, doesn’t it? Looking at the whole picture can be overwhelming, I get it. You might be thinking, “My kitchen is tiny,” or “I don’t have the budget for major changes,” or simply, “Where do I even start?” But remember that initial assessment phase? That’s your starting point. You don’t have to tackle everything at once. Maybe the biggest bottleneck is the dish pit flow, or perhaps implementing better storage organization could yield the quickest wins. It’s not necessarily about a full gut renovation; often, targeted improvements make a huge difference.
The core idea is continuous improvement. Your kitchen isn’t static; it’s a living, breathing entity (hopefully not literally, clean those drains!). Small, incremental changes based on observation and feedback from your team can lead to significant streamlining over time. It requires a commitment to looking critically at how things are done and being willing to experiment. Maybe I should challenge myself, and you: pick just *one* thing this week. Observe one process, identify one small inefficiency, and brainstorm one potential improvement. Could rearranging a single prep table save steps? Could adding one shelf clear up counter clutter? Start there. Because yes, you absolutely *can* do this. It’s a process, not a magic wand, but taking that first step is how you begin to transform kitchen chaos into choreographed efficiency. What’s the one tweak you’re going to try?
FAQ
Q: How much does it typically cost to streamline a commercial kitchen layout?
A: Costs vary wildly! Simple reorganization and adding shelving might cost very little. Moving major equipment requiring plumbing or electrical work, or buying new efficient pieces, can run into thousands or tens of thousands. It depends entirely on the scope of changes. Start with low-cost, high-impact changes like workflow adjustments and storage optimization first.
Q: What are the biggest streamlining mistakes people make?
A: I’d say neglecting workflow analysis before making changes is a big one – moving things without understanding the *why*. Another is underestimating utility requirements (plumbing, electrical, ventilation) for equipment placement. Also, failing to involve the actual kitchen staff in the planning process; they often have the best insights into daily bottlenecks.
Q: Can these principles apply to a very small kitchen, like a food truck?
A: Absolutely! In fact, they’re even *more* critical in tight spaces. Zoning, efficient workflow, smart storage (especially vertical), and multi-functional equipment are paramount when every inch counts. You have to be incredibly intentional about layout and equipment placement in a small footprint.
Q: When should I consider hiring a professional kitchen designer?
A: If you’re planning a new build-out, a major renovation, or if you’re struggling to solve persistent inefficiency problems yourself, a professional designer specializing in commercial kitchens is often worth the investment. They understand ergonomics, compliance codes, equipment specs, and workflow optimization at expert level and can prevent costly mistakes.
You might also like
- Maximizing Efficiency in Tiny Kitchen Spaces
- Checklist: Must-Have Equipment for Your Restaurant Kitchen
- Navigating Health Codes and Safety in Kitchen Design
@article{can-i-streamline-my-commercial-kitchen-setup-yes-you-can,
    title   = {Can I Streamline My Commercial Kitchen Setup? Yes You Can!},
    author  = {Chef's icon},
    year    = {2025},
    journal = {Chef's Icon},
    url     = {https://chefsicon.com/can-i-do-this-streamline-your-commercial-kitchen-setup/}
}