The Best Fluffy Pancakes recipe you will fall in love with. Full of tips and tricks to help you make the best pancakes.
The Secret Life of Soup Kettles: Why Seasoning Large Batches Feels Like Alchemy (And How to Actually Nail It)
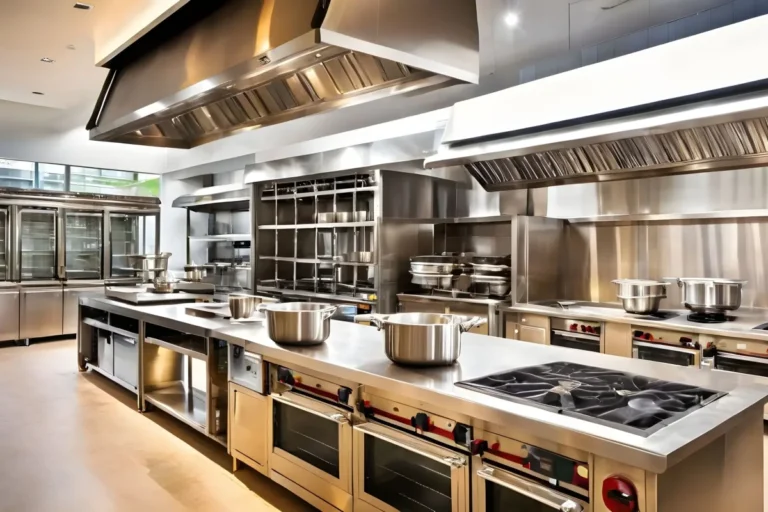
Let me tell you about the first time I walked into a commercial kitchen during soup service. The steam was rising from a 60-gallon kettle like some kind of culinary volcano, and the aroma hit me before I even crossed the threshold – rich, complex, with that unmistakable depth that only comes from hours of careful seasoning. The chef, a grizzled veteran with a tattoo of a whisk on his forearm, barely looked up as he tossed what looked like an entire handful of herbs into the swirling broth. “That’s how you wake up a big batch,” he muttered. I stood there, clipboard in hand, wondering if seasoning a commercial soup kettle was more science or sorcery. Five years later, I’m still asking myself that question – but now I’ve got some answers.
Here’s the thing about large-batch soup seasoning that no one tells you: it’s not just about scaling up your home recipe. That 60-gallon kettle behaves differently than your Dutch oven. The flavors develop differently. The salt distributes differently. And if you mess it up? Well, let’s just say you’ll be serving “mystery broth” to a lot of disappointed customers. In this guide, we’re going to dive deep into the techniques, tricks, and hard-earned lessons of seasoning commercial soup kettles for large batches. By the end, you’ll understand not just how to season effectively, but why certain approaches work (and why others fail spectacularly).
I’m writing this because I’ve seen too many talented cooks struggle with the transition from small-batch to large-scale soup production. There’s a learning curve, and it’s steeper than most expect. Maybe you’re opening a new café and want to perfect your signature soup. Maybe you’re managing a cafeteria kitchen and need to feed 500 people daily. Or maybe you’re just curious about how those perfectly balanced restaurant soups achieve their depth. Whatever brings you here, you’re in the right place. We’ll cover everything from the fundamentals of flavor layering to the nitty-gritty of salt distribution, from the best tools for the job to the common pitfalls that can turn your masterpiece into a disaster. Let’s get started.
The Science (and Art) Behind Large-Batch Soup Seasoning
Why Your Home Soup Skills Don’t Directly Translate
I remember the first time I tried to scale up my grandmother’s chicken noodle soup recipe for a 40-gallon kettle. The result? A bland, watery mess that tasted like someone had diluted good intentions with too much hope. What went wrong? Turns out, large batches behave differently on a molecular level. The surface area to volume ratio changes dramatically as you scale up, which affects evaporation rates, heat distribution, and flavor concentration. In a small pot, your aromatics release their oils quickly and evenly. In a commercial kettle, those same ingredients might sink to the bottom or get trapped in convection currents, leading to uneven flavor distribution.
Then there’s the issue of heat transfer. Commercial kettles often use steam jackets or direct heat sources that create different cooking environments than your stovetop. The gentle simmer you’re used to becomes a more aggressive boil in large batches, which can break down delicate herbs and vegetables too quickly. And don’t even get me started on salt solubility – in large volumes, salt doesn’t dissolve and distribute as evenly, which can lead to pockets of over- or under-seasoned soup. It’s enough to make you want to go back to cooking for your family of four.
But here’s the good news: once you understand these principles, you can work with them rather than against them. The key is to think like a chemist and cook like an artist. You need to respect the science while leaving room for intuition. Is this the best approach? Let’s consider: maybe we should start by examining the specific challenges of large-batch seasoning before jumping into solutions. Or perhaps we should look at the tools first? I’m torn between diving into the technical details and keeping things practical. Ultimately, I think we need both – so let’s start with the fundamentals and build from there.
The Three Pillars of Large-Batch Soup Seasoning
After years of experimentation (and more than a few failures), I’ve come to believe that successful large-batch soup seasoning rests on three foundational principles. These aren’t just my opinions – they’re backed by conversations with chefs, food scientists, and even a few equipment manufacturers. Here’s what you need to know:
- Layered Flavor Development: In large batches, flavors need to be built in stages rather than added all at once. This means thinking about when to add each ingredient based on its volatility, solubility, and heat sensitivity.
- Controlled Reduction: The way your soup reduces affects everything from mouthfeel to flavor concentration. Large batches require different reduction techniques than small ones.
- Dynamic Seasoning: Seasoning isn’t a one-time event – it’s an ongoing process that continues even after the soup leaves the kettle. You need to account for how flavors will evolve during holding and service.
Let me give you an example of how this plays out in practice. Take a classic French onion soup. In a small batch, you might caramelize your onions, deglaze with wine, add stock, and season at the end. But in a 60-gallon kettle? You’d need to caramelize your onions in stages (maybe even in a separate tilt skillet), deglaze with wine in a way that doesn’t create hot spots, and season gradually throughout the process. The onions might need to cook for hours longer to achieve the same depth of flavor. And that final seasoning adjustment? It might need to happen in multiple steps to ensure even distribution.
I’ve seen chefs try to shortcut this process, and the results are always disappointing. Maybe they’ll add all their herbs at once, only to find that the delicate notes have disappeared by service time. Or they’ll season aggressively at the beginning, not realizing that the flavors will concentrate as the soup reduces. It’s a delicate balance, and one that requires both patience and precision. But when you get it right? That’s when soup seasoning becomes less of a chore and more of a craft.
Choosing the Right Equipment for Large-Batch Seasoning
Why Your Kettle Choice Matters More Than You Think
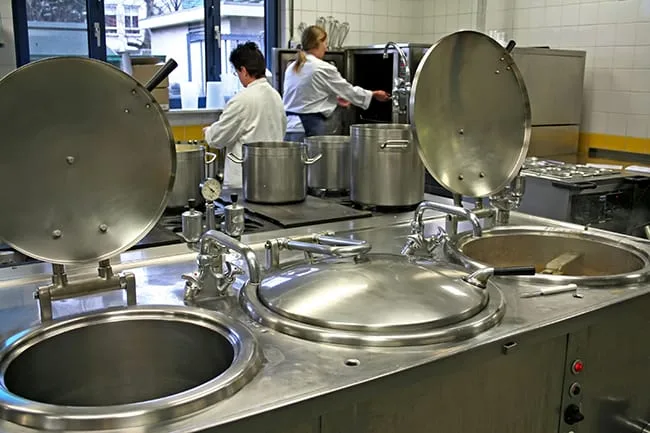
Not all commercial soup kettles are created equal. I learned this the hard way when I inherited a kitchen with three different kettles – a 40-gallon steam-jacketed model, a 60-gallon direct-fire kettle, and an 80-gallon tilting braising pan that we used for everything. At first, I thought they were interchangeable. Spoiler alert: they’re not. The type of kettle you use affects everything from heat distribution to stirring efficiency, which in turn impacts how your seasoning develops and distributes.
Let’s break down the main types of commercial soup kettles and their seasoning implications:
- Steam-Jacketed Kettles: These are the workhorses of most commercial kitchens. The steam jacket provides gentle, even heat that’s perfect for delicate soups and stocks. The downside? They can be slower to bring to a boil, which means your initial seasoning steps might take longer. But once you’re at temperature, they maintain it beautifully. For seasoning, this means you can be more precise with your timing – herbs and spices won’t get scorched as easily.
- Direct-Fire Kettles: These heat up quickly and can reach higher temperatures, which is great for caramelization and reduction. However, they’re prone to hot spots, which can lead to uneven cooking and seasoning. If you’re using a direct-fire kettle, you’ll need to stir more frequently and be extra careful with your seasoning additions to avoid scorching.
- Tilting Braising Pans: These versatile pieces of equipment can do double duty as kettles, but they have their quirks. The wide, shallow design means more surface area for evaporation, which can concentrate flavors quickly. However, this also means you might need to adjust your liquid levels and seasoning amounts accordingly.
I remember one particularly frustrating service where we were making a large batch of tomato soup in our direct-fire kettle. The bottom caramelized beautifully (maybe too beautifully – we had to scrape off some burnt bits), but the top layer was under-seasoned and watery. It was a classic case of heat distribution issues. From that day on, I made sure to stir more frequently and add seasoning in stages, tasting as I went. Which brings me to my next point: stirring isn’t just about preventing burning – it’s a crucial seasoning tool.
The Forgotten Art of Stirring (And Why It’s Your Secret Seasoning Weapon)
I’ll admit it: I used to think stirring was just something you did to keep things from sticking. Then I watched a veteran soup chef work her magic on a 60-gallon batch of minestrone. She didn’t just stir – she conducted. There was a rhythm to it, a purpose. She’d stir vigorously for a minute, then let it rest, then stir again. Sometimes she’d scrape the sides, sometimes she’d focus on the center. It was like watching a dance.
Turns out, there’s real science behind this. Stirring affects convection currents in your soup, which in turn affects how heat and flavors distribute. In large batches, natural convection can create layers of different temperatures and seasoning levels. Vigorous stirring breaks up these layers and creates more uniform conditions. But here’s the catch: too much stirring can be just as problematic as too little. Over-stirring can incorporate too much air, leading to oxidation and flavor degradation. It can also break down delicate ingredients like herbs and vegetables too quickly.
So what’s the sweet spot? From my experience, it depends on the soup and the kettle. For most applications, I recommend:
- Stirring vigorously for 30-60 seconds every 5-10 minutes during the initial cooking phase
- Reducing to gentle stirring every 15-20 minutes once the soup is at temperature
- Increasing stirring frequency when adding new ingredients or seasonings
- Using a specific stirring pattern (like a figure-eight) to ensure you’re covering the entire kettle
And here’s a pro tip: use your stirring as an opportunity to taste and adjust seasoning. Each time you stir, take a sample from different depths of the kettle. You might be surprised at how much the flavor can vary from top to bottom. This is especially important when you’re adding salt or acidic ingredients, which can settle or stratify in large batches.
I’m still perfecting my stirring technique, to be honest. There are days when I feel like I’ve got it down, and others when I’m convinced I’m doing it all wrong. Maybe I should clarify: there’s no single “right” way to stir. It’s about understanding the principles and adapting them to your specific situation. The key is to be intentional, observant, and willing to adjust as you go.
The Layered Approach to Seasoning Large Batches
Building Flavor from the Ground Up
If there’s one concept that transformed my large-batch soup seasoning, it’s the idea of flavor layering. This isn’t just about adding ingredients in a certain order – it’s about understanding how each component contributes to the final product and when it should be introduced to achieve maximum impact. Think of it like building a house: you need a solid foundation before you can add the walls, and you can’t put on the roof until the structure is sound.
Let me walk you through my layering process, using a classic chicken noodle soup as an example. This is the method I’ve developed after countless batches, and it’s served me well in both 40-gallon and 80-gallon kettles:
- The Aromatic Base: Start with your mirepoix (onions, carrots, celery) and any other aromatic vegetables. For chicken soup, I like to add a bit of fennel and leek for extra depth. Cook these in fat (oil or butter) until they’re softened but not browned. This is your flavor foundation. In large batches, I often do this in a separate tilt skillet to ensure even cooking, then transfer to the kettle.
- The Protein Layer: Add your chicken (or other protein) and cook until it’s just done. The goal here is to develop flavor without overcooking the meat. In large batches, this might mean poaching the chicken separately and adding it back later, or using a combination of fresh and pre-cooked chicken to ensure even cooking.
- The Liquid Layer: This is where things get tricky in large batches. You can’t just pour in all your stock at once – it will cool down the kettle too much and dilute your flavors. Instead, add it gradually, allowing the temperature to recover between additions. For chicken soup, I start with about a third of my total liquid, let it come to a simmer, then add the rest in stages.
- The Herb Layer: Here’s where many cooks go wrong. In small batches, you might add all your herbs at once. In large batches, you need to be more strategic. Start with hardy herbs (thyme, bay leaves, parsley stems) early in the process. Delicate herbs (tarragon, chives, basil) should be added towards the end. And remember: in large volumes, you’ll need more herbs than you think to achieve the same flavor impact.
- The Acid Layer: Acidity brightens and balances flavors, but it can also curdle dairy or break down delicate ingredients. In large batches, I add acidic components (wine, vinegar, lemon juice) in stages. For chicken soup, I might deglaze the aromatics with white wine early on, then add a touch of lemon juice at the end for brightness.
- The Seasoning Layer: This is where salt and other seasonings come in. But here’s the key: in large batches, you can’t just add all your salt at once. You need to season gradually, tasting and adjusting as you go. I usually divide my total salt into three portions: one added with the aromatics, one added with the liquid, and one final adjustment at the end.
- The Finishing Layer: This is where you add ingredients that need minimal cooking (fresh herbs, cooked noodles, garnishes). In large batches, I often hold these ingredients separately and add them to individual portions to maintain texture and freshness.
I’ve found that this layered approach gives me the most consistent results. But here’s the thing: it’s not set in stone. Some days, I’ll adjust the order based on the soup or the kettle I’m using. The important thing is to understand why each layer matters and how it contributes to the final product. That way, you can adapt the process to your specific needs.
The Salt Dilemma: How to Season Without Overdoing It
Salt is the most important seasoning in your arsenal, but it’s also the easiest to mess up – especially in large batches. I’ve seen chefs ruin entire kettles of soup with one miscalculated salt addition. The problem is that salt doesn’t distribute evenly in large volumes, and its impact changes as the soup reduces. What tastes perfectly seasoned at the beginning might be too salty by the end. So how do you get it right?
First, let’s talk about when to add salt. I used to add all my salt at the beginning, thinking it would distribute evenly as the soup cooked. Big mistake. Salt needs time to dissolve and distribute, but adding it too early can draw moisture out of your ingredients and create an overly salty broth. These days, I follow a modified version of the layered approach:
- Start with about 20% of your total salt when cooking your aromatics
- Add another 30% when you add your initial liquid
- Add 30% more when you add the bulk of your liquid
- Save the final 20% for adjustments at the end
But here’s the real secret: you need to account for reduction. In large batches, your soup will reduce more than you expect, which concentrates the salt. I’ve found that for every 10% reduction in volume, you need to reduce your salt by about 5% to maintain the same level of seasoning. It’s a rough estimate, but it’s helped me avoid many salty disasters.
And then there’s the issue of salt distribution. In large kettles, salt can settle or create pockets of high concentration. That’s why stirring is so important – not just for heat distribution, but for seasoning distribution as well. I like to add salt in a circular motion around the kettle, then stir vigorously for at least a minute to ensure even distribution.
But what if you do oversalt? Don’t panic. There are a few tricks you can try:
- Dilution: Add more liquid (water, stock, or even milk for creamy soups) to balance the saltiness. This is the most straightforward solution, but it can dilute other flavors as well.
- Acid: A touch of lemon juice or vinegar can balance saltiness. Be careful not to overdo it, though – you don’t want to make your soup sour.
- Starch: Adding potatoes or other starchy vegetables can absorb some of the salt. Just remember to remove them before serving.
- Dairy: For creamy soups, adding more cream or milk can help balance saltiness. This works particularly well for chowders and bisques.
- Sweetness: A touch of sugar or honey can counteract saltiness. This works best in soups with a natural sweetness, like tomato or carrot.
I’ve used all of these techniques at one time or another, and they’ve saved me from having to throw out entire batches. But the best solution is prevention. Always taste as you go, and remember that it’s easier to add more salt than to take it away.
Advanced Techniques for Flavor Development in Large Batches
Mastering the Maillard Reaction in Commercial Kettles
If you want to take your large-batch soups to the next level, you need to understand the Maillard reaction. This is the chemical process that creates the complex, savory flavors we associate with browned meat and caramelized vegetables. In small batches, it’s easy to achieve – just brown your ingredients in a hot pan. But in large batches? It’s a whole different ballgame.
The challenge with commercial kettles is that they don’t get hot enough to trigger the Maillard reaction effectively. Most kettles top out around 212°F (100°C), which is the boiling point of water. The Maillard reaction, however, starts to occur around 285°F (140°C) and really gets going around 300-350°F (150-175°C). So how do you achieve those deep, complex flavors in a large batch?
Here are a few techniques I’ve used successfully:
- Pre-Browning: Brown your proteins and vegetables in a separate pan or tilt skillet before adding them to the kettle. This is my go-to method for soups like beef barley or French onion. The key is to work in batches to avoid steaming the ingredients instead of browning them.
- High-Heat Searing: If your kettle has a direct-fire option, you can use it to sear ingredients before adding liquid. This works best for hearty soups with robust ingredients that can handle the heat. Be careful, though – direct fire can create hot spots that lead to burning.
- Fat Management: The Maillard reaction requires fat to occur. In large batches, I often add extra fat (like olive oil or butter) to my aromatics to encourage browning. Just be sure to skim off any excess fat at the end if it’s not part of your desired final product.
- Sugar Addition: A touch of sugar can help jumpstart the Maillard reaction at lower temperatures. This works particularly well for vegetable-based soups. I usually add about 1 teaspoon of sugar per gallon of soup to my aromatics.
- Dry Roasting: For some ingredients (like spices or nuts), dry roasting before adding to the soup can enhance their flavor through the Maillard reaction. This works great for soups with Middle Eastern or Indian influences.
I remember the first time I tried pre-browning for a large batch of beef stew. The difference was night and day. The soup had a depth of flavor that I’d never achieved before in a commercial kettle. It was a game-changer. But here’s the thing: it’s not always practical. Pre-browning takes time and extra equipment, which might not be feasible in a busy kitchen. That’s why I’ve also experimented with other methods, like adding a touch of soy sauce or Worcestershire sauce to mimic the umami flavors created by the Maillard reaction.
Is this the best approach for every soup? Probably not. But for hearty, meat-based soups, it’s worth the extra effort. The key is to understand what the Maillard reaction brings to the table (literally) and how to achieve similar results within the constraints of your equipment.
The Power of Umami: Boosting Flavor Without Adding Salt
If you want to make your large-batch soups taste richer and more complex without adding more salt, you need to harness the power of umami. This fifth basic taste (alongside sweet, sour, salty, and bitter) is what gives foods their savory, meaty, satisfying quality. And here’s the good news: there are plenty of umami-rich ingredients that work beautifully in large batches.
Let me share some of my favorite umami boosters and how I use them in commercial soup production:
- Tomato Paste: A classic umami booster. I like to cook it down with my aromatics until it turns a deep red-brown color. This caramelization enhances its umami properties. For large batches, I use about 1 cup of tomato paste per 40 gallons of soup.
- Mushrooms: Dried mushrooms (like porcini or shiitake) are umami powerhouses. I soak them in hot water, then add both the mushrooms and the soaking liquid to my soups. Fresh mushrooms work too, but they need to be cooked down thoroughly to release their umami.
- Soy Sauce or Fish Sauce: These fermented sauces add instant umami depth. I use them sparingly – about 1-2 tablespoons per gallon of soup – and add them towards the end of cooking to preserve their flavor.
- Parmesan Rinds: Don’t throw out those cheese rinds! They’re packed with umami. I add them to soups during the last hour of cooking, then remove them before serving. They work particularly well in minestrone and other Italian-style soups.
- Anchovies: I know, I know – anchovies can be polarizing. But when used correctly, they add incredible depth without tasting fishy. I usually add 2-3 anchovy fillets per gallon of soup, letting them melt into the broth.
- Miso Paste: This fermented soybean paste is a fantastic umami booster. I like to whisk it with a bit of the soup broth before adding it to the kettle to prevent clumping. White miso is milder and works well in most soups, while red miso has a stronger flavor that’s great for hearty stews.
- Worcestershire Sauce: This complex sauce contains anchovies, tamarind, and other umami-rich ingredients. I add it towards the end of cooking – about 1 tablespoon per gallon of soup.
- Dried Seaweed: Kombu (a type of kelp) is a staple in Japanese dashi stock, and it adds incredible umami to soups. I usually add a 4-inch piece per gallon of soup and remove it before serving.
Here’s a pro tip: combine multiple umami sources for a synergistic effect. For example, I might use tomato paste, dried mushrooms, and Parmesan rinds in the same soup. The combination creates a depth of flavor that’s greater than the sum of its parts. This is especially important in large batches, where flavors can get diluted or lost during cooking.
I’ve found that umami boosters are particularly useful when I’m trying to reduce salt without sacrificing flavor. They add complexity and satisfaction, making the soup taste richer and more complete. But here’s a word of caution: umami can be overpowering if you’re not careful. Start with small amounts and taste as you go. It’s always easier to add more than to take away.
Holding and Serving: The Final Seasoning Frontier
Why Your Soup Tastes Different at Service (And What to Do About It)
Here’s a scenario that might sound familiar: you’ve spent hours perfecting your soup. It tastes amazing straight from the kettle. But by the time it makes it to the customer’s bowl, something’s off. The flavors are muted. The seasoning is off. What happened?
Welcome to the world of holding and serving, where all your hard work can unravel in the final stretch. In large-batch production, this is often the most overlooked aspect of seasoning. But here’s the truth: your soup continues to evolve even after it leaves the kettle. Temperature changes, oxidation, and ingredient interactions can all affect the final flavor. And if you’re not accounting for these factors, you’re leaving the quality of your soup to chance.
Let me break down what happens to your soup during holding and serving:
- Flavor Concentration: As your soup sits in a steam table or holding kettle, it continues to reduce. This concentrates the flavors – including the salt. That’s why soups often taste saltier at the end of service than they did at the beginning.
- Flavor Degradation: Delicate herbs and aromatics can break down during holding, leading to a loss of freshness. This is especially true for ingredients like basil, cilantro, and chives.
- Oxidation: Exposure to air can cause some ingredients to oxidize, changing their flavor. This is particularly problematic for soups with high fat content or certain vegetables like potatoes.
- Ingredient Interactions: Some ingredients continue to release flavors during holding. For example, dried herbs will continue to infuse the soup with their essence, while starchy vegetables might break down and thicken the broth.
- Temperature Fluctuations: As soup is ladled out and new batches are added, the temperature can fluctuate. This affects how flavors are perceived – cold soup tastes less flavorful than hot soup.
So how do you account for these changes? Here are some strategies I’ve developed over the years:
- Season Lightly at First: When you’re seasoning your soup initially, aim for it to taste slightly under-seasoned. It will concentrate during holding. I usually season my soups to about 80-90% of what I want the final flavor to be.
- Add Fresh Herbs at Service: Instead of adding all your herbs during cooking, save some for garnishing individual portions. This preserves their freshness and brightness.
- Use Holding Kettles Wisely: If possible, transfer your soup to a holding kettle or steam table just before service. The less time it spends holding, the better. If you must hold it for an extended period, consider a kettle with precise temperature control.
- Stir Regularly: Even during holding, stirring helps distribute flavors and prevent stratification. I like to give my holding kettles a quick stir every 15-20 minutes.
- Taste Throughout Service: Make it a habit to taste your soup regularly during service. This allows you to catch any flavor changes and make adjustments as needed.
- Adjust Seasoning at the Point of Service: Set up a small station with salt, pepper, fresh herbs, and other seasoning ingredients. This allows you to make final adjustments to each bowl before it goes out to the customer.
I’ve found that the key to successful holding is anticipation. You need to think about how your soup will change during holding and adjust your initial seasoning accordingly. This takes practice, but once you get the hang of it, you’ll be able to serve consistently delicious soup throughout your entire service.
Portion Control: The Unsung Hero of Consistent Seasoning
Here’s something that might surprise you: the size of your portions can affect how your soup tastes. It’s not just about controlling costs – it’s about ensuring that each customer gets a properly seasoned bowl. Let me explain.
In large batches, seasoning isn’t always perfectly even. There might be slight variations in saltiness or flavor intensity from one part of the kettle to another. When you’re ladling out portions, you might inadvertently serve some that are more or less seasoned than others. This is where portion control comes in.
By standardizing your portion sizes, you can:
- Ensure that each customer gets a consistent experience
- Control the ratio of broth to solid ingredients, which affects perceived seasoning
- Manage your food costs more effectively
- Reduce waste by preventing over-portioning
But here’s the thing: portion control isn’t just about using the right ladle. It’s about understanding how your serving methods affect the final product. For example, if you’re serving a soup with both broth and solid ingredients (like a minestrone), you need to ensure that each portion gets a good mix of both. This might mean stirring the kettle before each ladle or using a slotted spoon to distribute the solids evenly.
I’ve experimented with different portioning methods over the years, and here’s what I’ve found works best:
- Standardized Ladles: Use the same size ladle for every portion. This ensures consistency and makes it easy to train staff. For most soups, I recommend a 10-12 ounce ladle.
- Portion Scoops: For soups with a lot of solid ingredients, a portion scoop can help ensure that each bowl gets a good mix of broth and solids. This works particularly well for chowders and stews.
- Weight-Based Portioning: For the most precise control, you can portion your soup by weight. This is especially useful for high-end restaurants where consistency is paramount. I usually aim for 10-12 ounces of soup per portion, depending on the type.
- Pre-Portioned Garnishes: If you’re adding garnishes (like fresh herbs, croutons, or cheese) at the point of service, consider pre-portioning them. This ensures that each bowl gets the same amount of garnish, which affects the overall flavor balance.
But portion control isn’t just about the tools – it’s about the technique. Here are some tips to ensure that each portion is properly seasoned:
- Stir Before Serving: Always give your soup a good stir before ladling out portions. This helps distribute any settled ingredients and ensures even seasoning.
- Taste Regularly: Make it a habit to taste your soup throughout service. This allows you to catch any changes in seasoning and adjust as needed.
- Train Your Staff: Ensure that all staff members understand the importance of portion control and proper serving techniques. This includes stirring the soup, using the correct ladle, and distributing solids evenly.
- Adjust for Garnishes: If you’re adding garnishes at the point of service, account for their flavor impact when seasoning your soup. For example, if you’re topping each bowl with grated cheese, you might want to slightly under-season the base soup.
I’ll be honest: portion control can feel tedious, especially during a busy service. But it’s one of those details that separates good soup from great soup. When you get it right, your customers might not even notice – but they’ll keep coming back for more.
Troubleshooting Common Large-Batch Seasoning Problems
When Your Soup Tastes Like Water (And How to Fix It)
We’ve all been there: you taste your carefully seasoned soup, and it’s… bland. Watery. Lacking that depth and complexity you were aiming for. In small batches, this is frustrating. In large batches, it’s a disaster. But before you resign yourself to serving “mystery broth,” let’s look at some common causes and solutions for watery-tasting soup.
First, let’s diagnose the problem. Watery soup can result from:
- Insufficient Reduction: If you don’t cook your soup long enough or at a high enough temperature, the flavors won’t concentrate properly.
- Too Much Liquid: Adding too much stock or water dilutes the flavors. This is a common mistake when scaling up recipes.
- Under-Seasoning: Sometimes, the issue isn’t the flavor concentration but the lack of seasoning. Salt enhances other flavors, so under-seasoned soup can taste bland even if it has good depth.
- Poor Ingredient Quality: Weak or low-quality ingredients (like watery vegetables or bland stock) can result in a watery-tasting soup.
- Insufficient Aromatics: Not using enough aromatic vegetables (onions, carrots, celery) or not cooking them properly can lead to a lack of flavor foundation.
So how do you fix watery soup? Here are some strategies I’ve used successfully:
- Reduce Further: The most straightforward solution is to cook the soup longer to evaporate excess liquid. This concentrates the flavors. Just be careful not to over-reduce, or your soup might become too thick or salty.
- Add Umami Boosters: Ingredients like tomato paste, soy sauce, or Parmesan rinds can add depth and complexity to watery soup. See the section on umami for more ideas.
- Adjust Seasoning: Sometimes, all your soup needs is a bit more salt. Taste and adjust gradually, remembering that flavors will concentrate as the soup reduces.
- Add More Aromatics: If your soup lacks a solid flavor foundation, consider adding more cooked aromatics. You can sauté them separately and add them to the soup.
- Use a Thickener: While not ideal for all soups, a bit of roux, cornstarch, or pureed vegetables can help give your soup more body and make the flavors seem more concentrated.
- Add Acid: A touch of lemon juice or vinegar can brighten up bland soup and make the flavors seem more vibrant.
- Incorporate Fat: Fat carries flavor, so adding a bit of butter, olive oil, or cream can help make your soup taste richer and more satisfying.
I remember one particularly challenging service where our vegetable soup was coming out watery and bland. We tried reducing it further, but it was already at the right consistency. Adding more salt didn’t help. In the end, we whisked in a bit of tomato paste and a splash of balsamic vinegar, and the difference was remarkable. The soup went from bland to vibrant, with a depth of flavor that had been missing.
Here’s a pro tip: prevent watery soup by building flavor from the ground up. Start with a solid foundation of aromatics, use quality ingredients, and season in layers. And always taste as you go – it’s much easier to fix issues early in the process than at the end.
Dealing with Over-Seasoned or Over-Salted Soup
On the opposite end of the spectrum from watery soup is over-seasoned or over-salted soup. This is one of the most common (and most frustrating) problems in large-batch soup production. The good news is that there are ways to salvage over-seasoned soup – but prevention is always better than cure.
First, let’s look at why soup gets over-seasoned:
- Reduction: As soup reduces, the flavors (including salt) become more concentrated. If you season your soup at the beginning and then reduce it significantly, it can become too salty.
- Uneven Distribution: In large batches, salt and other seasonings don’t always distribute evenly. This can lead to pockets of over-seasoned soup.
- Ingredient Variations: Different batches of ingredients can have varying levels of saltiness. For example, some stocks are saltier than others, and some cheeses are saltier than their labels suggest.
- Human Error: Let’s face it – sometimes we just add too much salt. It happens to the best of us.
- Cumulative Seasoning: If you add salt at multiple stages without accounting for previous additions, you can end up with too much.
So what do you do when your soup is too salty or over-seasoned? Here are some techniques I’ve used to salvage batches:
- Dilution: The most straightforward solution is to add more liquid (water, stock, or milk for creamy soups). This dilutes the salt and other seasonings. Just be aware that it will also dilute other flavors, so you might need to adjust your seasoning afterwards.
- Starchy Ingredients: Adding potatoes, rice, or other starchy ingredients can absorb some of the excess salt. Let them cook in the soup for a while, then remove them before serving.
- Dairy: For creamy soups, adding more cream or milk can help balance excess salt. This works particularly well for chowders and bisques.
- Acid: A touch of lemon juice or vinegar can help balance saltiness. Be careful not to overdo it, or your soup might taste sour.
- Sweetness: A bit of sugar or honey can counteract saltiness. This works best in soups with a natural sweetness, like tomato or carrot.
- Fat: Adding more fat (like butter or olive oil) can help coat the palate and make the soup seem less salty.
- Dilution with Unsalted Ingredients: Adding more of the unsalted components (like vegetables or meat) can help balance the seasoning. This is a good option if you also need to increase the volume of your soup.
I’ve had to use all of these techniques at one time or another, and they’ve saved me from having to throw out entire batches. But here’s the thing: they’re not perfect. Dilution can make your soup taste watery. Starchy ingredients can change the texture. Dairy can make your soup too rich. The key is to use these techniques judiciously and taste as you go.
Prevention, as they say, is the best medicine. Here are some strategies to prevent over-seasoning in the first place:
- Season Gradually: Add salt and other seasonings in stages, tasting as you go. Remember that it’s easier to add more than to take away.
- Account for Reduction: If you know your soup will reduce significantly, season it lightly at first and adjust at the end.
- Use Measuring Tools: In large batches, it’s easy to lose track of how much salt you’ve added. Use measuring cups or spoons to keep track.
- Taste from Different Depths: In large kettles, seasoning can stratify. Taste from different depths to ensure even distribution.
- Consider the Salt Content of Ingredients: Some ingredients (like cheese, cured meats, and certain stocks) are naturally salty. Account for this when seasoning your soup.
- Train Your Staff: Ensure that all staff members understand the importance of gradual seasoning and proper tasting techniques.
I’ll never forget the time I over-salted a 60-gallon batch of clam chowder. It was my first week at a new job, and I was trying to impress. I added what I thought was a reasonable amount of salt, but I didn’t account for the saltiness of the clams and the bacon. By the time I tasted it, the soup was inedible. I ended up having to dilute it with milk and water, then adjust the seasoning with a bit of sugar and lemon juice. It wasn’t my finest moment, but I learned a valuable lesson: when it comes to salt, less is more.
Putting It All Together: A Step-by-Step Guide to Seasoning Large-Batch Soup
From Prep to Service: The Complete Process
After all this theory, let’s get practical. Here’s my step-by-step process for seasoning large-batch soup, from prep to service. I’ve refined this over years of trial and error, and it’s served me well in kitchens of all sizes. Remember, this is a general guide – you’ll need to adapt it to your specific soup and equipment.
- Plan Your Batch:
- Determine your final yield and work backwards to calculate ingredient quantities
- Consider how the soup will reduce during cooking and holding
- Plan your seasoning additions based on the layered approach
- Account for any garnishes or finishing ingredients that will be added at service
- Prep Your Ingredients:
- Chop your aromatics uniformly for even cooking
- Pre-measure your seasonings to avoid last-minute mistakes
- Prepare any umami boosters (like tomato paste or dried mushrooms) that will be added early in the process
- Have your finishing ingredients (fresh herbs, garnishes) ready for service
- Build Your Flavor Foundation:
- Heat your kettle and add your cooking fat (oil, butter, etc.)
- Add your aromatics and cook until softened but not browned
- Add about 20% of your total salt to help draw out moisture and enhance flavor
- If using, add your umami boosters (tomato paste, dried mushrooms, etc.) and cook until fragrant
- Develop Your Protein Layer:
- Add your protein (meat, poultry, fish, or plant-based alternatives)
- Cook until just done, being careful not to overcook
- If necessary, remove the protein and set it aside to add back later
- Add Your Liquid:
- Start with about a third of your total liquid and bring to a simmer
- Add another 30% of your total salt
- Add your hardy herbs (thyme, bay leaves, parsley stems) and any spices
- Gradually add the rest of your liquid, allowing the temperature to recover between additions
- Simmer and Develop Flavors:
- Bring the soup to a gentle simmer and maintain this temperature throughout cooking
- Stir regularly to ensure even cooking and seasoning distribution
- Taste and adjust seasoning as needed, adding another 30% of your total salt
- Add any vegetables or other ingredients that need longer cooking times
- Final Seasoning Adjustments:
- Taste your soup and make final seasoning adjustments, adding the last 20% of your salt as needed
- Add any delicate herbs or ingredients that need minimal cooking
- Adjust the acidity with a touch of lemon juice or vinegar if needed
- Consider adding a splash of wine or other finishing flavors
- Prepare for Holding:
- Transfer your soup to a holding kettle or steam table just before service
- Stir well to ensure even distribution of ingredients and seasoning
- Adjust the temperature to maintain a gentle simmer (around 180-190°F or 82-88°C)
- Have your garnishes and finishing ingredients ready for service
- Service:
- Stir the soup before each portion to ensure even distribution
- Taste regularly throughout service and make adjustments as needed
- Add fresh herbs or other garnishes to each bowl at the point of service
- Consider setting up a seasoning station for final adjustments
- Post-Service:
- Cool any leftover soup quickly and properly to maintain quality
- Note any adjustments you’d make for the next batch
- Clean your kettle thoroughly to prevent flavor carryover
I’ve followed this process for everything from delicate consommé to hearty beef stew, and it’s helped me achieve consistent, well-seasoned results. But here’s the thing: it’s not set in stone. Some days, I’ll adjust the order based on the soup or the equipment I’m using. The important thing is to understand the principles behind each step and how they contribute to the final product.
Let me walk you through a real-world example: a 60-gallon batch of minestrone soup. Here’s how I’d approach it:
- I’d start by sautéing my mirepoix (onions, carrots, celery) with a bit of olive oil and 20% of my total salt in a tilt skillet. This ensures even cooking and good flavor development.
- Once the vegetables are softened, I’d add tomato paste and cook until it turns a deep red-brown color. This enhances its umami properties.
- I’d transfer the mixture to my steam-jacketed kettle and add my initial liquid (about 20 gallons of stock). I’d add another 30% of my salt and my hardy herbs (thyme, bay leaves).
- Once the soup is simmering, I’d add my beans, pasta, and any other ingredients that need longer cooking times. I’d stir regularly to ensure even cooking.
- As the soup cooks, I’d taste and adjust seasoning, adding another 30% of my salt. I’d also add my zucchini and green beans, which need less cooking time.
- Towards the end of cooking, I’d add my delicate herbs (basil, parsley) and make final seasoning adjustments, adding the last 20% of my salt as needed.
- For service, I’d transfer the soup to a holding kettle and set up a garnish station with fresh basil, grated Parmesan, and a bit of olive oil. Each bowl would get a sprinkle of fresh basil and a drizzle of oil at the point of service.
This process ensures that the soup is well-seasoned, with a depth of flavor that develops throughout cooking. And by adding fresh herbs and oil at the point of service, I maintain the brightness and freshness that can be lost during holding.
Beyond the Basics: Innovative Seasoning Techniques for Large Batches
Infusions and Extracts: Concentrated Flavor Boosters
If you’re looking to take your large-batch soups to the next level, consider using infusions and extracts. These concentrated flavor boosters can add depth and complexity without adding bulk to your soup. They’re particularly useful in large batches, where it can be challenging to achieve intense flavors without overloading the kettle with ingredients.
Here are some of my favorite infusion and extract techniques:
- Herb Infusions: Steep fresh or dried herbs in hot stock to create a concentrated infusion. Strain out the herbs and add the infusion to your soup. This works particularly well for delicate herbs like basil or tarragon, which can lose their flavor during long cooking times.
- Spice Infusions: Toast whole spices (like cumin, coriander, or fennel seeds) and steep them in hot liquid to create a spice infusion. This extracts the essential oils and flavors without adding the gritty texture of ground spices.
- Citrus Zest Extracts: Steep citrus zest in warm oil or alcohol to extract the aromatic oils. Add this extract to your soup for a bright, fresh citrus note. This works great in both clear broths and creamy soups.
- Garlic or Onion Confit: Slow-cook garlic or onions in oil until they’re soft and caramelized. Add this confit to your soup for a deep, sweet onion or garlic flavor without the harshness of raw alliums.
- Umami Extracts: Create a concentrated umami extract by reducing soy sauce, fish sauce, or mushroom stock. Add this to your soup for an instant umami boost.
- Smoked Infusions: Use a smoking gun or cold smoker to infuse your stock or broth with smoke flavor. This adds a complex, smoky note that works well in hearty soups and stews.
I remember the first time I used a garlic confit in a large batch of tomato soup. The depth of flavor was incredible – sweet, complex, and intensely garlicky without any harshness. It was a revelation. Since then, I’ve experimented with all sorts of infusions and extracts, and they’ve become a regular part of my large-batch seasoning toolkit.
Here’s how I typically use infusions in my soup production:
- Create the infusion or extract using one of the methods above.
- Strain out any solids to ensure a smooth texture.
- Add the infusion to the soup towards the end of cooking, just before final seasoning adjustments.
- Taste and adjust as needed, keeping in mind that infusions can be quite concentrated.
The key to using infusions effectively is to start small. These are concentrated flavors, and it’s easy to overdo it. I usually start with about 1 cup of infusion per 40 gallons of soup and adjust from there. And remember: infusions are meant to enhance your soup, not overpower it. Use them to add subtle depth and complexity, not to mask poor-quality ingredients or lazy cooking.
Global Flavors: Adapting International Techniques for Large Batches
One of the most exciting aspects of large-batch soup production is the opportunity to explore global flavors. But adapting international techniques to commercial kettles can be challenging. Different cuisines have different approaches to seasoning, and what works in a small pot might not translate directly to a 60-gallon kettle. Let me share some of my favorite global seasoning techniques and how I’ve adapted them for large batches.
French Techniques:
French cuisine is all about building layers of flavor. Here’s how I adapt classic French techniques for large batches:
- Mirepoix: This classic combination of onions, carrots, and celery forms the flavor base of many French soups. In large batches, I often cook my mirepoix in a separate tilt skillet to ensure even cooking, then transfer it to the kettle.
- Bouquet Garni: This bundle of herbs (usually thyme, bay leaf, and parsley) is a staple in French cooking. For large batches, I use a larger bouquet garni (or multiple smaller ones) and remove it before service.
- Deglazing: This technique involves adding liquid to a pan to dissolve the browned bits left from cooking. In large batches, I deglaze in stages to avoid cooling down the kettle too much.
- Reduction: French soups often rely on reduction for flavor concentration. In large batches, I reduce my soups gradually, stirring frequently to prevent scorching.
Asian Techniques:
Asian cuisines often use umami-rich ingredients and balance multiple flavor profiles. Here’s how I adapt these techniques:
- Dashi: This Japanese stock forms the base of many soups. For large batches, I make a concentrated dashi using kombu and bonito flakes, then dilute it to the desired strength.
- Five-Spice Blends: Chinese five-spice powder is a complex blend of spices that adds warmth and depth. In large batches, I toast the spices before adding them to enhance their flavor.
- Fermented Ingredients: Ingredients like miso, soy sauce, and fish sauce are staples in many Asian cuisines. I add these towards the end of cooking to preserve their complex flavors.
- Balancing Flavors: Many Asian soups balance sweet, sour, salty, and umami flavors. In large batches, I add these elements gradually, tasting and adjusting as I go.
Latin American Techniques:
Latin American soups often feature bold, vibrant flavors. Here’s how I adapt these techniques:
- Sofrito: This aromatic base of onions, peppers, garlic, and tomatoes is used in many Latin American soups. For large batches, I cook my sofrito in a tilt skillet to ensure even cooking, then transfer it to the kettle.
- Adobo: This blend of spices and vinegar is used to season meats and soups. In large batches, I add adobo gradually, tasting and adjusting as I go.
- Chiles: Dried chiles are a staple in many Latin American soups. I soak them in hot water, then puree them before adding to the soup to ensure even distribution.
- Acid Balance: Many Latin American soups use lime juice or vinegar for brightness. I add these towards the end of cooking to preserve their fresh flavor.
Middle Eastern Techniques:
Middle Eastern soups often feature warm spices and aromatic herbs. Here’s how I adapt these techniques:
- Spice Blends: Blends like baharat or ras el hanout add complex warmth to soups. In large batches, I toast the spices before adding them to enhance their flavor.
- Herbs: Fresh herbs like parsley, cilantro, and dill are often used in Middle Eastern cooking. I add these towards the end of cooking to preserve their freshness.
- Lemon: A touch of lemon juice or zest brightens many Middle Eastern soups. I add this towards the end of cooking to preserve its fresh flavor.
- Yogurt or Tahini: These ingredients add richness and depth to many Middle Eastern soups. I add them towards the end of cooking to prevent curdling.
Adapting these global techniques to large batches has been one of the most rewarding aspects of my work. It’s allowed me to bring authentic flavors to a wider audience and explore new culinary traditions. But it’s not without its challenges. The key is to understand the principles behind each technique and adapt them to your specific equipment and constraints.
I remember the first time I tried to make a large batch of pho. I was determined to do it right, but I quickly realized that my 60-gallon kettle wasn’t ideal for the traditional method of simmering bones for hours. So I adapted. I made a concentrated stock in smaller batches, then combined them in the kettle. I toasted my spices separately and added them in a cheesecloth bundle to prevent them from scattering throughout the soup. And I added my delicate herbs and garnishes at the point of service to maintain their freshness. The result wasn’t 100% authentic, but it was delicious – and it introduced many of our customers to the flavors of Vietnam for the first time.
Conclusion: The Never-Ending Journey of Soup Seasoning
As I sit here writing this, Luna (my rescue cat, if you remember) is curled up on my desk, occasionally batting at my pen. She’s a good reminder that even the most complex processes can be broken down into simple, manageable steps. Seasoning large-batch soup in commercial kettles might seem daunting at first, but it’s really just a series of small, intentional actions – each one building on the last to create something greater than the sum of its parts.
We’ve covered a lot of ground in this guide, from the science behind large-batch seasoning to the practical techniques that will help you achieve consistent, delicious results. We’ve talked about the importance of layering flavors, the challenges of salt distribution, and the art of stirring. We’ve explored advanced techniques like infusions and global flavor adaptations. And we’ve looked at the often-overlooked aspects of holding and serving that can make or break your final product.
But here’s the thing: no matter how much you know, there’s always more to learn. Every batch of soup is a new opportunity to refine your technique, to experiment with new flavors, to push the boundaries of what’s possible in a commercial kettle. Some days, you’ll nail it – your soup will be perfectly balanced, with layers of flavor that dance on the palate. Other days, you’ll struggle – your soup might be too salty, or too bland, or just… off. That’s okay. Even after years of doing this, I still have days when I’m not sure if my seasoning is right, when I second-guess my techniques, when I wonder if I should have added more salt or less acid or a different herb.
Maybe I should clarify something before we wrap up: this guide isn’t meant to be a rigid set of rules. It’s a collection of techniques, principles, and hard-earned lessons that you can adapt to your specific situation. Your kitchen is different from mine. Your equipment is different. Your customers are different. The key is to understand the why behind each technique, so you can apply it effectively in your own context.
So here’s my challenge to you: take one technique from this guide and try it in your next large-batch soup. Maybe it’s the layered seasoning approach. Maybe it’s using umami boosters. Maybe it’s adjusting your holding techniques. Whatever it is, give it a shot and see how it works for you. Keep notes. Taste as you go. And don’t be afraid to make mistakes – that’s how we learn.
And remember: at the end of the day, soup is about more than just seasoning. It’s about nourishment. It’s about comfort. It’s about bringing people together. Whether you’re feeding a family of four or a cafeteria of 500, your soup has the power to make someone’s day a little brighter. That’s a pretty amazing thing, right?
Now if you’ll excuse me, Luna is giving me that look that means it’s time for her afternoon snack. And I think I might just make myself a bowl of soup while I’m at it.
FAQ: Your Commercial Soup Kettle Seasoning Questions Answered
Q: How do I know if my large-batch soup is properly seasoned? It’s hard to taste from a 60-gallon kettle!
A: You’re absolutely right – tasting from a large kettle can be challenging. Here’s what I recommend: use a long-handled ladle to take samples from different depths of the kettle. Pour a small amount into a tasting cup and let it cool slightly before tasting. Remember that soup will taste less seasoned when it’s cold, so aim for it to be slightly over-seasoned when hot. Also, consider using a refractometer to measure salt content if you want to be extra precise. For most soups, you’re looking for a balanced flavor where no single element dominates, and where the salt enhances (but doesn’t overpower) the other flavors. And don’t forget: your soup will continue to develop flavor during holding, so it’s okay if it tastes slightly under-seasoned straight from the kettle.
Q: What’s the best way to add salt to a large batch of soup? Should I just dump it in all at once?
A: Please, for the love of all things delicious, don’t dump all your salt in at once! In large batches, salt doesn’t distribute evenly, which can lead to pockets of over- or under-seasoned soup. Here’s my preferred method: divide your total salt into three portions. Add the first portion (about 20%) when you’re cooking your aromatics. This helps draw out moisture and enhances flavor development. Add the second portion (about 30%) when you add your initial liquid. This gives the salt time to dissolve and distribute. Add the third portion (about 30%) when you add the bulk of your liquid. And save the final 20% for adjustments at the end. This gradual approach ensures even distribution and gives you more control over the final seasoning. Also, remember to stir vigorously after each salt addition to help distribute it evenly throughout the kettle.
Q: My soup always tastes great straight from the kettle, but bland by the end of service. What am I doing wrong?
A: Ah, the classic holding dilemma! This is one of the most common issues in large-batch soup production, and it’s all about understanding how your soup changes during holding. Here are a few things that might be happening: your soup is reducing during holding, which concentrates the salt but can mute other flavors; your delicate herbs and aromatics are breaking down; or your soup is oxidizing from exposure to air. Here’s how to fix it: first, season your soup slightly under-seasoned straight from the kettle. It will concentrate during holding. Second, save some of your delicate herbs and aromatics to add at the point of service. This preserves their freshness and brightness. Third, stir your soup regularly during holding to ensure even distribution of flavors. And fourth, consider using a holding kettle with precise temperature control to minimize flavor degradation. Also, don’t forget to taste your soup throughout service and make adjustments as needed. Sometimes, all it takes is a touch of fresh herbs or a splash of acid to bring your soup back to life.
Q: How can I make my large-batch soups taste richer without adding more salt or fat?
A: If you want to boost the richness of your soups without adding more salt or fat, you need to harness the power of umami and texture. Here are some of my favorite techniques: first, use umami-rich ingredients like tomato paste, mushrooms, soy sauce, or Parmesan rinds. These add depth and complexity without adding salt or fat. Second, consider the texture of your soup. A slightly thicker soup will taste richer than a thin one. You can achieve this with a bit of roux, pureed vegetables, or even a touch of xanthan gum. Third, pay attention to your cooking techniques. Pre-browning your ingredients or using a smoking gun can add layers of flavor that make your soup taste richer. Fourth, don’t underestimate the power of acid. A touch of lemon juice or vinegar can brighten up your soup and make it taste more vibrant. And fifth, consider your serving temperature. Hot soup tastes richer than cold soup, so make sure you’re serving your soup at the right temperature. Finally, remember that richness isn’t just about flavor – it’s also about mouthfeel. A soup with a smooth, velvety texture will taste richer than one with a thin, watery texture.
@article{mastering-commercial-soup-kettle-seasoning-techniques-for-large-batches-a-chefs-guide-to-flavor-consistency-and-efficiency,
    title   = {Mastering Commercial Soup Kettle Seasoning Techniques for Large Batches: A Chef’s Guide to Flavor, Consistency, and Efficiency},
    author  = {Chef's icon},
    year    = {2026},
    journal = {Chef's Icon},
    url     = {https://chefsicon.com/commercial-soup-kettle-seasoning-techniques-large-batches/}
}