The Best Fluffy Pancakes recipe you will fall in love with. Full of tips and tricks to help you make the best pancakes.
I’ll admit it, I used to think running a kitchen was all about intuition. You know, the kind of thing where a chef just *feels* what works, like some culinary sixth sense. But after years of working in restaurants, consulting for food trucks, and even helping a few friends redesign their home kitchens (yes, I’m that friend), I’ve realized it’s so much more than that. It’s a delicate dance between menu engineering, ingredient pairings, and kitchen layout, and when one of these elements is off, the whole system starts to wobble. And trust me, I’ve seen the wobbles, like the time I watched a line cook nearly drop a pan because the prep station was on the opposite side of the kitchen from the stove. Or the menu that looked amazing on paper but flopped because the ingredients didn’t play well together, leaving customers confused and the kitchen staff exhausted.
So, what’s the secret? Is it just about having the right equipment? The best ingredients? A team that can move like a well-oiled machine? Well, yes, but it’s also about understanding how these pieces fit together. How a dish’s design influences where you place your stations. How the flavors you choose can make or break your workflow. And how a kitchen’s layout can either streamline your service or turn it into a logistical nightmare. I’ve spent way too many nights lying awake, staring at my ceiling (thanks, Luna, for the company), wondering if there’s a perfect formula. Spoiler: There isn’t. But there *are* principles that can make your life, and your kitchen, a whole lot easier. Let’s break it down.
In this article, we’re going to dive into the nitty-gritty of how menu engineering shapes your ingredient choices, how those choices dictate your kitchen layout, and why ignoring this relationship is like trying to bake a cake without a recipe, messy, unpredictable, and likely to end in disaster. By the end, you’ll have a roadmap for designing a kitchen that doesn’t just *work* but actually enhances your menu and makes your staff’s lives easier. And who knows? Maybe you’ll even sleep better at night.
The Psychology of Menu Engineering: Why Your Dishes Aren’t Just Food
What Even Is Menu Engineering, Anyway?
Okay, let’s start with the basics. Menu engineering isn’t just about slapping together a list of dishes and hoping for the best. It’s a strategic approach to designing a menu that maximizes profitability, customer satisfaction, and operational efficiency. Think of it like a chess game where every move, from the placement of a dish to the description of its ingredients, is calculated to influence how customers order. And no, I’m not suggesting you manipulate people (well, not *too* much). It’s more about understanding how humans make decisions and using that knowledge to create a menu that feels intuitive, exciting, and, most importantly, doable in your kitchen.
I remember the first time I heard the term “menu engineering,” I rolled my eyes. It sounded like corporate jargon designed to suck the soul out of cooking. But then I saw it in action. A friend of mine, who runs a small bistro in East Nashville, completely overhauled her menu after realizing that 80% of her profits were coming from just 20% of her dishes. She didn’t just cut the underperformers, she reworked the entire menu to highlight her strengths, adjust pricing, and even tweak the language to make certain dishes more appealing. The result? A 30% increase in revenue and a kitchen that ran smoother because the staff wasn’t juggling a dozen half-finished plates at once. That’s when it clicked for me: menu engineering isn’t about being sneaky. It’s about being smart.
So, how do you actually *do* it? It starts with data. You need to know which dishes are your stars (high profit, high popularity), your plowhorses (high popularity, low profit), your puzzles (low popularity, high profit), and your dogs (low popularity, low profit). Once you’ve categorized your menu items, you can start making decisions. Do you keep the dog because it’s a signature dish, or do you cut it to free up space for something more profitable? Do you rework the plowhorse to make it more cost-effective, or do you lean into it as a crowd-pleaser? These aren’t easy questions, and there’s no one-size-fits-all answer. But asking them is the first step toward a menu that works for *your* kitchen, not against it.
The Hidden Power of Ingredient Overlap
Here’s where things get interesting. Menu engineering isn’t just about the dishes themselves, it’s about how those dishes interact with each other. And one of the biggest factors in that interaction? Ingredient pairings. The more ingredients your dishes share, the easier it is to manage inventory, reduce waste, and streamline prep. But here’s the catch: if you’re not careful, you can end up with a menu that’s so repetitive it feels boring. So how do you strike the balance?
Let me give you an example. A few years ago, I consulted for a farm-to-table restaurant that was struggling with food waste. They had a beautiful menu, full of seasonal ingredients and creative dishes. But every week, they were throwing out half their produce because they’d over-ordered or underutilized certain items. The problem? Their dishes were too disparate. One night, they’d use cilantro in a salsa, the next in a marinade, and the next in a garnish, but because the dishes were so different, the cilantro would sit in the walk-in until it wilted. The solution? We reworked the menu to create ingredient families, groups of dishes that shared core components. The cilantro now appeared in three dishes that all used it in different ways, but because they were part of the same family, the kitchen could prep it all at once and use it up before it went bad. Waste dropped by 40%, and the staff’s prep time decreased because they weren’t constantly switching between unrelated tasks.
This is where ingredient pairings come into play. The best menus aren’t just collections of individual dishes, they’re ecosystems where ingredients flow from one dish to another, creating a sense of harmony. But how do you create that ecosystem without making your menu feel like a puzzle where every piece looks the same? It’s all about versatility. Take something like roasted chicken. On its own, it’s a simple protein. But pair it with different sauces, sides, and garnishes, and suddenly you’ve got a menu that feels diverse without requiring a dozen different prep stations. One night it’s chicken with chimichurri, the next it’s chicken with a spicy peanut sauce, and the next it’s shredded chicken in a tacos. Same core ingredient, endless possibilities.
Of course, this approach isn’t without its challenges. What if your customers get bored? What if your menu starts to feel too predictable? I’ve wrestled with this myself. There’s a fine line between efficiency and monotony, and it’s not always easy to see where that line is until you’ve crossed it. But here’s the thing: customers don’t notice ingredient overlap as much as you think they do. What they notice is consistency, quality, and a sense of cohesion. If your menu feels like it’s all part of the same story, they’ll buy into it. And if it doesn’t? Well, that’s when you start hearing things like, “I don’t know what this restaurant is about.” And trust me, you don’t want that.
Ingredient Pairings: The Flavor Alchemy That Makes or Breaks Your Menu
Why Some Ingredients Just *Work*
Let’s talk about ingredient pairings. This is where things get really fun, or really frustrating, depending on how your day is going. Some ingredients just *click*. Think bacon and eggs, tomato and basil, chocolate and peanut butter. These pairings aren’t just delicious; they’re almost *inevitable*, like they were meant to be together. But why? What’s the science behind these magical combinations, and how can you use that knowledge to elevate your menu?
It all comes down to flavor compounds. Certain ingredients share chemical compounds that make them taste good together. For example, tomatoes and basil both contain high levels of linalool, a compound that gives them their fresh, slightly floral aroma. When you pair them, those compounds amplify each other, creating a flavor that’s greater than the sum of its parts. The same goes for coffee and cinnamon (both contain cinnamaldehyde), or strawberries and cream (thanks to furaneol, which gives strawberries their sweetness and cream its richness).
But here’s the thing: not all ingredient pairings are created equal. Some are classics for a reason, while others are just… weird. Remember the cronut craze? Or the time someone decided to put hot sauce on ice cream? (No, I’m not naming names, but let’s just say I’ve seen things.) The line between innovative and ill-advised can be thin, and it’s not always clear where that line is until you’ve crossed it. So how do you know when you’re onto something great and when you’re just setting yourself up for disaster?
I’ll be honest, I’ve had my fair share of misses. There was the time I tried to pair blue cheese with watermelon (it sounded good in my head, but let’s just say the customers were not impressed). Or the time I thought adding lavender to a chocolate dessert would be “elevated,” only to realize it tasted like soap. But here’s what I’ve learned: ingredient pairings aren’t just about flavor. They’re about context. A pairing that works in one dish might fail in another. A combination that’s perfect for a summer menu might feel out of place in the winter. And sometimes, the best pairings aren’t the ones that make sense on paper, they’re the ones that surprise you.
So how do you find those pairings? It starts with experimentation. Don’t be afraid to play around with ingredients, even if they seem like an odd match at first. Keep a notebook (or a notes app, if you’re like me and lose paper notebooks constantly) of combinations you try, what worked, and what didn’t. Over time, you’ll start to see patterns. You’ll notice that certain ingredients keep popping up together, or that certain flavors just *feel* right. And that’s when the magic happens, when you stop following rules and start trusting your instincts.
The Role of Texture and Temperature in Pairings
Here’s something I don’t think gets enough attention: ingredient pairings aren’t just about flavor. They’re also about texture and temperature. Think about it. A dish that’s all soft and creamy can feel monotonous, no matter how delicious the flavors are. But add a crispy element, a fried shallot, a toasted nut, a crunchy vegetable, and suddenly, the dish comes alive. The same goes for temperature. A cold salad with warm roasted vegetables feels more dynamic than one where everything is the same temperature. These contrasts aren’t just nice-to-haves; they’re essential for creating dishes that feel balanced and exciting.
I learned this the hard way when I was developing a menu for a pop-up dinner series. I had this beautiful dish planned: seared scallops with a creamy risotto and a bright citrus beurre blanc. On paper, it sounded amazing. In reality? It was *fine*. The flavors were good, but the dish felt flat. There was no contrast, no surprise. So I went back to the drawing board. I added a crispy element (toasted breadcrumbs), a fresh element (a quick-pickled radish), and a textural contrast (shaved fennel). Suddenly, the dish had depth. It wasn’t just about the scallops and the sauce anymore, it was about the interplay of textures and temperatures. And that’s when it clicked for me: ingredient pairings aren’t just about what tastes good together. They’re about what *feels* good together.
But here’s the thing: texture and temperature aren’t just about making a dish more interesting. They’re also about practicality. A dish that’s all cold ingredients is easier to prep ahead of time, but it might not have the same appeal as one with warm and cold elements. A dish with multiple textures might require more prep stations, which can slow down your kitchen. So how do you balance these considerations? It’s all about planning. Think about how each element of a dish will be prepped, cooked, and plated. Will the crispy element hold up if it’s prepped too far in advance? Will the warm element stay warm long enough to make it to the table? These are the kinds of questions you need to ask yourself when designing a menu. Because at the end of the day, a dish can be the most delicious thing in the world, but if it’s a nightmare to execute, it’s not worth it.
Kitchen Layout: The Invisible Backbone of Your Menu
Why Your Kitchen Layout Might Be Sabotaging Your Menu
Let’s talk about kitchen layout. This is the part of the equation that most people don’t think about until it’s too late. You can have the most brilliant menu in the world, the most perfect ingredient pairings, and a team of rockstar cooks, but if your kitchen layout is a mess, none of it matters. I’ve seen it happen more times than I can count, a restaurant opens with a beautiful menu, a great concept, and a line out the door, only to collapse under the weight of its own inefficiency. And nine times out of ten, the problem isn’t the food. It’s the kitchen layout.
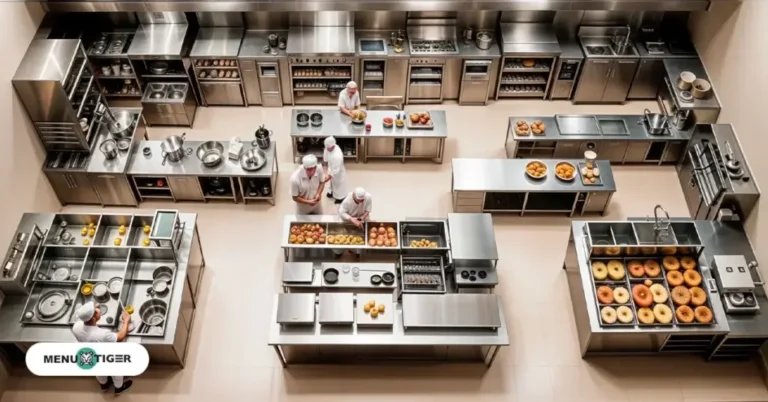
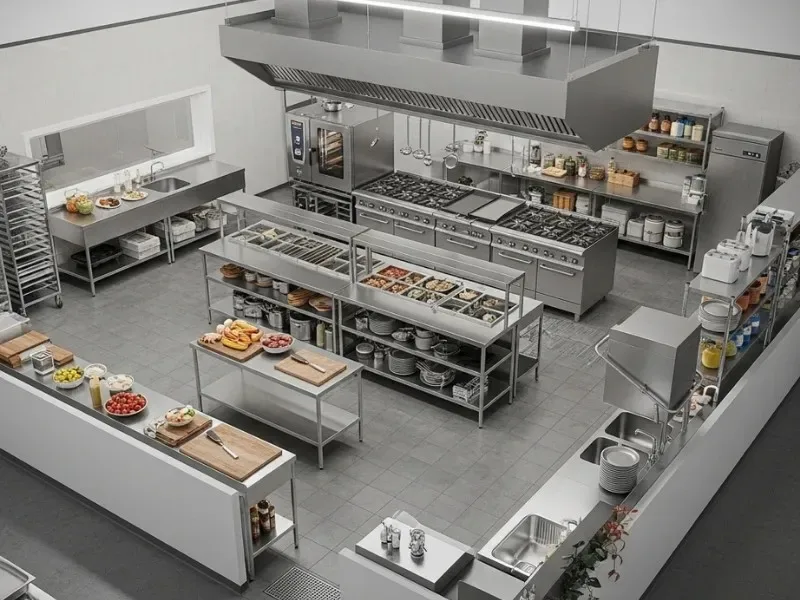
So what makes a good kitchen layout? It’s not just about having enough space or the right equipment. It’s about flow. A well-designed kitchen should feel like a dance, where every movement is intentional and every station is in the right place. The prep station should be close to the walk-in. The fryer should be near the plating area. The expo station should be in a spot where the chef can see the entire line. When these elements are out of place, even by just a few feet, it creates bottlenecks, slows down service, and turns what should be a smooth operation into a chaotic mess.
I’ll never forget the first time I walked into a kitchen that was *truly* well-designed. It was a small sushi bar in San Francisco, and I was there to interview the chef for an article. The kitchen was tiny, maybe 200 square feet, but it was *perfect*. Every station was exactly where it needed to be. The rice cooker was next to the prep station. The fish was stored in a small fridge under the counter. The plating area was right in front of the chef, so he could see the entire line at a glance. And the best part? The kitchen was *quiet*. No one was shouting. No one was running around like a chicken with its head cut off. It was like watching a symphony, where every note was in the right place at the right time. That’s when I realized: kitchen layout isn’t just about efficiency. It’s about harmony.
But here’s the thing: designing a good kitchen layout</ isn’t easy. It requires a deep understanding of how your menu works, how your staff moves, and what your space constraints are. And it’s not something you can just wing. You need to think about everything, from the placement of your equipment to the flow of traffic to the ergonomics of your stations. And you need to do it *before* you start building, because once the kitchen is set up, it’s a lot harder to make changes. I’ve seen restaurants spend thousands of dollars retrofitting their kitchens because they didn’t think about the layout upfront. Don’t be that restaurant.
The Golden Triangle: The Secret to a Functional Kitchen
Alright, let’s get into the nitty-gritty of kitchen layout. If you’ve ever taken a cooking class or read a kitchen design book, you’ve probably heard of the golden triangle. It’s a concept that’s been around for decades, and for good reason: it works. The idea is simple. In any kitchen, the three most important stations, the refrigerator, the sink, and the stove-should form a triangle. This ensures that the cook can move efficiently between these three stations without wasting time or energy. And while the golden triangle is most commonly associated with home kitchens, the principle applies to commercial kitchens as well. In fact, it’s even *more* important in a commercial setting, where every second counts.
But here’s the thing: the golden triangle isn’t just about the big three. It’s about the *relationship* between all your stations. In a commercial kitchen, you might have a prep station, a cooking station, a plating station, and a dishwashing station. Each of these stations should be arranged in a way that minimizes movement and maximizes efficiency. For example, the prep station should be close to the walk-in, so your staff isn’t running back and forth every time they need an ingredient. The cooking station should be near the plating area, so the food doesn’t have to travel far once it’s done. And the dishwashing station should be in a spot where it’s easily accessible but doesn’t interfere with the flow of service.
I’ll give you an example. A few years ago, I helped a friend redesign the kitchen for her food truck. She was struggling with efficiency, her staff was constantly bumping into each other, and service was slower than she wanted. The problem? Her stations were all over the place. The prep station was on one side of the truck, the cooking station was on the other, and the plating area was in the middle. Every time someone needed to prep an ingredient, they had to walk across the truck, which wasted time and created bottlenecks. So we rearranged the stations. We put the prep station next to the walk-in, the cooking station near the plating area, and the expo station in a spot where the chef could see the entire line. The result? Service sped up by 20%, and her staff was *much* happier. It was a small change, but it made a huge difference.
But here’s the thing: the golden triangle isn’t a one-size-fits-all solution. Every kitchen is different, and what works for one might not work for another. You need to think about your menu, your staff, and your space constraints. And you need to be willing to experiment. Don’t be afraid to try different layouts and see what works best. And if something isn’t working, don’t be afraid to change it. A good kitchen layout isn’t set in stone, it’s a living, breathing thing that evolves with your menu and your team.
How Menu Engineering and Kitchen Layout Work Together (Or Don’t)
When Your Menu and Kitchen Are in Sync (And When They’re Not)
Alright, let’s talk about the big picture. We’ve covered menu engineering, ingredient pairings, and kitchen layout as separate concepts, but the truth is, they’re all interconnected. A great menu is useless if your kitchen can’t execute it. A well-designed kitchen is wasted if your menu doesn’t take advantage of it. And the best ingredient pairings in the world won’t save you if your staff is constantly running around like headless chickens. The key to a successful kitchen is alignment-making sure that your menu, your ingredients, and your layout are all working together toward the same goal.
I’ve seen what happens when this alignment is missing. A few years ago, I consulted for a restaurant that had a beautiful menu, creative dishes, seasonal ingredients, the works. But the kitchen was a disaster. The prep station was on the opposite side of the kitchen from the walk-in. The fryer was next to the plating area, which meant the chef was constantly dodging hot oil. And the expo station was in a spot where the chef couldn’t see the line. The result? Service was slow, the staff was stressed, and the food wasn’t as good as it could have been. The menu was amazing, but the kitchen layout was sabotaging it.
So how do you create alignment? It starts with planning. Before you finalize your menu, think about how it will be executed in your kitchen. What stations will you need? What equipment? How will the flow of service work? And before you finalize your kitchen layout, think about your menu. What dishes will you be serving? What ingredients will you be using? How will your staff move between stations? These are the kinds of questions you need to ask yourself if you want your kitchen to run smoothly.
But here’s the thing: alignment isn’t just about the big picture. It’s also about the little details. For example, if you’re serving a dish that requires a lot of prep, make sure your prep station is close to the walk-in. If you’re serving a dish that needs to be plated quickly, make sure the plating area is near the cooking station. And if you’re serving a dish that requires multiple steps, make sure your stations are arranged in a way that minimizes movement. These might seem like small things, but they add up. And when your menu and your kitchen are in sync, the result is magic.
The Role of Staff in the Equation
Here’s something I don’t think gets enough attention: your staff is a *huge* part of the equation. A great menu and a well-designed kitchen are useless if your staff doesn’t know how to use them. And a poorly trained staff can turn even the best-designed kitchen into a chaotic mess. So how do you make sure your team is part of the solution, not part of the problem?
It starts with training. Your staff needs to know how to use the equipment, how to move efficiently between stations, and how to execute the menu. And they need to know it *before* service starts. I’ve seen too many kitchens where the staff is thrown into the deep end on opening night, and it’s a disaster. Don’t be that kitchen. Take the time to train your staff, walk them through the menu, and show them how the kitchen works. And don’t just do it once, make training an ongoing process. The more comfortable your staff is with the menu and the layout, the smoother service will be.
But training isn’t just about the technical stuff. It’s also about communication. A well-run kitchen is like a well-oiled machine, and communication is the oil that keeps it running. Your staff needs to be able to talk to each other, call out orders, and work together as a team. And that starts with you. As the leader, you need to set the tone. Be clear, be concise, and be consistent. And don’t be afraid to step in if something isn’t working. The best kitchens aren’t the ones where everything goes perfectly, they’re the ones where the team can adapt when things go wrong.
And here’s the thing: your staff is also a great source of feedback. They’re the ones in the trenches, so they know what’s working and what’s not. Don’t be afraid to ask for their input. What’s slowing them down? What’s making their jobs harder? What would make the kitchen run more smoothly? These are the kinds of questions you need to ask if you want to create a kitchen that works for *everyone*, not just you.
Putting It All Together: A Step-by-Step Guide to Designing Your Dream Kitchen
Step 1: Start with Your Menu
Alright, let’s get practical. If you’re designing a kitchen from scratch, or even just reworking an existing one, where do you start? The answer is simple: start with your menu. Your menu is the foundation of your kitchen. It dictates what equipment you’ll need, what stations you’ll have, and how your staff will move. So before you do anything else, sit down and think about what you want to serve. What dishes will be on your menu? What ingredients will you use? What techniques will you employ? These are the kinds of questions you need to answer before you start designing your kitchen.
I’ll give you an example. A few years ago, I helped a friend design a kitchen for her new restaurant. She had a clear vision for her menu, seasonal, locally sourced, and focused on wood-fired cooking. So we started by thinking about what that meant for her kitchen. She’d need a wood-fired oven, of course, but she’d also need a prep station for chopping vegetables, a station for butchering meat, and a plating area near the oven. And because she was serving seasonal dishes, she’d need a walk-in that could accommodate a rotating cast of ingredients. Once we had a clear picture of her menu, we could start designing the kitchen around it.
But here’s the thing: your menu isn’t set in stone. It’s a living, breathing thing that will evolve over time. So don’t be afraid to revisit it as you design your kitchen. What dishes are working? What aren’t? What ingredients are you using the most? What techniques are you employing? These are the kinds of questions you need to ask yourself if you want your kitchen to be flexible enough to adapt to your menu as it changes.
Step 2: Map Out Your Stations
Once you have your menu, the next step is to map out your stations. This is where the rubber meets the road. You need to think about what stations you’ll need, where they’ll be located, and how they’ll interact with each other. And you need to do it in a way that minimizes movement and maximizes efficiency.
Let’s go back to my friend’s restaurant. We knew she’d need a wood-fired oven, a prep station, a butchering station, and a plating area. But where should they go? We started by thinking about the flow of service. The prep station should be close to the walk-in, so her staff wouldn’t have to run back and forth every time they needed an ingredient. The butchering station should be near the walk-in as well, so the meat could be stored and prepped in the same area. The wood-fired oven should be near the plating area, so the food wouldn’t have to travel far once it was done. And the expo station should be in a spot where the chef could see the entire line.
But here’s the thing: mapping out your stations isn’t just about the big picture. It’s also about the little details. For example, where will you store your utensils? Where will you keep your spices? Where will your staff put their personal items? These might seem like small things, but they add up. And when your stations are well-organized, your staff will be able to move more efficiently, which means faster service and happier customers.
And don’t forget about ergonomics. A well-designed kitchen isn’t just efficient, it’s also comfortable. Your staff will be on their feet for hours at a time, so you need to make sure they’re not constantly reaching, bending, or twisting. Think about the height of your counters, the placement of your equipment, and the flow of traffic. The more comfortable your staff is, the better they’ll perform.
Step 3: Choose Your Equipment
Alright, now that you have your stations mapped out, it’s time to choose your equipment. This is where things can get expensive, so you need to be strategic. What equipment do you *really* need? What can you live without? And what can you get secondhand or lease instead of buying new?
Let’s go back to my friend’s restaurant. She knew she’d need a wood-fired oven, of course, but she also needed a prep station, a butchering station, and a plating area. So we started by thinking about what equipment she’d need for each station. The prep station would need cutting boards, knives, and storage containers. The butchering station would need a butcher block, a meat grinder, and a vacuum sealer. The plating area would need plates, utensils, and garnishes. And the wood-fired oven would need, well, a wood-fired oven.
But here’s the thing: equipment isn’t just about functionality. It’s also about durability and maintenance. You need equipment that can stand up to the rigors of a commercial kitchen, and you need to be able to maintain it. So don’t just think about what you need now, think about what you’ll need in the future. And don’t be afraid to invest in quality. Cheap equipment might save you money upfront, but it’ll cost you in the long run.
And don’t forget about safety. A commercial kitchen is a dangerous place, and you need to make sure your equipment is safe to use. Think about things like fire suppression systems, ventilation, and ergonomics. The safer your kitchen is, the happier your staff will be, and the fewer accidents you’ll have.
Step 4: Test and Refine
Alright, you’ve got your menu, your stations, and your equipment. Now it’s time to test and refine. This is where the rubber meets the road. You need to put your kitchen to the test and see what works and what doesn’t. And you need to be willing to make changes if something isn’t working.
I’ll give you an example. A few years ago, I helped a friend design a kitchen for his food truck. We thought we had everything figured out, the prep station was close to the walk-in, the cooking station was near the plating area, and the expo station was in a spot where the chef could see the entire line. But when we started testing, we realized there was a problem. The prep station was too far from the cooking station, which meant the staff was constantly running back and forth. So we moved the prep station closer to the cooking station, and service sped up by 20%. It was a small change, but it made a huge difference.
But here’s the thing: testing isn’t just about the big picture. It’s also about the little details. For example, where should you store your utensils? Where should you keep your spices? Where should your staff put their personal items? These might seem like small things, but they add up. And when your kitchen is well-organized, your staff will be able to move more efficiently, which means faster service and happier customers.
And don’t forget about feedback. Your staff is a great source of information. They’re the ones in the trenches, so they know what’s working and what’s not. Don’t be afraid to ask for their input. What’s slowing them down? What’s making their jobs harder? What would make the kitchen run more smoothly? These are the kinds of questions you need to ask if you want to create a kitchen that works for *everyone*, not just you.
The Future of Kitchen Design: Where Do We Go From Here?
Alright, let’s take a step back and think about the big picture. We’ve covered a lot of ground-menu engineering, ingredient pairings, kitchen layout, the works. But where do we go from here? What’s the future of kitchen design, and how can we stay ahead of the curve?
I’ll be honest, I don’t have all the answers. But I do have some thoughts. For one, I think we’re going to see a lot more flexibility in kitchen design. The days of the one-size-fits-all kitchen are over. Restaurants are becoming more specialized, and their kitchens need to reflect that. Whether it’s a food truck, a pop-up, or a fine-dining restaurant, the kitchen needs to be designed around the menu, not the other way around.
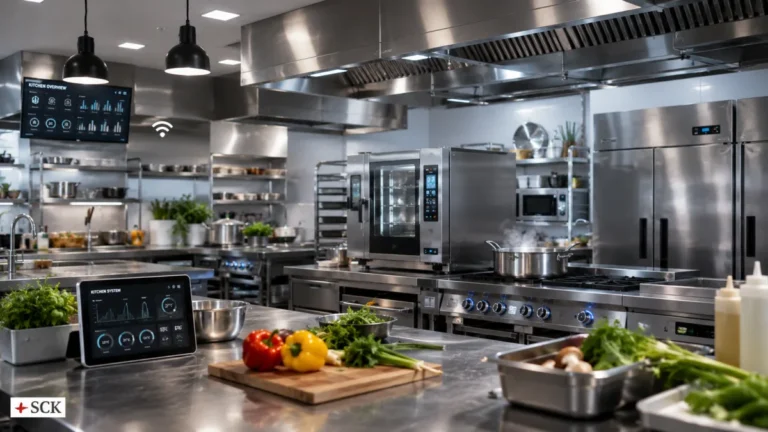
I also think we’re going to see a lot more technology in the kitchen. From smart ovens to automated prep stations, technology is changing the way we cook. And while I’m not suggesting we replace chefs with robots (I’m a purist at heart), I do think technology can make our lives easier. Imagine a kitchen where the oven tells you when your food is done, or a prep station that automatically tracks your inventory. These aren’t just pipe dreams, they’re the future of kitchen design.
But here’s the thing: no matter how much technology we have, the fundamentals will always be the same. A great kitchen is still about menu engineering, ingredient pairings, and kitchen layout. It’s about understanding how these pieces fit together and using that knowledge to create something amazing. And at the end of the day, that’s what it’s all about, creating something amazing.
So where do we go from here? I don’t know. But I do know this: the future of kitchen design is bright. And if we keep pushing the boundaries, asking questions, and challenging the status quo, there’s no limit to what we can achieve.
FAQ
Q: What’s the most important factor in menu engineering?
A: The most important factor in menu engineering is understanding your customers and your kitchen’s capabilities. You need to know what dishes are popular, what’s profitable, and what your staff can execute consistently. It’s not just about creating a menu that looks good on paper, it’s about creating a menu that works in the real world. Data is your friend here. Track your sales, listen to customer feedback, and don’t be afraid to make changes if something isn’t working.
Q: How do I know if my ingredient pairings are working?
A: The best way to know if your ingredient pairings are working is to pay attention to customer feedback and sales data. Are people ordering the dish? Are they enjoying it? Are they coming back for more? If the answer is yes, then your pairings are probably working. If not, it might be time to rethink them. And don’t forget about your staff, they’re the ones executing the dishes, so their input is invaluable. If they’re struggling with a pairing, it might be a sign that it’s not as intuitive as you thought.
Q: What’s the biggest mistake people make when designing a kitchen layout?
A: The biggest mistake people make when designing a kitchen layout is not thinking about the flow of service. A kitchen isn’t just a collection of stations, it’s a system, and every part of that system needs to work together. If your stations are too far apart, your staff will waste time running back and forth. If your equipment is in the wrong place, it’ll create bottlenecks. And if your expo station isn’t in the right spot, your chef won’t be able to see the line. The key is to think about how your staff will move through the kitchen and design the layout around that flow.
Q: How can I make my kitchen more efficient without spending a lot of money?
A: There are plenty of ways to make your kitchen more efficient without breaking the bank. Start by looking at your menu engineering. Are there dishes that are too complicated or time-consuming? Can you simplify them without sacrificing quality? Next, look at your kitchen layout. Are there stations that are too far apart? Can you rearrange them to minimize movement? And don’t forget about your staff. Are they trained to work efficiently? Are they communicating effectively? Sometimes, the smallest changes can make the biggest difference. And if you’re really strapped for cash, consider leasing equipment or buying secondhand. It’s not ideal, but it’s better than nothing.
@article{menu-engineering-ingredient-pairings-and-kitchen-layout-the-unseen-science-behind-every-great-meal,
    title   = {Menu Engineering, Ingredient Pairings, and Kitchen Layout: The Unseen Science Behind Every Great Meal},
    author  = {Chef's icon},
    year    = {2026},
    journal = {Chef's Icon},
    url     = {https://chefsicon.com/menu-engineering-ingredient-pairings-kitchen-layout/}
}