The Best Fluffy Pancakes recipe you will fall in love with. Full of tips and tricks to help you make the best pancakes.
Table of Contents
- 1 Mastering Your Walk-In: A Comprehensive Guide
- 1.1 1. The Foundation: Zoning and Layout
- 1.2 2. Shelving Strategies: Maximize Vertical Space
- 1.3 3. Container Consistency: The Key to Visual Order
- 1.4 4. Inventory Management: Knowing What You Have
- 1.5 5. Temperature Monitoring: Maintaining the Cold Chain
- 1.6 6. Cleaning Schedule: A Non-Negotiable Routine
- 1.7 7. Cross-Contamination Prevention: A Critical Focus
- 1.8 8. Lighting: Illuminating Efficiency
- 1.9 9. Staff Training: Empowering Your Team
- 1.10 10. Regular Audits: Maintaining the System
- 2 Staying Cool Under Pressure: Final Thoughts
- 3 FAQ
- 4 You Might Also Like
Running a restaurant kitchen is, let’s be honest, controlled chaos. And one of the biggest potential disaster zones? The walk-in cooler. It’s the heart of your inventory, the keeper of freshness, and, if mismanaged, a breeding ground for waste, stress, and potential health code violations. I’ve seen it all, from perfectly organized walk-ins that hum with efficiency to…well, let’s just say I’ve seen things that would make a health inspector faint. My own journey started in the Bay Area, working my way through kitchens before my move to Nashville. Now, here I am, settled in with my rescue cat, Luna, and a career focused on helping restaurants thrive. This isn’t just about pretty shelves; it’s about your bottom line, your team’s sanity, and the quality of the food you serve.
This article is going to dive deep into practical, actionable walk-in cooler organization tips. We’re not just talking about tidying up; we’re talking about a systematic approach that will transform your walk-in from a potential liability into a well-oiled machine. We’ll cover everything from basic layout principles to advanced inventory management techniques. Think of this as a comprehensive guide, a friend in the trenches who understands the unique challenges of a bustling restaurant environment.
Why does this matter so much? Because a well-organized walk-in cooler directly impacts your restaurant’s success. It reduces food waste, saves time, improves food safety, and ultimately, boosts your profits. It’s one of those foundational elements that, when done right, creates a ripple effect of positive outcomes throughout your entire operation. So, let’s get started on making your walk-in cooler your restaurant’s secret weapon, rather than its Achilles’ heel. And, you know, it might just help you sleep a little better at night, too.
Mastering Your Walk-In: A Comprehensive Guide
1. The Foundation: Zoning and Layout
Think of your walk-in cooler like a small city. It needs zones, traffic flow, and designated areas for different types of goods. The most fundamental principle is First In, First Out (FIFO). This means that the items you receive first should be the items you use first. It sounds obvious, but you’d be surprised how often this gets overlooked in the heat of a busy service. To implement FIFO effectively, you need a layout that supports it. Newer items go to the *back*, older items stay in the *front*.
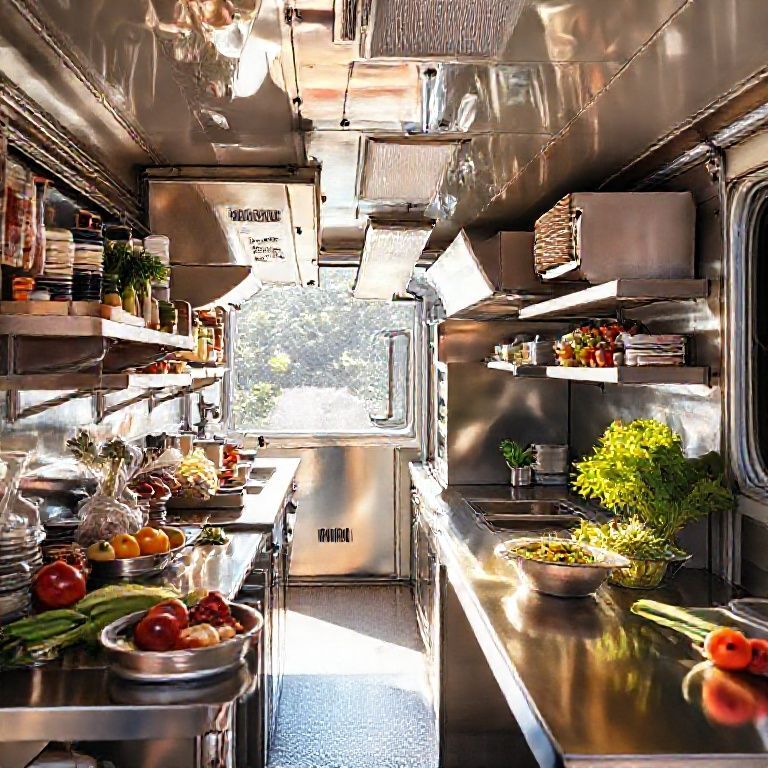
Consider creating specific zones for different food categories: dairy, produce, meat, seafood, prepped items, etc. This prevents cross-contamination and makes it much easier to locate what you need. Think about the frequency of use, too. Items you use constantly should be easily accessible, while less frequently used items can be stored higher up or further back. I’ve seen restaurants use color-coded labels for each zone, which can be incredibly helpful for new staff. This is a simple and practical way to implement a visual management system.
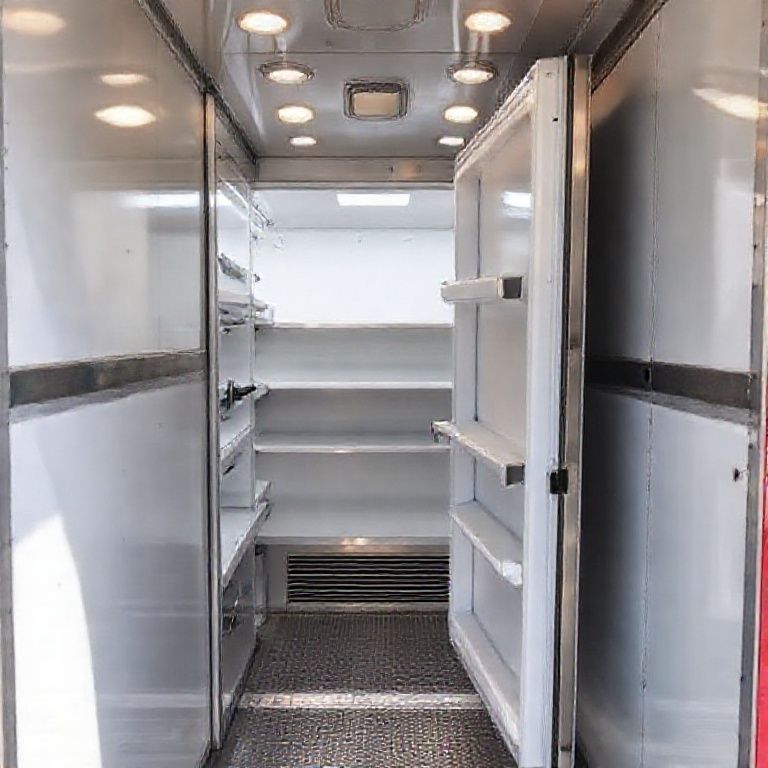
Another crucial aspect of layout is air circulation. Don’t pack your shelves too tightly. Cold air needs to circulate freely to maintain consistent temperatures and prevent spoilage. Leave space between items and between the items and the walls. This is especially important for walk-in coolers with forced-air cooling systems. Also, and this might seem basic, but make sure your shelving is sturdy and properly installed. The last thing you need is a shelf collapsing under the weight of your inventory. Invest in heavy-duty shelving that can withstand the demands of a commercial kitchen.
Finally, keep the floor clear! Boxes, crates, and random items on the floor are tripping hazards and make cleaning difficult. A clean floor is a sign of a well-managed walk-in, and it’s crucial for maintaining hygiene standards. I’ve seen some restaurants use floor markings to designate pathways and storage areas, which can be a surprisingly effective way to maintain order. It’s all about creating a system that’s easy to follow, even under pressure.
2. Shelving Strategies: Maximize Vertical Space
Restaurant kitchens are often tight on space, and walk-in coolers are no exception. That’s why maximizing vertical space is essential. Think tall, not wide. Use shelving that reaches as high as is safely accessible. You might need a sturdy step stool or a rolling ladder, but it’s worth it to utilize every available inch. Consider adjustable shelving so you can customize the height of each shelf to accommodate different-sized items. This prevents wasted space above smaller items.
Wire shelving is generally preferred for walk-in coolers because it allows for better air circulation than solid shelving. It’s also easier to clean. Make sure the shelving is corrosion-resistant, especially if you’re storing acidic items like tomatoes or citrus fruits. I’ve also seen restaurants use slanted shelving for certain items, like produce, to improve visibility and accessibility. This can be a great way to implement FIFO, as items naturally roll forward as you remove them.
Think about the weight capacity of your shelving, too. Don’t overload it! This can be a safety hazard and can damage the shelving. Distribute the weight evenly across the shelves. Heavier items should be stored on lower shelves, and lighter items can be stored higher up. And, please, label your shelves! Clear, concise labels make it easy for everyone to find what they need and to put things back in the right place. This is a simple but crucial step in maintaining order. I like to use a label maker for a professional, consistent look.
One more tip: consider using shelf liners. These can help protect your shelves from spills and make cleaning easier. They also provide a bit of cushioning for fragile items. There are various types of shelf liners available, from solid plastic to wire mesh. Choose the type that best suits your needs and your budget. It’s a small investment that can make a big difference.
3. Container Consistency: The Key to Visual Order
One of the biggest visual clutter culprits in a walk-in cooler is mismatched containers. A hodgepodge of different sizes, shapes, and materials makes it difficult to see what you have and creates an overall sense of chaos. The solution? Container consistency. Invest in a set of matching, clear containers for all your prepped items, sauces, and other ingredients. Clear containers allow you to see the contents at a glance, which saves time and reduces food waste.
Choose containers that are stackable and designed for commercial use. They should be durable, easy to clean, and able to withstand the cold temperatures of your walk-in. Square or rectangular containers are generally more space-efficient than round containers. Consider using different sizes of containers for different types of items, but stick to a consistent brand and style. This creates a uniform, organized look.
Labeling is absolutely essential, even with clear containers. Use a label maker or permanent marker to clearly label each container with the contents, date prepped, and use-by date. This is crucial for food safety and inventory management. I’ve seen restaurants use color-coded labels to indicate different days of the week, which can be a helpful visual cue for FIFO. For example, Monday’s prepped items might have a blue label, Tuesday’s a green label, and so on. This creates a very visual system that everyone is required to follow.
Don’t forget about lids! Make sure your containers have tight-fitting lids to prevent spills, contamination, and dehydration. Lids also allow you to stack containers more securely, maximizing vertical space. And, for goodness sake, ditch the cardboard boxes! Cardboard absorbs moisture and can harbor bacteria. Transfer items from cardboard boxes to your designated containers as soon as they arrive.
4. Inventory Management: Knowing What You Have
A beautifully organized walk-in cooler is useless if you don’t know what’s inside. Effective inventory management is the cornerstone of a well-run kitchen. It reduces food waste, prevents over-ordering, and ensures that you always have the ingredients you need on hand. There are several ways to approach inventory management, from simple pen-and-paper systems to sophisticated software solutions. The key is to find a system that works for your restaurant and your team.
A basic inventory system involves creating a list of all the items in your walk-in cooler, along with their quantities and expiration dates. This list should be updated regularly, ideally daily or at least weekly. You can use a spreadsheet, a dedicated inventory management app, or even a simple whiteboard. The important thing is to be consistent and to track everything that comes in and goes out.
More advanced inventory management systems can integrate with your point-of-sale (POS) system to automatically track inventory levels and generate purchase orders. This can save a significant amount of time and reduce the risk of human error. However, these systems can be expensive and may not be necessary for smaller restaurants. A simpler, more manual system can be just as effective if it’s implemented consistently and diligently.
Regardless of the system you choose, regular physical inventory counts are essential. This involves physically counting every item in your walk-in cooler and comparing the counts to your inventory records. This helps you identify discrepancies, track down missing items, and ensure that your records are accurate. Physical inventory counts should be done at least monthly, and more frequently for high-volume restaurants. I find it helpful to designate a specific day and time for inventory counts and to assign responsibility to a specific team member. This ensures that it gets done consistently.
5. Temperature Monitoring: Maintaining the Cold Chain
Maintaining the correct temperature in your walk-in cooler is critical for food safety and quality. The ideal temperature range for most walk-in coolers is between 34°F and 38°F (1°C and 3°C). Temperatures above 40°F (4°C) can allow bacteria to grow rapidly, increasing the risk of foodborne illness. Temperatures below 32°F (0°C) can cause some items to freeze, damaging their quality and texture.
Regular temperature monitoring is essential. Install a reliable thermometer inside your walk-in cooler and check it at least twice a day, ideally more often. Record the temperature readings in a logbook or spreadsheet. This helps you identify any temperature fluctuations and take corrective action before they become a problem. Some walk-in coolers have built-in temperature monitoring systems that automatically record temperatures and send alerts if the temperature goes outside the safe range.
Be aware of potential temperature variations within your walk-in cooler. The area near the door is often warmer than the back of the cooler. Store items that are more sensitive to temperature fluctuations, like dairy and seafood, in the coldest part of the cooler. Also, make sure your walk-in cooler’s door seals are in good condition. Damaged seals can allow cold air to escape, leading to temperature fluctuations and increased energy costs. Regularly inspect the seals and replace them if necessary.
Finally, don’t overload your walk-in cooler. Overloading can restrict airflow and make it difficult for the cooler to maintain a consistent temperature. It can also put a strain on the cooling system, leading to premature failure. If you find that your walk-in cooler is consistently overloaded, you may need to consider expanding your storage capacity or adjusting your ordering practices. It’s a balancing act, but maintaining the right temperature is paramount.
6. Cleaning Schedule: A Non-Negotiable Routine
A clean walk-in cooler is a safe and efficient walk-in cooler. A regular cleaning schedule is absolutely non-negotiable. It’s not just about aesthetics; it’s about preventing contamination, controlling odors, and extending the life of your equipment. A dirty walk-in cooler can harbor bacteria, mold, and other nasty things that can contaminate your food and make your staff sick.
Establish a daily, weekly, and monthly cleaning schedule. Daily tasks should include wiping up spills, sweeping the floor, and checking for any signs of spoilage. Weekly tasks should include cleaning the shelves, walls, and door seals. Monthly tasks should include a more thorough cleaning, including defrosting the evaporator coils (if necessary) and cleaning the condenser coils. You might also want to consider a quarterly deep clean, where you remove everything from the cooler and clean it from top to bottom.
Use appropriate cleaning products that are safe for food contact surfaces. Avoid using harsh chemicals or abrasive cleaners that can damage the cooler’s interior. Follow the manufacturer’s instructions for cleaning and maintenance. And, please, train your staff on proper cleaning procedures! Everyone who works in the kitchen should be responsible for keeping the walk-in cooler clean. It’s a team effort.
One often-overlooked area is the drain. Make sure the drain is clear and free of debris. A clogged drain can lead to standing water, which can create a breeding ground for bacteria and mold. Regularly flush the drain with hot water and a mild detergent. It’s a small detail, but it can make a big difference in maintaining a clean and sanitary walk-in cooler.
7. Cross-Contamination Prevention: A Critical Focus
Cross-contamination is a major concern in any commercial kitchen, and the walk-in cooler is no exception. Cross-contamination occurs when bacteria or other harmful microorganisms are transferred from one food item to another. This can happen through direct contact, dripping liquids, or improper storage practices. Preventing cross-contamination is essential for food safety and protecting your customers from foodborne illness.
The most important rule is to store raw meat, poultry, and seafood below ready-to-eat foods. This prevents any juices from dripping onto foods that won’t be cooked. Use separate containers for raw and cooked foods, and never store them together. Ideally, you should have designated shelves or zones for raw and cooked items. This minimizes the risk of accidental contact.
Properly wrap and seal all food items. This not only prevents cross-contamination but also helps to maintain freshness and prevent dehydration. Use airtight containers or wrap items tightly in plastic wrap or foil. Label everything clearly, including the date, to avoid confusion. And, again, ditch the cardboard boxes! Cardboard can absorb moisture and harbor bacteria, increasing the risk of cross-contamination.
Train your staff on proper food handling procedures, including handwashing, glove use, and proper storage techniques. Emphasize the importance of preventing cross-contamination and make it a regular part of your kitchen’s culture. Regular reminders and refresher training can help to reinforce these important practices. It’s a constant effort, but it’s absolutely crucial for maintaining a safe and healthy kitchen environment.
8. Lighting: Illuminating Efficiency
Good lighting might seem like a minor detail, but it can make a huge difference in the efficiency and safety of your walk-in cooler. A well-lit cooler makes it easier to find what you need, reduces the risk of accidents, and helps you spot any potential problems, like spills or spoilage. If you’re fumbling around in a dimly lit cooler, you’re more likely to make mistakes, waste time, and potentially injure yourself.
Make sure your walk-in cooler has adequate lighting that illuminates all areas, including the corners and shelves. If the existing lighting is insufficient, consider adding additional fixtures. LED lighting is a good option for walk-in coolers because it’s energy-efficient, long-lasting, and produces minimal heat. This helps to keep the cooler’s temperature stable and reduces your energy costs.
Ensure that the light fixtures are properly shielded and protected from moisture. Walk-in coolers are damp environments, and exposed light bulbs can be a safety hazard. Use fixtures that are specifically designed for use in damp locations. Regularly check the light bulbs and replace them as needed. A burned-out bulb can significantly reduce visibility and make it difficult to work safely.
Consider installing motion-sensor lighting. This can save energy by automatically turning the lights on when someone enters the cooler and turning them off when they leave. It’s a convenient and efficient solution, especially for busy kitchens where the cooler door is constantly being opened and closed. It’s a small upgrade that can make a big difference in the overall functionality of your walk-in.
9. Staff Training: Empowering Your Team
All the organization systems in the world won’t be effective if your staff isn’t properly trained. Staff training is the key to maintaining a well-organized and efficient walk-in cooler. Everyone who works in the kitchen, from the chefs to the dishwashers, should understand the importance of proper storage, inventory management, and cleaning procedures. They should be able to follow the system you’ve put in place and contribute to maintaining order.
Develop a comprehensive training program that covers all aspects of walk-in cooler management. This should include hands-on training, demonstrations, and written materials. Explain the reasoning behind your systems and procedures, not just the rules themselves. When people understand *why* something is important, they’re more likely to follow through. For example, explaining the science behind FIFO and cross-contamination makes a huge difference.
Provide regular refresher training to reinforce these practices and address any questions or concerns. Make walk-in cooler management a regular topic of discussion in your team meetings. Encourage feedback from your staff and be open to suggestions for improvement. It’s a collaborative effort, and everyone’s input is valuable. I’ve found that creating a sense of shared responsibility is key to long-term success. It feels less like a chore when people are taking ownership.
Consider creating a checklist or a visual guide that outlines the key steps in your walk-in cooler procedures. This can be posted inside the cooler as a reminder for staff. Make it easy to follow and visually appealing. And, most importantly, lead by example! If you consistently follow the procedures yourself, your staff is more likely to do the same.
10. Regular Audits: Maintaining the System
Even the best-laid plans can go awry if they’re not regularly monitored and evaluated. Regular audits are essential for maintaining your walk-in cooler organization system and identifying any areas that need improvement. Think of it as a quality control check for your cooler. It’s not about finding fault; it’s about ensuring that your system is working effectively and making adjustments as needed.
Conduct audits on a regular basis, ideally weekly or bi-weekly. Use a checklist to evaluate different aspects of your walk-in cooler, such as: Is FIFO being followed? Are items properly labeled and stored? Is the temperature within the safe range? Is the cooler clean and organized? Are there any signs of spoilage or damage? This gives you hard data, not just feelings.
Involve your staff in the audit process. This can help to create a sense of ownership and accountability. Assign different team members to conduct audits on a rotating basis. This not only distributes the workload but also provides a fresh perspective. Different people will notice different things. I had a line cook once who had an eagle eye for outdated produce – saved us a ton of waste.
Document the results of your audits and track any trends or recurring issues. This helps you identify areas that need more attention or training. Use the audit findings to make adjustments to your system, update your training materials, or address any equipment problems. It’s a continuous process of improvement. And remember, the goal is not perfection; it’s progress. Every small improvement you make contributes to a more efficient and effective kitchen.
Staying Cool Under Pressure: Final Thoughts
Organizing your walk-in cooler is an ongoing process, not a one-time project. It requires consistent effort, attention to detail, and a commitment from your entire team. But the rewards are well worth the effort. A well-organized walk-in cooler saves time, reduces food waste, improves food safety, and ultimately, boosts your bottom line. It creates a more efficient and less stressful work environment for your staff, which translates to better food and better service for your customers. It’s a win-win situation.
So, I challenge you to take a hard look at your own walk-in cooler. What can you improve? What small changes can you make today that will have a big impact tomorrow? Don’t be afraid to experiment, to try new things, and to adapt your system as your needs change. The key is to find what works best for your restaurant and your team. And remember, I’m here cheering you on! A well-organized walk-in is a sign of a well-run kitchen, and it’s a goal that’s absolutely within your reach. It may not be glamorous, but it’s one of the most important things you can do to ensure your restaurant’s success. And, who knows, you might even inspire your own rescue cat (or dog!) with your newfound organizational prowess.
Ultimately, the pursuit of a perfect walk-in is, like most things in the restaurant industry, a journey, not a destination. Are we ever truly *done* optimizing? Probably not. But that’s part of the fun, right? The constant striving for improvement, the small victories, the lessons learned from the inevitable mishaps. It’s all part of the beautiful, chaotic, and ultimately rewarding world of running a restaurant.
FAQ
Q: What’s the single most important thing I can do to improve my walk-in cooler organization?
A: Implement a strict FIFO (First In, First Out) system. This means ensuring that older items are used before newer items, which minimizes food waste and ensures freshness.
Q: How often should I clean my walk-in cooler?
A: You should have a daily, weekly, and monthly cleaning schedule. Daily tasks include wiping spills and sweeping. Weekly tasks include cleaning shelves and walls. Monthly tasks include a more thorough cleaning, including defrosting and cleaning coils.
Q: What’s the ideal temperature for a walk-in cooler?
A: The ideal temperature range is between 34°F and 38°F (1°C and 3°C). Regular temperature monitoring is crucial.
Q: How can I prevent cross-contamination in my walk-in cooler?
A: Store raw meat, poultry, and seafood *below* ready-to-eat foods. Use separate, sealed containers for raw and cooked items, and label everything clearly.
You Might Also Like
@article{walk-in-cooler-organization-sanity-saving-restaurant-tips,
    title   = {Walk-In Cooler Organization: Sanity-Saving Restaurant Tips},
    author  = {Chef's icon},
    year    = {2025},
    journal = {Chef's Icon},
    url     = {https://chefsicon.com/walk-in-cooler-organization-tips-for-restaurants/}
}