The Best Fluffy Pancakes recipe you will fall in love with. Full of tips and tricks to help you make the best pancakes.
Table of Contents
If you’re in the foodservice industry, you know that refrigeration is the backbone of your kitchen. But when it comes to choosing between a walk-in cooler and a reach-in refrigerator, things can get a bit confusing. I’ve been there, standing in the midst of a bustling kitchen, wondering which would be the better fit. Let’s dive into the nitty-gritty of each, weigh the pros and cons, and figure out which one is right for your business.
A few years back, when I moved to Nashville and started working remotely, I found myself advising a friend on setting up his new restaurant. The question of walk-in cooler vs. reach-in refrigerator came up, and it was a bit of a head-scratcher. But after some research and real-world experience, I’ve got a clearer picture. So, let’s break it down.
Understanding the Basics
What is a Walk-In Cooler?
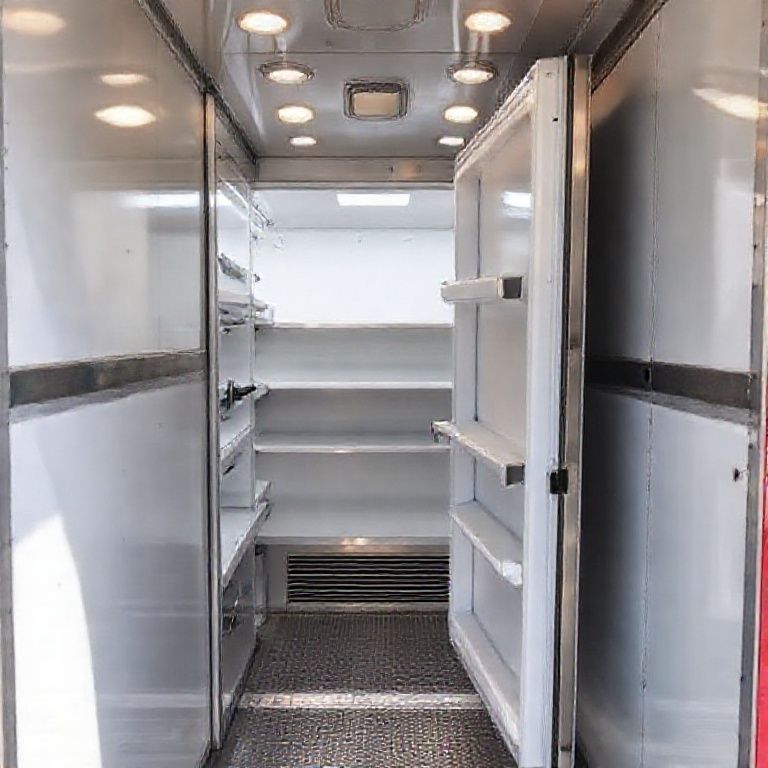
A walk-in cooler is essentially a large, refrigerated room. It’s designed for high-volume storage, making it ideal for restaurants, cafeterias, and other foodservice operations that need to keep a lot of perishable items fresh. These coolers come in various sizes and can be customized to fit specific needs. Companies like Chef’s Deal offer comprehensive kitchen design services that can help you figure out the best layout for your walk-in cooler.
What is a Reach-In Refrigerator?
A reach-in refrigerator, on the other hand, is a standalone unit that you can, well, reach into. It’s smaller and more compact, perfect for smaller operations or for supplementing a walk-in cooler. Reach-in refrigerators are typically used for storing items that need to be accessed frequently.
Space and Capacity
Walk-In Cooler
When it comes to capacity, walk-in coolers are the clear winners. They can hold a massive amount of food, making them ideal for large-scale operations. However, they do require a significant amount of space. If you’re working with a smaller kitchen, a walk-in cooler might not be feasible.
But here’s where it gets interesting. With the right design, a walk-in cooler can actually help you optimize your space. For instance, Chef’s Deal offers free kitchen design services that can help you integrate a walk-in cooler into your layout seamlessly. So, while it takes up more space, it can also make your kitchen more efficient.
Reach-In Refrigerator
Reach-in refrigerators are much smaller and can fit into tighter spaces. They’re great for smaller kitchens or for supplementing a walk-in cooler. However, their capacity is limited, so they might not be suitable for high-volume operations.
I’ve seen some really creative uses of reach-in refrigerators. For example, a local café here in Nashville uses them to store their daily specials right by the prep station. It’s a great way to keep things organized and within reach.
Energy Efficiency
Walk-In Cooler
Walk-in coolers generally consume more energy than reach-in refrigerators. They have to maintain a consistent temperature over a larger area, which requires more power. However, modern walk-in coolers are designed with energy efficiency in mind. Features like better insulation and advanced refrigeration systems can help reduce energy consumption.
Is this the best approach? Let’s consider the long-term benefits. While the initial investment in a high-efficiency walk-in cooler might be higher, the savings on energy bills can add up over time. Plus, with professional installation services from suppliers like Chef’s Deal, you can ensure that your cooler is running at peak efficiency.
Reach-In Refrigerator
Reach-in refrigerators are typically more energy-efficient due to their smaller size. They require less power to maintain the desired temperature. However, if you need multiple reach-in refrigerators to meet your storage needs, the energy savings might not be as significant.
It’s a bit of a trade-off, isn’t it? You save on space and initial cost with reach-in refrigerators, but you might end up using more energy if you need several units.
Accessibility and Organization
Walk-In Cooler
Walk-in coolers offer excellent accessibility and organization. You can walk in, see everything at a glance, and organize your inventory efficiently. This makes it easier to rotate stock and ensure that nothing goes to waste.
I’m torn between the convenience of a walk-in cooler and the space-saving benefits of a reach-in refrigerator, but ultimately, the ability to see and access everything at once is a huge advantage in a busy kitchen.
Reach-In Refrigerator
Reach-in refrigerators are less accessible simply because you can’t see everything at once. You have to open the doors and dig around to find what you need. This can lead to disorganization and wasted time.
Maybe I should clarify that this doesn’t mean reach-in refrigerators are a bad choice. They’re perfect for smaller operations or for storing frequently used items. It’s all about finding the right balance for your needs.
Cost Considerations
Walk-In Cooler
Walk-in coolers are generally more expensive than reach-in refrigerators. The cost includes not just the unit itself, but also installation and possibly customization. However, suppliers like Chef’s Deal offer competitive pricing and financing options that can make the investment more manageable.
When you factor in the long-term benefits, such as improved organization and potential energy savings, the higher initial cost might be worth it.
Reach-In Refrigerator
Reach-in refrigerators are more affordable upfront. They’re a great option if you’re on a tight budget or if you only need to store a small amount of food. Plus, they’re easier to install and don’t require as much customization.
But here’s the thing: if you end up needing multiple reach-in refrigerators, the costs can add up. So, while they’re cheaper initially, they might not be the most cost-effective solution in the long run.
Maintenance and Upkeep
Walk-In Cooler
Walk-in coolers require regular maintenance to keep them running smoothly. This includes cleaning, checking the refrigeration system, and ensuring the doors seal properly. Suppliers like Chef’s Deal offer expert consultation and support, which can be invaluable for keeping your cooler in top condition.
It’s a bit of a commitment, but with the right support, maintaining a walk-in cooler doesn’t have to be a headache.
Reach-In Refrigerator
Reach-in refrigerators are generally easier to maintain. They’re smaller, so cleaning and checking the system is less of a hassle. However, they still require regular upkeep to ensure they’re running efficiently.
I’ve found that the key to maintaining any refrigeration unit is consistency. Regular cleaning and checks can prevent small issues from becoming big problems.
Environmental Impact
Walk-In Cooler
Walk-in coolers have a larger environmental impact due to their size and energy consumption. However, modern units are designed to be more eco-friendly, with features like better insulation and advanced refrigeration systems.
Is this enough to offset the impact? It’s a tough question. While modern walk-in coolers are more efficient, they still consume a significant amount of energy.
Reach-In Refrigerator
Reach-in refrigerators are generally more eco-friendly due to their smaller size and lower energy consumption. However, if you need multiple units, the environmental impact can add up.
It’s a complex issue, and there’s no easy answer. Ultimately, the best choice depends on your specific needs and circumstances.
Special Features and Customization
Walk-In Cooler
One of the big advantages of walk-in coolers is their customizability. You can design them to fit your specific needs, whether that’s adding shelves, racks, or even separate compartments for different types of food.
Companies like Chef’s Deal offer comprehensive kitchen design and equipment solutions, which can be a huge help when you’re trying to figure out the best layout for your cooler.
Reach-In Refrigerator
Reach-in refrigerators are less customizable, but they do come with a variety of features that can make them more versatile. For example, some models have adjustable shelves, while others have glass doors that make it easier to see what’s inside.
It’s all about finding the right balance between features and functionality. What works for one kitchen might not work for another, so it’s important to consider your specific needs.
Conclusion: Making the Right Choice
So, which is the better choice: walk-in cooler or reach-in refrigerator? Well, it depends. Both have their advantages and disadvantages, and the best choice ultimately depends on your specific needs and circumstances.
If you’re running a large-scale operation and need to store a lot of food, a walk-in cooler is probably the way to go. It offers more capacity, better organization, and can be customized to fit your needs. Plus, with the right design and installation, it can actually help you optimize your space.
On the other hand, if you’re working with a smaller kitchen or a tighter budget, a reach-in refrigerator might be the better choice. It’s more affordable, easier to install, and can fit into tighter spaces. Just keep in mind that you might need multiple units to meet your storage needs, which can add up in terms of cost and energy consumption.
Ultimately, the best way to make a decision is to consider your specific needs and circumstances. Think about your budget, your space, and your storage needs. And don’t be afraid to seek out expert consultation and support. Companies like Chef’s Deal can be a huge help in figuring out the best solution for your kitchen.
FAQ
Q: What is the main difference between a walk-in cooler and a reach-in refrigerator?
A: The main difference is size and capacity. A walk-in cooler is a large, refrigerated room designed for high-volume storage, while a reach-in refrigerator is a smaller, standalone unit designed for easy access to frequently used items.
Q: Which is more energy-efficient: a walk-in cooler or a reach-in refrigerator?
A: Generally, reach-in refrigerators are more energy-efficient due to their smaller size. However, modern walk-in coolers are designed with energy efficiency in mind, so the difference might not be as significant as you think.
Q: Is a walk-in cooler or a reach-in refrigerator better for a small kitchen?
A: A reach-in refrigerator is typically better for a small kitchen due to its smaller size and ease of installation. However, if you have the space and need the extra storage, a walk-in cooler can be a good investment.
Q: How can I maintain my walk-in cooler or reach-in refrigerator?
A: Regular cleaning and maintenance are key. For walk-in coolers, this includes checking the refrigeration system and ensuring the doors seal properly. For reach-in refrigerators, it’s important to clean the unit regularly and check for any signs of wear and tear.
@article{walk-in-cooler-vs-reach-in-refrigerator-a-comprehensive-guide,
    title   = {Walk-In Cooler vs. Reach-In Refrigerator: A Comprehensive Guide},
    author  = {Chef's icon},
    year    = {2025},
    journal = {Chef's Icon},
    url     = {https://chefsicon.com/walk-in-cooler-vs-reach-in-refrigerator/}
}