
Table of Contents
- 1 Unpacking Kitchen Workflow: The Core Concepts
- 1.1 1. The Classic Work Triangle: Still Relevant?
- 1.2 2. Zoning Your Kitchen: Beyond the Triangle
- 1.3 3. Optimizing Traffic Flow: Avoiding Kitchen Collisions
- 1.4 4. Landing Zones: The Unsung Heroes
- 1.5 5. Vertical Space & Smart Storage: Thinking Upwards
- 1.6 6. Appliance Placement: Function Over Form (Mostly)
- 1.7 7. Lighting: Illuminating Your Workflow
- 1.8 8. Small Kitchen Solutions: Efficiency in Tight Spaces
- 1.9 9. Ergonomics and Accessibility: Designing for Humans
- 1.10 10. Maintenance and Cleaning: Designing for Ease
- 2 Bringing It All Together: Your Kitchen’s Flow State
- 3 FAQ
Okay, let’s talk kitchens. Not the glossy magazine kind (though those are nice to look at), but the real, working heart of the home. Or, if you’re in the biz, the engine room of a restaurant. I spend a *lot* of time thinking about flow and efficiency – blame the marketing background, maybe? It’s all systems and processes when you boil it down. Whether it’s a campaign launch or just making dinner after a long day working from home here in Nashville, how things are arranged fundamentally changes the experience. Poor workflow in the kitchen? It’s not just annoying; it’s wasted time, extra steps, maybe even burnt garlic. And nobody wants burnt garlic.
I remember my first apartment kitchen back in the Bay Area. Tiny doesn’t even begin to cover it. It was more like a kitchen suggestion. Everything was crammed in, the fridge door blocked the pantry, the counter space was basically non-existent. Making anything more complicated than toast felt like a strategic military operation. It forced me to get *really* creative with space, but mostly it was just frustrating. Now, my Nashville place has a bit more room, thank goodness, but the principles of optimizing kitchen workflow and layout remain the same, regardless of size. It’s about making the space work *for* you, not against you. Luna, my cat, seems to understand flow perfectly – she always finds the most inconvenient spot right under my feet. Maybe I need to optimize her workflow too.
So, what are we actually talking about here? We’re diving deep into how to arrange your kitchen – whether it’s at home or a professional setup – to make cooking, prepping, and cleaning smoother, faster, and frankly, more enjoyable. We’ll look at classic concepts, maybe question some of them (because why not?), and explore practical tips you can actually use. This isn’t about needing a total gut renovation (unless you want one!), but about understanding the logic behind efficient layouts and applying it where you can. It’s about minimizing those frantic dashes across the room because you forgot the salt or can’t find the right pan. Let’s make your kitchen a place of calm, productive energy, not chaos. Sound good? Let’s get into it.
Unpacking Kitchen Workflow: The Core Concepts
1. The Classic Work Triangle: Still Relevant?
Ah, the kitchen work triangle. You’ve probably heard of it. It’s the conceptual triangle connecting the three main work areas: the sink, the refrigerator, and the stove (or cooktop/oven). The idea, born in the 1940s, was to minimize travel distance between these key points, making cooking more efficient. Typically, the sum of the three sides shouldn’t be less than 12 feet or more than 26 feet, with each leg between 4 and 9 feet. Does it still hold up today? Mostly, yes. It’s a solid starting point for thinking about layout, especially in traditionally shaped kitchens. Having these core functions within easy reach undeniably reduces steps and saves time. Think about how often you move between grabbing ingredients from the fridge, rinsing them at the sink, and putting them on the stove. It’s a constant dance.
However, modern kitchens often have more ‘zones’ and appliances than just these three. We might have dedicated baking stations, coffee bars, multiple sinks, or islands with prep sinks and cooktops. So, is the triangle the *only* way? Maybe not. I sometimes think the concept feels a bit… rigid? For larger kitchens or layouts with islands, the triangle can become stretched or obstructed. And what about galley kitchens, which are inherently linear? The triangle concept doesn’t neatly apply there. So, while it’s a fundamental principle and a great guideline for basic efficiency, don’t treat it as unbreakable gospel. Think of it more as a foundational idea to build upon or adapt. The core principle – minimizing travel between key tasks – remains absolutely crucial, even if the shape isn’t a perfect triangle. We need to consider workflow patterns specific to how *we* cook.
2. Zoning Your Kitchen: Beyond the Triangle
This brings me to the idea of kitchen zones. Instead of just focusing on the Big Three (sink, stove, fridge), think about grouping items and space according to task. This feels more intuitive for how we actually use kitchens today, I think. You might have:
- Prep Zone: Ideally located between the sink and stove, with ample counter space, cutting boards, knives, mixing bowls, maybe near the trash/compost. This is where the main action of chopping, mixing, and assembling happens.
- Cooking Zone: Centered around the stove/oven/cooktop. Keep pots, pans, cooking utensils, spices, oils, and pot holders nearby. Good ventilation is key here too.
- Cleaning Zone: Around the sink and dishwasher. Store cleaning supplies, dish soap, sponges, dish towels, and have easy access to the trash and recycling bins. A drying rack or space should be integrated.
- Storage Zone(s): This includes the refrigerator/freezer (consumables) and pantry/cabinets (non-perishables, dishes, glassware, small appliances). Think about grouping items logically – everyday dishes near the dishwasher, glasses near the sink or fridge, bakeware together.
- Optional Zones: Depending on your habits, you might add a baking zone (mixer, baking sheets, ingredients), a coffee/beverage station, or even a dedicated homework/admin spot if it’s a family kitchen.
Defining these zones helps you organize storage logically and ensures that everything you need for a specific task is within easy reach. It transforms the kitchen from a collection of appliances and cabinets into a series of functional workstations. This approach is much more flexible than the rigid work triangle and adapts better to different kitchen shapes and sizes, especially larger ones or those with islands. It’s about creating efficient micro-workflows within the larger kitchen system. Doesn’t that just make sense? Grouping things by task reduces searching and running around. It’s like organizing your desk – everything has a place related to its function.
3. Optimizing Traffic Flow: Avoiding Kitchen Collisions
Ever try to open the dishwasher while someone else is trying to get into the fridge, and suddenly you’re playing a game of human Tetris? Yeah, me too. Poor traffic flow is a major source of kitchen inefficiency and frustration, especially if multiple people use the space simultaneously. A good layout anticipates movement patterns and minimizes congestion. Key pathways, like the route between the sink, fridge, and stove (hello again, work triangle!), should be clear and unobstructed. Ideally, main traffic lanes should be at least 42 inches wide for one cook, and 48 inches wide for two cooks. This allows people to pass each other without bumping and ensures appliance doors (oven, dishwasher, fridge) can be opened without blocking the entire path.
Think about the journey food takes: from storage (fridge/pantry) to prep area, to cooking zone, and finally to the table or plating area. Then consider the cleanup path: table to sink/dishwasher. Try to arrange your zones and appliances to support this natural flow without unnecessary backtracking or crisscrossing paths. Islands can be tricky – they can improve workflow by adding counter space and storage, but if placed poorly, they become major obstacles. Ensure there’s adequate clearance all around the island. Also, consider the kitchen’s relationship to adjacent rooms. If it opens into a dining area or family room, try to keep the main cooking action slightly separated from the main household traffic patterns. You don’t want kids or pets constantly running through the hot zone. Planning for unobstructed movement is as critical as placing the appliances correctly.
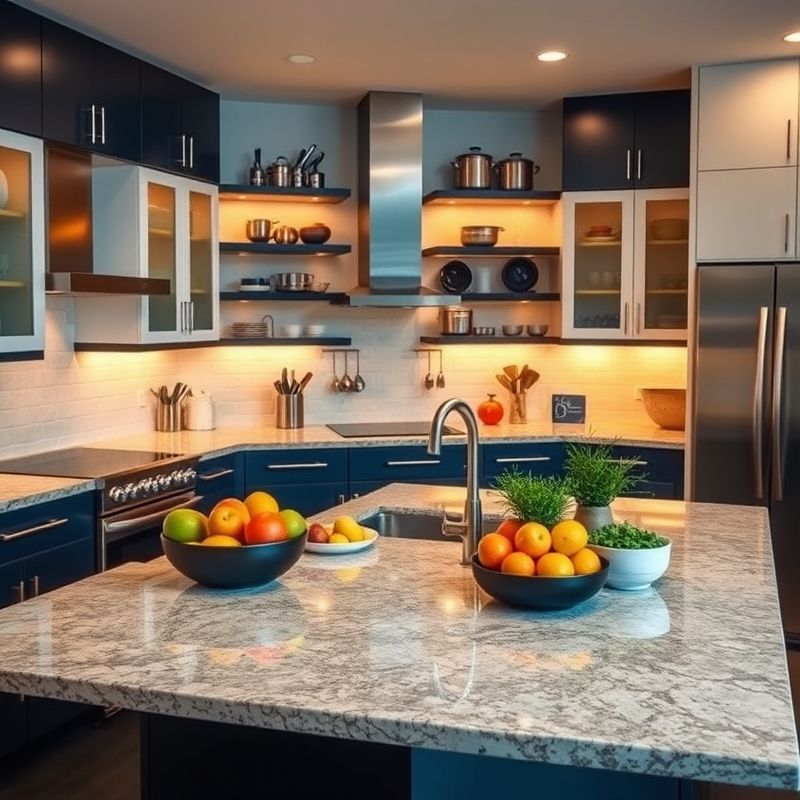
4. Landing Zones: The Unsung Heroes
What’s a landing zone? It’s a designated spot of heat-resistant countertop space next to key appliances where you can safely place items you’re taking out. Think about it: where do you put a hot dish coming out of the oven? Groceries going into the fridge? Items waiting to be washed next to the sink? Without clear landing zones, you end up juggling hot pans, precariously balancing items, or walking further than necessary. It’s a safety issue as much as an efficiency one.
Here are some essential landing zones to plan for:
- Next to the Stove/Cooktop: At least 12-15 inches of clear counter space to place hot pots and pans, or ingredients waiting to go in.
- Next to the Oven: Similar to the cooktop, you need about 15 inches beside or above the oven (if it’s wall-mounted) for hot dishes.
- Next to the Refrigerator: Ideally on the handle side, provide 15 inches of counter space for loading/unloading groceries or assembling items from the fridge.
- Next to the Microwave: Again, about 15 inches is helpful for placing dishes before and after heating.
- Around the Sink: Space on both sides is ideal – one side for dirty dishes waiting to be washed, the other for clean items or draining.
These aren’t just random patches of counter; they are crucial transition points in your workflow. Ensuring you have adequate appliance adjacency space makes tasks smoother and safer. It seems obvious, but it’s amazing how often these crucial spots are overlooked in kitchen designs, leading to awkward shuffling and potential spills or burns. It’s a small detail that makes a huge difference in daily use.
5. Vertical Space & Smart Storage: Thinking Upwards
Counter space is prime real estate, but don’t forget the space above and below! Vertical space utilization is key, especially in smaller kitchens. Think tall pantry cabinets reaching the ceiling, tiered shelves inside cabinets, wall-mounted racks for spices or knives, pot racks hanging from the ceiling or wall. Inside cabinets and drawers, organizers are your best friend. Drawer dividers for utensils and cutlery, pull-out shelves for pots and pans (no more digging in the back!), tiered risers for spices or cans – these make items more visible and accessible.
Consider storing frequently used items in the most accessible locations – typically between shoulder and knee height. Heavier items like stand mixers or large pots are best stored lower down, while lighter, less frequently used items can go on higher shelves. Think about decanting dry goods like flour, sugar, pasta, and grains into clear, stackable containers. This not only looks tidy but also lets you see at a glance what you have and makes accessing them easier than wrestling with floppy bags. Maximizing storage efficiency isn’t just about cramming more stuff in; it’s about organizing it so you can find and reach what you need quickly and easily. It directly impacts your prep and cooking time. Every second saved not searching for the paprika is a win!
6. Appliance Placement: Function Over Form (Mostly)
Where you put your appliances significantly impacts workflow. We’ve talked about the work triangle and landing zones, but there are other considerations. The dishwasher is almost always best placed right next to the sink – usually to the right or left depending on whether you’re right- or left-handed and your counter layout. This minimizes drips and makes loading scraped plates much easier. The microwave placement is often debated. Above the range? Convenient for venting (if it’s a combo unit) but can be awkward or unsafe to reach into, especially with hot liquids. On the counter? Takes up valuable prep space. Built into a cabinet or island? Often a great compromise, keeping it accessible but out of the main prep area.
Think about the sequence of tasks. For example, placing the trash and recycling near the sink and primary prep area makes sense for clearing scraps and packaging. Wall ovens offer flexibility in placement – they can be installed at a more ergonomic height than the oven under a range, reducing bending. However, ensure you have that crucial landing zone nearby. Sometimes, optimal appliance positioning might mean deviating slightly from perfect symmetry or a specific aesthetic. While looks matter, prioritize function for a kitchen that truly works. An awkward but beautiful kitchen is still awkward. Is this the best approach? I lean towards function, but a good designer can usually find a way to make it look good too. It’s a balance, isn’t it?
7. Lighting: Illuminating Your Workflow
Never underestimate the power of good lighting in a kitchen. Poor lighting can make prep work difficult and even dangerous (hello, finger!), and it just makes the space feel gloomy. A good lighting plan involves multiple layers. First, you need bright, focused task lighting directly over your main work areas: the prep zone counter, the sink, and the cooktop. Under-cabinet lighting is fantastic for illuminating countertops shadowed by upper cabinets. Pendant lights over an island or peninsula can provide both task and ambient light. Recessed ceiling lights can provide good overall ambient lighting for the entire room.
Consider adding dimmer switches to control the mood and intensity. Bright light is needed for chopping and cooking, but you might want softer light for dining or relaxing in the kitchen space. Natural light is also a huge plus, so maximize window access if possible. Don’t rely on a single overhead fixture – it often creates shadows exactly where you need to see. Proper illumination makes the kitchen safer, more functional, and frankly, a more pleasant place to be. It directly supports efficiency by ensuring you can clearly see what you’re doing, reducing mistakes and eye strain. It’s an often-overlooked aspect of workflow design but absolutely critical.
8. Small Kitchen Solutions: Efficiency in Tight Spaces
Working with a small kitchen, like my old Bay Area spot? Efficiency isn’t just nice, it’s essential. You have to be ruthless about clutter and smart about layout. We’ve already touched on some key strategies: maximizing vertical space is paramount. Use wall space for magnetic knife strips, spice racks, pot rails. Choose appliances wisely – maybe a smaller fridge, an 18-inch dishwasher, or a cooktop instead of a full range if oven use is infrequent. Look for multi-functional items: an over-the-sink cutting board adds prep space, a microwave cart can provide storage and a surface.
Keep countertops as clear as possible. Only essential daily-use items should live there. Everything else needs a designated storage spot. Consider reflective surfaces like glossy tiles or cabinet finishes, and light colors to make the space feel larger and brighter. A pull-out pantry cabinet, though narrow, can store a surprising amount. Drop-leaf tables or fold-down counters can provide extra workspace when needed and fold away when not. In a small kitchen, every inch counts, and space-saving strategies force you to be incredibly intentional about workflow. It’s about paring down to the essentials and making every element work hard.
9. Ergonomics and Accessibility: Designing for Humans
An efficient kitchen is also one that’s comfortable and safe to work in. Kitchen ergonomics considers how the design fits the human body to reduce strain and risk of injury. Countertop height is a big one. Standard height is 36 inches, but this might not be ideal for everyone. If possible, varying counter heights (e.g., a lower section for baking/kneading, around 30-34 inches) can be beneficial. Consider reach distances – frequently used items shouldn’t require excessive bending or stretching. Heavy items are best stored between knee and shoulder height.
Accessibility is also crucial, especially if designing for people with mobility issues or for aging in place. Wider pathways (48 inches+), lower counters or pull-out work surfaces, accessible storage (pull-down shelves, drawers instead of base cabinets), lever-style faucet handles, and side-opening ovens can make a huge difference. Even if these aren’t immediate needs, incorporating principles of universal design can make the kitchen more comfortable for everyone and add long-term value. Thinking about how bodies interact with the space prevents fatigue and makes kitchen tasks less of a chore. It’s about human-centered design, not just appliance arrangement.
10. Maintenance and Cleaning: Designing for Ease
Finally, let’s not forget cleanup. An efficient kitchen should also be relatively easy to clean and maintain. Material choices play a role here. Non-porous countertop materials like quartz or stainless steel are generally easier to wipe down and keep sanitary than, say, tile with grout lines. Seamless backsplashes are easier than tiled ones. Flooring should be durable and water-resistant. Consider the placement of trash and recycling – making disposal convenient encourages tidiness during the cooking process.
Layout impacts cleaning too. Avoid awkward corners or tight spaces where dirt and grime can accumulate. Ensure you can easily reach behind appliances like the stove or fridge for occasional deep cleaning (or choose integrated appliances for a seamless look). Open shelving looks great but requires more frequent dusting than closed cabinets. Thinking about ease of maintenance during the design phase saves time and effort down the line. A kitchen that’s easy to clean up encourages you to cook more often, completing the cycle of efficiency!
Bringing It All Together: Your Kitchen’s Flow State
So, we’ve journeyed through the work triangle, zones, traffic flow, landing spots, storage, lighting, and even the nitty-gritty of ergonomics and cleaning. It’s a lot to consider, I know. Optimizing kitchen workflow isn’t about achieving some mythical state of perfection, because let’s be real, life (and cooking) is messy sometimes. Luna shedding on the floor I just swept is proof enough of that. It’s really about intentionality. It’s about looking at your space, understanding how *you* use it, and making deliberate choices to reduce friction and frustration.
Maybe the biggest takeaway is that there’s no single ‘right’ layout. The hyper-efficient setup for a professional chef might feel sterile and impractical for a busy family. The ideal layout for someone who bakes constantly will differ from someone who primarily uses the microwave. The key is to analyze your own patterns, identify your pain points (where do things get bottlenecked? what task always feels awkward?), and apply the principles we’ve discussed – zoning, flow, accessibility – to *your* specific context. Even small changes, like reorganizing a cabinet or adding under-cabinet lights, can make a noticeable difference in your daily routine.
I challenge you to just observe yourself the next time you’re making a meal. How many steps do you take between the fridge and the counter? Where do you instinctively want to put down that hot pan? Are you constantly bumping into someone? Maybe sketch out your current layout and trace your common paths. Seeing it visually can be really illuminating. Is optimizing your kitchen workflow the ultimate key to happiness? Probably not. But can it make daily life a little smoother, a little less stressful, and maybe even free up a few extra minutes to enjoy your meal or pet your cat? I definitely think so. What’s one small change you could make this week to improve your kitchen’s flow?
FAQ
Q: What is the most important factor in kitchen workflow efficiency?
A: It’s hard to pick just one! But arguably, a logical layout that minimizes travel distance between key work areas (like the sink, fridge, and stove, often conceptualized as zones or the work triangle) and ensures clear traffic flow is fundamental. Proper zoning based on tasks (prep, cooking, cleaning) is also crucial.
Q: How much counter space do I really need for good workflow?
A: It depends on how you cook, but generally, having at least 36 inches of uninterrupted counter space for your primary prep area is recommended. Don’t forget crucial ‘landing zones’ (15+ inches) next to the fridge, stove, oven, and microwave.
Q: Can I improve workflow without a major renovation?
A: Absolutely! Focus on optimizing storage with organizers (drawer dividers, pull-out shelves, vertical racks), decluttering countertops, improving task lighting (e.g., adding under-cabinet lights), and strategically rearranging items within cabinets and drawers to group them by task or zone.
Q: Is an island always a good idea for kitchen efficiency?
A: Not necessarily. While islands can add valuable counter space, storage, and potentially house appliances, they can obstruct traffic flow if the kitchen isn’t large enough. Ensure you have adequate clearance around it (at least 42-48 inches for main pathways) so it aids workflow rather than hinders it.
You might also like
- Small Kitchen Solutions: Maximizing Tight Spaces
- Choosing the Right Kitchen Layout: Pros & Cons of Common Designs
- Smart Kitchen Storage Ideas and Organization Hacks
@article{smarter-kitchen-workflow-layout-tips-for-real-efficiency,
    title   = {Smarter Kitchen Workflow: Layout Tips for Real Efficiency},
    author  = {Chef's icon},
    year    = {2025},
    journal = {Chef's Icon},
    url     = {https://chefsicon.com/optimizing-kitchen-workflow-layout-tips-efficiency/}
} 

