
Table of Contents
Okay, let’s talk knives. Seriously, if there’s one thing that separates feeling like a competent home cook from feeling like you’re wrestling an octopus every time you try to make dinner, it’s knowing how to handle a knife. I remember moving to Nashville, setting up my kitchen, all excited… and then facing down a pile of vegetables for chili, armed with a dull knife and frankly, zero confidence. It wasn’t pretty. Luna, my cat, just watched judgingly from her perch on the counter (yes, I know, counters are not for cats, we’re working on it). But that night pushed me to actually learn some basic knife skills for home cooks, and honestly? It changed everything. Cooking became less of a chore and more of a… well, a craft. Maybe that sounds dramatic, but think about it – it’s the most fundamental interaction you have with your ingredients.
It’s not about becoming a super-fast, Food Network-style chopping machine overnight. Forget the blindingly fast dicing you see on TV, that takes years and frankly, isn’t necessary for making a great meal at home. This is about safety, efficiency, and actually enjoying the process of preparing food. It’s about control. When you know how to hold the knife correctly, how to guide it, how to make consistent cuts, you unlock a whole new level of cooking. You work faster, yes, but more importantly, you work safer. And your food? It just cooks better when things are cut uniformly. Imagine roasted vegetables where some bits are burnt to a crisp and others are still raw – inconsistent knife work is often the culprit. So, stick with me here. We’re going to break down the essentials, step-by-step, no fancy jargon, just practical stuff you can actually use tonight. I’m still learning too, always refining, but these basics are the bedrock.
We’ll cover the absolute must-knows: how to hold that intimidating chef’s knife so it feels like an extension of your hand, how to keep your fingers safe (super important!), the few essential cuts that will get you through 90% of recipes, and even how to tackle the dreaded onion without weeping buckets. I promise, investing a little time in these skills pays off massively. It’s like learning to type properly instead of hunt-and-peck; suddenly, expressing yourself becomes fluid instead of frustrating. Let’s ditch the frustration and get comfortable with one of the most essential tools in the kitchen. It might even become… fun? Maybe? Let’s find out.
Getting Comfortable: Your Knife and You
The Workhorse: The Chef’s Knife
First things first, you need a decent knife. You don’t need a $500 Japanese masterpiece (though they are lovely). What you really need for most tasks is a solid chef’s knife, probably an 8-inch one. This is your go-to for chopping, slicing, dicing, mincing… pretty much everything. Look for one that feels balanced in your hand – not too heavy in the blade, not too heavy in the handle. The weight should feel centered around where the blade meets the handle (the bolster area). It should feel like an extension of your arm, not a clumsy piece of metal. A full tang (where the metal of the blade runs all the way through the handle) is generally a sign of better quality and balance, but honestly, just find one that feels right *to you*. Go to a store and hold a few. Seriously. It’s like buying shoes; you wouldn’t buy them without trying them on, right? A comfortable, sharp chef’s knife is the foundation of good knife skills. Don’t worry about getting a whole block full of knives you’ll never use. Start with a good chef’s knife, a paring knife (for small, intricate tasks), and maybe a serrated bread knife. That’s honestly enough for most home cooks. We’re focusing on the chef’s knife today because it does the heavy lifting.
Holding the Knife: The Pinch Grip
Okay, this is crucial. How you hold the knife dictates control and safety. Forget gripping the handle like it’s a baseball bat. The most stable and controlled grip is the pinch grip. Here’s how it works: You literally pinch the blade itself, right where it meets the handle (the bolster, or just above it if there isn’t a distinct bolster), between your thumb and forefinger. Your other three fingers then wrap comfortably around the handle. It might feel weird at first, I get it. I spent years just clenching the handle. But try it. Pinch the metal. Feel how much more control you have over the angle and movement of the blade? It connects your hand directly to the working part of the knife. This grip gives you precision, prevents the knife from wobbling, and ultimately makes you safer because the blade goes exactly where you intend it to. Practice just holding it like this until it feels somewhat natural. Pick it up, put it down, always using the pinch grip. It’s muscle memory, and building it starts now. This is non-negotiable for good technique.
The Guide Hand: The Claw Grip
Your other hand, the one holding the food, is just as important for safety and consistency. This is your guide hand. You need to protect those fingertips! The technique here is called the claw grip. Curl your fingertips under, like you’re gently gripping a ball, so your knuckles are pointing forward towards the knife blade. Your thumb should be tucked behind your fingers. The side of the knife blade (the flat part, not the sharp edge!) rests against your knuckles. Your knuckles then guide the knife as you slice, ensuring consistent thickness and keeping your fingertips safely curled away from the edge. It feels counterintuitive initially – you want to flatten your hand out. Don’t. Keep those fingers tucked! The knuckles act as a fence, a physical guide for the blade. Slide the food forward under your clawed hand as you make cuts. This technique is probably the single biggest thing you can do to prevent accidental cuts. Seriously, protect your fingers. Make the claw grip your default position whenever you’re cutting anything.
Making the Cut: Essential Techniques
The Basic Slice
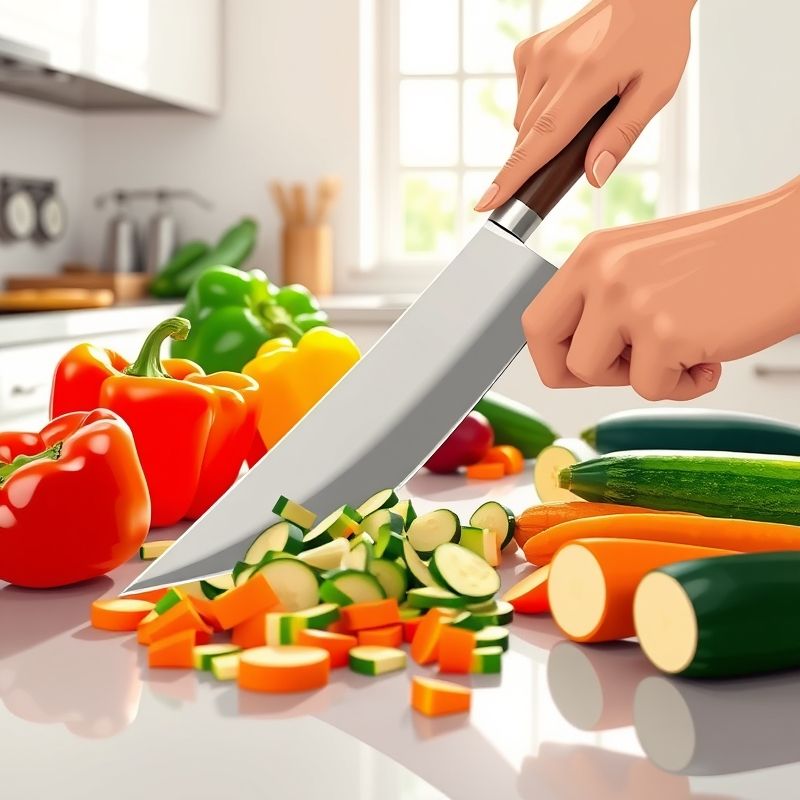
Let’s start cutting. The most fundamental motion is the slice. For most things, you don’t just push straight down (that’s a chop, and less efficient for many tasks). You want a smooth, rocking or sliding motion. Think about the shape of your chef’s knife blade – it’s curved, right? Use that curve. Start with the tip of the knife on the cutting board, the food positioned under the middle or heel of the blade. Push the knife forward and down, slicing through the food until the middle or heel of the blade contacts the board. Then, lift the heel and pull the knife back, keeping the tip generally down or close to the board, ready for the next slice. It’s a fluid, slightly circular or rocking motion. Rocking motion is key here. Imagine drawing a shallow arc. This uses the entire length of the blade, requires less force, and results in cleaner cuts. Try it slowly on something easy like a zucchini or cucumber. Pinch grip on the knife, claw grip on the zucchini. Rock the knife forward and down, then back. Keep the guiding knuckles against the blade. Consistency over speed, always.
Dicing: Creating Cubes
Dicing just means cutting food into uniform cubes. The size can vary (small dice, medium dice, large dice), but the principle is consistency. Let’s take an onion (we’ll get into the full onion breakdown later, but for now, imagine a flat, stable piece). First, you slice the onion into planks of your desired thickness. Then, you stack those planks (not too high!) and slice them lengthwise into sticks (batons). Finally, gather those sticks and cut them crosswise into cubes. The key is uniformity. Why? Because uniform pieces cook at the same rate. Whether you’re sweating onions for a sauce or roasting potatoes, even cooking is crucial for flavour and texture. Practice making your slices and stick cuts consistent. If your planks are uneven, your dice will be uneven. If your sticks are different widths, your dice will be irregular. Slow down, focus on making each cut deliberate. Consistent cuts lead to better cooking results. It’s that simple, but it takes practice. Don’t expect perfect cubes right away. Just aim for ‘more similar than not’ to start.
Mincing: Going Fine
Mincing is basically dicing, but much, much smaller. Think garlic, ginger, shallots, herbs. You want tiny, irregular pieces. There are a couple of ways to do this. You can make very fine slices, then very fine crosswise cuts, essentially a tiny dice. Or, you can roughly chop the item first, then use a rocking motion with your guide hand resting flat on the top/spine of the blade near the tip to stabilize it, while your knife hand rocks the handle up and down, pivoting on the tip. The blade moves rapidly across the pile of food, cutting it finer and finer. Keep gathering the pile back together with the knife blade and continue chopping until it reaches the desired fineness. Mincing is often used for aromatics where you want the flavor to distribute evenly and melt into the dish. Don’t smash it into a paste (unless the recipe calls for it), just aim for very small pieces. Again, keep your guide hand fingers safe – either use the claw grip for the initial rough chop or keep them flat on the spine of the knife, well away from the edge, during the rocking mince.
Julienne and Chiffonade: Fancy Cuts Made Easy(ish)
Okay, sounding a bit fancy now, but these are useful. Julienne means cutting vegetables into long, thin matchsticks. Think carrots for stir-fry or potatoes for shoestring fries. You typically slice the vegetable thin, stack the slices, then slice them lengthwise into thin strips. Again, consistency is the goal. Uniform matchsticks. It takes patience. Is it strictly necessary for everyday home cooking? Maybe not always, but it’s a good skill to have for certain dishes and presentations. Chiffonade is specifically for leafy greens and herbs, like basil or spinach. You stack the leaves, roll them up tightly like a cigar, and then thinly slice the roll crosswise. This creates fine ribbons. It’s perfect for garnishes or incorporating delicate greens into a dish without them bruising too much. Both techniques rely on the same principles: sharp knife, stable grip, guide hand safety, and consistent slicing. They just require a bit more precision. Don’t stress if your first attempts aren’t perfect. Mine certainly weren’t. Just keep practicing.
Tackling Specific Items
The Onion Challenge: No More Tears?
Ah, the onion. The cornerstone of so much flavor, yet the bane of many cooks’ eyes. Here’s a common method that minimizes tears (by keeping the root end intact for as long as possible, as that’s where most of the tear-inducing compounds are concentrated) and gives you a nice dice. First, cut the onion in half pole-to-pole (through the root and stem ends). Peel off the skin. Place one half flat-side down on the board. Make horizontal cuts towards the root, but *not* all the way through it. Keep the root holding everything together. The number of cuts depends on how small you want your dice. Then, make vertical cuts, again towards the root but not through it, perpendicular to the first set of cuts. Finally, slice downwards crosswise. The onion will fall away into a neat dice. That intact root end is the key. Once you’ve diced most of it, you can chop the remaining root bit separately if needed. Does it eliminate tears completely? Maybe not for everyone (some onions are just *potent*), but it definitely helps. Working quickly and using a very sharp knife also reduces the release of those irritating compounds. A dull knife crushes more cells, releasing more tear gas.
Garlic: Slice, Smash, or Mince
Garlic! Another flavor bomb. How you prep it affects its intensity. For a milder flavor, use whole or slightly smashed cloves. To smash, place the flat side of your knife blade over the clove and give it a firm whack with the heel of your hand. This breaks it open and makes peeling easy. For sliced garlic (good for sautéing where you don’t want it to burn too quickly), cut the root end off, peel, and make thin slices using your claw grip. Remember, thin slices burn fast, so keep an eye on them. For a stronger, more pungent flavor that disperses well, you’ll want to mince it. Smash the clove first to peel it easily, then do a rough chop, and use the rocking mince technique described earlier (guide hand flat on the spine, rocking the knife) until it’s very fine. Some people like using a garlic press, and that’s fine too – it creates more of a paste and releases a lot of pungent flavor quickly. It really depends on the dish and your preference. But knowing how to handle it with a knife gives you more control over the final texture and taste.
Herbs: Preserving Freshness
Fresh herbs add so much brightness. But chopping them wrong can bruise them, turning them dark and diminishing their flavor. The key is a sharp knife and minimal chopping. For leafy herbs like parsley, cilantro, or mint, gather them into a tight bunch. Use your claw grip and slice through them cleanly. Avoid repeatedly chopping over the same spot, as this crushes the delicate leaves. One or two passes should be enough for a rough chop. If you need them finer, use the chiffonade technique for larger leaves like basil (stack, roll, slice). For woody herbs like rosemary or thyme, you typically just need to strip the leaves from the stem and then give them a quick chop if desired. Washing herbs? Do it just before using and dry them thoroughly (a salad spinner works great). Wet herbs clump together and are harder to chop cleanly. Treat them gently, use a sharp knife, and you’ll preserve their vibrant color and flavor.
Safety and Maintenance: The Long Game
Knife Safety is Non-Negotiable
I know I’ve mentioned it, but it bears repeating: knife safety is paramount. Always use a cutting board, preferably wood or plastic, never glass or stone (these will dull your knife instantly and are slippery). Make sure your cutting board is stable – place a damp paper towel or a non-slip mat underneath it if it slides around. Always cut *away* from yourself. Keep your fingers tucked using the claw grip. Never, ever try to catch a falling knife. Just jump back and let it drop. Don’t leave sharp knives loose in a drawer; use a knife block, a magnetic strip, or blade guards. And never put your good knives in the dishwasher! The harsh detergents, high heat, and potential for banging against other items can damage the blade and handle. Wash them by hand carefully with soap and warm water, drying them immediately. Pay attention. Most cuts happen when you’re distracted or rushing. Focus on the task at hand. Cooking should be enjoyable, not lead to an ER visit.
Keeping Your Edge: Honing vs. Sharpening
A sharp knife is a safe knife. Why? Because it cuts cleanly with less pressure, making it less likely to slip. A dull knife requires more force, increasing the risk of accidents. There’s a difference between honing and sharpening. Honing realigns the microscopic edge of the blade, which gets slightly bent out of shape with regular use. You should hone your knife frequently, even every time you use it, using a honing steel (that long metal rod that often comes with knife blocks). Hold the steel vertically, tip down on the cutting board (on a towel for stability). Hold your knife at about a 15-20 degree angle to the steel. Starting with the heel of the blade near the handle of the steel, draw the knife down and towards you, sweeping the entire edge from heel to tip against the steel. Repeat on the other side of the blade. Do this a few times on each side. It doesn’t remove metal; it just straightens the edge. Sharpening actually removes metal to create a new edge. This is needed less frequently, depending on how often you cook – maybe a few times a year for a home cook. You can use whetstones, electric sharpeners, or take them to a professional. Honing maintains the edge; sharpening restores it. Learn to hone regularly; it makes a huge difference.
Practice, Patience, and Potatoes
Like any skill, knife skills require practice. Don’t expect perfection overnight. Be patient with yourself. Start slow. Focus on technique, not speed. Speed will come naturally as you get more comfortable. Need something cheap to practice on? Buy a bag of potatoes or onions. Spend an hour just practicing your slices, dices, and juliennes. It might feel silly, but deliberate practice is how you build muscle memory and confidence. Watch videos online (there are tons of great tutorials), but then actually *do* it. Feel the knife in your hand, focus on the claw grip, listen to the sound of clean cuts. Pay attention to the results – are your pieces consistent? Are you feeling more controlled? It’s a journey. Some days you’ll feel like a pro, other days you might mangle a carrot. It happens. Just keep practicing. The payoff – faster prep, safer cooking, better results, and maybe even finding a meditative rhythm in the chopping – is totally worth it. Plus, you’ll have lots of prepped potatoes for roasting!
Final Thoughts on Finding Your Flow
So, there you have it. The absolute basics of knife skills for us home cooks. It’s not about complex Cordon Bleu techniques, it’s about building a foundation of safety, control, and efficiency in your own kitchen. Mastering the pinch grip, religiously using the claw grip, understanding the basic cuts – these things genuinely transform the cooking experience. It moves from a potentially hazardous chore to something more intentional, more rhythmic. I still find myself sometimes slipping into old habits, maybe rushing too much when I’m hungry (Luna starts staring intently around dinnertime, adding pressure!), but then I consciously correct my grip, slow down for a second, and remember the basics.
Maybe the real challenge isn’t just learning the techniques, but integrating them until they become second nature? Until you don’t *think* about the pinch grip, you just *do* it. It’s about finding that flow state where your hands know what to do, freeing up your mind to think about the flavors you’re building, the meal you’re creating. It takes time, it takes conscious effort, but it’s an investment that pays dividends every single time you step up to the cutting board. So, my challenge to you (and to myself, always) is this: pick one skill – maybe just the claw grip – and focus on it intently the next few times you cook. See how it feels. Notice the difference. Then add another. Bit by bit, you’ll build that confidence and skill, promise.
FAQ
Q: What’s the single most important knife skill to learn first?
A: Honestly, I’d say learning the claw grip for your guide hand. It’s the biggest safety factor, preventing nasty cuts and allowing you to guide the knife accurately. Master that, and you’ve significantly reduced your risk of injury.
Q: Do I really need an expensive knife?
A: Nope! While high-end knives are great, a moderately priced chef’s knife (say, in the $50-$100 range) that feels comfortable and balanced in *your* hand and holds an edge reasonably well is perfectly sufficient for home cooking. Focus on keeping whatever knife you have sharp and learning good technique.
Q: How often should I sharpen my knives?
A: It depends on use, but for most home cooks, actual sharpening (removing metal) is only needed maybe 1-3 times per year. Regular honing with a steel, however, should be done much more frequently – ideally, briefly before each use or every few uses – to maintain the edge’s alignment.
Q: What’s the best cutting board material?
A: Wood (like maple or walnut) or plastic/composite boards are generally recommended. They are kinder to your knife’s edge than glass, ceramic, or stone, which will dull your knife very quickly. Wood has natural antimicrobial properties, while plastic can often go in the dishwasher, though both need proper cleaning and sanitizing. Make sure it’s stable!
You might also like
- Choosing Your First Chef’s Knife: A Practical Guide
- How to Sharpen Kitchen Knives at Home: Basics
- Essential Kitchen Tools Beyond the Knife
@article{basic-knife-skills-every-home-cook-should-know,
    title   = {Basic Knife Skills Every Home Cook Should Know},
    author  = {Chef's icon},
    year    = {2025},
    journal = {Chef's Icon},
    url     = {https://chefsicon.com/basic-knife-skills-for-home-cooks/}
} 

