
Table of Contents
- 1 Tackling the Pantry: Strategies and Solutions
- 1.1 Step Zero: The Great Pantry Purge
- 1.2 Budget Brilliance: Organizing on a Shoestring
- 1.3 Mid-Range Makeover: Smart Investments
- 1.4 The Splurge: High-End Pantry Systems
- 1.5 Maximizing Vertical Space: Look Up!
- 1.6 The Power of Zoning: Creating Logical Flow
- 1.7 Label Everything (Seriously, Everything)
- 1.8 Keep Track: Simple Inventory Management
- 1.9 Maintenance Mode: Keeping Order Intact
- 1.10 Beyond the Basics: Lighting, Access, and Awkward Spaces
- 2 Bringing It All Together
- 3 FAQ
Okay, let’s talk pantries. Mine, for the longest time after moving to Nashville, was… well, let’s just say ‘organized chaos’ would be generous. More like a Jenga tower of canned goods threatening imminent collapse every time I reached for the olive oil. Luna, my cat, seemed to find it particularly amusing, occasionally batting at precariously perched bags of rice just to watch my reaction, I swear. Coming from the Bay Area, where space was at a premium and forced a certain level of tidiness, the slightly larger pantry here felt like an invitation to just… accumulate. Sound familiar? Whether you’ve got a sprawling walk-in or a couple of shelves masquerading as a pantry, getting it organized feels like a Herculean task, especially when you start looking at those picture-perfect pantry makeovers online and see the dollar signs flashing. But here’s the thing I’ve learned, working from home and spending *way* too much time staring into the abyss of my snack shelf: achieving pantry nirvana doesn’t have to break the bank. It’s about strategy, not just spending.
So, that’s what we’re diving into today: pantry organization ideas for every budget. We’ll cover everything from practically free hacks using stuff you probably already own, to mid-range solutions that offer a nice balance of form and function, all the way up to those splurge-worthy systems if you’re ready to invest. It’s not just about making it look good for the ‘gram (though, let’s be real, that’s a nice bonus). It’s about reducing food waste because you can actually *see* what you have, saving time because you’re not hunting for that elusive can of chickpeas, and honestly, just bringing a little bit of calm to a potentially stressful part of the kitchen. It’s about creating a system that works for *you*, your cooking style, and yes, your wallet. I think there’s a deeper connection here too, between how we organize our physical spaces and how we organize our thoughts, our lives. Maybe that’s just the ex-marketing analyst in me looking for patterns, but clearing clutter often clears the mind, right?
We’re going to break down the process, step-by-step, looking at different approaches and products. I’ll share some things I’ve tried, what worked, what definitely didn’t (hello, overly complicated spice rack I abandoned after a week), and hopefully give you some actionable ideas you can implement right away, regardless of whether your budget is closer to ‘found couch change’ or ‘minor home renovation’. We’ll look at the psychology behind why certain systems work better than others, how visual cues impact usability, and how to maintain order once you’ve achieved it. Because let’s face it, the initial overhaul is one thing; keeping it that way amidst the hustle of daily life is the real challenge. Let’s get these shelves sorted.
Tackling the Pantry: Strategies and Solutions
Step Zero: The Great Pantry Purge
Before you even *think* about buying a single container or label maker, you absolutely have to do the least glamorous but most crucial step: decluttering. Seriously, don’t skip this. Pull *everything* out. Yes, everything. Onto your counters, your table, the floor (maybe put down a sheet first?). Prepare to be slightly horrified by what you find lurking in the back corners. Check expiration dates ruthlessly. That spice blend from 2019? Toss it. The can of water chestnuts you bought for a recipe you never made? If it’s expired, gone. If it’s still good but you know deep down you’ll never use it, donate it to a local food bank (check their guidelines first!). Be honest with yourself. Did you buy that trendy health food powder during a momentary wellness kick and now hate the taste? Let it go. This step is completely free and makes the biggest immediate impact. It’s not just about dates; it’s about usage and intention. What do you actually cook with? What was an aspirational purchase? This initial cleanout defines the actual space and inventory you need to organize, preventing you from buying containers for stuff you don’t even need. Think of it as establishing your baseline inventory – a pantry audit, if you will. It’s the foundation upon which all other organizational efforts are built. Without this step, you’re just organizing clutter, which kind of defeats the purpose, doesn’t it?
Budget Brilliance: Organizing on a Shoestring
Okay, the purge is complete. Now, let’s talk organization when funds are tight. This is where creativity shines! First up: repurpose existing containers. Cleaned-out jam jars, large yogurt tubs, coffee cans – these can all become storage for smaller items like nuts, seeds, chocolate chips, or even loose tea. Shoeboxes, especially sturdy ones, can corral small packets (think gravy mixes, yeast sachets) or group similar items like baking supplies. Cut down larger cardboard boxes to create dividers on shelves. You can even cover them in wrapping paper or contact paper scraps if you want a more cohesive look, but honestly, functional is the goal here. Use masking tape and a permanent marker for basic labeling – it’s cheap and effective. Small, shallow boxes (like those from checks or cosmetics) are great for corralling spice jars that tend to wander. The key here is using what you already have access to. It might not look like a magazine spread, but it will be functional, and cost you next to nothing. Is this the most aesthetically pleasing approach? Maybe not universally, but it’s incredibly practical and sustainable. It forces you to think functionally first. Sometimes the simplest solutions are genuinely the best, and there’s zero guilt associated with cost.
Mid-Range Makeover: Smart Investments
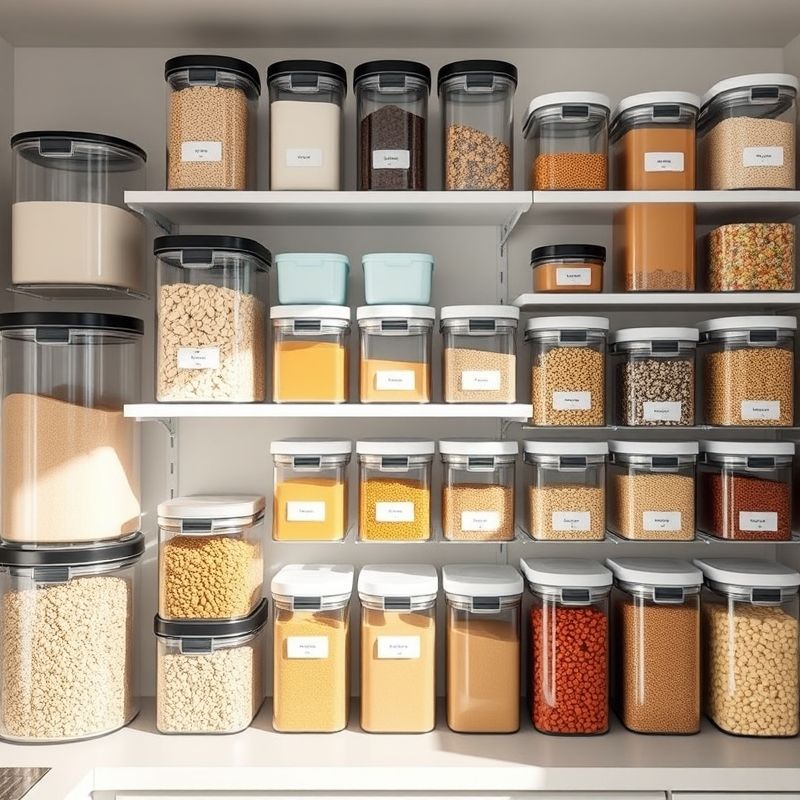
If you have a bit more budget to play with, you can start investing in some dedicated organizing tools that offer both function and a more uniform aesthetic. This is where things like matching clear storage containers come in. Decanting dry goods like flour, sugar, pasta, and cereal into airtight containers not only looks neat but also keeps food fresher longer and protects against pests. Look for stackable options to maximize vertical space. You don’t need to buy the most expensive brand; there are many affordable sets available online or at big-box stores. Another game-changer in this price range? Turntables or Lazy Susans. These are fantastic for deep shelves or corners where things tend to get lost. Perfect for oils, vinegars, spices, or canned goods. Tiered shelf risers are also brilliant for cans and jars, allowing you to see everything at a glance instead of just the front row. Consider investing in some inexpensive wire or plastic baskets to group items like snacks, breakfast bars, or baking supplies. These act like drawers on your shelves, making it easy to pull out a whole category at once. This level is about strategic purchases that significantly improve accessibility and visibility without requiring a huge financial outlay. It’s often the sweet spot for most people – noticeable improvement, reasonable cost.
The Splurge: High-End Pantry Systems
Alright, if you’re ready to invest significantly in your pantry organization, the options become quite sophisticated. This is where you might consider custom shelving solutions or built-in units designed specifically for your space. Think pull-out drawers and shelves, which bring everything easily into reach, eliminating those hard-to-access back corners entirely. High-end, perfectly matching container sets made from glass or durable BPA-free plastic with premium sealing mechanisms are common here. You might invest in integrated spice racks, wine storage, or even small appliance garages within the pantry. Some people opt for professional organizers to design and implement the system. Is this necessary for everyone? Absolutely not. But for those who prioritize a highly streamlined, aesthetically perfect, and ultra-functional space, and have the budget, these premium organizational systems can be transformative. It’s less about basic storage and more about creating a fully optimized food management hub. The investment can be substantial, running into hundreds or even thousands depending on the scale and customization. I’m torn on this level sometimes… the marketing expert in me appreciates the seamless branding and user experience, but the practical home cook wonders if it’s *really* that much better than a well-executed mid-range setup. Ultimately, it’s a personal value judgment.
Maximizing Vertical Space: Look Up!
Regardless of your budget, one often-overlooked area is vertical space. Most pantries have shelves spaced far apart, leaving lots of unused air above your items. Simple solutions include stackable bins and containers, which we’ve mentioned. But also consider under-shelf baskets that hook onto the shelf above, instantly creating another layer of storage for small, flat items like wraps, foils, or bags of nuts. Shelf risers, even inexpensive wire ones, essentially double the usable surface area for shorter items like cans or spices. Don’t forget the back of the pantry door! Over-the-door organizers with multiple pockets or racks are fantastic for spices, jars, snacks, or cleaning supplies (if you store those in your pantry). Utilizing this vertical real estate is crucial, especially in smaller pantries. It’s about thinking three-dimensionally. Every cubic inch counts, particularly when you’re trying to fit a lot into a limited footprint, like many of us have experienced. Moving from a larger space to my current Nashville spot really drove this home for me – I had to get creative vertically.
The Power of Zoning: Creating Logical Flow
Think like a grocery store aisle designer. Group similar items together into logical zones. This makes finding things intuitive and helps prevent accidentally buying duplicates. Create a baking zone with flour, sugar, sprinkles, extracts, etc. Establish a breakfast zone with cereals, oatmeal, pancake mix, and syrup. Have a dedicated snack area (maybe use bins to separate kid snacks from adult snacks). Group canned goods by type (vegetables, fruits, soups, beans). Keep oils, vinegars, and sauces together near where you might grab them for cooking. Pasta and grains can have their own section. This concept of category grouping isn’t just about tidiness; it’s about efficiency. When you need to make pasta, you grab the pasta from its zone, the sauce from its zone, maybe some canned tomatoes from theirs – it streamlines the cooking process. It also makes taking inventory much quicker. You can see at a glance if you’re low on breakfast items or if your baking supplies need replenishing. This taps into basic cognitive principles – our brains like categorization. It reduces mental load when searching for something specific.
Label Everything (Seriously, Everything)
I know, I know, labeling seems obvious, but its importance cannot be overstated, especially if you’re decanting items into uniform containers. Flour looks a lot like powdered sugar, salt like regular sugar – avoid kitchen mishaps! But labeling goes beyond identification. It creates visual order and reinforces your zoning system. It also helps other members of the household find things and, crucially, put them back in the right place (we can dream, right?). You don’t need a fancy label maker, though they are nice and relatively affordable now. Handwritten labels on masking tape or chalkboard labels work perfectly well, especially for the budget-conscious. Pre-printed labels offer a very polished look if that’s your goal. Whatever method you choose, be consistent with the style and placement. Consistent labeling transforms a collection of containers into a cohesive system. It’s a small detail that makes a huge difference in usability and long-term maintenance. Maybe I should clarify… it’s not *just* about knowing what’s inside, it’s about signalling ‘this belongs here’ and reducing the friction of putting things away correctly. It’s a visual cue for order.
Keep Track: Simple Inventory Management
How many times have you bought a can of diced tomatoes only to find three already hiding in the back? An organized pantry pairs beautifully with some form of inventory management. This doesn’t need to be complicated. A simple magnetic notepad on the fridge where you jot down items as they run low works wonders. You could keep a running list on your phone’s notes app. For the tech-savvy, there are dedicated pantry inventory apps, some of which even allow you to scan barcodes. The goal is to have a quick reference before you go shopping to avoid overbuying and reduce food waste. Find a system that you’ll actually stick with. I’ve tried apps, but honestly, a simple whiteboard sticker inside the pantry door where I scribble notes works best for me. It’s low-tech but effective. This practice closes the loop – you organize to see what you have, and the inventory list helps you maintain that awareness and shop smarter. It’s about creating a feedback loop between your pantry and your shopping habits. It might feel like extra work initially, but it saves time and money in the long run.
Maintenance Mode: Keeping Order Intact
Okay, you did it. The pantry looks amazing. Now, how do you keep it that way? Organization is not a one-time project; it’s an ongoing process. Schedule brief, regular tidy-ups – maybe 5-10 minutes once a week. Put things back immediately after use (or train your household members to!). When you bring groceries home, take the extra minute to decant items into their containers or put them in their designated zones right away, rather than just shoving them onto a shelf. Periodically (maybe quarterly?), do a quick mini-purge to check dates and reassess if the system is still working for you. Needs change, cooking habits evolve. Don’t be afraid to tweak your zones or container setup if something isn’t flowing well. Regular maintenance is key to preventing the slow creep back towards chaos. It’s like any system; it requires occasional recalibration and upkeep. Life happens, things get messy, Luna might knock over the meticulously stacked cans again, but having a system in place makes the reset much faster and less daunting.
Beyond the Basics: Lighting, Access, and Awkward Spaces
Let’s talk about those extra touches that elevate pantry function. Good pantry lighting is surprisingly important. If your pantry is dim, it’s hard to see what you have, especially in the back. Consider adding battery-operated LED strip lights under shelves or motion-activated puck lights. They’re relatively inexpensive and make a huge difference. Accessibility is another factor. Keep frequently used items at eye level or waist level. Heavier items should go on lower shelves, lighter or less-used items up high. A sturdy step stool is essential if you have high shelves. What about awkward corners or deep shelves? We mentioned Lazy Susans, but pull-out drawers or deep wire baskets can also make these spaces much more usable. Don’t just accept dead space; find a tool or technique to conquer it. These might seem like minor details, but addressing lighting and accessibility enhances the overall usability and makes maintaining your organized system much easier. It’s about removing those little friction points that make using the pantry annoying.
Bringing It All Together
So, there you have it – a whirlwind tour of pantry organization ideas, from the practically free to the fully custom. The biggest takeaway? It’s not about having the fanciest containers or the biggest space. It’s about being intentional. Start with the purge – always the purge! Then, assess your budget and choose strategies that fit. Whether you’re reusing jam jars and shoeboxes or installing sleek pull-out shelves, the core principles remain the same: declutter, categorize (zone), make items visible and accessible, label consistently, and maintain the system. Find what works for *your* cooking style, *your* family, and *your* budget.
Maybe the real challenge isn’t just organizing the shelves, but organizing our habits around them? Keeping the inventory updated, putting things back where they belong, resisting the urge to buy that fifth jar of mustard because it was on sale. It’s a microcosm of larger life stuff, isn’t it? Finding order, maintaining it, adapting when things change. I’m still working on it myself, my pantry is definitely a work in progress, not perfection. But it’s miles better than the Jenga tower it used to be. Perhaps the best approach is just to start small, make one change this week – maybe just tackle one shelf, or commit to labeling your existing containers.
What’s next for pantry organization? Will we all have smart refrigerators that auto-generate grocery lists synced with smart pantry shelves that detect low stock? Maybe. I’m not sure if that level of tech intrusion is appealing or slightly terrifying. For now, though, a few well-placed bins, some clear labels, and a commitment to putting things back seems like a pretty solid, achievable goal for most of us. What corner of your pantry are you going to tackle first?
FAQ
Q: My pantry is tiny, like just one cabinet! How can I maximize space?
A: Focus heavily on vertical space! Use stackable containers, shelf risers to create tiers, under-shelf baskets, and definitely utilize the back of the cabinet door with an organizer. Decanting into square or rectangular containers often fits more efficiently than original packaging. Ruthless decluttering is even more critical in small spaces.
Q: What are the best types of containers to buy?
A: It depends on your budget and needs! For budget-friendly, repurposed glass jars and basic plastic bins work well. Mid-range, clear, airtight, stackable plastic or acrylic containers are popular for dry goods. Glass containers look great and are non-porous but can be heavier and more expensive. Choose containers that are square or rectangular for space efficiency and ensure they are airtight for freshness.
Q: How do I organize bulky items like bags of chips or paper towels?
A: For bulky bags like chips or pretzels, use large bins or baskets to corral them. You can also use clips to hang chip bags from wire shelving or hooks. For paper towels or other bulk paper goods, designate a specific high or low shelf if space allows, or consider storing overflow outside the main pantry area if necessary (like a garage or closet).
Q: I have kids, and the snack situation is out of control. Any tips?
A: Create a designated, easily accessible snack zone. Use clear bins or baskets labeled for different snack types (e.g., crackers, fruit snacks, granola bars). Consider pre-portioning some snacks into smaller reusable bags or containers for easy grab-and-go. Keeping this zone lower down allows kids to access their own snacks (if appropriate for their age), potentially reducing pantry disruption.
You might also like
- Small Kitchen Storage Hacks to Maximize Space
- Organizing Kitchen Cabinets: A Step-by-Step Guide
- Meal Prep Storage Solutions and Container Ideas
@article{smart-pantry-organization-ideas-for-any-budget-level,
    title   = {Smart Pantry Organization Ideas for Any Budget Level},
    author  = {Chef's icon},
    year    = {2025},
    journal = {Chef's Icon},
    url     = {https://chefsicon.com/pantry-organization-ideas-for-every-budget/}
} 

