
Table of Contents
- 1 Building Flavor: A Deep Dive into Poultry Perfection
- 1.1 The Foundation: Brines & Marinades – More Than Just Moisture
- 1.2 Aromatic Infusions: Herbs, Spices, and Rubs
- 1.3 The Sear: Maillard Magic and Building Depth
- 1.4 Deglazing: Capturing the Flavor Gold (Fond)
- 1.5 Low & Slow vs. High Heat Roasting: Method Matters
- 1.6 Stuffing & Cavity Flavoring: Internal Affairs
- 1.7 Sauces & Glazes: The Finishing Touch
- 1.8 Smoke & Fire: Grilling and Smoking Nuances
- 1.9 Umami Boosters: The Secret Weapons
- 1.10 Texture as Flavor: Crispy Skin, Tender Meat
- 2 So, What’s the Takeaway on Flavor?
- 3 FAQ
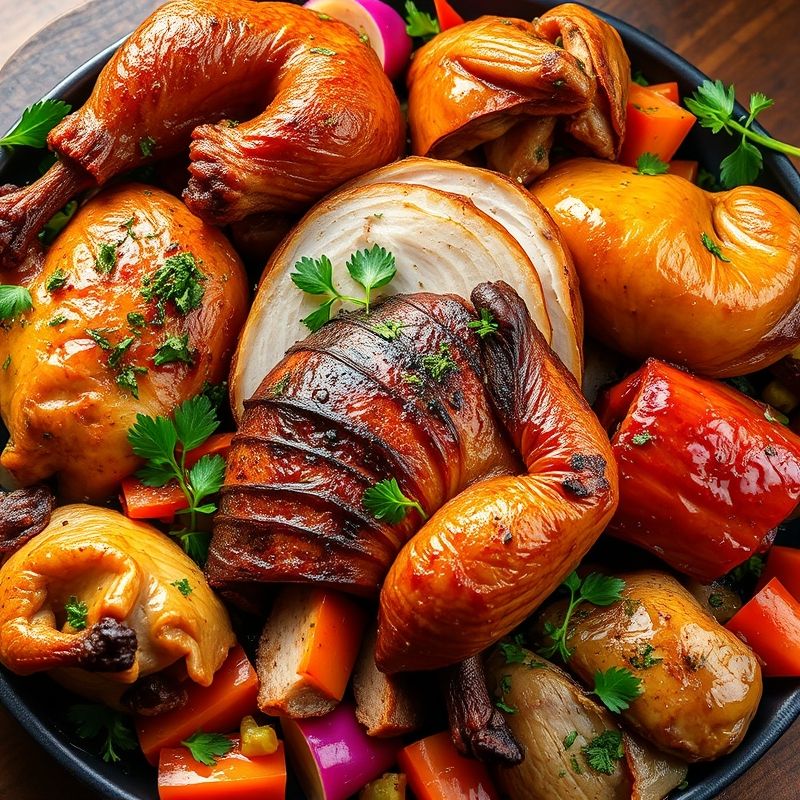
Okay, let’s talk chicken. Or turkey. Or duck. You know, poultry. It’s the weeknight staple, the holiday centerpiece, the blank canvas of the culinary world. But let’s be honest, how often does that canvas end up… well, beige? I’ve been there. Staring down at a perfectly cooked, yet tragically bland, piece of chicken breast, wondering where I went wrong. It wasn’t dry, necessarily, just… lacking. Missing that certain *something*. That’s where the magic – or maybe the method – of flavor layering techniques for poultry dishes comes in. It’s not about one single trick; it’s about building complexity, step by step, turning that blank canvas into something vibrant and memorable.
I remember moving to Nashville from the Bay Area, trading foggy mornings for humid evenings and, culinarily speaking, a whole different scene. Out west, it felt like a lot of focus was on pristine ingredients speaking for themselves. Here? There’s a deep appreciation for transformation, for coaxing out flavor, for… well, layering it on. Think about Nashville hot chicken – it’s not just heat; there’s spice, sweetness, tang, savory depth, all built layer upon layer. It got me thinking more intentionally about how I approach cooking poultry back home in my own kitchen (much to the occasional indifference of my cat, Luna, unless it involves tuna). It’s about moving beyond just salt and pepper and thinking about the entire journey of the dish, from fridge to plate.
So, what are we actually going to unpack here? We’re going deep. We’ll look at everything from the foundational work of brines and marinades to the finishing flourish of a perfectly balanced sauce. We’ll talk about harnessing the power of heat through searing and roasting, unlocking aromatics, capturing precious pan drippings (the glorious fond!), and even how texture plays a role in how we perceive flavor. This isn’t about rigid rules, more like a set of tools and ideas. Think of it as building a flavor toolkit specifically for chicken, turkey, duck, and whatever other feathered friends find their way into your kitchen. Ready to ditch the bland and build something delicious? Let’s get into it.
Building Flavor: A Deep Dive into Poultry Perfection
The Foundation: Brines & Marinades – More Than Just Moisture
Alright, first things first: prepping the bird. This is where the flavor journey truly begins, long before any heat gets involved. Brines and marinades are often the first layer, and honestly? They’re game-changers. A brine, at its simplest, is a saltwater solution. But thinking of it as just adding saltiness is missing the point. Through osmosis, the salt water gets drawn into the muscle fibers, not only seasoning the meat from within but also altering the protein structure. This helps the poultry retain more moisture during cooking, leading to that juicy, succulent result we’re all chasing. You can do a wet brine (submerging the bird) or a dry brine (rubbing with salt and sometimes sugar, letting it rest). I often lean towards dry brining for larger birds like turkey – less mess, and it helps dry out the skin for better crisping. But for chicken pieces? A wet brine with added aromatics like garlic, peppercorns, and bay leaves for a few hours? *Chef’s kiss*. Don’t forget the time element; too short and it’s ineffective, too long (especially with acidic marinades) and the texture can get weird.
Then you have marinades. These usually involve an acidic component (like vinegar, citrus juice, yogurt) or an enzymatic one (like pineapple or papaya) along with oils, herbs, spices, and seasonings. Unlike brines which primarily focus on moisture and seasoning, marinades are heavy lifters in the flavor department *and* tenderizing. The acid or enzymes work to break down tougher muscle fibers on the surface, making the meat more tender. Think yogurt-marinated chicken for tandoori, or a citrusy mojo marinade for grilled chicken. It’s crucial, though, to understand the balance. Too much acid for too long can ‘cook’ the surface, resulting in a mushy texture. It’s a delicate dance. I often find myself debating – brine or marinade? Sometimes, for leaner cuts like chicken breast, a quick marinade is perfect. For a whole bird, especially one destined for roasting, brining often wins for deep seasoning and moisture. The key takeaway here is that this initial step isn’t just about adding liquid; it’s about fundamentally changing the meat for better flavor penetration and texture.
Aromatic Infusions: Herbs, Spices, and Rubs
Once you’ve laid the foundation with a brine or marinade (or sometimes skipping it, depending on the goal), it’s time to bring in the aromatics. This is where personality really starts to infuse the dish. We’re talking herbs, spices, garlic, onions, citrus zest – the building blocks of distinct flavor profiles. A dry rub is a classic approach: a blend of dried spices and herbs rubbed directly onto the surface of the poultry. This creates a flavorful crust as it cooks. Think paprika, cumin, chili powder, garlic powder, onion powder, black pepper, maybe some brown sugar for caramelization. The possibilities are endless, from smoky BBQ rubs to herbaceous Mediterranean blends. Toasting whole spices before grinding them? It unlocks volatile oils and deepens their flavor exponentially. It’s an extra step, sure, but the payoff is huge. I keep a small coffee grinder just for spices – definitely don’t mix those beans and cumin!
Beyond dry rubs, consider fresh herbs. Tucking sprigs of rosemary and thyme under the skin of a roasting chicken, or stuffing the cavity with lemon halves and garlic cloves, infuses the meat gently from the inside out as it cooks. Making a paste, sometimes called a wet rub, by mixing spices with a little oil or mustard can help it adhere better and sometimes penetrate slightly more than a dry rub alone. Think about spice synergy – how different spices complement and enhance each other. Cumin and coriander are classic partners, paprika loves garlic, chili enjoys a touch of sweetness. Don’t just throw things together; consider the profile you’re building. And timing matters! Some aromatics are best added before cooking, others benefit from being added during (like basting with herb butter), and some delicate fresh herbs (like cilantro or parsley) are best added right at the end to preserve their bright flavor. This layer is all about adding those distinct character notes, the melody on top of the baseline seasoning.
The Sear: Maillard Magic and Building Depth
Okay, let’s talk heat. Specifically, that initial high-heat contact: the sear. If you’re cooking poultry pieces – breasts, thighs, drumsticks – searing is often a critical step for developing deep, savory flavor. This isn’t just about browning; it’s about the Maillard reaction, a complex chemical process that occurs between amino acids and reducing sugars when heated. This reaction creates hundreds of different flavor compounds, responsible for that characteristic ‘roasty’ taste and appealing brown color. To get a good sear, you need a few things: high heat and a dry surface. Moisture is the enemy of browning; the heat will just steam the surface instead of searing it. This is why patting your chicken dry with paper towels before seasoning and cooking is so important. Seriously, don’t skip this.
What pan to use? Cast iron is my go-to. It holds heat incredibly well, providing the consistent high temperature needed for a deep, even sear. Stainless steel is another great option. Non-stick pans… well, they often don’t get hot enough or maintain heat as well for a really *great* sear. You’ll get some color, maybe, but often not that deep, crusty brown you’re looking for. The sear does more than just create flavor on the surface of the meat itself. It also creates the foundation for the next layer: the fond. Those little browned bits stuck to the bottom of the pan after searing? That’s concentrated flavor gold. Is searing *always* the answer? Maybe not for every single preparation method, like poaching or some slow cooker recipes. But for pan-roasting, grilling, or sautéing poultry, achieving a proper sear provides unparalleled depth of flavor, contributes essential texture contrast, and frankly, makes the food look way more appetizing. It’s a visual cue that signals deliciousness.
Deglazing: Capturing the Flavor Gold (Fond)
So, you’ve seared your chicken, and now there are beautiful brown bits stuck to the bottom of your pan. Whatever you do, don’t wash those away! That, my friends, is the fond, and it’s packed with concentrated flavor developed during the searing process. The next crucial layering technique is deglazing – using a liquid to lift that fond off the pan surface and incorporate it into a sauce or the cooking liquid. It’s a simple technique with a massive flavor impact. Once you’ve removed the chicken from the pan (you might be setting it aside to finish cooking later, or maybe it’s already cooked through), pour off any excess fat, leaving the browned bits behind.
Return the pan to medium heat and add your deglazing liquid. What liquid? Wine (white or red, depending on your dish), stock or broth, vinegar, citrus juice, even water can work in a pinch. As the liquid heats up, use a wooden spoon or spatula to gently scrape the bottom of the pan, loosening all those flavorful bits. Watch as the liquid bubbles and lifts the fond, dissolving it and turning the liquid a rich brown. This is the base of countless incredible pan sauces. You can then reduce this liquid slightly to concentrate the flavor further, perhaps add some butter for richness and gloss, maybe some herbs or shallots sautéed beforehand. It’s about capturing every last bit of flavor you worked to develop during searing and making it part of the final dish. It connects the flavor of the sear directly to the sauce, creating a cohesive and deeply savory result. This step transforms pan drippings from a byproduct into a flavor base, essential for many classic poultry preparations.
Low & Slow vs. High Heat Roasting: Method Matters
How you actually cook the bird after the initial prep and sear (if applicable) dramatically affects the final flavor profile and texture. Roasting is a classic for a reason, but even within roasting, there are choices. High heat roasting (say, 400°F/200°C or higher) is great for achieving crispy skin and quicker cooking times, especially for smaller birds or pieces. The intense heat renders fat quickly and promotes browning all over. However, it can sometimes result in slightly drier meat if you’re not careful, especially with leaner cuts like breast meat. It requires careful monitoring to avoid overcooking.
On the other hand, low and slow roasting (around 300-325°F / 150-160°C) allows the heat to penetrate more gently and evenly. This method is fantastic for larger birds like turkeys or whole chickens, promoting incredibly tender, juicy meat. The fat renders slowly, basting the meat naturally. While the skin might not get as shatteringly crisp initially, you can often crank up the heat for the last 15-20 minutes to achieve that desired browning. This method allows more time for internal aromatics (like herbs or lemon stuffed in the cavity) to infuse the meat. It also typically results in less shrinkage. Which is better? It depends! For weeknight chicken pieces, high heat might be more practical. For a showstopper holiday turkey, low and slow often yields more succulent results. Understanding how temperature control impacts moisture retention, fat rendering, and skin texture is key to choosing the right method for your desired outcome. And never forget the importance of resting the poultry after cooking – it allows the juices to redistribute, ensuring a moist bite.
Stuffing & Cavity Flavoring: Internal Affairs
Let’s talk about what goes *inside* the bird. While classic bread stuffing cooked inside the cavity is a tradition for many (though food safety guidelines often recommend cooking it separately now), the cavity is prime real estate for infusing flavor from within. Think beyond stuffing. Simply placing aromatic ingredients inside the main cavity before roasting can make a significant difference. Halved lemons or oranges, whole cloves of garlic (smashed slightly), sprigs of sturdy herbs like rosemary, thyme, or sage – as the bird roasts, the heat releases their volatile oils and aromas, gently perfuming the meat from the inside out. This is a subtle layer, but it adds a background complexity that complements the exterior seasonings.
Another fantastic technique, particularly for roasting whole birds, is getting flavor *under* the skin. Carefully loosen the skin over the breast and thigh meat, creating little pockets. You can then slide in pats of compound butter – butter mixed with chopped herbs, garlic, citrus zest, or spices. As the butter melts during cooking, it bastes the meat directly, adding richness, flavor, and helping to keep lean breast meat moist. You can also just slip whole herb leaves or thin slices of lemon under there. This ensures the flavor isn’t just sitting on the surface but is getting right next to the meat. These techniques focus on internal aromatics and targeted fat application for enhanced moisture retention and flavor, working in tandem with brines and surface seasonings.
Sauces & Glazes: The Finishing Touch
We’ve brined, rubbed, seared, maybe roasted low and slow… but we’re not necessarily done yet. The final layer often comes in the form of a sauce or glaze, applied during the last stages of cooking or served alongside. This is where you can really tie everything together or introduce a contrasting element. Pan sauces, built upon that deglazed fond we talked about, are a natural extension of the cooking process. Reducing stock, adding a splash of cream or a knob of butter, maybe some mushrooms or shallots – it uses the flavors already developed and concentrates them.
Glazes, often containing sugar (like honey, maple syrup, brown sugar) or fruit preserves, are typically brushed onto the poultry during the last 15-30 minutes of cooking. The heat caramelizes the sugars, creating a beautiful sheen and adding a layer of sweetness that can balance savory or spicy elements. Think honey-glazed chicken or duck à l’orange. It’s important to apply glazes towards the end, as the sugar can burn if exposed to high heat for too long. Beyond cooked sauces and glazes, consider fresh sauces served alongside: a vibrant salsa verde, a cooling tzatziki, a punchy chimichurri. These can add brightness, acidity, and freshness, cutting through the richness of roasted or grilled poultry. The key here is balance – considering the flavors already built and adding a final element that complements or contrasts effectively. Whether it’s a rich reduction, a sticky glaze, or a fresh counterpoint, this final layer provides the finishing polish.
Smoke & Fire: Grilling and Smoking Nuances
Taking poultry outdoors introduces whole new dimensions of flavor, primarily through smoke and direct flame contact. Grilling offers intense heat for great searing and char, creating those desirable grill marks and smoky notes. Direct grilling (placing the poultry directly over the heat source) is fast and great for smaller pieces. Indirect grilling (placing the poultry away from the direct heat, often with the lid closed) turns your grill into an outdoor oven, perfect for cooking larger pieces or whole birds more evenly without burning the exterior. The type of fuel matters too – charcoal often imparts a smokier flavor than gas grills.
Smoking takes this a step further, cooking the poultry low and slow in the presence of wood smoke. This isn’t just about a generic ‘smoky’ taste; different types of wood choice impart distinct flavor profiles. Hickory and mesquite offer strong, bold flavors, often associated with BBQ. Fruitwoods like apple and cherry provide milder, sweeter smoke, fantastic with poultry. Pecan offers a nutty middle ground. The goal is gentle smoke penetration over hours, infusing the meat with complex aromas while the low, consistent heat keeps it incredibly moist (often aided by brining beforehand). Achieving the right balance of smoke and heat requires careful temperature management. Too much smoke or the wrong kind can be acrid. It’s a technique that requires patience and practice, but the depth of flavor achieved through proper smoking is unlike anything else. Whether grilling or smoking, cooking over fire adds a primal, distinct layer that’s hard to replicate indoors.
Umami Boosters: The Secret Weapons
Sometimes, even after careful brining, rubbing, and saucing, a dish might feel like it’s missing… something. That’s often where umami comes in. Umami is the fifth basic taste, often described as savory, meaty, or brothy. Poultry has natural umami, but amplifying it can elevate the dish significantly. This layer involves incorporating ingredients rich in glutamate, the amino acid responsible for umami perception. Think beyond the obvious. A small amount of finely minced anchovy paste whisked into a marinade or pan sauce might sound weird for chicken, but it dissolves completely, adding an incredible savory depth without tasting fishy. Trust me on this one, or maybe don’t, but I swear it works wonders.
Other umami boosters include mushrooms (especially dried ones like shiitake, rehydrated and using the soaking liquid), Parmesan cheese (a sprinkle in a rub or sauce), soy sauce, Worcestershire sauce, tomato paste, or even a touch of MSG if you’re so inclined (it occurs naturally in many of these ingredients anyway). Using ingredients containing naturally occurring glutamates adds complexity and a satisfying richness that makes the overall flavor profile feel more complete and rounded. These aren’t necessarily front-and-center flavors but work in the background to enhance everything else. Incorporating these fermented products or umami-rich vegetables is like adding a hidden bass note that makes the whole melody richer.
Texture as Flavor: Crispy Skin, Tender Meat
This might sound counter-intuitive, but texture *is* a component of flavor perception. Think about it: the contrast between shatteringly crispy skin and incredibly tender, juicy meat isn’t just a textural pleasure; it enhances how we experience the taste. Achieving that perfect balance is often the ultimate goal in poultry cookery. Crispy skin usually requires dry skin to start (remember patting it dry? Dry brining also helps here by drawing out surface moisture), sufficient heat, and proper rendering fat. Letting a bird air-dry, uncovered, in the refrigerator overnight after brining can significantly improve skin crispiness.
Tender, juicy meat, on the other hand, relies on not overcooking and often benefits from techniques like brining or marinating to help with moisture retention. Cooking methods also play a huge role. Low and slow methods generally yield more tender results, while high heat methods require precise timing to avoid drying out the meat, especially lean parts. The technique of achieving crispy skin often involves high heat at some stage, either initially or at the end of cooking, while ensuring the meat remains succulent requires careful temperature monitoring (an instant-read thermometer is your best friend!). The interplay between these contrasting textures – the crackle of the skin giving way to yielding meat – creates a dynamic eating experience that makes the flavors seem more vibrant and satisfying. It’s the final, crucial sensory layer.
So, What’s the Takeaway on Flavor?
Whew, okay. That was a lot. We’ve journeyed from the very first step of brining or marinating, through rubs and sears, deglazing, roasting methods, internal aromatics, sauces, smoke, umami bombs, and finally, the crucial role of texture. The main thing I hope you get from all this rambling is that building incredible flavor in poultry isn’t about a single magic bullet. It’s a cumulative process, a series of deliberate choices and techniques layered one on top of the other. Each step contributes something unique, building towards a final result that’s far greater than the sum of its parts.
Does every piece of chicken need all ten steps? Absolutely not. A simple grilled chicken breast marinated for 30 minutes can be fantastic. But understanding the *potential* of each layer gives you the power to be intentional. You can pick and choose techniques based on the cut of poultry, the time you have, and the flavor profile you’re aiming for. Maybe tonight it’s just a quick sear and pan sauce. Maybe this weekend it’s the full low-and-slow smoked bird experience. The point is to think beyond just ‘cooking the chicken’ and start thinking about ‘building the flavor’.
Is this the definitive, only way to think about poultry flavor? Probably not. Cooking is fluid, personal, always evolving. But hopefully, this gives you a framework, some ideas to play with next time you’re staring down a pack of chicken thighs or a whole turkey. Will every experiment be a smashing success? Maybe not, but isn’t the process of figuring it out, tasting, tweaking, and trying again part of the fun? I think so. Now, if you’ll excuse me, Luna seems to think discussing poultry for this long means she’s entitled to some chicken herself.
FAQ
Q: My chicken always comes out dry, especially the breast meat. What’s the best layering technique to fix that?
A: Dryness is usually due to overcooking or lack of moisture retention. Brining (wet or dry) is your best friend here, as it helps the meat hold onto moisture. Also, using a meat thermometer is crucial to avoid overcooking – aim for about 160-165°F (71-74°C) in the thickest part, keeping in mind carryover cooking. Techniques like adding fat under the skin (compound butter) can also help baste the meat.
Q: I feel like my chicken tastes bland even when I use a marinade. What am I doing wrong?
A: Several things could be happening. Ensure your marinade has enough salt, as salt is key for flavor penetration. Also, check the time – some marinades need several hours (or even overnight for tougher cuts) to really work. Make sure you’re using potent aromatics (fresh garlic, strong spices) and maybe consider adding an umami booster like soy sauce or Worcestershire sauce to the marinade for extra depth.
Q: How long should I really marinate or brine poultry?
A: It varies! For marinades with high acidity (lots of citrus or vinegar), limit time for smaller pieces (like chicken breast) to 30 minutes to 2 hours to avoid mushy texture. Less acidic marinades (yogurt, oil-based) can go longer, maybe 4-12 hours. Wet brining usually ranges from 1 hour per pound for smaller pieces up to 12-24 hours for a whole turkey (follow a specific recipe). Dry brining typically needs 12-72 hours, depending on the size of the bird.
Q: With all these techniques, which one makes the *biggest* difference in flavor?
A: That’s tough, as they work together! But if I had to pick one foundational technique that significantly impacts both flavor and texture, it would probably be brining (or effective marinating). Seasoning the meat from within and improving moisture retention sets the stage for everything else. However, developing a good sear via the Maillard reaction is a close second for creating deep, savory notes.
You might also like
- Perfecting Pan Sauces: From Fond to Finish
- Brining Basics: Unlocking Juicy, Flavorful Meat
- Essential Spice Blends for Every Kitchen
@article{flavor-layering-techniques-poultry-dishes-beyond-bland-chicken,
    title   = {Flavor Layering Techniques Poultry Dishes: Beyond Bland Chicken},
    author  = {Chef's icon},
    year    = {2025},
    journal = {Chef's Icon},
    url     = {https://chefsicon.com/flavor-layering-techniques-poultry-dishes/}
} 
