
Table of Contents
- 1 Making the Cut: Understanding Commercial Meat Slicers
- 1.1 Why Go Commercial? The Deli Difference vs. Home Use
- 1.2 Blade Size: Does Bigger Always Mean Better?
- 1.3 Manual vs. Automatic Slicers: Effort vs. Efficiency
- 1.4 Decoding Duty Cycles: Light, Medium, or Heavy?
- 1.5 Gravity Feed vs. Vertical Feed: The Angle of the Dangle
- 1.6 Safety First, Always! Essential Features to Demand
- 1.7 Cleaning and Sanitization: The Unsung Hero of Food Safety
- 1.8 Maintenance Matters: Keeping Your Slicer Sharp and Smooth
- 1.9 Built to Last: Materials and Construction Quality
- 1.10 Beyond the Basics: Extra Features and Budget Considerations
- 2 Wrapping It Up: Slicing Smart
- 3 FAQ
Hey everyone, Sammy here, tuning in from my Nashville home office – Luna’s currently napping on my notes, which feels about right for a Tuesday. Today, I want to dive into something that’s both incredibly mundane and surprisingly complex: the commercial meat slicer. Yeah, I know, sounds thrilling, right? But stick with me. If you’ve ever worked in a kitchen, run a deli, or even just appreciated a perfectly thin slice of prosciutto, you know this machine is a workhorse. Get the wrong one, or use it improperly, and you’re looking at inefficiency at best, and serious danger at worst. Choosing the right one? It’s a game-changer for consistency, speed, and even food cost.
I remember my first real encounter with a commercial slicer back when I was doing some marketing consulting for a restaurant group in the Bay Area. It was this gleaming, slightly intimidating beast in the corner of the prep kitchen. The chef showed me how it worked, the *whirrrr* of the blade, the almost hypnotic back-and-forth of the carriage. But what stuck with me most was the respect, the *caution*, with which everyone treated it. It wasn’t just another appliance; it was a serious piece of machinery demanding focus. Since moving to Nashville and diving deeper into the food scene here – from the hot chicken shacks to the upscale charcuterie spots – I see them everywhere, humming away. And it got me thinking… how much thought really goes into selecting and safely operating these things?
There’s a surprising amount to consider beyond just “it slices meat.” You’ve got blade size, motor power, manual versus automatic, safety features, ease of cleaning… it’s a whole ecosystem. Honestly, it can feel a bit overwhelming. I’ve spent some time digging into it, talking to chefs, equipment suppliers, even safety consultants. What follows is my attempt to break it all down – a guide to help you navigate the world of commercial meat slicers, focusing on both smart selection and, crucially, safety. Because let’s be real, keeping all your fingers is pretty important, right? So grab a coffee (or maybe some sweet tea, we are in Nashville after all), and let’s slice into this.
Making the Cut: Understanding Commercial Meat Slicers
Why Go Commercial? The Deli Difference vs. Home Use
Okay, first things first. Why can’t you just use that little slicer you got for your wedding registry? Well, you *could*, but if you’re running any kind of food business, you’ll quickly hit a wall. Commercial slicers are built differently. They’re designed for volume and durability. Think about a busy deli during the lunch rush – they might be slicing pounds and pounds of turkey, ham, roast beef, and cheese every single hour. A home slicer would likely overheat, bog down, or just plain break under that kind of pressure. Commercial units have more powerful motors, often belt-driven or gear-driven, designed for continuous or near-continuous use. They’re built with heavier, more robust materials like stainless steel and anodized aluminum to withstand the rigors of a professional kitchen.
Beyond just surviving the workload, consistency is key. Commercial slicers offer precise thickness adjustments, often down to fractions of a millimeter. This isn’t just about aesthetics; it’s about portion control and food cost. If you’re selling sandwiches, consistent slice thickness means predictable costs and a uniform product for your customers. Imagine one sandwich having paper-thin turkey and the next having thick slabs – it’s unprofessional and messes with your bottom line. Furthermore, the blade quality and sharpness on a commercial machine are generally far superior, leading to cleaner cuts with less tearing or shredding, which improves yield and presentation. It’s about moving from occasional home use to reliable, heavy-duty performance day in and day out. It’s an investment, for sure, but one that pays off in efficiency and quality if you choose wisely.
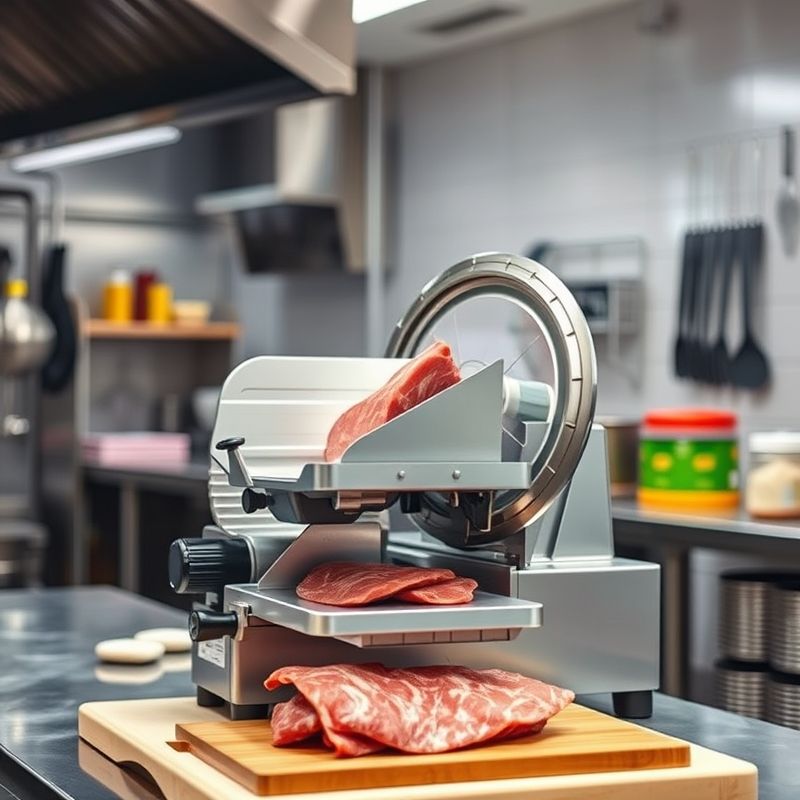
Blade Size: Does Bigger Always Mean Better?
Alright, let’s talk blades. You’ll see commercial slicers advertised with blade diameters typically ranging from 9 inches up to 14 inches. Does size matter? Absolutely. But bigger isn’t automatically *better* for everyone. The size of the blade dictates the maximum size of the product you can slice effectively. A 9-inch or 10-inch blade might be perfectly adequate for slicing smaller items like pepperoni, vegetables, or smaller blocks of cheese. They’re often found in light-duty models, suitable for kitchens that only need occasional slicing or have limited space. They tend to be less expensive and easier to handle and clean simply due to their smaller components.
Stepping up to a 12-inch blade is often considered the industry standard, the versatile workhorse. It can handle a wider range of products, including most deli meats, larger cheeses, and bigger vegetables. It offers a good balance between capability, footprint, and cost. Many medium-duty slicers feature this size. Then you have the big guns: the 13-inch and 14-inch blades. These are typically found on heavy-duty, often automatic slicers. They are designed for slicing large cuts of meat (like whole roasts or large hams) and oversized cheeses continuously. If you’re running a high-volume operation, processing large primal cuts, or dealing with particularly wide products, this is where you need to be. However, these machines are larger, heavier, more expensive, and require more countertop space. So, the choice really depends on what you slice most often and in what quantity. Don’t oversize if you don’t need to, but definitely don’t undersize and frustrate your staff or burn out your machine.
Manual vs. Automatic Slicers: Effort vs. Efficiency
This is a big fork in the road when choosing a slicer. Do you go manual or automatic? A manual slicer requires the operator to physically push the product carriage back and forth across the blade. This gives you direct control over the slicing speed and process. It’s often preferred for delicate items where you want precise control, or for lower-volume operations where the staff doesn’t mind the physical effort. Manual slicers are generally less expensive upfront, have fewer moving parts (potentially meaning fewer repairs, though that’s debatable), and are simpler to operate initially. They are great for kitchens slicing less than, say, an hour or two total per day.
An automatic slicer, on the other hand, features a motorized carriage that moves the product across the blade automatically. The operator simply sets the speed and thickness, loads the product, and turns it on. This is a massive labor saver in high-volume settings. It ensures consistent slicing speed, reduces operator fatigue (which can also be a safety factor), and frees up staff to perform other tasks while the machine works. Some automatics even have different stroke lengths or speeds. The trade-offs? They are significantly more expensive, heavier, take up more space, and have more complex mechanisms that could potentially require more maintenance down the line. If you’re slicing for several hours a day, dealing with large volumes, or need maximum consistency with minimal staffing, the investment in an automatic model often makes sense. I’m torn sometimes… the control of manual is nice, but for sheer output, automatic wins. Ultimately, it’s about volume, labor, and budget.
Decoding Duty Cycles: Light, Medium, or Heavy?
You’ll often see slicers categorized as light-duty, medium-duty, or heavy-duty. This isn’t just marketing fluff; it relates directly to the machine’s construction, motor power (usually measured in horsepower, HP), and how much slicing it’s designed to handle per day. Choosing the wrong duty cycle is a recipe for frustration and premature equipment failure. A light-duty slicer typically has a smaller motor (maybe 1/4 to 1/3 HP) and is designed for maybe an hour or less of slicing per day. They’re best for non-continuous use, slicing mostly meats and vegetables. Trying to slice dense cheese or run it for hours will likely lead to overheating and burnout. They are the most affordable option.
Medium-duty slicers are the versatile middle ground. With motors often around 1/3 to 1/2 HP, they can handle several hours of slicing per day. They can generally tackle a wider variety of products, including many types of cheese (though extended cheese slicing is demanding on any slicer). These are often the sweet spot for many restaurants, cafes, and smaller delis that have consistent slicing needs but aren’t running the machine non-stop all day. They offer a good balance of power, durability, and price.
Then there’s the heavy-duty slicer. These are the tanks, built for continuous operation in high-volume environments like large delis, supermarkets, or commissaries. They boast powerful motors (1/2 HP or more), robust construction, and often larger blades (12-14 inches). They are specifically designed to handle constant use and can slice everything from meats to dense cheeses, even sometimes partially frozen products (always check the manufacturer’s specs!). They represent the highest investment but are necessary for demanding applications. Trying to make a light-duty slicer do a heavy-duty job is like asking my cat Luna to herd cattle – it’s just not going to end well. Be realistic about your usage.
Gravity Feed vs. Vertical Feed: The Angle of the Dangle
How does the food actually meet the blade? This depends on whether you have a gravity feed or a vertical feed slicer. The vast majority of slicers you’ll encounter are gravity feed. In these models, the product carriage is tilted at an angle (usually around 30-45 degrees). Gravity helps the operator feed the product down towards the blade as it moves back and forth. This design works well for most deli meats and many vegetables, requiring less physical effort from the operator to keep the product engaged with the blade. It’s generally considered easier to use for all-purpose slicing and is the standard for most manual and many automatic slicers.
A vertical feed slicer, sometimes called a right-angle feed slicer, holds the product carriage perpendicular (or nearly perpendicular) to the blade. This means gravity isn’t assisting the feed; the operator (or the automatic mechanism) has to provide all the pressure to move the product into the blade. Why choose this? Vertical feed slicers offer exceptional precision and control, especially for products that might shift or roll in a gravity feed carriage. They are often preferred for slicing things like bacon, dense sausages, or specific cuts where absolute uniformity and minimal waste are paramount. Some specialized automatic models designed for high-speed, precise portioning often use a vertical feed. They might require a bit more effort in manual operation but excel in specific applications where precision is king. Most kitchens will likely be best served by a gravity feed model, but it’s good to know the difference exists, especially if you have very specific slicing needs.
Safety First, Always! Essential Features to Demand
Okay, let’s get serious. A commercial meat slicer has a rapidly spinning, razor-sharp blade. Safety isn’t optional; it’s paramount. Never, ever compromise on safety features or training. Look for slicers with robust blade guards that cover as much of the blade as possible when not actively slicing. A ring guard that encircles the non-slicing portion of the blade offers permanent protection. Many modern slicers have safety interlocks that prevent the machine from operating if key components, like the blade cover or sharpener assembly, are removed or not properly in place. This is huge for preventing accidents during cleaning or maintenance.
A no-volt release feature is also critical. This means if the power goes out, the slicer won’t automatically restart when the power comes back on; it needs to be intentionally turned back on. Imagine cleaning near the blade during a power outage, only to have it suddenly jump back to life – terrifying. The product pusher or clamp (sometimes called a meat grip or pusher plate) is essential for holding the food securely and keeping the operator’s hands away from the blade during the last bit of slicing. Never, ever operate a slicer without using the pusher for the end piece. Proper, documented training on safe operating procedures, cleaning, and emergency stops is non-negotiable for anyone who will use the machine. I’ve heard too many horror stories that could have been prevented by respecting the machine and using its safety features correctly. Don’t become a statistic.
Cleaning and Sanitization: The Unsung Hero of Food Safety
If safety features are critical during operation, then meticulous cleaning and sanitization are critical *after* operation. A dirty slicer is a breeding ground for bacteria like Listeria, leading to cross-contamination and potentially severe foodborne illness. This isn’t just a quick wipe-down. Proper cleaning involves disassembly, washing, rinsing, sanitizing, and air-drying specific parts. Most modern slicers are designed with cleaning in mind, featuring removable carriages, blade covers, and sometimes even blades (though blade removal requires extreme caution and specific procedures). Always follow the manufacturer’s instructions to the letter.
The basic process usually involves unplugging the machine (!!!), setting the thickness dial to zero, carefully removing parts like the product tray/carriage, the pusher/clamp, and the blade deflector. These parts should be taken to a sink, washed with detergent, rinsed thoroughly, then submerged in a properly diluted sanitizing solution for the required contact time. The fixed parts of the slicer, including the blade (with extreme care, using cut-resistant gloves and appropriate tools like a designated brush, never your bare hands or a rag), the ring guard, and the housing, need to be meticulously cleaned and sanitized in place. Pay attention to seams, crevices, and underneath components. Allow all parts to air dry completely before reassembling. How often? It depends on usage, but generally, slicers should be cleaned and sanitized at least every four hours of continuous use, and always at the end of the day or when switching between raw and ready-to-eat products. It’s tedious, yes, but absolutely essential for public health and keeping your establishment safe.
Maintenance Matters: Keeping Your Slicer Sharp and Smooth
Beyond daily cleaning, regular maintenance is key to keeping your slicer performing well and lasting longer. The most obvious maintenance task is blade sharpening. A dull blade doesn’t slice cleanly; it tears and shreds, reducing yield, compromising quality, and actually making the slicer *more* dangerous because it requires more force to use. How often you need to sharpen depends on usage and what you’re slicing (cheese dulls blades faster than meat). Some slicers have built-in sharpeners, which are convenient but require proper technique to avoid damaging the blade edge. Others require a separate sharpening stone or professional sharpening services. Consult your manual, but generally, a light honing daily or weekly and a full sharpening periodically is a good starting point. Always ensure the blade is thoroughly cleaned *after* sharpening to remove metal filings.
Other maintenance includes lubricating moving parts as specified by the manufacturer, checking drive belts or gears for wear and tear, ensuring safety interlocks are functioning correctly, and inspecting the power cord for damage. Keeping the machine free of food debris buildup in internal areas is also important. Again, your manufacturer’s manual is your best friend here – it will outline the specific maintenance schedule and procedures for your model. Investing a little time in preventative maintenance can save you costly repairs, downtime, and extend the life of your expensive equipment significantly. Don’t just run it ’til it breaks.
Built to Last: Materials and Construction Quality
When you’re investing in a commercial slicer, you want it to last. The materials and construction quality play a huge role in durability, ease of cleaning, and overall performance. Most commercial slicers are constructed primarily from anodized aluminum and stainless steel. Anodized aluminum is often used for the main body or housing. It’s relatively lightweight, durable, and resistant to corrosion and staining. It provides a good balance of performance and cost.
However, for components that come into direct contact with food or require maximum durability and cleanability, stainless steel is often preferred. Look for stainless steel in the product tray, the pusher/clamp, the blade itself (obviously), and sometimes the gauge plate (the part that determines slice thickness). Stainless steel is highly resistant to rust, corrosion, and pitting, it’s non-porous (making it more sanitary), and it can withstand harsh cleaning chemicals. Gauges of steel can vary, impacting overall robustness. Look for smooth finishes with minimal seams or crevices where food particles and bacteria can hide. Sealed base enclosures can prevent food debris from getting into the motor and internal components. Generally, slicers with more stainless steel components tend to be more expensive but offer superior longevity and easier sanitation, which can be worth the investment in the long run.
Beyond the Basics: Extra Features and Budget Considerations
Once you’ve nailed down the core requirements – duty cycle, blade size, manual vs. automatic, safety features – you might consider some extra bells and whistles. As mentioned, a built-in sharpener can be convenient, saving time and ensuring the correct sharpening angle, provided it’s used correctly. Some models feature a tilting carriage, which makes cleaning underneath and around the carriage much easier. Different blade types exist too; while most are smooth-edged, you might find serrated blades for specific tasks like slicing bread or very crusty meats, though they are less common for general-purpose slicing.
Consider the slicer’s footprint and weight, especially if space is tight or if it needs to be moved occasionally (though most commercial slicers are heavy and designed to stay put). Think about the ergonomics – is the on/off switch easily accessible? Is the thickness adjustment knob easy to use and precise? Ultimately, you need to balance these features with your budget. Commercial slicers range from under a thousand dollars for light-duty manual models to many thousands for heavy-duty automatics. Determine your absolute needs first, then see which ‘wants’ fit your budget. Is the top-of-the-line model with every feature truly necessary for your operation, or would a solid, reliable medium-duty machine suffice? Don’t overspend, but don’t cheap out on essentials like safety and appropriate duty cycle either. It’s about finding the right tool for *your* specific job.
Wrapping It Up: Slicing Smart
So, there you have it. Choosing a commercial meat slicer involves more than just picking one off a shelf. It’s about understanding your specific needs – the volume, the types of food, the available labor – and matching those needs to the right machine specs: blade size, motor power, manual or automatic operation. It requires a serious look at the construction, the materials, and critically, the built-in safety features. I guess it’s like any major equipment purchase in a commercial kitchen, really. You need to do your homework.
But maybe even more important than the selection process is the ongoing commitment to safety and sanitation. A slicer is only as good, and as safe, as the person operating it and the procedures used to clean and maintain it. Consistent training, rigorous cleaning protocols, and regular maintenance aren’t just best practices; they’re essential responsibilities when you have a machine like this in your kitchen. It demands respect.
Is finding the ‘perfect’ slicer easy? Probably not. There are always trade-offs between features, performance, and cost. But by carefully considering your operational needs and prioritizing safety and cleanability, you can make an informed decision that will serve your business well for years to come. Maybe the real challenge isn’t just buying the slicer, but fostering a kitchen culture that treats it, and the food it prepares, with the care and attention they deserve? Something to chew on, anyway. Stay safe out there!
FAQ
Q: How often should I sharpen my commercial slicer blade?
A: It really depends on how much you use it and what you slice. Heavy use or slicing dense products like cheese will dull the blade faster. As a general guideline, light daily honing might be needed, with a full sharpening weekly or bi-weekly for moderate use, or more often for heavy use. The best indicator is performance – if you notice tearing, shredding, or increased resistance, it’s likely time to sharpen. Always consult your slicer’s manual for specific recommendations and proper sharpening procedures.
Q: Can I slice cheese on any commercial meat slicer?
A: Technically, many slicers *can* slice cheese, but it’s much more demanding than slicing meat. Cheese creates more drag and can strain the motor. Light-duty slicers are generally not recommended for anything more than occasional, small amounts of soft cheese. Medium-duty slicers can often handle moderate amounts, while heavy-duty slicers are best suited for frequent or high-volume cheese slicing. Using a slicer underpowered for cheese can lead to motor burnout. Some manufacturers offer specific cheese slicers or advise on techniques (like chilling the cheese well) for better results.
Q: What’s the single biggest safety mistake people make with slicers?
A: It’s hard to pick just one, but operating the slicer without the product pusher/clamp to slice the very end of the food item is incredibly dangerous and leads to many hand injuries. Operators try to maximize yield and get too close. Other major mistakes include improper cleaning procedures (like reaching near an energized blade), bypassing safety interlocks, and insufficient training. Always use all safety guards and pushers, and ensure thorough training.
Q: Is an automatic slicer worth the extra cost?
A: It depends entirely on your volume and labor situation. If you’re slicing for several hours a day, an automatic slicer can significantly reduce labor costs, improve consistency, and decrease operator fatigue (which is also a safety benefit). The increase in productivity can often justify the higher upfront cost relatively quickly in a high-volume setting. However, for lower-volume operations (e.g., less than 2 hours of slicing per day), a manual slicer is often more cost-effective and provides more direct control.
You might also like
- Choosing the Right Commercial Oven: Convection vs. Combi
- Essential Guide to Walk-In Cooler Maintenance
- Optimizing Your Kitchen Workflow: Prep Area Organization
@article{commercial-meat-slicer-guide-choosing-safely-and-smartly,
    title   = {Commercial Meat Slicer Guide: Choosing Safely and Smartly},
    author  = {Chef's icon},
    year    = {2025},
    journal = {Chef's Icon},
    url     = {https://chefsicon.com/guide-to-commercial-meat-slicers-safety-and-selection/}
} 
